Chapter 3: Deeper into Darkness Walkthrough
A walkthrough for Chapter 3: Deeper into Darkness in Final Fantasy 7 Rebirth (FF7 Rebirth). Read on for a detailed guide of Chapter 3, including item locations, rewards, bosses, how to complete the Escape the Depths objective, as well as useful tips for completing this chapter!
| ◄ Previous Chapter | Next Chapter ▶ |
|---|---|
|
Chapter 2 A New Journey Begins |
Chapter 4 Dawn of a New Era |
List of Contents
Chapter 3: Deeper into Darkness Walkthrough
| Chapter 3 Main Objectives | |
|---|---|
| 1 | Following the Cloaked Figures |
| 2 | Confronting the Turks ┗ Mini-Boss Battle: Elena and Rude |
| 3 | Escape the Depths |
| 4 | Exiting to Junon ┗ Boss Battle: Mythril Golem |
Click on any of the links above to jump to the section!
Following the Cloaked Figures Walkthrough
| Objectives | |
|---|---|
| 1 | 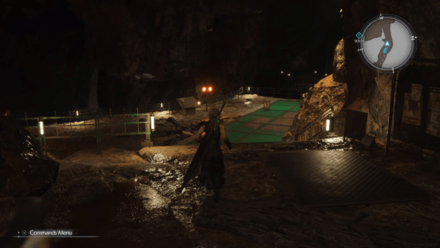 Follow the path and proceed through the mine. |
| 2 | Approach the black-robed individuals midway through the tunnels. |
Confronting the Turks Walkthrough
| Objectives | |
|---|---|
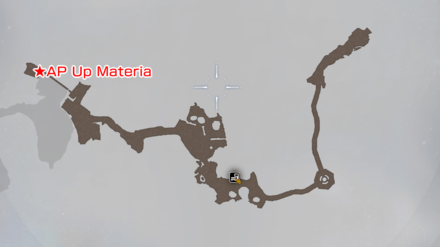
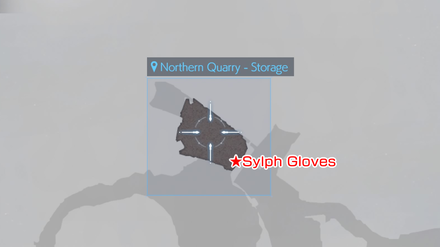
| 1 | 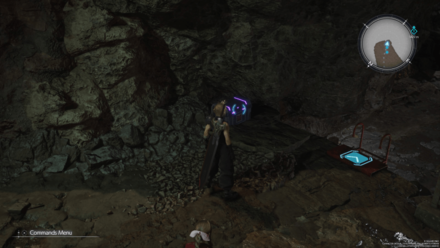 After Barret and Red XIII leave the group, continue following the rest of the robed individuals deeper into the mine. AP Up Materia: Pick up the purple materia from the ground before descending the stairs. Sylph Gloves: Tifa's weapon can also be obtained from the treasure chest along the way. |
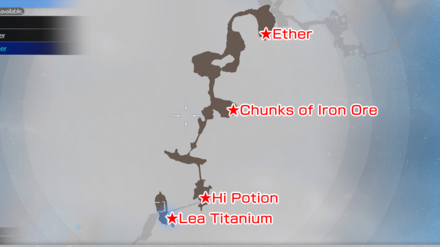
| 2 | 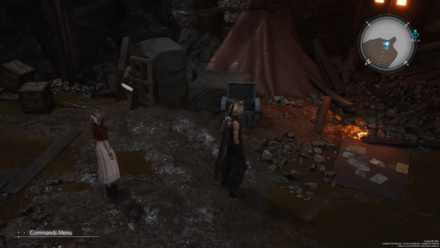 Upon arriving in the Mythril Quarry - 2nd Tier, pick up the Ether inside the nearby chest beside the stairs before proceeding to fight the Ogre. |
| 3 |  After defeating the Ogre, there is another open area with a different enemy and a treasure chest containing Chunks of Iron Ore. |
| 4 | 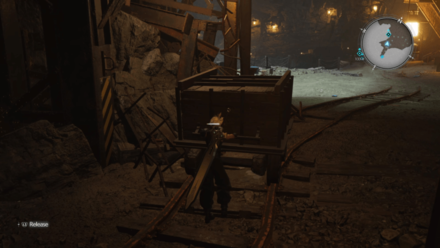 Obstacle Upon reaching a dead end, have Cloud move the mine cart to open up a path. |
| 5 | Ticket Out of Here Continue heading straight and look for a way to go up to the exit. |
| 6 | Broken Ladder Upon reaching the broken ladder, push the nearby mine cart next to it to ascend to the bridge. Do not forget to open the nearby treasure chest that contains Hi-Potions x3. |
| 7 | 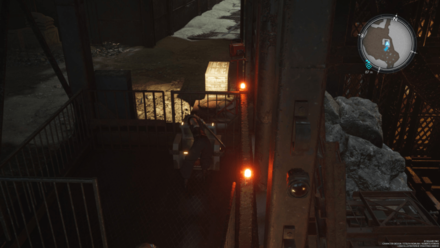 After crossing the bridge, turn to your left and you will find a stairs that will lead you down to the Central Quarry. Here you will find a treasure chest that contains Lea Titanium x3. |
| 8 | Return to the bridge and start following the path to your right and ascend toward the exit. |
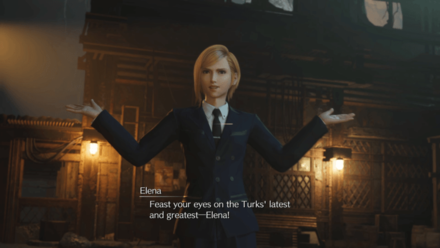
| 9 | Slowly approach the Turks and eavesdrop on their conversation. |
| 10 | Defeat Elena and Rude. ▶ How to Beat Rude and Elena |
Defeat Elena First
Rude will continuously use the Atlas Stance throughout the fight, significantly reducing the damage you deal. It's advisable to focus on defeating Elena first before dealing with Rude to make the fight much easier.
Escape the Depths Walkthrough
| Objectives | |
|---|---|
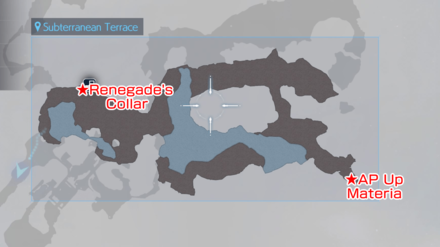
| 1 | 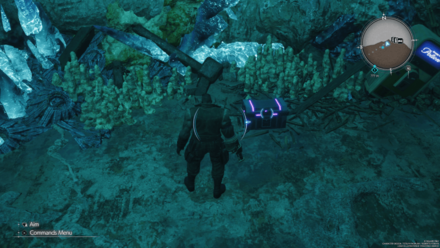 Climbers As soon as you start playing Barret, turn to your left and open the chest to obtain the Renegade's Collar. |
| 2 |  Start following the path and head towards the east side of the map. Before you start climbing up the using the roots, pick up the MP Up Materia on the souteast side of the map. |
| 3 | Use the roots at the end of the tunnel to ascend to the top of the cave. |
| 4 | 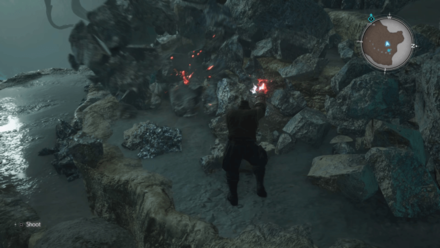 After reaching the first ledge, there are a couple of rocks that you can destroy to obtain some items. |
| 5 | 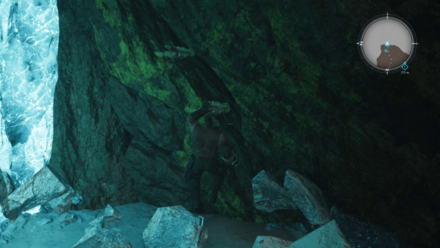 Climb the second set of roots, which are directly in front of you after climbing up the first ones. They are partially hidden behind some crystals. ┗ Jump to How to Reach the Quarry |
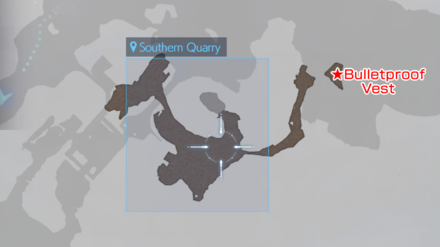
| 6 | 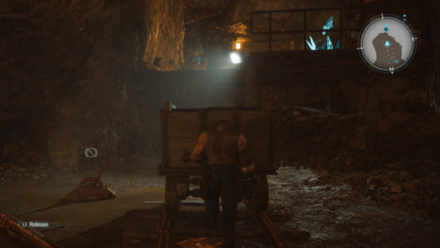 Start pushing the mine cart to open the chest with the Bullet Proof Vest on the ledge to your right before switching track. After that, you can use the lever near the end of the tunnel to switch the rail tracks and use the mine cart as a platform to reach the Quarry. |
| 7 | 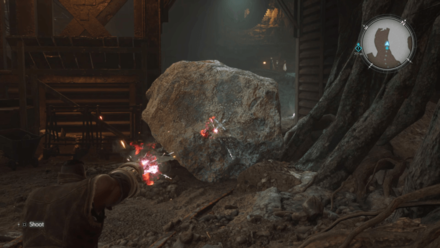 So Close Yet So Far As you move forward, you will encounter a large boulder blocking the path. Destroy it using Barret's weapon to clear the path. |
| 8 | 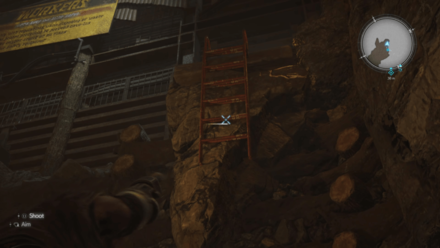 After talking to the rest of the group, continue heading north and you will see two ladders that you can shoot the bring down. |
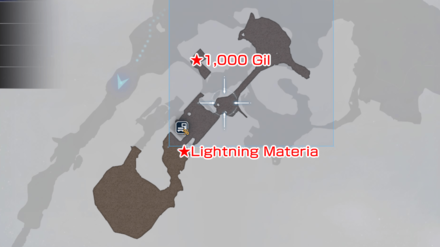
| 9 | 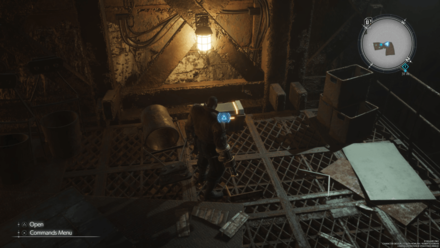 Shoot the first ladder to your right and open the chest above to obtain 1,000 Gil before proceeding to the next ladder. |
| 10 | 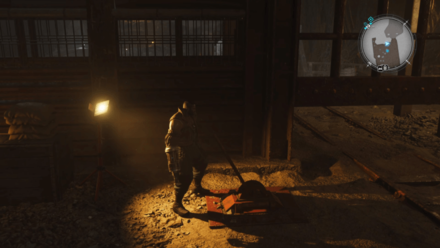 |
| 11 | Head outside and start destroying the large boulder that is blocking the bridge. |
| 12 | 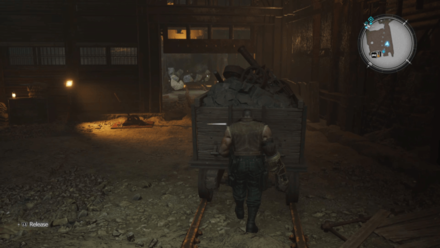 Little Ingenuity As soon as you open up the path, turn around and head back to the room where the rest stop is located. In this area, you'll find a nearby mine cart. Push it all the way across the bridge. |
| 13 | Use the lever near the bridge to change the track. |
| 14 | Push the mine cart again using this new track. |
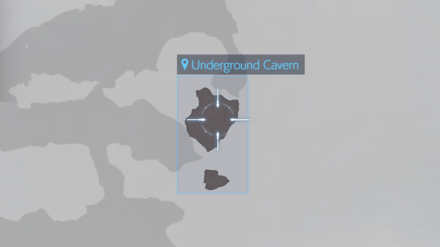
How to Reach the Quarry
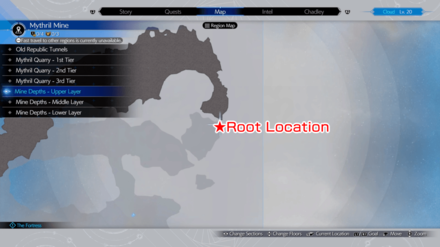
After being separated from the group, you'll need to find a way up the mines to rejoin the rest of the party. Utilize the roots to climb the wall, which will guide you back to the quarry.
The roots might be challenging to spot, as they can blend with the environment, especially after ascending the first ledge. You can find the roots in this area, concealed behind some crystals on the northeast side of the ledge.
Exiting to Junon Walkthrough
| Objectives | |
|---|---|
| 1 | 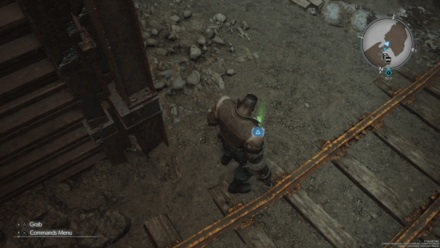 Return to the Rest Spot and wait for Aerith to open up the path. Make sure to pick up the Lightning Materia along the way. |
| 2 |  Continue following the new path and you will encounter the Mythril Golem. ▶ How to Beat Mythril Golem |
| 3 | After defeating the Mythril Golem, keep moving forward and regroup with the rest of the party. Do not forget to pick up the Chunk of Mythril Ore near the lever Aerith used to open the gate. |
| 4 | Follow the robed individuals and proceed towards the exit to reach Junon. |
Chapter 3 Boss Strategy Guide
| Chapter 3 Bosses Guide | |
|---|---|
| Elena and Rude | Mythril Golem |
How to Beat Elena and Rude
Elena
| Elena | |
|---|---|
 |
|
| Location | Chapter Unlocked |
| Mythril Mines | Deeper into Darkness |
| Weaknesses | Lesser Resistances |
|
|
None
|
| Greater Resistances | Immunities |
|
|
|
| Absorbed Elements | When Triggered |
|
None
|
None
|
| Pressure Conditions | |
| Hitting her with powerful offensive abilities will pressure her. Interrupting her synergy strikes will also pressure her. | |
Rude
| Rude | |
|---|---|
 |
|
| Location | Chapter Unlocked |
| Mythril Mines | Deeper into Darkness |
| Weaknesses | Lesser Resistances |
|
|
|
| Greater Resistances | Immunities |
|
|
|
| Absorbed Elements | When Triggered |
|
None
|
None
|
| Pressure Conditions | |
| Hitting him with multiple powerful offensive abilities while his guard is up will pressure him. Interrupting his synergy strikes will also pressure him. | |
Found at the Mythril Mines
You will fight Elena and Rude after being separated from Barret and Red XIII in the Mythril Mines during Chapter 3.
Recommended Party Setup and Roles
| Character | Role |
|---|---|
 Cloud Cloud
|
・Pressure them by Countering and Parrying ・Equip the Buster Sword and build the Stagger Gauge with Focused Thrust |
 Aerith Aerith
|
・Exploit Rude's weakness with Aero ・Hit Elena with Thunder to exploit her weakness |
 Tifa Tifa
|
・Pressure the enemy with Divekick |
Elena and Rude Fight Tips
- Focus on defeating Elena first before taking on Rude due to his Atlas Stance
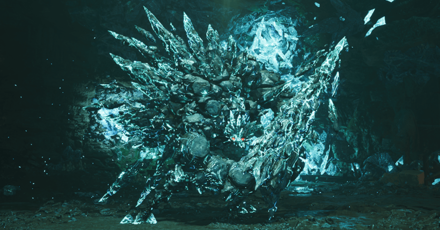
How to Beat Mythril Golem
| Mythril Golem | |
|---|---|
 |
|
| Location | Chapter Unlocked |
| Mythril Mines | Deeper into Darkness |
| Weaknesses | Lesser Resistances |
|
|
|
| Greater Resistances | Immunities |
|
|
|
| Absorbed Elements | When Triggered |
|
None
|
None
|
| Pressure Conditions | |
| It is resistant to physical attacks, but damaging its head will pressure it, making physical attacks more effective. | |
Found at the Mythril Mines
You can find the Mythril Golem inside the Mythril Mine near the end of Chapter 3.
Recommended Party Setup and Roles
| Character | Role |
|---|---|
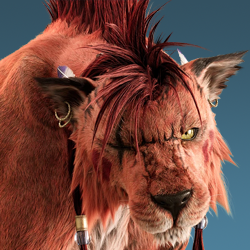
 Barret Barret
|
・Can use Electric Impulse, which doesn't expend MP ・Equip the Gatling Gun for its high Magic Attack ・Attack with Lightning-Based attacks, then physical once it is staggered ・Using the Thunder spell in succession will cause his MP to run out, so use alongside Electric Impulse |
 Red XIII Red XIII
|
・Can recover MP through Limit Break ・Use heavy attacks when enemy is staggered ・You can equip Thunder to him, or make use of his resilience to continuously attack and heal the team when needed |
The team shown here is the one you must fight Myhtril Golem with.
Mythril Golem Boss Fight Tips
- Use Lightning whenever available to chip away its HP.
- Spam Bonus Round using Barret to constantly stagger and pressure the Mythril Golem.
Chapter 3 Map and Obtainable Items
Maps
| List of Maps | ||
|---|---|---|
 |
 |
 |
 |
 |
 |
 |
 |
 |
Obtainable Items
| Old Republic Tunnels (Cloud) | ||
|---|---|---|
| - | - | |
| Mythril Quarry - 1st Tier (Cloud) | ||
| Sylph Gloves | - | - |
| Mythril Quarry - 2nd Tier (Cloud) | ||
| Ether x1 | Iron Ore x5 | Hi-Potions x3 |
| Lea Titanium x3 | - | - |
| Mine Depths Lower Layer (Barret) | ||
| Renegade's Collar | - | |
| Mine Depths Upper Layer (Barret) | ||
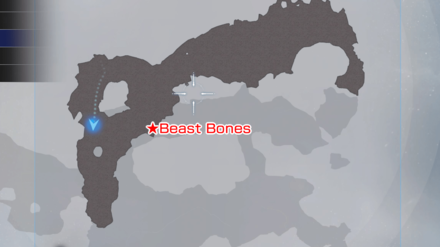
| Beast Bones x5 | - | - |
| Mythril Quarry - 3rd Tier (Barret) | ||
| Bullet Proof Vest | - | - |
| Mythril Quarry - 2nd Tier (Barret) | ||
| - | - | |
This list does not include the items that you get from destroying the wooden crates.
Materia List and How to Get All Materia
FF7 Rebirth Related Guides

| All Story Chapters | |
|---|---|
| Chapter 1 | Fall of a Hero |
| Chapter 2 | A New Journey Begins |
| Chapter 3 | Deeper into Darkness |
| Chapter 4 | Dawn of a New Era |
| Chapter 5 | Blood in the Water |
| Chapter 6 | Fool's Paradise |
| Chapter 7 | Those Left Behind |
| Chapter 8 | All That Glitters |
| Chapter 9 | The Planet Stirs |
| Chapter 10 | Watcher of the Vale |
| Chapter 11 | The Long Shadow of Shinra |
| Chapter 12 | A Golden Key |
| Chapter 13 | Where Angels Fear to Tread |
| Chapter 14 | End of the World |
| How Long to Beat? Game Length | |
| Post-Game Content and How to Get 100% Clear | |
Comment
Author

Chapter 3: Deeper into Darkness Walkthrough
Rankings
- We could not find the message board you were looking for.
Gaming News
![Neverness to Everness (NTE) Review [Beta Co-Ex Test] | Rolling the Dice on Something Special](https://img.game8.co/4414628/dd3192c8f1f074ea788451a11eb862a7.jpeg/show)


Popular Games

Genshin Impact Walkthrough & Guides Wiki
Honkai: Star Rail Walkthrough & Guides Wiki
Arknights: Endfield Walkthrough & Guides Wiki
Umamusume: Pretty Derby Walkthrough & Guides Wiki
Wuthering Waves Walkthrough & Guides Wiki
Pokemon TCG Pocket (PTCGP) Strategies & Guides Wiki
Abyss Walkthrough & Guides Wiki
Zenless Zone Zero Walkthrough & Guides Wiki
Digimon Story: Time Stranger Walkthrough & Guides Wiki
Clair Obscur: Expedition 33 Walkthrough & Guides Wiki


Recommended Games
Fire Emblem Heroes (FEH) Walkthrough & Guides Wiki
Pokemon Brilliant Diamond and Shining Pearl (BDSP) Walkthrough & Guides Wiki
Diablo 4: Vessel of Hatred Walkthrough & Guides Wiki
Super Smash Bros. Ultimate Walkthrough & Guides Wiki
Yu-Gi-Oh! Master Duel Walkthrough & Guides Wiki
Elden Ring Shadow of the Erdtree Walkthrough & Guides Wiki
Monster Hunter World Walkthrough & Guides Wiki
The Legend of Zelda: Tears of the Kingdom Walkthrough & Guides Wiki
Persona 3 Reload Walkthrough & Guides Wiki
Cyberpunk 2077: Ultimate Edition Walkthrough & Guides Wiki


All rights reserved
© SQUARE ENIX CO., LTD. All Rights Reserved.
CHARACTER DESIGN: TETSUYA NOMURA/ROBERTO FERRARI
LOGO ILLUSTRATION: © 1997 YOSHITAKA AMANO
The copyrights of videos of games used in our content and other intellectual property rights belong to the provider of the game.
The contents we provide on this site were created personally by members of the Game8 editorial department.
We refuse the right to reuse or repost content taken without our permission such as data or images to other sites.