Sand and Circuses Walkthrough and Hard Mode Guide

Sand and Circuses is a Side Quest that can be unlocked during Chapter 12 of Final Fantasy 7 Rebirth (FF7 Rebirth). Read on to learn more about how to unlock Sand and Circuses, how to beat each round and the Joker on Normal and Hard Mode, as well as the available rewards for completing the side quest.
How to Unlock Sand and Circuses
Complete the Of Robed Men and Ransoms Side Quest

To unlock Sand and Circuses later in Chapter 12, you will first need to complete the Of Robed Men and Ransom side quest available at the end of Chapter 7. Once you arrive at North Corel and speak to Dr. Sheiran, this side quest should become available.
Of Robed Men and Ransoms Walkthrough
Complete the Trouble in Paradise Side Quest

Before you can unlock Sand and Circuses, you will first need to complete the prerequisite side quest, Trouble in Paradise, available during Chapter 12. Do note that this particular side quest only becomes available after completing Lifeline in Peril and The Hardest Sell.
Trouble in Paradise Walkthrough
How to Complete Sand and Circuses
Talk to Leslie
| Map Image | Overworld Image |
|---|---|
 |
 |
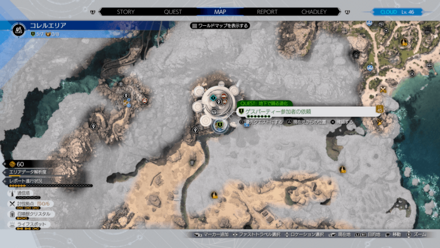
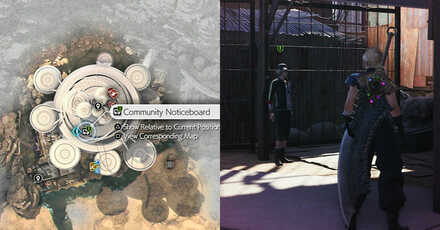
After you've completed all the necessary side quests, you can then fast-travel to The Dustbowl and proceed to the Community Noticeboard.
From there, accept the Sand and Circuses side quest and follow the objective marker so you can talk with Leslie.
Talk to the Gatekeeper
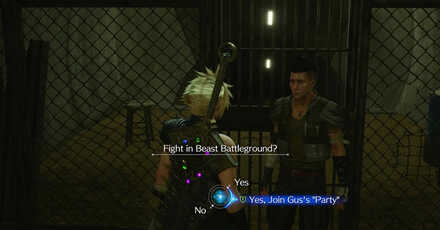
After you've talked with Leslie, follow the objective marker on the map and head down the ladder that leads to an underground level. From there, talk to the Gatekeeper and engage in a series of battles.
Participate in Solo Battles
| Solo Battles |
|---|
|
|
You will need to participate in a series of solo battles using members from your party, excluding Red XIII and Cait Sith. You could access the main menu during the Beast Battleground selection screen so you could equip and optimize your members with the proper gear.
Round 1: Yuffie
| Playable Character | Enemies |
|---|---|
 Yuffie Yuffie
|
・Valron x2 Strategy: ・Interrupt Graviton Charge with powerful attacks ・Exploit weakness and use Ice Elemental Ninjutsu ・Ice Spells build up its stagger gauge |
Yuffie will need to beat 2 Valron fiends during this round. Use Ice spells or Yuffie's Elemental ninjutsu to weaken it.
You will particularly want to interrupt the Graviton Charge move whenever the Valron does it. Make sure to have an ATB bar saved up and use a powerful attack, like an Ice Spell, to interrupt and pressure it.
Another tip is to equip a Precision Defense Focus materia to help you perfectly block the enemies' attacks since the attacks are relatively easy to predict.
Round 2: Aerith
| Playable Character | Enemies |
|---|---|
 Aerith Aerith
|
・Bomb x2 Strategy: ・Equip Barrier Materia to use Manaward ・Use Recovery Spells to endure in battle ・Cast a Ward to Use Ward Shift |
Aerith will be facing 2 Bomb fiends during this round. Equip a 2-star Barrier Materia so that you can use Manaward to protect yourself from the enemies' magic damage.
You will also need to be patient and avoid the Fireball attacks of the enemies before attacking because Aerith has a slow attack animation. For the large fireballs, it is recommended you keep running instead of dodging since the Fireball can still hit you if you dodge.
Casting a Ward will also help you since it allows you to properly use Ward Shift to teleport. Try to lure the fireballs in a different direction and then teleport to your ward to avoid it completely. Then, follow it up with an attack while the Bombs are idle.
Once you get the flow of battle, make sure to save up your ATB bars for offensive or recovery spells. Use a strong offensive spell whenever the Bomb is breathing fire to pressure it. You may also want to use your ATB to use your summon to deal damage while you avoid fireballs.
How to Get the Barrier Materia
Round 3: Barret
| Playable Character | Enemies |
|---|---|
 Barret Barret
|
・Zemzelett x2 Strategy: ・Use Steelskin to avoid being interrupted ・Inflict damage during Wingbeat ability to pressure it ・Exploit weakness and use Ice Spells |
Barret will engage battle with 2 Zemzelett fiends. Equip Barret with Ice Materia before the battle and use Ice Spells to exploit their weakness.
Once the battle starts, use Steelskin so that you cannot be interrupted when using abilities or spells. This is crucial since the Zemzeletts will be constantly attacking you, and Barret's attack animations are quite long.
Then, save up an ATB bar or Overcharge so that you can use a powerful attack when the enemy uses Wingbeat. This will pressure them, making it easy to take them down once they are staggered.
Round 4: Tifa
| Playable Character | Enemies |
|---|---|
 Tifa Tifa
|
・Modded Sweeper x1 Strategy: ・Exploit weakness and use Lightning Spells ・Prioritize attacking its arms |
Tifa will be taking on a mechanical enemy called the Modded Sweeper. Equip Tifa with Lightning Materia and cast Lightning Spells to pressure it. You can also pair it with Elemental Materia so that all of her attacks will be Lightning-imbued.
Next, you will want to prioritize attacking its arms so that it uses its strong attacks less often. Although, try blocking its barrage of attacks first and then counterattack while it is standing idle.
How to Get the Lightning Materia
Round 5: Cloud
| Playable Character | Enemies |
|---|---|
 Cloud Cloud
|
・Joker Strategy: ・Exploit weakness and use Wind Spells ・Dodge Soul Sucker ability to pressure it ・Dodge Destiny ability from Joker |
| Destiny Effects | |
| Hearts | Joker recovers HP |
| Diamonds | Joker casts defensive buff |
| Spades | Joker fires a magical attack |
| Clubs | Joker casts a physical attack from below |
| Joker | Joker fires a projectile that leaves you with 1 HP |
Cloud will be fighting the Joker fiend during this round. Equip Wind Materia and cast Wind Spells to exploit its weakness.
Dodging its Soul Sucker ability will pressure the fiend when it uses Anima Howl. You may want to be in melee range most of the time so it uses the close-range Soul Sucker, which is much easier to dodge than the ranged version.
Be mindful when the Joker is using its Destiny ability, as it has various effects in battle depending on the type of card that appears after casting it. It is best to dodge the Spades, Clubs, and Joker abilities, with the Joker ability being the deadliest of them all as it only leaves you with 1 HP.
Once it falls below half health, it will go into Anima Unleashed mode. During this mode, it will keep using Destiny but will be always pressured. At this time, spam the Focused Thrust ability to stagger it as quickly as possible.
Sand and Circuses Hard Mode Guide
| Sand and Circuses Hard Mode Tips |
|---|
|
|
| The Hard Mode builds in this guide use equipment that are at least Weapon Level 8. If you don't have enough Materia slots or the right Weapon Skills to complete a character setup, consider using a different weapon or collect all of the character's Manuscripts first. |
Round 1: Yuffie vs. Valron x2
| Jump to Round | ||||
|---|---|---|---|---|
| 1 | 2 | 3 | 4 | 5 |
 Yuffie Yuffie
Solo |
|||||
| Weapon | Armor | ||||
|---|---|---|---|---|---|
| Fuma Shuriken | Cetran Bracer | ||||
| Accessory | Summon Materia | ||||
| Genji Gloves | Gilgamesh | ||||
| Weapon Materia | Armor Materia | ||||
| Weapon Skills | |||||
|
|
|
||||
|
|
|
||||
Spam Ice Attacks With Yuffie
As soon as the fight begins, use ATB Boost so that you can get Yuffie's Ice Ninjutsu and Doppelganger active as soon as possible. From there, you'll just need to spam Blizzaga to beat this round. Remember to prioritize killing the Valron that uses Graviton Charge first to prevent it from casting Graviga.
Use Haste and Manaward If You're Struggling
In case you're having a hard time with this round, you can cast Haste to help generate ATB Charges and Manaward to prevent Graviga from bringing you down to 1 HP.
Round 2: Aerith vs. Bomb x2
| Jump to Round | ||||
|---|---|---|---|---|
| 1 | 2 | 3 | 4 | 5 |
| Enemies | Valron x2 |
|---|
 Aerith Aerith
Solo |
|||||
| Weapon | Armor | ||||
|---|---|---|---|---|---|
| Ceremonial Staff | Cetran Bracer | ||||
| Accessory | Summon Materia | ||||
| Genji Gloves | Gilgamesh | ||||
| Weapon Materia | Armor Materia | ||||
| Weapon Skills | |||||
|
|
|
||||
|
|
|
||||
Elemental-Fire Absorbs the Bombs' Attacks
Having a maxed-out Elemental linked to a Fire Materia lets you constantly heal from the Bomb's Fire attacks. This makes this round incredibly easy since you cannot die unless the Bombs decide to only use their regular physical attacks.
Activate Arcane Ward to Double-Cast Thundaga
Get your Arcane Ward active as soon as possible so that you can spam Thundaga and beat this round. If you want an extra bit of safety, use Radiant Ward to protect Aerith from the bomb's physical attacks while she's casting spells.
Alternatively, you could use Blizzaga for a better AoE attack, but you won't benefit from the Lightning Damage Up Weapon Skill.
Round 3: Barret vs. Zemzelett x2
| Jump to Round | ||||
|---|---|---|---|---|
| 1 | 2 | 3 | 4 | 5 |
 Barret Barret
Solo |
|||||
| Weapon | Armor | ||||
|---|---|---|---|---|---|
| Hi-Caliber Rifle | Cetran Bracer | ||||
| Accessory | Summon Materia | ||||
| Space Ranger Medal of Honor | Gilgamesh | ||||
| Weapon Materia | Armor Materia | ||||
| Weapon Skills | |||||
|
|
|
||||
|
|
|
||||
Instantly Activate Turbulent Spirit
Use Turbulent Spirit as soon as the fight begins so that Barret can rapidly charge his ATB Gauge and spam his abilities. This works even better with the boosts he gets to Overcharge since it recharges quicker, allowing him to gain even more ATB Charges over time.
Go Up to the Zemzeletts and Use Point Blank
Thanks to the Elemental-Ice equipped on your weapon, Point Blank should kill the Zemzeletts in one hit after a single Overcharge. Make sure that you have a full ATB Gauge before using this move to maximize its damage output.
Round 4: Tifa vs. Modded Sweeper
| Jump to Round | ||||
|---|---|---|---|---|
| 1 | 2 | 3 | 4 | 5 |
 Tifa Tifa
Solo |
|||||
| Weapon | Armor | ||||
|---|---|---|---|---|---|
| Kaiser Knuckles | Cetran Bracer | ||||
| Accessory | Summon Materia | ||||
| Corsair's Compass | Odin | ||||
| Weapon Materia | Armor Materia | ||||
| Weapon Skills | |||||
|
|
|
||||
|
|
|
||||
Focus on Destroying the Arms
The combination of Elemental-Lightning, Plasma Discharge, and Enemy Parts Damage Up should let Tifa easily destroy the Sweeper's arms. Prioritize destroying them first with abilities like Divekick or Starshower so that you can cripple the enemy and easily kill it off, especially once it gets staggered.
Cast Stop to Prevent It From Moving
The Modded Sweeper likes to move a lot when attacking, so make sure to cast Stop when you can to lock it in place and make it easier for you to destroy its arms.
Round 5: Cloud vs. Joker
| Jump to Round | ||||
|---|---|---|---|---|
| 1 | 2 | 3 | 4 | 5 |
 Cloud Cloud
Solo |
|||||
| Weapon | Armor | ||||
|---|---|---|---|---|---|
| Sleek Saber | Cetran Bracer | ||||
| Accessory | Summon Materia | ||||
| Corsair's Compass | Gilgamesh | ||||
| Weapon Materia | Armor Materia | ||||
| Weapon Skills | |||||
|
|
|
||||
|
|
|
||||
Cast Haste and Stop to Simplify the Fight
Once the fight starts, use ATB Boost so that you can cast Haste on yourself and Stop on the Joker. This allows you to get a lot of damage in before the enemy can even act.
Use Sonic Boom to Apply Attack Buffs
Sonic Boom is a good ability for this fight since it exploits the Joker's Wind weakness while also giving Cloud a Brave and Faith buff. Use this ability when you can to apply the buff and boost the damage of your other abilities, like Braver and Infinity's End.
Dodge Soul Sucker to Pressure the Joker
Make sure that you're dodging the Joker's Soul Sucker attack to avoid it from healing itself. After dodging it enough times, it will use Anima Howl and Anima Unleashed, where it automatically gets pressured. Save some of your ATB Charges so that you can stagger it with Focused Thrusts and kill it with Infinity's End immediately after.
Sand and Circuses Rewards
List of Rewards
| Rewards for Completing Sand and Circuses |
|---|
| ▸ Way of the Fist Vol. VI (10 SP for Tifa) ▸ 10 Party EXP ▸ Player EXP (based on current level) |
Increase Favorability With Tifa

Completing Sand and Circuses will also increase your friendship with Tifa. This will affect the events that will occur when you visit the Gold Saucer later in the game.
Romance and Relationship Guide
Way of the Fist Vol. XIV in Hard Mode
While playing in Hard Mode, completing this side quest will reward you the Way of the Fist Vol. XIV for Tifa. You can access Hard Mode after completing your first playthrough of the game in any difficulty.
Sand and Circuses Information
Information and Overview
| Basic Information | |||||
|---|---|---|---|---|---|
 Recommended Level: 42 |
|||||
| Availability | Region | Side Quest Giver | |||
| Chapter 12 | Corel | Leslie | |||
| Unlock Requirement | Complete the "Of Robed Men and Ransoms" and "Trouble in Paradise" side quests | ||||
FF7 Rebirth Related Guides

Side Quest Guides
| All Side Quest Guides |
|---|
| Best Side Quests to Do |
Grasslands Side Quests
| Side Quest List | Flowers from the Hill | Lifeline in Peril | A Rare Card Lost |
|---|---|---|
| Livestock's Bane | Where the Wind Blows | Hustle and Grind |
Junon Side Quests
| Side Quest List | Stuck in a Rut | When Words Won't Do | The Hardest Sell |
|---|---|---|
| Calling All Frogs | Dreaming of Blue Skies | Beneath Still Waters |
| Tides of War and Worry | ||
Corel Side Quests
Gongaga Side Quests
| Side Quest List | The Pursuit of Perfection | O Chicken, Where Art Thou | Teach Me, Great Warrior |
|---|---|---|
| The Spice of Life | Escape from Endless Writer's Block | Woodland Vigil |
Cosmo Canyon Side Quests
| Side Quest List | Bonds of Trust | Absence of a Sign | From Whence Life Flows |
|---|---|---|
| Promises to Keep | Victim of Circumstance | |
Nibel Side Quests
| Side Quest List | Esoteric Secrets of the Elders | My White-Haired Angel | Lament of the Damned |
|---|---|---|
Author
Sand and Circuses Walkthrough and Hard Mode Guide
Rankings
- We could not find the message board you were looking for.
Gaming News
Popular Games

Genshin Impact Walkthrough & Guides Wiki

Honkai: Star Rail Walkthrough & Guides Wiki

Arknights: Endfield Walkthrough & Guides Wiki

Umamusume: Pretty Derby Walkthrough & Guides Wiki

Wuthering Waves Walkthrough & Guides Wiki

Pokemon TCG Pocket (PTCGP) Strategies & Guides Wiki

Abyss Walkthrough & Guides Wiki

Zenless Zone Zero Walkthrough & Guides Wiki

Digimon Story: Time Stranger Walkthrough & Guides Wiki

Clair Obscur: Expedition 33 Walkthrough & Guides Wiki
Recommended Games

Fire Emblem Heroes (FEH) Walkthrough & Guides Wiki

Pokemon Brilliant Diamond and Shining Pearl (BDSP) Walkthrough & Guides Wiki

Diablo 4: Vessel of Hatred Walkthrough & Guides Wiki

Super Smash Bros. Ultimate Walkthrough & Guides Wiki

Yu-Gi-Oh! Master Duel Walkthrough & Guides Wiki

Elden Ring Shadow of the Erdtree Walkthrough & Guides Wiki

Monster Hunter World Walkthrough & Guides Wiki

The Legend of Zelda: Tears of the Kingdom Walkthrough & Guides Wiki

Persona 3 Reload Walkthrough & Guides Wiki

Cyberpunk 2077: Ultimate Edition Walkthrough & Guides Wiki
All rights reserved
© SQUARE ENIX CO., LTD. All Rights Reserved.
CHARACTER DESIGN: TETSUYA NOMURA/ROBERTO FERRARI
LOGO ILLUSTRATION: © 1997 YOSHITAKA AMANO
The copyrights of videos of games used in our content and other intellectual property rights belong to the provider of the game.
The contents we provide on this site were created personally by members of the Game8 editorial department.
We refuse the right to reuse or repost content taken without our permission such as data or images to other sites.


![Neverness to Everness (NTE) Review [Beta Co-Ex Test] | Rolling the Dice on Something Special](https://img.game8.co/4414628/dd3192c8f1f074ea788451a11eb862a7.jpeg/show)





I've got a faster strategy for Cloud vs Joker, using a magic build. Equipment: Rune Blade, Cetran Bracer and Genji Gloves Summon: Phoenix Weapon Materia: Wind + Magic Focus, Speed Up, Time, aTB Boost, Enemy Skill Armour Materia: Wind + MP Absorption, Wind + HP Absorption, Wind + Swiftcast, Magic Up, First Strike Weapon Abilities: ATB Charge Rate Up, Full Power Magic. Magic Attack Power +20, Attack Power +20 Battle: ATB Boost, Stop, Prime Mode > Fury, Aeroga x2