Midgardsormr Hard Mode Guide

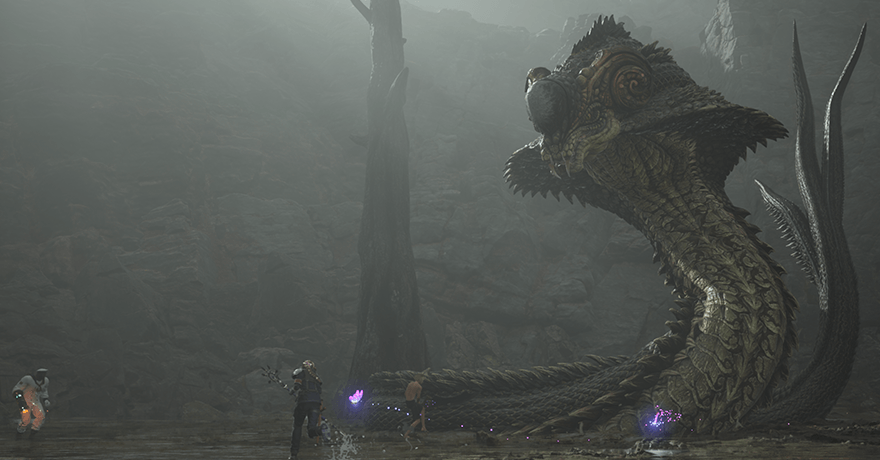
Midgardsormr is a boss in Chapter 2: A New Journey Begins of Final Fantasy 7 Rebirth (FF7 Rebirth). Learn how to beat Midgardsormr on Hard Mode and normal difficulties, its weaknesses and resistances, and a list of its moves and attack patterns in this guide!
List of Contents
Midgardsormr Weaknesses and Stats
Stats
 |
|||
| Easy | Normal | Hard | |
|---|---|---|---|
| HP | 9430 | 13472 | 109262 |
Weakness and Resistances
| Weaknesses | Lesser Resistances | Greater Resistances |
|---|---|---|
|
|
|
|
| Absorbed Elements | Immunities | |
| None |
|
|
Changes When Staggered
| Weakness / Effective | Resistance |
|---|---|
How to Pressure Midgardsormr
Use Ice Attacks or Synergy Abilities
|
|
The easiest way to instantly pressure Midgardsormr is to use offensive Synergy Abilities against it. On the final hit, the serpent will get Pressured, allowing you to build up the Stagger meter easily. However, do note that these abilities are different from Synergy Skills.
Alternatively, you can equip Ice Materia and inflict enough damage with Ice spells to Pressure it. However, do note that on Hard Mode, nothing short of a Blizzaga will do enough burst damage to pressure it.
How to Pressure and Stagger Enemies
Midgardsormr Best Party and Builds
| This section is for players who are playing on Easy and Normal difficulties. To check out the best builds and tips for Hard Mode, jump to our Hard Mode Guide section, below! |
Recommended Party Setup
| Available Characters and Roles | |
|---|---|
 Cloud Cloud
|
【Physical DPS】 ・Use Focused Thrust to build up Stagger when the boss is Pressured. ・Deal damage when Staggered using Punisher Mode and Braver spam. |
 Aerith Aerith
|
【Spellcaster DPS】 ・Exploit the Midgardsormr's weakness by attacking with Ice spells. Dealing enough Ice damage pressures the boss. ・Use the Guard Stick's Arcane Ward to cast offensive spells twice. |
 Barret Barret
|
【Tank / Support】 ・Can fill ATB quickly, allowing him to help with recovery ・Equip Shiva as a summon to deal massive damage ・Continue filling ATB while Shiva is summoned to use Summon Abilities ・Use the Gatling Gun's Focused Shot to build up the stagger gauge. |
Best Materia to Use
| Materia | How to Use |
|---|---|
|
|
・Exploit Midgardsormr's weakness to Ice with Blizzard ・If you only have one, equip it to Aerith on account of her high Magic Attack ・Aerith's Arcane Ward ability allows her to fire the spell twice each time. |
|
|
・Heal any single ally when their HP gets too low. |
|
|
・Use Pray to recover HP of all allies. |
How to Beat Midgardsormr
| Midgardsormr Boss Fight Tips |
|---|
|
|
Pressure Midgardsormr with Blizzard Spells
Midgardsormr can be pressured by exploiting its elemental weakness to ice. Blizzard attacks from the Ice Materia can do this, so equip this Materia onto Aerith, whose high Magic Attack allows her to deal the most damage per ATB charge.
Note: On Hard Mode, regular and -ra type spells won't cut it for damage. You will need to build up 2 ATB charges and use Blizzaga in order to deal enough elemental weakness damage to Pressure it on Hard.
Double-Cast Ice Spells with Arcane Ward
If you have the Guard Stick's ability mastered, you can cast Arcane Ward to create a glyph that double-casts offensive spells when standing inside its AoE. Use this to double your Ice damage and save on MP per cast.
However, do note that on Hard Difficulty, it will be better value to use Radiant Ward first since it grants Immunity while casting spells; arguably more important than being able to double-cast against a much deadlier Midgardsormr.
Use High Stagger Moves on Midgardsormr Once Pressured
| Character | High Stagger Move |
|---|---|
 Cloud Cloud
|
Focused Thrust ┗Buster Sword Weapon Ability |
 Barret Barret
|
Focused Shot ┗Gatling Gun Weapon Ability Bonus Round ┗Hi-Caliber Rifle Weapon Ability |
Once Midgardsormr is Pressured, hit it with high stagger abilities. Cloud and Barret should have easy access to a few abilities like this, allowing you to easily Stagger Midgardsormr across all three phases of the boss fight.
Spam High-Damage Moves Once Midgardsormr is Staggered
Once the Midgardsormr has been Staggered, it's your chance to lay into it with everything you have. When using Cloud, switch to Punisher Mode to build up ATB easily and spam Braver. Any offensive Limit Breaks you have should also be used while the boss is staggered.
Tip: If you have Tifa in your party, use the Unbridled Strength + Omnistrike combo spam to increase the damage multiplier of Stagger, before hitting it with a Divekick for damage. Avoid Rise and Fall as well as Whirling Uppercut since those have longer animations.
Use Barret to Build ATB for Items and Heals at Low HP
If your teammates begin to lose HP, switch from controlling Aerith to Barret, then use Potions or Cure Spells to heal your allies. Barret's normal attack charges the ATB Gauge extremely quickly, allowing you to heal your other teammates as often as needed.
Bring Back Fallen Allies with a Phoenix Down
Don't forget to use a Phoenix Down if one of your allies falls in battle to get them back on their feet! Just make sure you have heals ready as soon as they're up in case Midgardsormr decides to use its AoE fire attacks.
Phoenix Down Effects and How to Get
Stay on the Patches of Land to Dodge Toxic Waters
Perodically throughout the fight, Midgardsormr will use a move called Toxic Waters to poison the swamp water. While the move's animation looks like it has a large AoE, simply standing on one of the patches of land nearby will allow you to completely avoid it.
Run Away or Hide Behind Trees to Dodge Scorching Breath
Once you hit Midgardsormr's second phase, it will start using a high damaging move called Scorching Breath. Getting hit by it will cause you to take a lot of damage, so when you see it charging up for the shot, run away to make some space, or hide behind a tree to dodge it.
Summon Shiva to Deal Additional Ice Damage
After staggering the Midgardsormr for the first time, your Summon Gauge will begin to fill. Once charged, you can summon Shiva, whose Ice attacks can deal massive damage to the serpent.
After summoning, Shiva will attack automatically until the gauge reaches zero, eventually releasing Diamond Dust - her ultimate attack - before leaving the field. This ultimate is used automatically once the gauge runs out or when the ally who summoned her is knocked out.
Midgardsormr Hard Mode Guide
| Midgardsormr Hard Mode Tips |
|---|
| ★ Best Hard Mode Builds for Midgardsormr ★ |
|
|
Midgardsormr Hard Mode Builds
| The builds featured in this Hard Mode section are at Weapon Levels 7~8. If you find that you don't have enough Materia slots to complete the setup, consider getting all the possible Manuscripts on Normal, first. |
 Barret Barret Stagger Buildup / ATB Battery | |||||
| Weapon | Armor | ||||
|---|---|---|---|---|---|
| Battle Cry | Varvados Bracelet | ||||
| Accessory | Summon Materia | ||||
| Fortitude Ring | Alexander | ||||
| Weapon Materia | Armor Materia | ||||
| Weapon Skills | |||||
 Cloud Cloud Damage / Synergy Partner | |||||
| Weapon | Armor | ||||
|---|---|---|---|---|---|
| Igneous Saber | Cetran Armlet | ||||
| Accessory | Summon Materia | ||||
| Supernatural Wristguards | Odin | ||||
| Weapon Materia | Armor Materia | ||||
| Weapon Skills | |||||
 Aerith Aerith Main Ice Caster / Support | |||||
| Weapon | Armor | ||||
|---|---|---|---|---|---|
| Plumose Rod | Cetran Bracer | ||||
| Accessory | Summon Materia | ||||
| Circlet | Bahamut Arisen | ||||
| Weapon Materia | Armor Materia | ||||
| Weapon Skills | |||||
Use Synergy Abilities to Pressure it Instantly

On easier difficulties, you'll have plenty of time and MP to spam Blizzard spells. However, on Hard Mode (and considering the damage delay of Blizzaga), you'll want to play a bit safer, focusing on building ATB and Synergy during the earlier stages of the fight.
Make sure your controlled character has ATB Assist equipped so you can build ATB for your other party members. Once you have enough Synergy, use a Synergy Ability (ideally a Limit Level Increase or Unlimited MP one) to pressure the Midgardsormr.
All Synergy Abilities and How to Use
Use Partners in Pain to Gain Access to Catastrophe
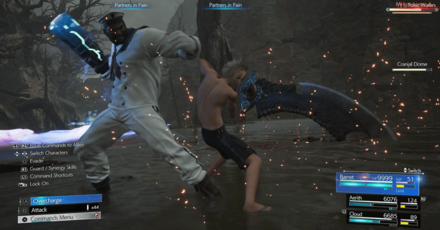
Catastrophe is leagues better than Barret's default Limit Break. Make sure to use the Partners in Pain Synergy Ability of Cloud and Barret to raise their limit level by one. If possible, you can attempt to build up for a re-cast in order to access Satellite Beam.
Gradually Build Stagger with Barret
When playing on Hard Mode, slowing down the pace of battle will usually be better than breezing through the different boss phases. For the Midgardsormr fight, use Barret as your primary character and buff him up with Bonus Round and Lifesaver.
Doing so allows you to hit max HP (with HP Up Materia) while also buffing your basic attacks with better Stagger buildup. Gradually build up Midgardsormr's Stagger meter, alternating between Overcharge and Focused Shot (when you have 2-ATB charges ready).
Use Infinity's End to Deal Consistent Damage on Stagger

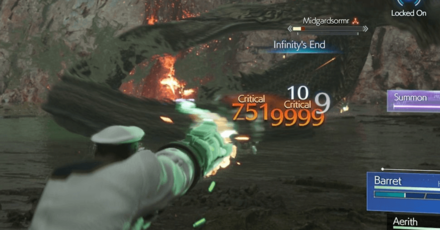
If you don't have access to limit breaks during the fight, immediately switch to Cloud once Midgardsormr gets staggered. Charge up 2 ATB bars using Punisher Mode and unleash Infinity's End which usually deals 9999 damage when hitting a staggered foe.
Use Aerith or Cloud as Bait for the Grab Attack
Ideally, you'll want Barret safe throughout the fight since he'll be your ATB battery and main tank. When the Midgardsormr disappears underwater, switch to Aerith or Cloud so either of them gets targeted.
You can attempt to dodge, but it's usually easier to have them get eaten. However, make sure to pay attention to the Disgorge move since your swallowed party member will most likely come back at low HP.
Use Revival Materia to Bring Back Fallen Party Members
If any of your party members fall in battle, you'll need to use Revival Materia to bring them back since you are not allowed to use items in Hard Mode. If you have Revival mastered, you can even use Arise to bring back allies with full HP!
Link Elemental and Fire Materia to Resist Fire
For new players to Hard Mode, Phase 2 is usually when Midgardsormr's damage starts to ramp up. Without proper preparation, Scorching Breath will deal 1000+ damage per burn instance, nuking even the tankiest of characters if caught out of position.
To avoid getting destroyed by Scorching Breath and the guaranteed hit of Beta, make sure to equip Elemental Materia to your Armor and link it with a Fire Materia. At 3★ level, linked Elemental Materia will allow you to Absorb and heal from elemental damage.
How to Get the Elemental Materia
How to Tank Beta with No Elemental Materia
If you don't have Elemental Materia available for this fight, the easiest way to tank Beta during Phase 3 is to make sure Barret has a high HP pool and that he has access to Healing and Revival Materia.
You can increase his HP by equipping him with a 5★ HP Up Materia. Make sure to save at least 1 ATB charge so that you can cast Turbulent Spirit after Beta. This allows you to immediately get enough ATB for a Curaga and Raise cast for fallen teammates.
Midgardsormr Rewards and Details
Rewards
| Midgardsormr Rewards | |||||||||||
|---|---|---|---|---|---|---|---|---|---|---|---|
| Easy/Normal | Hard Mode | ||||||||||
|
・163 EXP ・50 Party EXP ・10 AP ・650 Gil |
・6500 EXP ・30 AP ・3250 Gil ・The Way of the Fist Vol. VII |
||||||||||
| Items Dropped | Rare Items Dropped | ||||||||||
|
None
|
None
|
||||||||||
| Stealable Items | Morphable Items | ||||||||||
|
None
|
None
|
||||||||||
Basic Information and Details
| Midgardsormr | |
|---|---|
 |
|
| Location | Chapter Unlocked |
| Grasslands | Chapter 2 |
| Species | Movement |
| Biological | Grounded |
| Details | |
|
An immense serpent that dwells in the swamplands. It strikes at any creature who enters its territory, pulling the newfound prey into its coils, and then swallowing them whole. A potent venom drips from the base of its fangs, toxifying the waters in which it lives. Inflicting enough damage by exploiting its elemental weakness will pressure it. Hitting it with synergy abilities will pressure it instantly. |
|
FF7 Rebirth Related Guides

Boss Fight Guide and List of All Bosses
Story Bosses
| All Major Story Bosses | |
|---|---|
| Chapter 1 | Materia Guardian |
| Chapter 2 | Midgardsormr |
| Chapter 3 |
Rude and Elena Mythril Golem |
| Chapter 4 |
Terror of the Deep Roche |
| Chapter 5 | Jenova Emergent |
| Chapter 6 | Grasptropod |
| Chapter 7 |
Custom Valkyrie Gigatrice |
| Chapter 8 |
Dyne Anuran Suppressor |
| Chapter 9 |
Specimen H1024 Crimson Mare Mk. II |
| Chapter 10 | Gi Nattak |
| Chapter 11 |
Diabolic Variant Yin and Yang Forgotten Specimen Galian Beast Roche |
| Chapter 12 |
Abzu Rude and Elena Rufus |
| Chapter 13 |
Red Dragon Ironclad Reno and Rude Tseng and Elena Moss-Grown Adamantoise Demon Gate |
| Chapter 14 |
Jenova Lifeclinger Sephiroth Reborn |
Optional Bosses
| Grasslands | |
|---|---|
| Summon | Titan |
| Classified Intel | Quetzalcoatl |
| Side Quests |
White Terror |
| Junon | |
| Summon | Phoenix |
| Classified Intel | Mindflayer |
| Side Quests |
White Mousse Hell Rider II Sandstorm Drake |
| Corel | |
| Summon | Alexander |
| Classified Intel | Tonberry King |
| Side Quests |
Dark Claw Joker |
| Minigame | Test 0 |
| Gongaga | |
| Summon | Kujata |
| Classified Intel | Great Malboro |
| Side Quests |
Levridon Mastodon Gorgon Mane Gigantoad |
| Cosmo Canyon | |
| Summon | Bahamut Arisen |
| Classified Intel | Jabberwock |
| Side Quests | Irasceros Gigaworm |
| Nibel | |
| Summon | Odin |
| Classified Intel | King Zu |
| Side Quests |
Queen Bee Dranabarga |
| Meridian Ocean | |
| Gilgamesh's Island |
Gilgamesh Titan and Bahamut Arisen Phoenix and Kujata Alexander and Odin |
| Pirate King's Treasure |
Ogre Raider Brineborn Demon Hueyacoatl Sea Dragon |
Comment
Author
Midgardsormr Hard Mode Guide
Rankings
- We could not find the message board you were looking for.
Gaming News
Popular Games

Genshin Impact Walkthrough & Guides Wiki

Umamusume: Pretty Derby Walkthrough & Guides Wiki

Crimson Desert Walkthrough & Guides Wiki

Monster Hunter Stories 3: Twisted Reflection Walkthrough & Guides Wiki

Honkai: Star Rail Walkthrough & Guides Wiki

Pokemon Pokopia Walkthrough & Guides Wiki

The Seven Deadly Sins: Origin Walkthrough & Guides Wiki

Wuthering Waves Walkthrough & Guides Wiki

Zenless Zone Zero Walkthrough & Guides Wiki

Arknights: Endfield Walkthrough & Guides Wiki
Recommended Games

Fire Emblem Heroes (FEH) Walkthrough & Guides Wiki

Diablo 4: Vessel of Hatred Walkthrough & Guides Wiki

Cyberpunk 2077: Ultimate Edition Walkthrough & Guides Wiki

Yu-Gi-Oh! Master Duel Walkthrough & Guides Wiki

Super Smash Bros. Ultimate Walkthrough & Guides Wiki

Pokemon Brilliant Diamond and Shining Pearl (BDSP) Walkthrough & Guides Wiki

Elden Ring Shadow of the Erdtree Walkthrough & Guides Wiki

Monster Hunter World Walkthrough & Guides Wiki

The Legend of Zelda: Tears of the Kingdom Walkthrough & Guides Wiki

Persona 3 Reload Walkthrough & Guides Wiki
All rights reserved
© SQUARE ENIX CO., LTD. All Rights Reserved.
CHARACTER DESIGN: TETSUYA NOMURA/ROBERTO FERRARI
LOGO ILLUSTRATION: © 1997 YOSHITAKA AMANO
The copyrights of videos of games used in our content and other intellectual property rights belong to the provider of the game.
The contents we provide on this site were created personally by members of the Game8 editorial department.
We refuse the right to reuse or repost content taken without our permission such as data or images to other sites.


