Aerith Best Builds and Weapons
Aerith Gainsborough is a playable character in Final Fantasy 7 Rebirth (FF7 Rebirth). See the best builds for Aerith, list of weapons, their voice actors, and more about this character's background in this guide!
| Aerith Character Guides | |
|---|---|
| Best Builds and Weapons | Romance Guide |
List of Contents
Aerith Best Builds
| Stage and Chapter | List of Aerith Builds |
|---|---|
| Endgame (Hard Mode) |
Aerith Endgame Build |
| Late Game (Chapter 11) |
Aerith Late Game Build |
| Mid Game (Chapter 7) |
Aerith Mid Game Build |
| Early Game (Chapter 2-4) |
Aerith Early Game Build |
Aerith Endgame Build
| Accessory | Effect |
|---|---|
 Plumose Rod Plumose Rod
Weapon Lv. 8 |
|
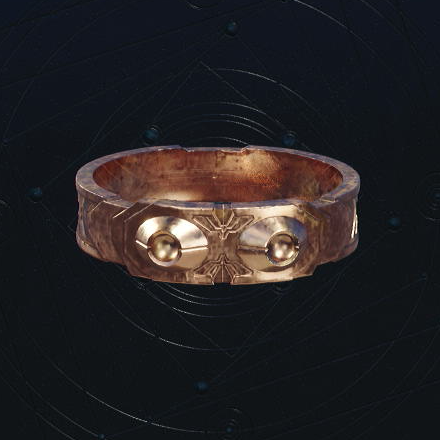
 Hades Armlet Hades Armlet
|
|
| Alternative Armor | |
| Weapon Skills | |
| Accessory | Effect |
|---|---|
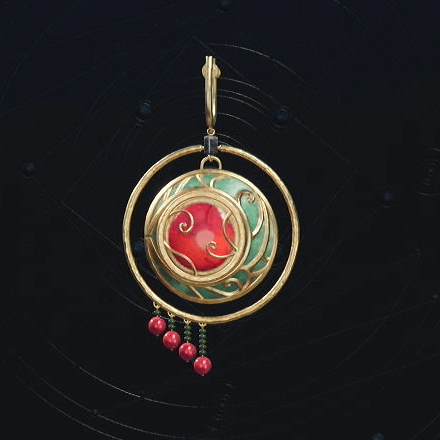
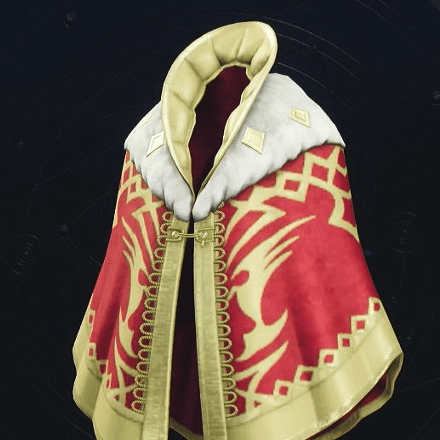 Chocoking's Cape Chocoking's Cape
|
Fills one ATB charge at the start of battle. |
| Alternative Accessories | |
This is a hard mode build for Aerith, equipped with magic element materia paired with support materia to help in petrifying most bosses and clearing mobs fast.
With First Strike, ATB Boost materia, and Chocoking's Cape, you should have enough ATB to cast a max-level spell within an arcane ward. This doubles your casted spell which means you'll double your damage.
Always use an elemental spell when fighting against mobs to finish the battle fast. Start with Petrify when fighting bosses to immobilize them early and land combos on them safely.
Keep in mind that Petrify can also be used as a spell that builds up stagger, while Poison should only be used if an enemy is weak to it.
Best Team Synergies
| Synergy Skills | |
|---|---|
| All | Bodyguard Ask any of your allies to defend you while you move about the battlefield. |
| Synergy Abilities | |
| United Refocus Provides a 3-charge ATB gauge. Useful for increasing the usage of commands in battle. |
|
| Mystic Manipulation Aerith clones Yuffie to assault an enemy. Grants unlimited MP for a limited time. |
|
Additional Build Notes
- You can get the Chocoking's Cape by completing the Gold Cup or Bust side quest.
- Cast one ward before using ATB Boost to maximize its full effect when starting battles (Only applicable if Chocoking's Cape is equipped).
- The third Magnify materia is a reward from the Brutal Challenge: Hellions' Intonement, which is available after beating Gilgamesh.
- You can pair Healing with Magic Efficiency instead if you only have two Magnify Materia.
Aerith Late Game Build
| Accessory | Effect |
|---|---|
 Timeless Rod Timeless Rod
Weapon Lv. 5 |
|
| Enhanced Yggdrasil Armlet |
|
| Weapon Skills |
| Accessory | Effect |
|---|---|
 Circlet Circlet
|
Increases max MP by 10% and Increases magic power by 5% |
| Alternative Accessories | |
You can choose to equip the Ceremonial Staff for more magic attack at the cost of having only 2 materia slots.
You can follow this build for Aerith when using her actively as a healer and spellcaster during Chapter 11: The Long Shadow of Shinra onwards.
Aerith maintains her role as a strong support and spellcaster able to exploit elemental weaknesses. Magnify is important since this allows any connected spell to apply to all enemies or allies. Time materia's Haste spell is useful for increasing ATB charge.
The Enhanced Yggrdasil Armlet provides 6 materia slots, enough for a wide variety of materia such as MP Absorption or Magic Focus. Feel free to switch out materia for any other linked materia or spells such as Gravity or Comet when needed.
Best Team Synergies
| Synergy Abilities | |
|---|---|
| United Refocus Provides a 3-charge ATB gauge. Useful for increasing the usage of commands in battle. |
|
| Firework Blade Unleash a strong magical range attack with Cloud against a distant enemy. Raises limit levels. |
|
| Mega Moogle Mash Extends stagger time and damage dealt to staggered enemies. |
|
Additional Build Notes
- Magnify can be obtained from Cait Sith's starting equipment.
- MP Absorption is developed at Chadley's Research in the Nibel Region.
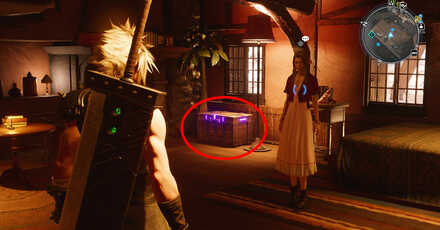
- If you have not obtained the Circlet yet, it can be found at the Seabreeze Storehouse after Corel's Chocobo Ranch, located in a treasure box past the two parked tankers
- Enhanced Yggdrasil Armlet is unlocked for transmutation when completing Excavation Intel: Island Base. The standard armlet is transmutable at Craftsmanship Level 13.
- Alternatively, you can equip the stronger Valkyrian Bangle. This can be obtained from Nidhogg Grotto (far southwest island) accessible via Chocobo.
- ATB Boost is best used when you have at least 1 bar of ATB since it will be doubled to 2 bars. This allows you to quickly use Prayer, cast two spells, or use another other command after placing a ward.
- You can choose to equip the Ceremonial Staff to Aerith for more magic attack at the cost of having only 2 materia slots.
Aerith Mid Game Build
| Accessory | Effect |
|---|---|
 Wizard's Rod Wizard's Rod
|
|
 Abyssal Bangle Abyssal Bangle
|
|
| Weapon Skills |
| Accessory | Effect |
|---|---|
|
Circlet
|
Increases max MP by 10% and Increases magic power by 5% |
| Alternative Accessories | |
You can follow This general build for Aerith when using her actively as a healer and spellcaster during Chapter 7: Those Left Behind onwards.
Slot in Fire and Ice and Lightning and Wind to cover all 4 elemental needs for your team. When using Healing materia, connect it with Magic Efficiency to reduce its MP cost.
With three available materia links, you can experiment with switching up Aerith's kit such as throwing in Elemental materia to imbue her basic attacks with elements (including attacks buffed by Radiant Ward), or having Auto-Cast if you are more actively using another character.
Best Team Synergies
| Synergy Abilities | |
|---|---|
| United Refocus Provides a 3-charge ATB gauge. Useful for increasing the usage of commands in battle. |
|
| Firework Blade Unleash a strong magical range attack with Cloud against a distant enemy. Raises limit levels. |
|
Additional Build Notes
- Magic Efficiency can be developed at Chadley's Research in Corel.
- Fire and Ice are developed at Chadley's Research in the Grasslands, while Lightning and Wind are developed at Chadley's Research in Junon.
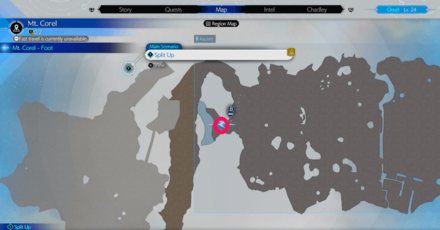
- Wizard's Rod can be obtained for free in a purple chest early on when entering Mt. Corel (can be found near vending machines).
- The Circlet can be found at the Seabreeze Storehouse after Corel's Chocobo Ranch, located in a treasure box past the two parked tankers
Aerith Early Game Build
| Accessory | Effect |
|---|---|
|
Timeless Rod
|
|
 Copper Bracer Copper Bracer
|
|
| Weapon Skills |
| Accessory | Effect |
|---|---|
 Magical Earrings Magical Earrings
|
Increases magic power by 5%. Increases max MP by 3. |
This is an early game build for Aerith available before fighting Midgardsomr, the game's first open world boss in Chapter 2: A New Journey Begins. Aerith's strength is in her support magic and burst damage from spellcasting due to her high magic attack.
Be sure to use her strategically since her basic attacks are usually slow. The Timeless Rod's Chrono Aegis will help defend against strong enemies closing in on her.
Best Team Synergies
| Synergy Abilities | |
|---|---|
| United Refocus Provides a 3-charge ATB gauge. Useful for increasing the usage of commands in battle. |
|
| Divine Punishment Tifa teams up with Aerith to deal a strong AoE attack that applies to a wide area at the target's location. Useful for multiple enemies. Raises limit levels. |
|
Additional Build Notes
- Materia can be bought at the Vending Machine at Oliver's Farm. Fire and Ice is developed at Chadley's Research.
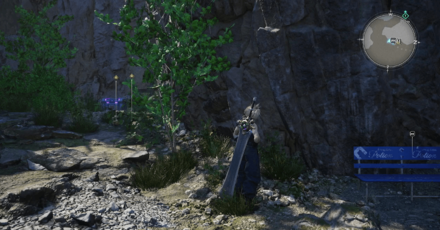
- The Timeless Rod can be found in a purple chest to the right of Chloe's Shop. The shop is found within Bill's Ranch in the Grasslands.
- The Copper Bracer can be transmuted for her at Craftsmanship Level 3. Alternatively, you can buy the Bone Bracelet from the Vending Machine for higher magic defense.
- Feel free to change Aerith's materia elements depending on the enemies she will face.
- Magical Earrings can be unlocked for transmutation by completing Excavation Intel 2: Pipeline Depository (can be discovered by completing Expedition Intel) in the Grasslands.
How to Use Aerith and Combat Guide
Aerith Controls
| Controls | Function |
|---|---|
| Dodges attacks. | |
| Warps to the position of a conjured ward (such as an Arcane Ward). Good for repositioning. | |
| Aerith fires a ranged attack. | |
Hold Tempest |
Hold to charge and release to have Aerith fire a strong ranged attack. Will summon a Fleeting Familiar when a fully-charged Tempest hits the target. |
| Block attacks | |
| General control for running | |
| Access the Command Menu for Abilities, Spells, Items, and Synergy |
Aerith Battle Tips
| How to Use Aerith |
|---|
|
|
Build for Healing and Support
An ideal go-to strategy for Aerith is to build her around her healing capabilities due to her MP and spell-oriented abilities. Other than healing, you will want to use her Ward abilities to strengthen your party member's casting abilities.
For an all-around healer, having Healing Materia connected with Magnify Materia is recommended for efficiently healing your entire party.
Use Arcane Ward for Strong Spells
| Arcane Ward + Thundaga | |||
|---|---|---|---|
| Target: Terror of the Deep Affected Caster: Cloud Spell: Thundaga |
|||
| Cast | MP Cost | Damage | ATB Cost |
| 1st Cast | 18 | 2871 | 2 |
| 2nd Cast Reduction |
5 -72.2% |
1570 -45.3% |
0 -100% |
| Total | |||
| - | 23 | 4441 | 2 |
Data above was observed in-game. Percentage values for the 2nd cast stand for reductions and are calculated as ((1st Cast Value - 2nd Cast Value)/1st Cast Value)*100.
Arcane Ward is a powerful ability in Aerith's kit that allows spells within the ward's area to be cast twice with no additional ATB cost. This affects all members within the ward's area, giving opportunities to nuke strong enemies (like bosses) quickly with strong spells that usually cost 2 ATB.
The 2nd cast of a spell affected by Arcane Ward will cost less MP and deal less damage.
Combo Arcane Ward with Magnify Materia
| Arcane Ward + Fira (+ Magnify) | |||
|---|---|---|---|
| Target: Silver Chimera x2 Affected Caster: Cloud Spell: Fira w/ Magnify Materia |
|||
| Cast | MP Cost | Damage | ATB Cost |
| 1st Cast | 10 | 255 | 268 | 1 |
| 2nd Cast Reduction |
3 -70% |
143 | 134 -43.9% | -50% |
0 -100% |
| Total | |||
| - | 13 | 398 | 134 | 1 |
Aerith's Arcane Ward skill can also combo with any spell affected by Magnify Materia. This is useful if you want to double-cast your spell on multiple enemies. Note that Magnify Materia reduces the potency of the spell, so you will not want this materia on lone targets or bosses.
For example, you can have Cloud use a magnified Fira to efficiently exploit the weaknesses of two Silver Chimera. This not only does some considerable damage at a lower MP cost but also efficiently builds stagger with little effort.
Radiant Ward for Basic Attacks and Invincibility
Radiant Ward is useful if you are in a position to use spells at a crucial moment or if you want to bolster Aerith's basic attacks. This ability grants invincibility to anyone casting a spell, making it useful for strong spells with a long cast time.
Aerith's basic attacks within this ward will be stronger, so if you want to play more offensively, this is Aerith's go-to ability.
Build ATB Meter at a Safe Distance
[:movie:3843059:{mode:autoplay]
Aerith cannot naturally build her ATB meter quickly compared to fast fighters like Cloud, so it is best to have her play at a distance with her ranged attacks.
Fortunately, her powerful abilities like Arcane Ward only cost 1 ATB. You do not have to put too much effort into attacking. Prioritize having her on the defense and supporting other party members.
Aerith Best Combos
Basic Combos
| Attack | Function |
|---|---|
| Basic Range Attack
Mash |
Aerith fires basic projectiles from her staff. It is slow-firing, and mostly ideal for building up her ATB meter. Converted to lasers within a Radiant Ward. |
Tempest Hold and Release |
Aerith charges a strong projectile and launches it towards a target. Has stagger potential. Spawns a Fleeting Familiar that fires off projectiles against a target or another nearby enemy. |
Names given to the above combos are for descriptive purposes. The list above is subject to updates.
Ability Combos
| Combo | Function |
|---|---|
| Warp Shift Combo |
Ward Shift is useful for repositioning Aerith to a placed Ward away from a disadvantageous spot. It can be used offensively for AoE abilities like Sorcerous Storm or for quickly casting a spell under invincibility in a Radiant Ward. |
Aerith's combo rotation is best paired with abilities or spells due to the simplistic nature of her basic attacks. For this reason, she is dependent on filling her ATB meter early in the fight.
Aerith Best Folio Skill Cores
| Skill Core / Priority | Type and Effect |
|---|---|
| United Refocus ★★★ |
Synergy Ability ・Gives Aerith and her partner temporary 3-charge ATB gauges, increasing their flexibility in readying commands such as spells and abilities. |
| Mystic Manipulation ★★★ |
Synergy Ability ・Aerith Clones Yuffie to land a barrage of attacks on an enemy. Temporarily provides unlimited MP. |
| Bodyguard ★★★ |
Synergy Skill ・An essential defensive synergy skill that adds another survivability option for Aerith. |
| Spellbound Blast ★★★ |
Synergy Skill ・An charge attack that allows Aerith to receive MP from her party members. |
| Elemental Damage Up ★★★ |
Stat Boost ・Provides increased fire, ice, lightning, and wind damage. |
| Enduring Ward ★★★ |
Stat Boost ・Further increases the duration of Aerith's wards by 25%. |
| Altruistic Recovery Boost ★★☆ |
Stat Boost ・Increases Aerith's HP recovery by 10% when healing party members. |
| MATK Up ★★☆ |
Stat Boost ・Increases magic attack by 20. |
| MP Up ★☆☆ |
Stat Boost ・Raises Aerith's max MP by 3. |
Aerith Weapon Locations and Stats
Guard Stick
 Guard Stick Guard Stick
|
|||
| Stats and Ability | Weapon Skills | ||
|---|---|---|---|
| ・ATK + 18 ・MATK + 26 ・DEF + 0 ・MDEF + 0 Slots: ◯◯ Ability: Arcane Ward |
|||
| Location | |||
| Aerith starts with the Guard Stick as her default weapon. You'll gain access to this weapon as soon as she joins you in Chapter 2. | |||
Timeless Rod
|
Timeless Rod
|
|||
| Stats and Ability | Weapon Skills | ||
|---|---|---|---|
| ・ATK + 20 ・MATK + 37 ・DEF + 0 ・MDEF + 0 Slots: ◯-◯◯ Ability: Chrono Aegis |
|||
| Location | |||
 |
 |
||
| Beside Chloe in Bill's Ranch | |||
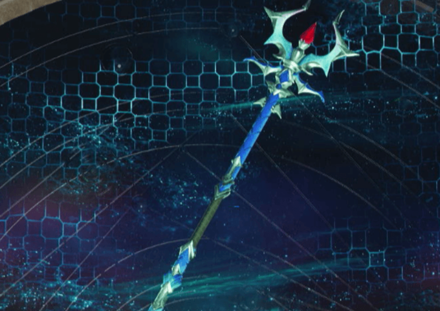
Empress's Scepter
 Empress's Scepter Empress's Scepter
|
|||
| Stats and Ability | Weapon Skills | ||
|---|---|---|---|
| ・ATK + 36 ・MATK + 31 ・DEF + 0 ・MDEF + 0 Slots: ◯◯◯◯ Ability: Radiant Ward |
|||
| Location | |||
 |
 |
||
| In Aerith's Room at the Inn in Under Junon | |||
Wizard's Rod
|
Wizard's Rod
|
|||
| Stats and Ability | Weapon Skills | ||
|---|---|---|---|
| ・ATK + 31 ・MATK + 46 ・DEF + 0 ・MDEF + 0 Slots: ◯-◯◯-◯◯ Ability: Lustrous Shield |
|||
| Location | |||
 |
 |
||
| Near a Rest Station at the Foot of Mt. Corel | |||
Ceremonial Staff
 Ceremonial Staff Ceremonial Staff
|
|||
| Stats and Ability | Weapon Skills | ||
|---|---|---|---|
| ・ATK + 56 ・MATK + 92 ・DEF + 0 ・MDEF + 0 Slots: ◯◯ Ability: ATB Ward |
|||
| Location | |||
 |
 |
||
| Besides Rest Stop After Flashback | |||
Gambanteinn
 Gambanteinn Gambanteinn
|
|||
| Stats and Ability | Weapon Skills | ||
|---|---|---|---|
| ・ATK + 58 ・MATK + 86 ・DEF + 0 ・MDEF + 0 Slots: ◯-◯◯-◯◯◯ Ability: Noble Sacrifice |
|||
| Location | |||
 |
 |
||
| Down the Stairs After Learning Moving Vessels | |||
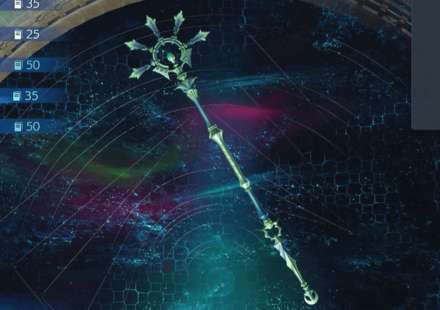
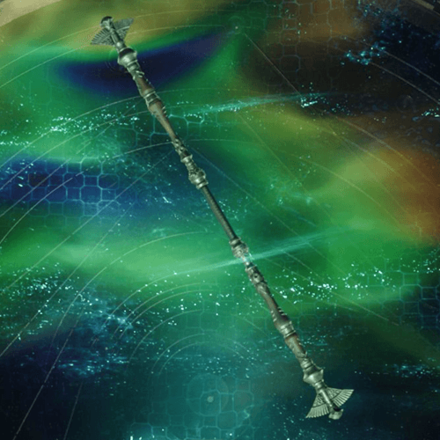
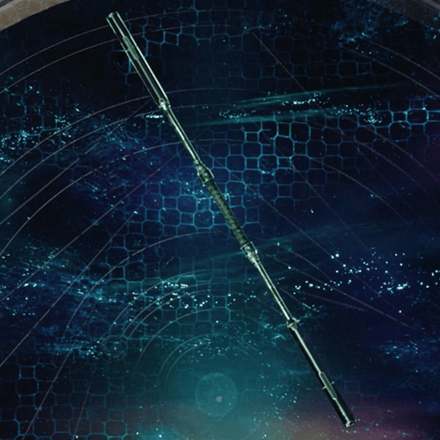
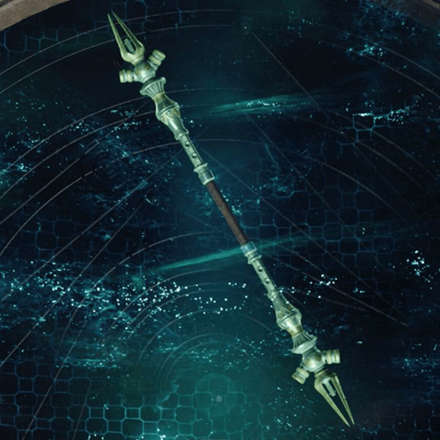
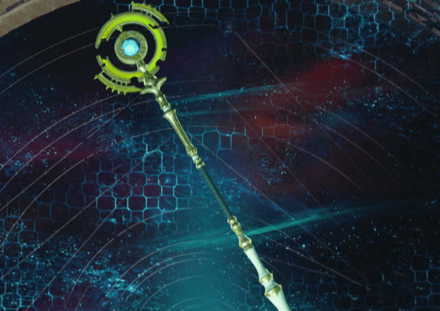
Plumose Rod
|
Plumose Rod
|
|||
| Stats and Ability | Weapon Skills | ||
|---|---|---|---|
| ・ATK + 43 ・MATK + 125 ・DEF + 0 ・MDEF + 0 Slots: ◯-◯◯◯◯◯ Ability: Ray of Judgement |
|||
| Location | |||
 |
 |
||
| Clear 8 Shinra Trials in Hojo's Lab | |||
All Weapons and How to Get Them
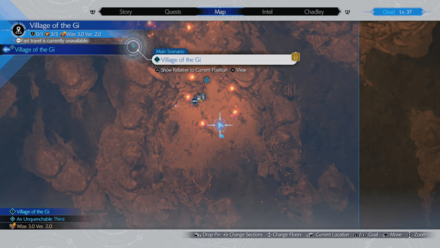
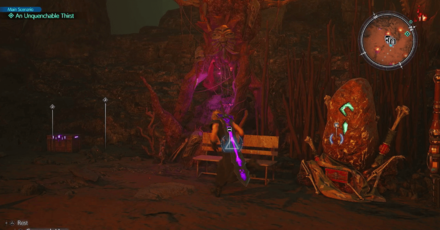
Aerith Manuscript Locations
Telluric Scriptures Locations
| Volume | Difficulty Req. | How to Get |
|---|---|---|
| Vol. 1 | Easy / Normal |
Side Quest: Flowers from the Hill
Reward for completing the Flowers from the Hill Side Quest in the Grasslands region. |
| Vol. 2 | Easy / Normal |
Moogle Shop
Can be purchased at Merchant Rank 2 for 6 Moogle Medals. |
| Vol. 3 | Easy / Normal |
GP Exchange
Purchase at the GP Exchange for 100 GP. |
| Vol. 4 | Easy / Normal |
Moogle Shop
Can be purchased at Merchant Rank 6 for 6 Moogle Medals. |
| Vol. 5 | Easy / Normal |
Musclehead Colosseum
Reward for clearing Two-Person Bout: Disorderly Peacekeepers. |
| Vol. 6 | Easy / Normal |
Side Quest: Beneath Still Waters
Reward for completing the Beneath Still Waters Side Quest in the Junon region. |
| Vol. 7 | Hard |
Side Quest: Flowers from the Hill
Reward for defeating the Mandrakes during the Flowers from the Hill Side Quest, in the Grasslands region while playing in Hard Mode. |
| Vol. 8 | Hard |
Boss: Rude
Reward for defeating Rude in Chapter 3 Hard Mode. |
| Vol. 9 | Hard |
Boss: Terror of the Deep
Reward for defeating Terror of the Deep in Chapter 4 Hard Mode. |
| Vol. 10 | Hard |
Side Quest: Rendezvous in Costa del Sol
Reward for defeating the Barnaclaws during the Rendezvous in Costa del Sol Side Quest, in the Corel region while playing in Hard Mode. |
| Vol. 11 | Hard |
Side Quest: The Spice of Life
Reward for defeating the Gorgon Mane during the The Spice of Life Side Quest, in the Gongaga region while playing in Hard Mode. |
| Vol. 12 | Hard |
Side Quest: Absence of a Sign
Reward for defeating Reapertails during the Absence of a Sign Side Quest, in the Junon region while playing in Hard Mode. |
| Vol. 13 | Hard |
Side Quest: Beneath Still Waters
Reward for defeating Hell Rider II during the Beneath Still Waters Side Quest, in the Junon region while playing in Hard Mode. |
| Vol. 14 | Hard |
Side Quest: Woodland Vigil
Reward for completing the Woodland Vigil Side Quest, in the Gongaga region while playing in Hard Mode. |
| Vol. 15 | Hard |
Boss: Demon Gate
Reward for defeating the Demon Gate in Chapter 13 Hard Mode. |
| Vol. 16 | Hard |
Combat Simulator: Aerith vs. The Magi
Reward for completing the Legendary Bout: Aerith vs. The Magi in Combat Simulator. |
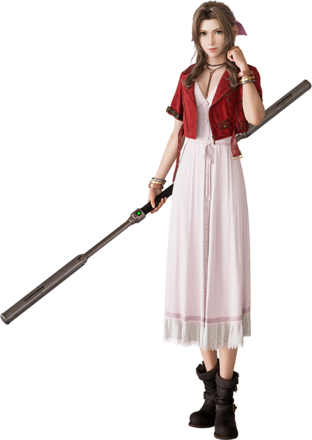
Aerith Character Profile and Background
Profile and Voice Actor
 Aerith |
Voice Actors | |
|---|---|---|
| EN: Briana White
JP: Sakamoto Maaya |
||
| Weapon | ||
| Staff | ||
| Chapter Unlocked | ||
|
Chapter 2 A New Journey Begins |
||
| Official Introduction | ||
| A flower seller who lives in the Sector 5 slums. She is the last survivor of the ancient species called "Cetra" and has the ability to hear the planet. She was captured by Shinra to locate the "Promised Land" of the Cetra legend, but was rescued by Cloud and fled out of Midgar. Along with her new friends, her desire to travel through the vast wilderness grows. | ||
Major Supporting Character in FF7 Remake
Aerith, also known as the Flower Girl, is a living Ancent (Cetra) who serves as a major playable character in FF7 Remake. She meets Cloud in Midgar and eventually joins with the rest of the Avalanche crew to take on the Shinra Electric Company and chase Sephiroth.
Sought after by the Shinra Turks due to her ability to interact with the planet's lifestream, Aerith serves as the party's trusted mage and healer, and is capable of strengthening the party's abilities through various wards and spells.
Aerith Abilities
List of Aerith Abilities
| Ability | Effect / Source |
|---|---|
| Soul Drain | Unleash an attack that absorbs MP. Absorbs additional MP from staggered enemies. Unlocked from the start |
| Sorcerous Storm | Deal magic damage to nearby enemies. Unlocked from the start |
| Arcane Ward | Conjure a ward. Attack spells cast within the ward will automatically be cast twice. Weapon: Guard Stick |
| Radiant Ward | Conjure a ward that grants invincibility while casting spells. Strengthens Aerith's basic attack. Weapon: Empress's Scepter |
| Chrono Aegis | Raise a barrier that damages and temporarily freezes enemies who attempt to strike you. Weapon: Timeless Rod |
| Lustrous Shield | Raise a barrier that damages and temporarily freezes enemies who attempt to strike you. Weapon: Wizard's Rod |
| ATB Ward | Conjure a ward. Fill ATB charges within the ward to increase your allies' ATB gauges. Weapon: Ceremonial Staff |
| Ray of Judgement | Fire an energy burst that hits multiple times. Increased stagger damage bonus. Weapon: Plumose Rod |
| Noble Sacrifice | Sacrifice yourself to revive fallen allies, restore their HP, and remove detrimental status effects. Costs 2 ATB. Weapon: Gambanteinn |
Aerith Limit Breaks
List of Aerith Limit Breaks
| Limit Break | Effect / How to Get |
|---|---|
| Healing Wind | Limit Level 1 Summon a soothing breeze to restore a moderate amount of HP to allies. Dawn in a New Era of Junon Unlocked from the start |
| Planet's Protection | Limit Level 2 Entreat the planet's favor to nullify physical damage dealt to all party members. Can only be used once per battle. Dawn in a New Era of Junon Unlocked from the start |
| Rising Fury | Limit Level 3 Fills the other party members' limit break gauges. Unlocked through the Folio Skill Tree at party level 8. |
Aerith Synergy Skills
List of Aerith Synergy Skills
| Partner | Synergy Skill |
|---|---|
| Cloud Barret Tifa Red XIII |
Bodyguard Ask your partner to defend you while you move about the field. |
Aerith Synergy Abilities
List of Aerith Synergy Abilities
| Synergy Ability | Description | Buff |
|---|---|---|
| Firework Blade | Partner: Cloud Cloud uses Aerith's magic to unleash a ranged attack. Raises their limit levels. |
Raises Limit Levels (Cloud and Aerith) |
| Divine Punishment | Partner: Tifa Tifa makes use of Aerith's magic to deal damage across a wide area. Raises their limit levels. |
Raises Limit Levels (Tifa and Aerith) |
| Planetary Roar | Partner: Red XIII Aerith channels her magic through Red XIII's howl, unleashing a ranged attack across a wide area. Raises their limit levels. |
Raises Limit Levels (Red XIII and Aerith) |
Aerith's Role in FF7 Rebirth
Major Supporting Character
Fall of a Hero in Nibelheim
Aerith returns as a major supporting playable character in FF7 Rebirth. She first appears as a non-playable character along with Avalanche crew during Cloud's recount of his memories at Nibelheim.
Dawn in a New Era of Junon
She becomes a playable character in Dawn of a New Era of Junon where she journeys to the Shinra jurisdiction Junon along with the Avalanche crew.
FF7 Rebirth Related Guides

Other Character Guides
| Character Guides | |
|---|---|
| Characters Tier List | Best Builds |
| Best Party Compositions | Best Abilities |
List of Playable Characters
| All Characters | |||
|---|---|---|---|
 Aerith Aerith
|
 Barret Barret
|
 Cait Sith Cait Sith
|
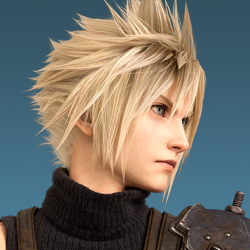 Cloud Cloud
|
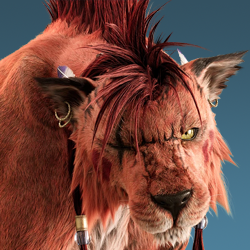 Red XIII Red XIII
|
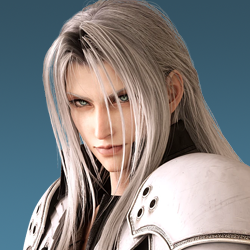 Sephiroth Sephiroth
|
 Tifa Tifa
|
 Yuffie Yuffie
|
 Zack Zack
|
|||
Comment
Author

Aerith Best Builds and Weapons
Rankings
- We could not find the message board you were looking for.
Gaming News
![Neverness to Everness (NTE) Review [Beta Co-Ex Test] | Rolling the Dice on Something Special](https://img.game8.co/4414628/dd3192c8f1f074ea788451a11eb862a7.jpeg/show)


Popular Games

Genshin Impact Walkthrough & Guides Wiki
Honkai: Star Rail Walkthrough & Guides Wiki
Arknights: Endfield Walkthrough & Guides Wiki
Umamusume: Pretty Derby Walkthrough & Guides Wiki
Wuthering Waves Walkthrough & Guides Wiki
Pokemon TCG Pocket (PTCGP) Strategies & Guides Wiki
Abyss Walkthrough & Guides Wiki
Zenless Zone Zero Walkthrough & Guides Wiki
Digimon Story: Time Stranger Walkthrough & Guides Wiki
Clair Obscur: Expedition 33 Walkthrough & Guides Wiki


Recommended Games
Fire Emblem Heroes (FEH) Walkthrough & Guides Wiki
Pokemon Brilliant Diamond and Shining Pearl (BDSP) Walkthrough & Guides Wiki
Diablo 4: Vessel of Hatred Walkthrough & Guides Wiki
Super Smash Bros. Ultimate Walkthrough & Guides Wiki
Yu-Gi-Oh! Master Duel Walkthrough & Guides Wiki
Elden Ring Shadow of the Erdtree Walkthrough & Guides Wiki
Monster Hunter World Walkthrough & Guides Wiki
The Legend of Zelda: Tears of the Kingdom Walkthrough & Guides Wiki
Persona 3 Reload Walkthrough & Guides Wiki
Cyberpunk 2077: Ultimate Edition Walkthrough & Guides Wiki


All rights reserved
© SQUARE ENIX CO., LTD. All Rights Reserved.
CHARACTER DESIGN: TETSUYA NOMURA/ROBERTO FERRARI
LOGO ILLUSTRATION: © 1997 YOSHITAKA AMANO
The copyrights of videos of games used in our content and other intellectual property rights belong to the provider of the game.
The contents we provide on this site were created personally by members of the Game8 editorial department.
We refuse the right to reuse or repost content taken without our permission such as data or images to other sites.