Red XIII Best Builds and Weapons
Red XIII (or Red 13) is a playable character in Final Fantasy 7 Rebirth (FF7 Rebirth). See the best builds for Red XIII, list of weapons, their voice actors, and more about this character's background in this guide!
| Red XIII Character Guides | |
|---|---|
| Best Builds and Weapons | Romance Guide |
List of Contents
Red XIII Best Builds
| Stage and Chapter | List of Red XIII Builds |
|---|---|
| Endgame (Hard Mode) |
Red XIII Endgame Build |
| Late Game (Chapter 11) |
Red XIII Late Game Build |
| Mid Game (Chapter 7) |
Red XIII Mid Game Build |
| Early Game (Chapter 2-4) |
Red XIII Early Game Build |
Red XIII Endgame Build
| Equipment | Materia |
|---|---|
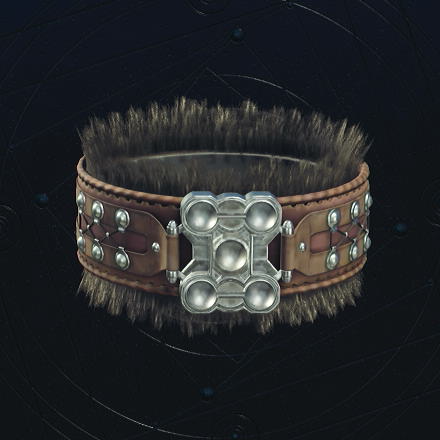
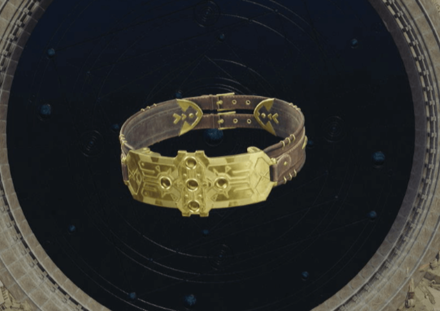 Golden Collar Golden Collar
Weapon Lv. 8 |
|
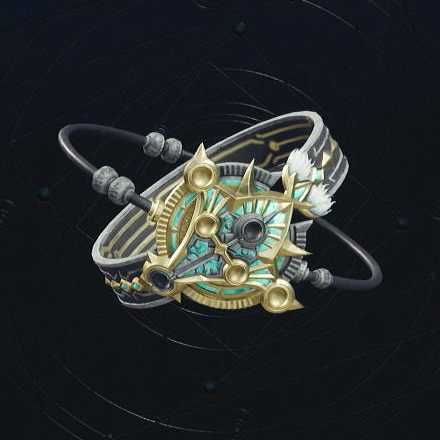 Celestial Bangle Celestial Bangle
|
|
| Alternative Armor | |
| Weapon Skills | |
| Accessory | Effect |
|---|---|
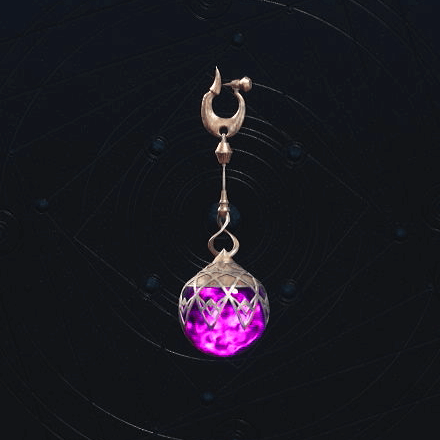
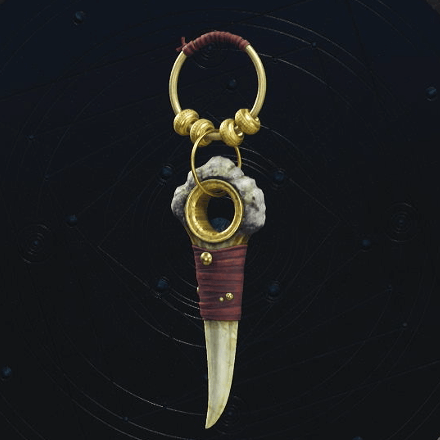 Gi Warrior's Charm Gi Warrior's Charm
|
Increases the limit gauge fill rate by 10%. |
| Alternative Accessories | |
Red XIII's best endgame build for Hard Mode focuses mainly on increasing his survivability so he can tank more hits for the Vengeance Gauge. This build works even if you're not actively controlling Red.
Start by casting Chilling Roar for the extra Vengeance Gauge buildup whenever Red is hit followed by Darkside to increase the damage of Sidewinder, Crescent Claw, and his other attack abilities.
The health Red loses due to Darkside's effect and tanking hits can be recovered using Cure, Siphon Fang, and his Lv1 Limit Break, Bloody Fang. You can also make use of the damage he received to empower Reaper Touch before you let Red heal.
Gi Warrior's Charm allows Red to frequently use any of his Limit Break depending on his needs. It can be Bloody Fang to recover HP and MP, Howling moon to instantly trigger a longer Vengeance Mode, or Wrath of the Land to deal devastating damage.
Best Team Synergies
| Synergy Skills | |
|---|---|
| Any | Wild Charge Lets Red XIII and an ally charge through attacks while closing gaps between their target. |
| Iron Defense More of a protection for Red's allies, as he can quickly move to a safe spot and "pull" an ally from harm with this Synergy Skill while also bracing for other incoming attacks. |
|
| Synergy Abilities | |
| Planetary Roar Increases both members' limit levels, giving Aerith access to Planet's Protection that adds a layer to Red's tanking capabilities. |
|
| Call of the Wild Extends the Stagger duration for Red's Vengeance Mode attacks. |
|
Additional Build Notes
- Alexander can be swapped with a summon of your choice.
- Try to unlock Retaliation in Red's folio skill tree for a more powerful counterattack than Sentinel Stance! Take note that using this ability immediately ends Vengeance Mode, so only use it when the Vengeance Gauge is about to be depleted.
Red XIII Late Game Build
| Equipment | Materia |
|---|---|
|
Golden Collar
Weapon Lv. 5 |
|
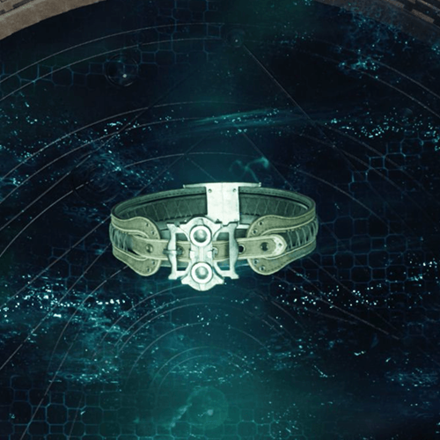
 Garm Bangle Garm Bangle
|
|
| Weapon Skills |
| Accessory | Effect |
|---|---|
 Precision Defense Focus Materia Earrings Precision Defense Focus Materia Earrings
|
Allows use of the highest level of precision defense focus materia, rendering enemies' binding attacks ineffective against perfectly timed blocks. |
| Alternative Accessories | |
This build for Red XIII can be followed during Chapter 11: The Long Shadow of Shinra onwards. Building up the Vengeance Gauge and having a reactive but speedy playstyle is still the priority for Red XIII.
Golden Collar provides a high attack damage for Red XIII. Garm Bangle is an easily accessible armor piece if you do not have access yet to equipment like the Valkyrian Bangle. When needed, Fire and Ice can be swapped out for any other element materia depending on the fight.
Best Team Synergies
| Synergy Skills | |
|---|---|
| Any | Wild Charge Allows Red XIII to damage and close the distance between enemies. It also guards against attacks, helping you build up the Vengeance gauge faster. |
| Synergy Abilities | |
| United Refocus Temporarily partitions both Red XIII's and Barret's ATB gauges into three segments, making it easier to save up on command usage. |
|
| Savage Assault Red XIII and Cloud pair up for a strong synergy attack. Raises Limit Levels. |
|
| Overfang Barret sends Red XIII flying at the enemy, doing big damage and raising their Limit Levels. |
|
Additional Build Notes
- Speed Up is rewarded from completing Gongaga Battle Intel: Rooted in the Planet.
- The Valkyrian Bangle is obtained at the Nidhogg Grotto in the Nibel Region (far southwest island). This needs a Chocobo capable of using Chocojet (Chocobo Intel found from the side quest Esoteric Secrets of the Elders).
Red XIII Mid Game Build
| Equipment | Materia |
|---|---|
 Renegade's Collar Renegade's Collar
|
|
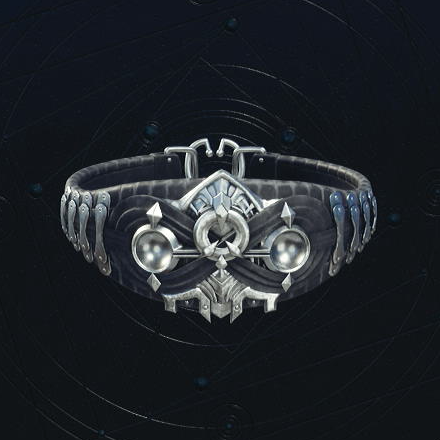 Abyssal Bangle Abyssal Bangle
|
|
| Weapon Skills |
| Accessory | Effect |
|---|---|
 Hi-Power Wristguards Hi-Power Wristguards
|
Increases strength by 5%. Increases max HP by 250. |
This build for Red XIII can be followed during Chapter 7: Those Left Behind onwards. We focused on augmenting Red XIII's Vengeance gauge buildup by giving him defense-based materia such as Precision Defense Focus.
Renegade's Collar is the choice weapon for Red XIII since it provides him a high attack power stat and the ATB Charge Rate Up weapon skill. HP Absorption and Enemy Skill are paired to grant him HP whenever he uses the Enemy Skill ability.
Best Team Synergies
| Synergy Skills | |
|---|---|
| Wild Charge Allows Red XIII to damage and close the distance between enemies. It also guards against attacks, helping you build up the Vengeance gauge faster. |
|
| Synergy Abilities | |
| United Refocus Temporarily partitions both Red XIII's and Barret's ATB gauges into three segments, making it easier to save up on command usage. |
|
| Overfang Barret sends Red XIII flying at the enemy, doing big damage and raising their Limit Levels. |
|
Additional Build Notes
- HP Absorption can be developed at Chadley's Research in the Corel Region. Gathering Data Points from that region becomes available starting at Chapter 7.
- Enemy Skill can be obtained as a reward from Biological Intel: Know Thine Enemy in Chadley's Combat Simulator.
- Hi-Power Wristguards can be unlocked for transmutation by completing Excavation Intel 2: Pipeline Depository (can be discovered by completing Expedition Intel) in the Grasslands.
Red XIII Early Game Build
| Equipment | Materia |
|---|---|
 Mythril Collar Mythril Collar
|
|
 Hunter's Bangle Hunter's Bangle
|
|
| Weapon Skills |
| Accessory | Effect |
|---|---|
|
Hi-Power Wristguards
|
Increases strength by 5%. Increases max HP by 250. |
This is an early game build for Red XIII available before fighting Midgardsomr, the game's first open world boss in Chapter 2: A New Journey Begins.
Red XIII is exceptionally quick in battle, being able to cover lots of ground through both his dodges and attacks. Take advantage of Precision Defense Focus to make easier to time perfect blocks on enemies.
Best Team Synergies
| Synergy Skills | |
|---|---|
| Wild Charge Allows Red XIII to damage and close the distance between enemies. It also guards against attacks, helping you build up the Vengeance gauge faster. |
|
| Synergy Abilities | |
| United Refocus Temporarily partitions both Red XIII's and Barret's ATB gauges into three segments, making it easier to save up on command usage. |
|
| Overfang Barret sends Red XIII flying at the enemy, doing big damage and raising their Limit Levels. |
|
Additional Build Notes
- Precision Defense Focus Materia and HP Up Materia can be bought from the Vending Machine at Oliver's Farm.
- You can switch out the Lightning materia for another element when fighting a different enemy. Lightning when fighting the Mythril Golem boss alongside Barret in Chapter 3: Deeper into Darkness.
- Hi-Power Wristguards can be unlocked for transmutation by completing Excavation Intel 2: Pipeline Depository (can be discovered by completing Expedition Intel) in the Grasslands.
How to Use Red XIII and Combat Guide
Red XIII Controls
| Button / Action | Description |
|---|---|
| Basic slash attack | |
| Hold |
Spinning attack |
| Increases attack power and dodge speed | |
(During Vengeance Mode) |
Vertical slashes that can recover a portion of your HP. |
| Dodge attacks | |
| Access the Command Menu for Abilities, Spells, Items, and Synergy | |
| Block attacks | |
| General control for running |
Red XIII Battle Tips
| How to Use Red XIII |
|---|
|
|
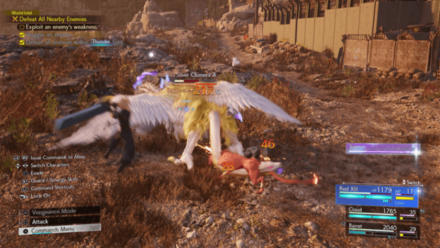
Best Against Multiple Ground Enemies
Red XIII excels at fighting multiple enemies on the ground, as most of his attacks and abilities cover a lot of space. Avoid using Red XIII against flying enemies, as he doesn't have aerial skills that can hit enemies hovering in the air.
Build Up Vengeance Gauge First
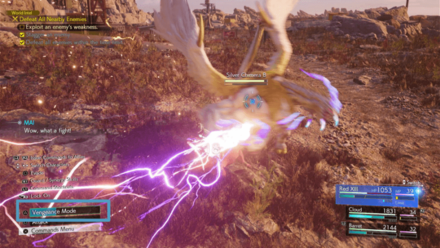
You can maximize Red XIII's full potential if you use his Vengeance Mode in combat. Build it up first by playing a bit defensively and guarding until you get enough gauge for the rest of the battle.
Practice perfect blocking attacks and use his Sentinel Stance to fill the Vengeance meter quickly!
Use Siphon Fang to Recover HP
Siphon Fang allows Red XIII to recover a portion of its HP for each hit. Mix it with different combos to maximize Red XIII's damage dealt during combat!
Note that you need Red XIII's Vengeance Mode up before you can use his Siphon Fang.
Don't Hesitate to Use Abilities
Most of Red XIII's heavy-hitting attacks come from his abilities. Don't hesitate to use them to defeat your enemies quickly, especially when they are staggered!
Utilize Red XIII's Speed
Red XIII is a swift character in FF7 Rebirth. Use his speed to move around and get an advantageous position during combat!
Red XIII Best Combos
| Attack | Function |
|---|---|
| Standard Whirling Slash Combo |
Perform basic slash attacks and do a Whirling Slash as the finisher. |
| Siphon Fang Combo (During Vengeance) |
Do basic slash attacks and perform a Siphon Fang at the end during Vengeance Mode. |
Names given to above combos are for descriptive purposes. The list above is subject to updates.
Red XIII Best Folio Skill Cores
| Skill Core / Priority | Type and Effect |
|---|---|
| Retaliation ★★★ |
Ability ・Great alternative for Sentinel Stance when Vengeance Mode is about to end and Red XIII has 2 ATB bars ready. |
| Ringmaster / Call of the Wild ★★★ |
Synergy Ability ・Allows Yuffie to setup her Ninjutsu and Doppelganger earlier in the fight. |
| Limit Gauge Guard ★★★ |
Stat Boost ・Increases limit gauge charge rate when blocking, allowing more Bloody Fang casts to recover HP and MP. |
| Speed Up ★★★ |
Stat Boost ・Increases ATB charge rate. |
| Enduring Vengeance ★★★ |
Stat Boost ・Makes Vengeance Mode last longer. |
| Vengeful Guardian ★★★ |
Stat Boost ・Extends staggered time and further increases damage dealt against staggered enemies during Vengeance Mode. |
| Wrath of the Land ★★☆ |
Limit Break ・Deals massive damage, but only useful during battles where you can reach Limit Level 3 before the fight ends. |
| Iron Defense ★★☆ |
Synergy Skill ・Pulls an ally to block an incoming attack together. |
| Wild Charge ★★☆ |
Synergy Skill ・Close gaps between a target while blocking incoming attacks. |
| Max HP Up ★★☆ |
Stat Boost ・Increases max HP. |
| MDEF Up ★★☆ |
Stat Boost ・Reduces damage received from magic attacks. |
| Elemental Defense Up ★★☆ |
Stat Boost ・Reduces damage received from elemental attacks. |
| Enhanced Counterspin ★☆☆ |
Stat Boost ・Improves the effect of Counterspin (press the attack button after getting hit or blocking an attack). |
Red XIII Weapon Locations and Stats
Mythril Collar
|
Mythril Collar
|
|||
| Stats and Ability | Weapon Skills | ||
|---|---|---|---|
| ・ATK + 24 ・MATK + 20 ・DEF + 0 ・MDEF + 0 Slots: ◯-◯◯ Ability: Stardust Ray |
|||
| Location | |||
| Red XIII starts with the Mythril Collar as his default weapon. You'll gain access to this weapon as soon as he joins you in Chapter 2. | |||
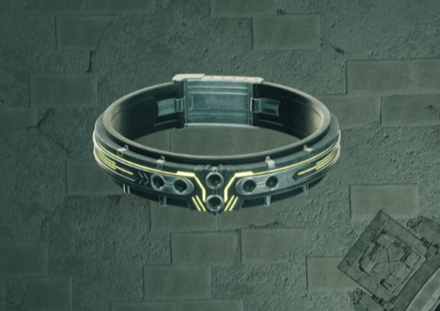
Renegade's Collar
|
Renegade's Collar
|
|||
| Stats and Ability | Weapon Skills | ||
|---|---|---|---|
| ・ATK + 40 ・MATK + 22 ・DEF + 0 ・MDEF + 0 Slots: ◯◯ Ability: Crescent Claw |
|||
| Location | |||
 |
 |
||
| After fighting Elena and Rude in the Mythril Mine | |||
Silver Collar
 Silver Collar Silver Collar
|
|||
| Stats and Ability | Weapon Skills | ||
|---|---|---|---|
| ・ATK + 37 ・MATK + 37 ・DEF + 0 ・MDEF + 0 Slots: ◯◯◯◯ Ability: Chilling Roar |
|||
| Location | |||
 |
 |
||
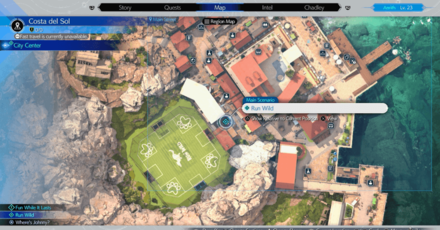
| Get First Place in Run Wild Minigame | |||
Amethyst Collar
 Amethyst Collar Amethyst Collar
|
|||
| Stats and Ability | Weapon Skills | ||
|---|---|---|---|
| ・ATK + 45 ・MATK + 70 ・DEF + 0 ・MDEF + 0 Slots: ◯-◯◯-◯ Ability: Supernal Fervor |
|||
| Location | |||
 |
 |
||
| Complete Of Robed Men and Ransoms Sidequest | |||
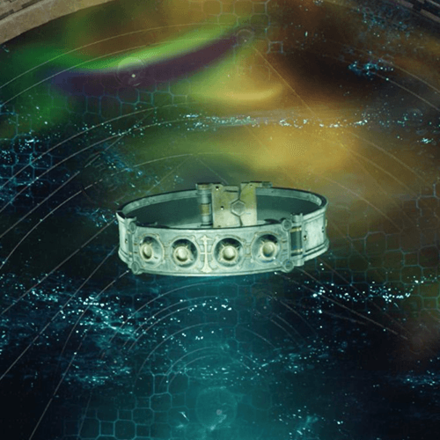
Golden Collar
|
Golden Collar
|
|||
| Stats and Ability | Weapon Skills | ||
|---|---|---|---|
| ・ATK + 106 ・MATK + 29 ・DEF + 0 ・MDEF + 0 Slots: ◯-◯◯◯◯ Ability: Watcher's Respite |
|||
| Location | |||
 |
 |
||
| On a Broken Platform in Gongaga Reactor | |||
Mystic Collar
 Mystic Collar Mystic Collar
|
|||
| Stats and Ability | Weapon Skills | ||
|---|---|---|---|
| ・ATK + 97 ・MATK + 59 ・DEF + 0 ・MDEF + 0 Slots: ◯◯◯◯◯◯ Ability: Watcher's Spirit |
|||
| Location | |||
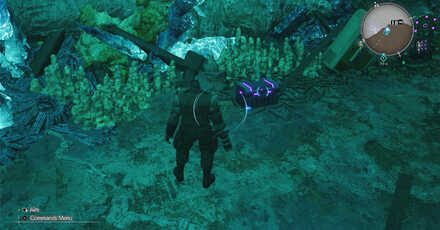
| Obtainable on the Fetch Sequence in Cave of Gi | |||
Brisingamen
 Brisingamen Brisingamen
|
|||
| Stats and Ability | Weapon Skills | ||
|---|---|---|---|
| ・ATK + 79 ・MATK + 97 ・DEF + 0 ・MDEF + 0 Slots: ◯-◯◯-◯◯◯ Ability: Reaper Touch |
|||
| Location | |||
 |
 |
||
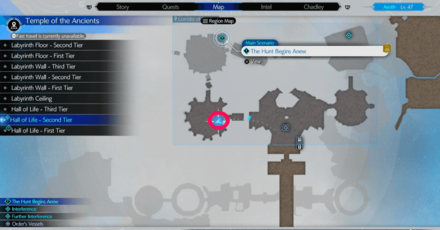
| Found After Doing Life Vessel in Hall of Life | |||
All Weapons and How to Get Them
Red XIII Manuscript Locations
Tale of the Red Warrior Locations
| Volume | Difficulty Req. | How to Get |
|---|---|---|
| Vol. 1 | Easy / Normal |
Moogle Shop
Can be purchased at Merchant Rank 2 for 6 Moogle Medals. |
| Vol. 2 | Easy / Normal |
Side Quest: Of Robed Men and Ransoms
Reward for completing the Of Robed Men and Ransoms Side Quest in the Corel region. |
| Vol. 3 | Easy / Normal |
GP Exchange
Purchase at the GP Exchange for 100 GP. |
| Vol. 4 | Easy / Normal |
Musclehead Colosseum
Reward for clearing Two-Person Bout: Ghoulish Delights. |
| Vol. 5 | Easy / Normal |
Moogle Shop
Can be purchased at Merchant Rank 5 for 6 Moogle Medals. |
| Vol. 6 | Easy / Normal |
Side Quest: Bonds of Trust
Reward for completing the Bonds of Trust Side Quest in the Cosmo Canyon region. |
| Vol. 7 | Hard |
Side Quest: Livestock's Bane
Reward for defeating the White Terror during the Livestock's Bane Side Quest, in the Grasslands region while playing in Hard Mode. |
| Vol. 8 | Hard |
Boss: Mythril Golem
Reward for defeating Mythril Golem in Chapter 3 Hard Mode. |
| Vol. 9 | Hard |
Side Quest: The Hardest Sell
Reward for defeating the White Mousse during the The Hardest Sell Side Quest, in the Junon region while playing in Hard Mode. |
| Vol. 10 | Hard |
Side Quest: Of Robed Men and Ransoms
Reward for defeating the Dark Claw during the Of Robed Men and Ransoms Side Quest, in the Corel region while playing in Hard Mode. |
| Vol. 11 | Hard |
Side Quest: O Chicken, Where Art Thou
Reward for defeating the Levridon during the O Chicken, Where Art Thou Side Quest, in the Gongaga region while playing in Hard Mode. |
| Vol. 12 | Hard |
Side Quest: From Whence Life Flows
Reward for completing the From Whence Life Flows Side Quest, in the Cosmo Canyon region while playing in Hard Mode. |
| Vol. 13 | Hard |
Side Quest: Promises to Keep
Reward for defeating the Irasceros during the Promises to Keep Side Quest, in the Grasslands region while playing in Hard Mode. |
| Vol. 14 | Hard |
Boss: Gi Nattak
Reward for defeating the Gi Nattak in Chapter 10 Hard Mode. |
| Vol. 15 | Hard |
Boss: Red Dragon
Reward for defeating the Red Dragon in Chapter 13 Hard Mode. |
| Vol. 16 | Hard |
Combat Simulator: Red XIII vs. The Beasts
Reward for completing the Legendary Bout: Red XIII vs. The Beasts in Combat Simulator. |
Red XIII Character Profile and Background
Profile and Voice Actor
 Red XIII |
Voice Actors | |
|---|---|---|
| EN: Max Mittelman
JP: Kappei Yamaguchi |
||
| Weapon | ||
| Collar | ||
| Chapter Unlocked | ||
|
Chapter 2 A New Journey Begins |
||
| Official Introduction | ||
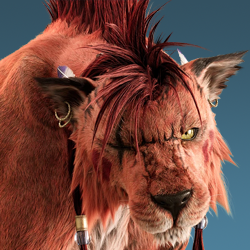
| Red XIII is a beast with a flaming tail, crimson fur, deadly claws, and the ability to speak. Cloud and company help him escape Professor Hojo's clutches, and he decides to join them on their journey. His species is known for their long life spans, and he is no exception. As this Cosmo Canyon native is the eldest member of the party, he offers its members words of wisdom from time to time. | ||
Dr. Hojo's Beast Captive
Red XIII is a beast capable of human language that is held captive by Dr. Hojo for his experiments. Red XIII joins Cloud and his party after getting saved by them and helps them with their journey, but not as a playable character.
Red XIII Abilities
List of Red XIII Abilities
| Ability | Effect / Source |
|---|---|
| Sidewinder | Leap into the air to deliver a punishing blow from above. Unlocked from the start |
| Sentinel Stance | Guard against attacks to greatly increase Vengeance Gauge. Press Unlocked from the start |
| Stardust Ray | Unleash a devastating attack over a wide area. Costs 2 ATB. Weapon: Mythril Collar |
| Crescent Claw | Slash at a foe. Deplete the gauge while in Vengeance Mode to increase potency and range. Weapon: Renegade's Collar |
| Chilling Roar | Retaliate with ice shards whenever hit by an attack. Charges the Vengeance Gauge when a counterstrike lands. Weapon: Silver Collar |
| Supernal Fervor | Grant Haste on all party members. Can only be used during Vengeance Mode. Costs 2 ATB. Weapon: Amethyst Collar |
| Watcher's Respite | Deplete the Vengeance Gauge to heal allies. Potency proportional to amount expended. Weapon: Golden Collar |
| Watcher's Spirit | Deplete the Vengeance Gauge to increase allies' ATB. Potency proportional to amount expended. Weapon: Mystic Collar |
| Reaper Touch | Deliver a deadly strike. Potency is inversely proportional to current HP. Weapon: Brisingamen |
Red XIII Limit Breaks
List of Red XIII Limit Breaks
| Limit Break | Effect / How to Get |
|---|---|
| Bloody Fang | Limit Level 1 Charge forward in an animalistic rage, bathing in foes' blood and restoring your HP and MP. Available from the start of Dawn in a New Era of Junon. |
| Howling Moon | Limit Level 2 Howl to the moon above, activating a longer-lasting Vengeance Mode Available in Dawn in a New Era of Junon. |
| Wrath of the Land | Limit Level 3 Call upon the might of the planet and rend the enemy with deadly fangs. Unlocked through the Folio Skill Tree at party level 8. |
Red XIII Synergy Skills
List of Red XIII Synergy Skills
| Synergy Skill | Synergy Skill | Folio Level |
|---|---|---|
| Wild Charge | Partner(s): Cloud, Tifa, Barret, Aerith Team up with your partner to charge forward while guarding against incoming attacks. |
1 |
| Phantom Fang | Partner(s): Cloud, Barret Team up with your partner to dodge and deliver a counterstrike. Dodge at the right time to perofrm a follow up attack. |
2 |
| Iron Defense (Red XIII) | Partner(s): Tifa, Aerith, Yuffie Team up with your partner to take a strong defensive stance. |
3 |
Red XIII Synergy Abilities
List of Red XIII Synergy Abilities
| Synergy Ability | Description | Buff |
|---|---|---|
| Savage Assault | Cloud and Red XIII channel their burning anger as they tear into an enemy. Raises their limit levels. | Limit Level Increase |
| Planetary Roar | Aerith channels her magic through Red XIII's howl, unleashing a ranged attack across a wide area. Raises their limit levels. | Limit Level Increase |
| Overfang | Barret sends Red XIII flying toward an enemy at high velocity. Raises their limit levels. | Limit Level Increase |
Red XIII's Role in FF7 Rebirth
Supporting Playable Character
Red XIII is a playable character that has a supporting role in FF7 Rebirth. Aside from aiding the party using his deadly claws and sharp fangs, he also impart words of wisdom to their members as they look for Sephiroth in their journey!
FF7 Rebirth Related Guides

Other Character Guides
| Character Guides | |
|---|---|
| Characters Tier List | Best Builds |
| Best Party Compositions | Best Abilities |
List of Playable Characters
| All Characters | |||
|---|---|---|---|
 Aerith Aerith
|
 Barret Barret
|
 Cait Sith Cait Sith
|
 Cloud Cloud
|
 Red XIII Red XIII
|
 Sephiroth Sephiroth
|
 Tifa Tifa
|
 Yuffie Yuffie
|
 Zack Zack
|
|||
Comment
Author

Red XIII Best Builds and Weapons
Rankings
- We could not find the message board you were looking for.
Gaming News


Popular Games

Genshin Impact Walkthrough & Guides Wiki
Honkai: Star Rail Walkthrough & Guides Wiki
Arknights: Endfield Walkthrough & Guides Wiki
Umamusume: Pretty Derby Walkthrough & Guides Wiki
Wuthering Waves Walkthrough & Guides Wiki
Pokemon TCG Pocket (PTCGP) Strategies & Guides Wiki
Abyss Walkthrough & Guides Wiki
Zenless Zone Zero Walkthrough & Guides Wiki
Digimon Story: Time Stranger Walkthrough & Guides Wiki
Clair Obscur: Expedition 33 Walkthrough & Guides Wiki


Recommended Games
Fire Emblem Heroes (FEH) Walkthrough & Guides Wiki
Pokemon Brilliant Diamond and Shining Pearl (BDSP) Walkthrough & Guides Wiki
Diablo 4: Vessel of Hatred Walkthrough & Guides Wiki
Super Smash Bros. Ultimate Walkthrough & Guides Wiki
Yu-Gi-Oh! Master Duel Walkthrough & Guides Wiki
Elden Ring Shadow of the Erdtree Walkthrough & Guides Wiki
Monster Hunter World Walkthrough & Guides Wiki
The Legend of Zelda: Tears of the Kingdom Walkthrough & Guides Wiki
Persona 3 Reload Walkthrough & Guides Wiki
Cyberpunk 2077: Ultimate Edition Walkthrough & Guides Wiki


All rights reserved
© SQUARE ENIX CO., LTD. All Rights Reserved.
CHARACTER DESIGN: TETSUYA NOMURA/ROBERTO FERRARI
LOGO ILLUSTRATION: © 1997 YOSHITAKA AMANO
The copyrights of videos of games used in our content and other intellectual property rights belong to the provider of the game.
The contents we provide on this site were created personally by members of the Game8 editorial department.
We refuse the right to reuse or repost content taken without our permission such as data or images to other sites.