How to Beat Brutal Challenge: The Seventh Seal

This is a guide on how to beat Brutal Challenge: The Seventh Seal in the Combat Simulator of Final Fantasy 7 Rebirth (FF7 Rebirth). Check out the unlock requirements and rewards, a list of enemies and bosses in each round, and the best party, equipment, and Materia to beat this challenge.
List of Contents
Best Party and Builds
| Best Party for Brutal Challenge: The Seventh Seal | ||
|---|---|---|
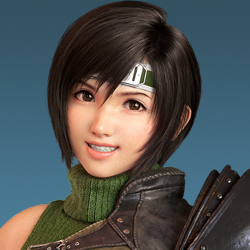 Yuffie Yuffie |
 Tifa Tifa |
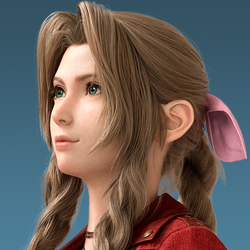 Aerith Aerith |
Yuffie Equipment and Materia
 Yuffie Yuffie
Main DPS |
|||||
| Weapon | Armor | ||||
|---|---|---|---|---|---|
| Crescent Sickle | Cetran Bracer | ||||
| Accessory | Summon Materia | ||||
| Sorcerer's Earrings | Gilgamesh | ||||
| Weapon Materia | Armor Materia | ||||
|
|
|
||||
| Weapon Skills | |||||
|
|
|
||||
|
|
|
||||
Yuffie will be the Main DPS for this team thanks to her ability to target multiple different weaknesses with her Elemental Ninjutsus and the Fire and Ice plus Lightning and Wind Materias.
She also has other great abilities like Shooting Star for crowd control and Doppelganger to double cast spells and abilities. When combined with her elemental prowess, Yuffie can easily take down the hordes of enemies in this Combat Simulator challenge.
Since Yuffie will be your main character, she will also hold the ATB Assist Materia to fill the other party member's ATB Gauges and Prayer since she will have her ATB full most of the time compared to the other two who would rather use Curaga's one ATB charge to heal.
Tifa Equipment and Materia
 Tifa Tifa
Secondary DPS |
|||||
| Weapon | Armor | ||||
|---|---|---|---|---|---|
| Kaiser Knuckles | Valkyrian Bangle | ||||
| Accessory | Summon Materia | ||||
| Full Throttle Wristguards | Odin | ||||
| Weapon Materia | Armor Materia | ||||
|
|
|
||||
| Weapon Skills | |||||
|
|
|
||||
|
|
|
||||
Tifa will be your Secondary DPS on this team because she can heavily increase Stagger's damage bonus, helping you finish off an enemy before they can get back up again.
Healing and Revival are useful in case Aerith is preoccupied or doesn't have ATB charges while Elemental linked to Fire lets her absorb Fire attacks from multiple powerful Fire-type enemies.
Aerith Equipment and Materia
 Aerith Aerith
Support |
|||||
| Weapon | Armor | ||||
|---|---|---|---|---|---|
| Ceremonial Staff | Cetran Armlet | ||||
| Accessory | Summon Materia | ||||
| Enhanced Psychic's Charm | Phoenix | ||||
| Weapon Materia | Armor Materia | ||||
|
|
|
||||
| Weapon Skills | |||||
|
|
|
||||
|
|
|
||||
If you don't have a Ceremonial Staff with 6 Materia Slots, you can use Gambanteinn with Spiritual Harvest, Max MP +3, Reprieve, and ATB Charge Rate Up instead.
Aerith will be a traditional healer support with Curaga and Arise along with Resist and Esuna to deal with negative status effects. She also has Barrier to help mitigate the damage from Gigantuar and Gargantuar's 10,000 Needles during Round 9.
Aside from that, she has Haste as a generally good buff to apply, Prayer so that she can preserve her MP, and Elemental linked to Fire to absorb Fire attacks from multiple powerful Fire-type enemies.
Recommended Materia on Armor
| Materia on Armor |
|---|
Majority of the enemies have powerful fire attacks, but you can reduce its damage easily by equipping an Elemental and Fire materia on one of your character's armor. If you have a 3 star Elemental materia, you can even absorb their Fire damage and heal back health.
How to Beat All Rounds
Round 1
| Jump to Round | |||||||||
|---|---|---|---|---|---|---|---|---|---|
| 1 | 2 | 3 | 4 | 5 | 6 | 7 | 8 | 9 | 10 |
| Enemies |
・Barnaclaw
・Elder Golem |
||||||||
Focus down the Elder Golem first since the Barnaclaw is barely a threat in this fight. Use Yuffie's Wind attacks to take down the golem quickly before switching to Fire for the crab to prevent it from powering up.
Even though the Barnaclaw can be mostly ignored, you still need to watch out for its Bullfrog Bubble attack so that you don't have to waste Aerith's ATB Charges and MP to cast Esuna.
Round 2
| Jump to Round | |||||||||
|---|---|---|---|---|---|---|---|---|---|
| 1 | 2 | 3 | 4 | 5 | 6 | 7 | 8 | 9 | 10 |
| Enemies |
・Burt
・Kid G |
||||||||
Switch to Tifa and deal with Kid G first since he's the only real threat in this fight. Focus on dodging his attacks so that he'll be put under pressure and immediately counter him with Overpowers to quickly stagger him. Repeat this process until he's dead.
As a note, you should always have at least one ATB Charge saved on Aerith so that she can cast Arise in case Kid G uses Whammo, which deals 9999 damage. Once Kid G's been dealt with, swap back to Yuffie and simply kill Burt with her Fire attacks.
Round 3
| Jump to Round | |||||||||
|---|---|---|---|---|---|---|---|---|---|
| 1 | 2 | 3 | 4 | 5 | 6 | 7 | 8 | 9 | 10 |
| Enemies |
・Sea Devil
・Dragon |
||||||||
Have Yuffie use her Ice attacks to deal with the Sea Devil first since the only really scary attack in this fight is Infernal Bind. Once that's been dealt with, you can continue launching a barrage of Ice attacks on the Dragon to kill it.
Round 4
| Jump to Round | |||||||||
|---|---|---|---|---|---|---|---|---|---|
| 1 | 2 | 3 | 4 | 5 | 6 | 7 | 8 | 9 | 10 |
| Enemies |
・Tonadu
・Stone Golem |
||||||||
Target Tonadu first with Yuffie's Wind attacks since you can quickly kill it by dodging Death from Above before switching to Tifa to stagger and kill it. From there, switch back to Yuffie and continue using Wind attacks on the Stone Golem until it's dead.
Round 5
| Jump to Round | |||||||||
|---|---|---|---|---|---|---|---|---|---|
| 1 | 2 | 3 | 4 | 5 | 6 | 7 | 8 | 9 | 10 |
| Enemies |
・Suevite Disgorgon
・Sanguine Scourge |
||||||||
Kill the Sanguine Scourge first with Lightning attacks since its AoE attacks are more annoying to deal with compared to the Suevite Disgorgon's attacks. Once the Scourge is down, switch Yuffie to Ice attacks to kill the Disgorgon.
Round 6
| Jump to Round | |||||||||
|---|---|---|---|---|---|---|---|---|---|
| 1 | 2 | 3 | 4 | 5 | 6 | 7 | 8 | 9 | 10 |
| Enemies |
・Mystic Dragon
・Irasceros |
||||||||
Since the Mystic Dragon likes to fly out of reach when you pressure it with Yuffie's Wind attacks, you'll want to focus on it first so that you can stagger it and finish it off with Tifa when it falls to the ground.
From there, Irasceros can be easily beaten by dodging its attacks and hitting it with Lightning attacks. Remember to save up ATB Charges when its stagger meter is high so that you can interrupt its Concentrate with a Thunderous Banishment III or a Thundaga.
You also don't have to worry about much Tifa and Aerith as they will absorb most of the enemies' Fire attacks with the Elemental materia.
However, keep an eye on Irasceros' buff list as it can sometimes cast buffs on itself that reflect certain types of attacks. Switch Yuffie's attacks to the type that aren't being reflected when this happens.
Round 7
| Jump to Round | |||||||||
|---|---|---|---|---|---|---|---|---|---|
| 1 | 2 | 3 | 4 | 5 | 6 | 7 | 8 | 9 | 10 |
| Enemies |
・Reapertail
・Gigant Bomb |
||||||||
You can target the Reapertail first with Yuffie's Ice attacks since the rest of your party can absorb the Gigant Bomb's Fire attacks while you're out of range dealing with the Reapertail. After killing the Reapertail, continue using Ice attacks on the Bomb to quickly kill it and move on to the next round.
Round 8
| Jump to Round | |||||||||
|---|---|---|---|---|---|---|---|---|---|
| 1 | 2 | 3 | 4 | 5 | 6 | 7 | 8 | 9 | 10 |
| Enemies |
・Gigaworm
・Dark Claw |
||||||||
Prioritize dealing with the Gigaworm first since it can Swallow two people at a time, leaving only one character left in the battle. If one or two party members get swallowed, make sure that you deal enough damage to force it to spit them out, otherwise, they'll eventually be automatically spat out at 0 HP.
If you don't dodge away from its Swallow, at least try to leave Yuffie as the one left in the fight so that you can deal enough Ice damage to force it to spit out the rest of your party. It's also easier to dodge Swallow with Yuffie using Brumal Form.
Once the Worm is killed, the rest of the fight becomes very straightforward since you just need to dodge Dark Claw's Reaper Claws attack to pressure and kill it.
Round 9
| Jump to Round | |||||||||
|---|---|---|---|---|---|---|---|---|---|
| 1 | 2 | 3 | 4 | 5 | 6 | 7 | 8 | 9 | 10 |
| Enemies |
・Gigantuar
・Gargantuar |
||||||||
Have Aerith cast Barrier on Tifa and herself as soon as possible so that they'll take minimal damage from the two Catctuar's Needle attacks. You don't need to cast it on the character you control since you can dodge the attacks, unlike the AI who blocks them instead.
For the fight itself, have Yuffie attack at range and cast -ga spells or Banishment/Purification III whenever possible. Also, you want to make sure to save ATB charges to use these attacks when the Cactuars use Needle Rain so that you can stagger and finish them off.
Round 10
| Jump to Round | |||||||||
|---|---|---|---|---|---|---|---|---|---|
| 1 | 2 | 3 | 4 | 5 | 6 | 7 | 8 | 9 | 10 |
| Enemies |
・Diabolic Variant
・Ember Zu |
||||||||
Quickly get rid of the Ember Zu first with Yuffie's Ice attacks to make the fight much more manageable. With the Zu out of the way, you can fully focus on killing the Diabolic Variant, its Arm, and its Duplicate with Blizzard spells and Icy Banishment III.
It is also recommended to cast a party-wide Regen on the team to counter the continuous damage from Diabolic Variant's Enshadow. Stagger this enemy quickly to stop it from releasing more poison.
Brutal Challenge: The Seventh Seal Unlock and Rewards
| Basic Information | |||||
|---|---|---|---|---|---|
|
Brutal Challenge: The Seventh Seal A series of three-person fights in which you pick your team. Defeat fiends that have long resided comfortably at the top of the food chain. ・Items cannot be used
・Only available on Hard difficulty |
|||||
| Level | 70 | Rounds | 10 | Team | 1-3 |
| Rewards | ・MP Up Materia Earrings | ||||
| Unlock Requirements | |||||
|
・Complete Brutal Challenge: Hellions' Intonement ・ Complete the main scenario |
|||||
To unlock Brutal Challenge: The Seventh Seal in the Combat Simulator, you will first need to beat Brutal Challenge: Hellions' Intonement and complete all Chapters of the main story. Once you've done these two things, you'll be able to attempt this Combat Simulator challenge.
Brutal Challenge: Hellions' Intonement Guide
Final Fantasy 7 Rebirth Related Guides
All Combat Simulator Battles and Rewards
All Combat Simulator Articles
| Combat Simulator Guides |
|---|
| Brutal and Legendary Combat Simulator Guide |
Biological Intel
| List of Biological Intel Missions | |
|---|---|
| Know Thine Enemy | Blinded by Light |
| Breath of Life | At Any Cost |
| Head Case | That's the Smell |
| Stony Stare | - |
Brutal Challenges
| List of Brutal Challenges | |
|---|---|
| Army of the Damned | Requiem for the Scorned |
| Unending Nightmare | Hellions' Intonement |
| The Seventh Seal | Rulers of the Outer Worlds |
Legendary Bouts
Author

How to Beat Brutal Challenge: The Seventh Seal
Rankings
- We could not find the message board you were looking for.
Gaming News


Popular Games

Genshin Impact Walkthrough & Guides Wiki
Honkai: Star Rail Walkthrough & Guides Wiki
Arknights: Endfield Walkthrough & Guides Wiki
Umamusume: Pretty Derby Walkthrough & Guides Wiki
Wuthering Waves Walkthrough & Guides Wiki
Pokemon TCG Pocket (PTCGP) Strategies & Guides Wiki
Abyss Walkthrough & Guides Wiki
Zenless Zone Zero Walkthrough & Guides Wiki
Digimon Story: Time Stranger Walkthrough & Guides Wiki
Clair Obscur: Expedition 33 Walkthrough & Guides Wiki


Recommended Games
Fire Emblem Heroes (FEH) Walkthrough & Guides Wiki
Pokemon Brilliant Diamond and Shining Pearl (BDSP) Walkthrough & Guides Wiki
Diablo 4: Vessel of Hatred Walkthrough & Guides Wiki
Super Smash Bros. Ultimate Walkthrough & Guides Wiki
Yu-Gi-Oh! Master Duel Walkthrough & Guides Wiki
Elden Ring Shadow of the Erdtree Walkthrough & Guides Wiki
Monster Hunter World Walkthrough & Guides Wiki
The Legend of Zelda: Tears of the Kingdom Walkthrough & Guides Wiki
Persona 3 Reload Walkthrough & Guides Wiki
Cyberpunk 2077: Ultimate Edition Walkthrough & Guides Wiki


All rights reserved
© SQUARE ENIX CO., LTD. All Rights Reserved.
CHARACTER DESIGN: TETSUYA NOMURA/ROBERTO FERRARI
LOGO ILLUSTRATION: © 1997 YOSHITAKA AMANO
The copyrights of videos of games used in our content and other intellectual property rights belong to the provider of the game.
The contents we provide on this site were created personally by members of the Game8 editorial department.
We refuse the right to reuse or repost content taken without our permission such as data or images to other sites.
How about giving some details on any of this. How are we supposed to dodge the gigaworm for example? Or sometimes you leave out ehat element you should attack enemies with like we should already know.