Dyne Hard Mode Guide
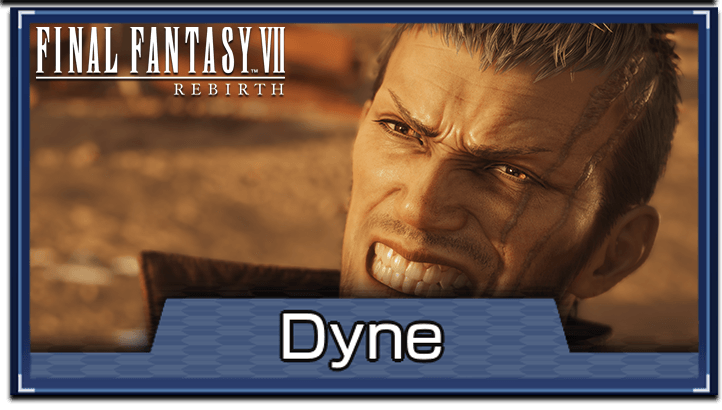
Dyne is a boss in Chapter 8: All That Glitters of Final Fantasy 7 Rebirth (FF7 Rebirth). Learn how to beat Dyne on Hard Mode and normal difficulties, his weaknesses and resistances, and a list of his moves and attack patterns in this guide!
List of Contents
Dyne Weaknesses and Stats
Stats
 |
|||
| Easy | Normal | Hard | |
|---|---|---|---|
| HP | ? | 25645 | 78532 |
Weakness and Resistances
| Weaknesses | Lesser Resistances | Greater Resistances |
|---|---|---|
| None | None | |
| Absorbed Elements | Immunities | |
| None | ||
Changes When Staggered
| Weakness / Effective | Resistance |
|---|---|
| None |
How to Pressure Dyne
Deal Enough Damage or Destroy His Scrap Arms
|
|
Unfortunately, the only real way to Pressure Dyne in Phases 1 and 2 is to deal enough damage to him. This can be achieved by using a combination of Fire spells or Barret's Overcharge during the boss fight.
Once Dyne reaches Phase 3, he will become more resistant to being Pressured. In order to Pressure him during this phase, you will need to destroy the scrap arms he conjures up throughout the last phase.
How to Pressure and Stagger Enemies
Dyne Best Party and Builds
| This section is for players who are playing on Easy and Normal difficulties. To check out the best builds and tips for Hard Mode, jump to our Hard Mode Guide section, below! |
Solo Boss Fight using Barret
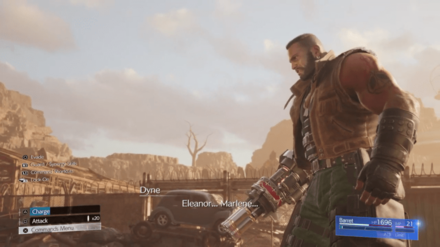
The boss fight is a one-on-one battle between Dyne and Barret. You won't be able to add party members in this boss fight, but you can adjust Barret's build beforehand.
Barret Best Builds and Romance Guide
Best Equipment
| Item | Item Info |
|---|---|
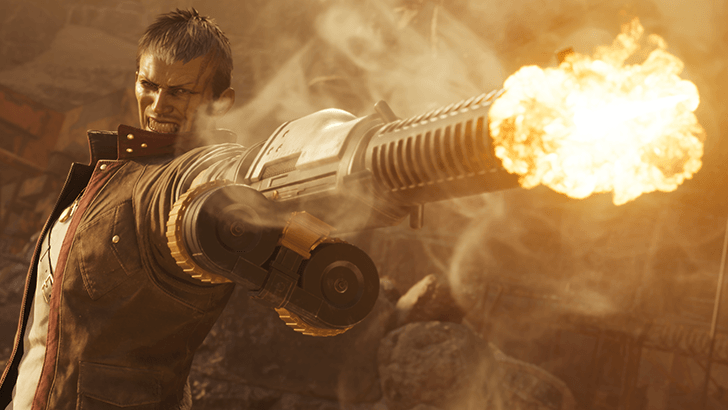
 Vulcan Cannon Vulcan Cannon(Weapon) ◯-◯ ◯-◯ |
・Best weapon at this point in the story because of its base stats. ・Has 4 Materia Slots. Enough to equip the materia you need for the boss fight. |
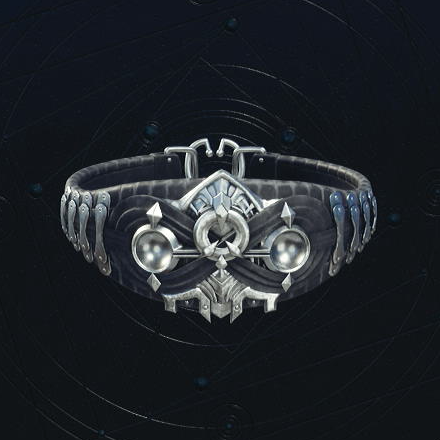 Abyssal Bangle Abyssal Bangle(Armor) ◯-◯ ◯ |
Purchased in the Corel Region. ・Increases the Defense (DEF) stat of Barret. ・Adds 3 more materia slots for Barret. |
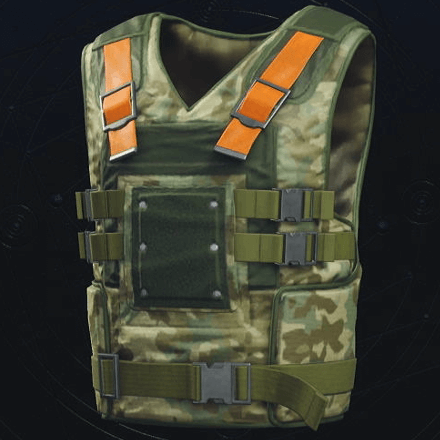 Survival Vest Survival Vest(Accessory) |
Effect: Increases vitality by 10%. ・Vitality increases your DEF, allowing you to take more Physical attack hits. ・Can be swapped out for a Power Wristguard if you value offense over defense. |
Best Materia to Use
| Materia | Effect |
|---|---|
|
|
・Ability to cast Fire spells, which is the only weakness of Dyne. |
|
|
・Only equipped to help with stat boosting since the summon gauge in this fight only appears after staggering Dyne twice. |
|
|
・Heal a single ally in battle. |
|
|
・Increase the HP of a character. |
|
|
・Increase the MP of a character. |
|
|
・Gain ATB when blocking attacks.
・Can benefit greatly by blocking basic attacks |
|
|
・Improves the functionality of blocking with perfect timing.
・Works better together with Steadfast Block |
|
|
・Automatically use items without consuming ATB after performing several actions. |
|
|
・Boosts the level of a Materia. ・Best linked with Fire Materia. |
How to Beat Dyne
| Dyne Boss Fight Tips |
|---|
|
|
Use Fire to Exploit Weakness
Dyne's sole weakness is Fire. Equip a Fire Materia to cast fire spells or unlock skills from the Folio Skill Tree to inflict Fire damage on Dyne.
Block Basic Attacks or Use Cover
You can easily block or use cover to avoid getting hit by Dyne's basic attacks if you have Precision Defense Focus Materia equipped. You can pair it with Steadfast Block Materia to reduce the damage taken on non-perfect blocks and gain small ATB boosts per block.
Use Scrap Piles as Cover
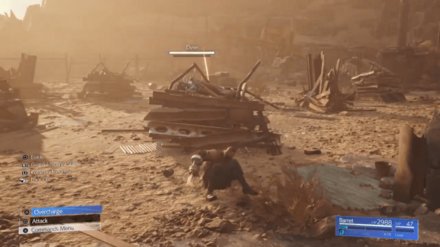
There are several scrap piles around the arena that you can use to hide against Dyne's attacks. If you think you can't dodge or block attacks, hide behind cover to avoid damage.
While behind cover, you can also use Fire Spells since they curve around the scrap piles to hit Dyne. However, do note that all the scrap piles will be removed in Phase 3.
Paralyzing Shot Goes Through Cover
Dyne's Paralyzing Shot is a ground attack that can go through cover. Make sure to move away from Dyne once you see the attack prompt to make dodging the attack easier as you will have more space to move and avoid getting hit.
Repentance Can Destroy Cover
Dyne's Repentance in Phase 2 is a powerful laser attack that deals a lot of damage. Make sure to avoid it by hiding behind cover or dodging to the side at the last second. When taking cover, don't stick to your chosen scrap pile since the attack has a small AoE as well.
Activate Lifesaver to Increase HP
Since it's a solo boss fight with Barret, Lifesaver uses come with no risk as there are no teammates to tank damage for. By fighting solo, Lifesaver simply becomes a flat increase to HP without any of its usual downsides.
Make sure to cast Lifesaver alongside Steelskin to truly increase Barret's defenses. Lifesaver can be learned by mastering the Barrage Blaster you get in Chapter 7.
Dodge or Hide from Point Blank Attack
Dodge sideways or hide behind a cover once you see the Point Blank attack prompt on Dyne. It is a quick dashing attack that deals a lot of damage if you get caught. If in the open, try to move quickly before the animation starts to avoid getting hit!
Move Away from Blast Mines
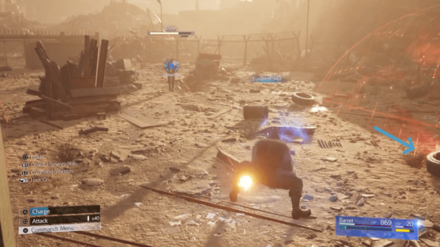
Dyne will start shooting Blast Mines around the arena during the second phase. Avoid moving into its AoE to prevent it from exploding. You can still dodge it if you accidentally go in range, but the timing will be very tricky.
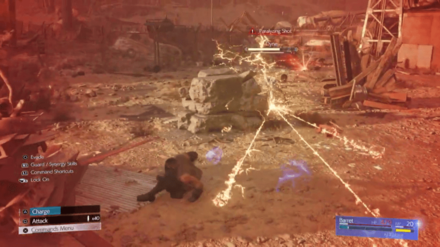
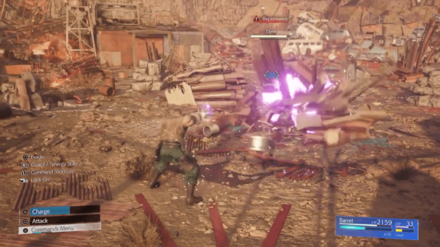
Destroy Scrap Body Parts to Stagger Dyne
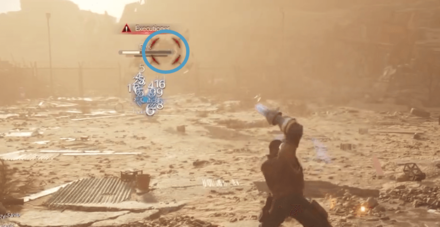
Dyne will gather metal scraps in Phase 3, turning them into additional, targetable body parts that unleash powerful attacks. Use strong abilities or fire spells against the limbs to break them and build up Dyne's stagger gauge.
You should be able to hit those body parts once you see the red circle icon on the screen after he conjures a new metal appendage.
Use Maximum Fury to Counter Phantom Ray Attack
One easy way to destroy Dyne's scrap body parts is to use Barret's Maximum Fury once Dyne unleashes his Phantom Ray Attack. Use Maximum Fury the second you see the tentacle-like limbs grow out from his body to destroy all of them at once!
Some Scrap Attacks are Best to Dodge Instead
It's best to dodge some of the attacks from his body parts made from scrap, like the Heedless Swing or Executioner attack. Their animations are quite fast, and you might get hit before your attack finishes.
Dyne Hard Mode Guide
| Dyne Hard Mode Tips |
|---|
| ★ Best Hard Mode Builds for Dyne ★ |
|
|
Dyne Best Hard Mode Builds
| The build featured in this Hard Mode section is at Weapon Level 7. If you find that you don't have enough Materia slots to complete the setup, consider getting all the possible Manuscripts on Normal, first. |
Note: We do away with Healing Materia completely since its cast time leaves you too vulnerable in Phase 3. Chakra will be better for this fight when looking to heal up across all three phases of the boss.
 Barret Barret
Main DPS |
|||||
| Weapon | Armor | ||||
|---|---|---|---|---|---|
| Vulcan Cannon | Cetran Bracer | ||||
| Accessory | Summon Materia | ||||
| Fortitude Ring | Alexander | ||||
| Weapon Materia | Armor Materia | ||||
| Weapon Skills | |||||
|
|
|
||||
|
|
|
||||
Use Firaga and Overcharge to Push Dyne to Phase 2
During Phase 1, you'll easily be able to push Dyne into Phase 2 by using Firaga, Overcharge, and a few basic attacks. Given this, make sure to spend a bit of time buffing up in Phase 1 with Lifesaver, Steelskin, and Bonus Round since the other Phases won't give you as much room to apply buffs.
Cast Firaga from Behind Cover to Avoid Taking Damage
Curiously enough, Firaga goes around the scrap piles (sometimes through them), allowing you to cast it safely during Phases 1 and 2. Just make sure you aren't casting when Dyne uses Paralyzing Wave since this will interrupt you and waste the 2 ATB charges you spent.
Use Firaga After Dyne Uses Repentance
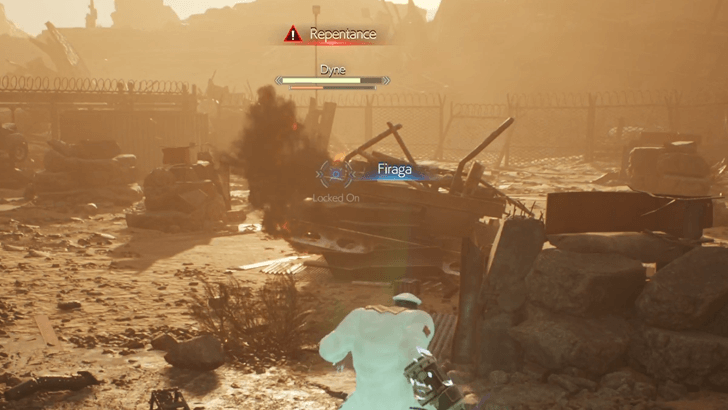
Your opening for Firaga casts will be when Dyne uses Repentance. Unlike in Normal Mode, he uses this ability twice in quick succession. Take cover and start charging a Firaga as soon as you know you're safe from the second Repentance.
Hitting him with Firaga should Pressure him, allowing you to build up Stagger using Overcharge. Once he gets Staggered, charge up to 2 ATB and cast another Firaga to quickly chunk away at his HP ahead of Phase 3.
Dyne Stops Taking Damage in Phase 2 After Dropping to 40% HP
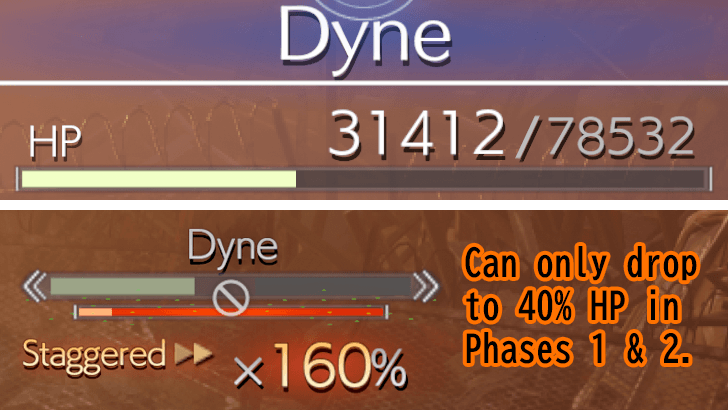
If you get your Firaga and Overcharge rotations right during the first Stagger phase, you should be able to drop Dyne down to 40% of his HP. However, he will stop taking damage after this until he reaches Phase 3. Use the ATB you build up for heals and buffs in the meantime.
Focus on Dodging During Phase 3
Phase 3 won't give you enough time to breathe, making healing a luxury during this phase. Instead of attacking, make sure to focus on dodging Dyne's attacks until you can reliably pressure him when he uses Executioner.
To dodge Hidden Barb, simply run sideways to avoid the hit and the stuns. To dodge Heedless Swing, run as far away as possible (just make sure you don't get hit by the paralyzing rays after each swing).
Summons are Unavailable Until the Second Stagger Phase
The emphasis on dodging in Phase 3 is also attributed to the unavailability of summons. Unlike other boss fights, the Summon Gauge won't appear until you stagger Dyne twice. At that point, you'll have done enough damage to finish him off without the summon, anyway.
Get Close to Dyne to Stop Phantom Ray and Undying Rage
To immediately cancel the Phantom Ray and Undying Rage moves, simply get close to Dyne so that he starts casting Iron Spike. Once you see the Iron Spike text flash, dodge backwards to avoid the attack easily.
In Hard Mode, it is imperative to cancel both these moves early since they add unnecessary risk during Phase 3. As an added bonus, Dyne's recovery animation after Iron Spike allows you to cast a quick Chakra if your HP is low at this point of the fight.
Use Fira to Destroy His Metal Arm During Executioner
The move you're looking out for during Phase 3 is called Executioner. Make sure to always have at least 1 ATB charge handy for when Dyne uses it. Upon seeing the move, wait for the Scrap-Arm to become targetable. Once it is, cast a Fira to quickly destroy it.
When the arm gets destroyed, Dyne will end up in a Pressured state, allowing you to build up the Stagger gauge and interrupt his attacks using Overcharge.
Dyne Rewards and Details
Rewards
| Dyne Rewards | |||||||||||
|---|---|---|---|---|---|---|---|---|---|---|---|
| Easy/Normal | Hard Mode | ||||||||||
|
・1800 EXP ・50 Party EXP ・10 AP ・1200 Gil |
・6500 EXP ・30 AP ・3250 Gil ・Sharpshooter's Copanion Vol. XI |
||||||||||
| Items Dropped | Rare Items Dropped | ||||||||||
|
None
|
None
|
||||||||||
| Stealable Items | Morphable Items | ||||||||||
|
None
|
None
|
||||||||||
Basic Information and Details
| Dyne | |
|---|---|
|
|
|
| Location | Chapter Unlocked |
| Scrapyard Prison Cell | Chapter 8 |
| Species | Movement |
| Human | Grounded |
| Details | |
|
The gun-armed assailant responsible for the bloodshed in the Gold Saucer. After losing everything he held dear, he took up the mantle of a cold-blooded executioner. Driven by an insatiable need for vengeance, he has turned his ire on the man he once called his closest friend. Inflicting enough damage will pressure him. When his HP is reduced, he will fuse with scrap metal to perform powerful attacks. During this time, he will be difficult to pressure. However, destroying a discrete part will interrupt his attacks and make him more susceptible to being staggered. |
|
FF7 Rebirth Related Guides

Boss Fight Guide and List of All Bosses
Story Bosses
| All Major Story Bosses | |
|---|---|
| Chapter 1 | Materia Guardian |
| Chapter 2 | Midgardsormr |
| Chapter 3 |
Rude and Elena Mythril Golem |
| Chapter 4 |
Terror of the Deep Roche |
| Chapter 5 | Jenova Emergent |
| Chapter 6 | Grasptropod |
| Chapter 7 |
Custom Valkyrie Gigatrice |
| Chapter 8 |
Dyne Anuran Suppressor |
| Chapter 9 |
Specimen H1024 Crimson Mare Mk. II |
| Chapter 10 | Gi Nattak |
| Chapter 11 |
Diabolic Variant Yin and Yang Forgotten Specimen Galian Beast Roche |
| Chapter 12 |
Abzu Rude and Elena Rufus |
| Chapter 13 |
Red Dragon Ironclad Reno and Rude Tseng and Elena Moss-Grown Adamantoise Demon Gate |
| Chapter 14 |
Jenova Lifeclinger Sephiroth Reborn |
Optional Bosses
| Grasslands | |
|---|---|
| Summon | Titan |
| Classified Intel | Quetzalcoatl |
| Side Quests |
White Terror |
| Junon | |
| Summon | Phoenix |
| Classified Intel | Mindflayer |
| Side Quests |
White Mousse Hell Rider II Sandstorm Drake |
| Corel | |
| Summon | Alexander |
| Classified Intel | Tonberry King |
| Side Quests |
Dark Claw Joker |
| Minigame | Test 0 |
| Gongaga | |
| Summon | Kujata |
| Classified Intel | Great Malboro |
| Side Quests |
Levridon Mastodon Gorgon Mane Gigantoad |
| Cosmo Canyon | |
| Summon | Bahamut Arisen |
| Classified Intel | Jabberwock |
| Side Quests | Irasceros Gigaworm |
| Nibel | |
| Summon | Odin |
| Classified Intel | King Zu |
| Side Quests |
Queen Bee Dranabarga |
| Meridian Ocean | |
| Gilgamesh's Island |
Gilgamesh Titan and Bahamut Arisen Phoenix and Kujata Alexander and Odin |
| Pirate King's Treasure |
Ogre Raider Brineborn Demon Hueyacoatl Sea Dragon |
Author

Dyne Hard Mode Guide
Rankings
- We could not find the message board you were looking for.
Gaming News
![Animal Crossing: New Horizons Review [Switch 2] | Needlessly Crossing Over to a New Generation](https://img.game8.co/4391759/47d0408b0b8a892e453a0b90f54beb8a.png/show)


Popular Games

Genshin Impact Walkthrough & Guides Wiki
Honkai: Star Rail Walkthrough & Guides Wiki
Arknights: Endfield Walkthrough & Guides Wiki
Umamusume: Pretty Derby Walkthrough & Guides Wiki
Wuthering Waves Walkthrough & Guides Wiki
Pokemon TCG Pocket (PTCGP) Strategies & Guides Wiki
Abyss Walkthrough & Guides Wiki
Zenless Zone Zero Walkthrough & Guides Wiki
Digimon Story: Time Stranger Walkthrough & Guides Wiki
Clair Obscur: Expedition 33 Walkthrough & Guides Wiki


Recommended Games
Fire Emblem Heroes (FEH) Walkthrough & Guides Wiki
Pokemon Brilliant Diamond and Shining Pearl (BDSP) Walkthrough & Guides Wiki
Diablo 4: Vessel of Hatred Walkthrough & Guides Wiki
Super Smash Bros. Ultimate Walkthrough & Guides Wiki
Yu-Gi-Oh! Master Duel Walkthrough & Guides Wiki
Elden Ring Shadow of the Erdtree Walkthrough & Guides Wiki
Monster Hunter World Walkthrough & Guides Wiki
The Legend of Zelda: Tears of the Kingdom Walkthrough & Guides Wiki
Persona 3 Reload Walkthrough & Guides Wiki
Cyberpunk 2077: Ultimate Edition Walkthrough & Guides Wiki


All rights reserved
© SQUARE ENIX CO., LTD. All Rights Reserved.
CHARACTER DESIGN: TETSUYA NOMURA/ROBERTO FERRARI
LOGO ILLUSTRATION: © 1997 YOSHITAKA AMANO
The copyrights of videos of games used in our content and other intellectual property rights belong to the provider of the game.
The contents we provide on this site were created personally by members of the Game8 editorial department.
We refuse the right to reuse or repost content taken without our permission such as data or images to other sites.
Easy mode HP for Dyne is 17,952.