This survey will take about 1 minute.
Your answers will help us to improve our website.
Elden Ring Nightreign
Raider Remembrance Quest Guide and How to Unlock
★ Team up using our Multiplayer Board!
☆ The Forsaken Hollows DLC: Scholar | Undertaker
★ The Great Hollow Guide and Rewards
☆ New Bosses: Balancers | Dreglord
★ Best Class Tier List and Best Teams
☆ How to Unlock Forsaken Hollows DLC
This is a Remembrance Guide for Raider in Elden Ring Nightreign. See how to complete Raider's remembrance objectives and how to unlock them here!
| Raider Character Pages | ||
|---|---|---|
| Build | Remembrance | Skins |
List of Contents
Raider Remembrance Quest Walkthrough
| Raider Remembrance Objectives and Chapters | |
|---|---|
| Chapter 1 | Initially available. Defeat Tricephalos to unlock Chapter 2. |
| Chapter 2 | ▼ First Remembrance Quest: Defeat the Onestrike Gladiator. Reward: Torn Braided Cord (Relic) |
| Chapter 3 | Run expeditions and collect Memory Fragments to unlock Chapter 4. |
| Chapter 4 | ▼ Second Remembrance Quest: Defeat the Blinding Elder Lion. Reward: Raider's Chalice |
| Chapter 5 | Defeat your second Nightlord to unlock Chapter 6. |
| Chapter 6 | Defeat your third Nightlord to unlock Chapter 7. |
| Chapter 7 | ▼ Final Remembrance Quest: Defeat White Horn. Rewards: ・Black Claw Necklace (Relic) ・Raider's Remembrance Skin |
| Chapter 8 | Automatically unlocked after finishing Chapter 7's Remembrance quest. |
Chapter 2: Defeat the Onestrike Gladiator
| # | Onestrike Gladiator Walkthrough |
|---|---|
| 1 | 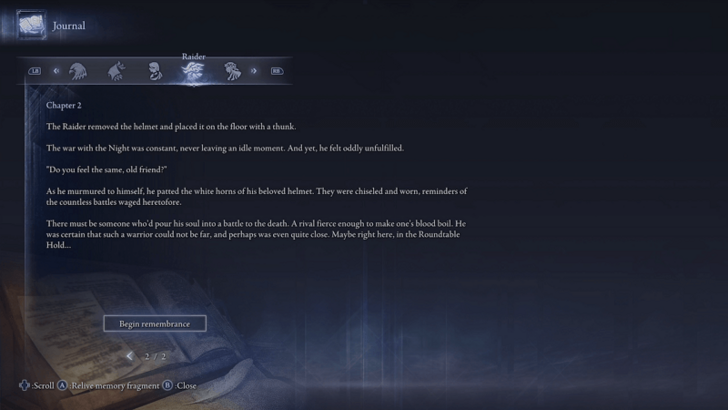 After beating the first Nightlord, Gladius, head to the Journal in the Roundtable Hold and turn the page to Chapter 2 of Raider's section. Select Begin Remembrance to start the objective. ▶︎ How to Beat Gladius, Beast of Night |
| 2 | 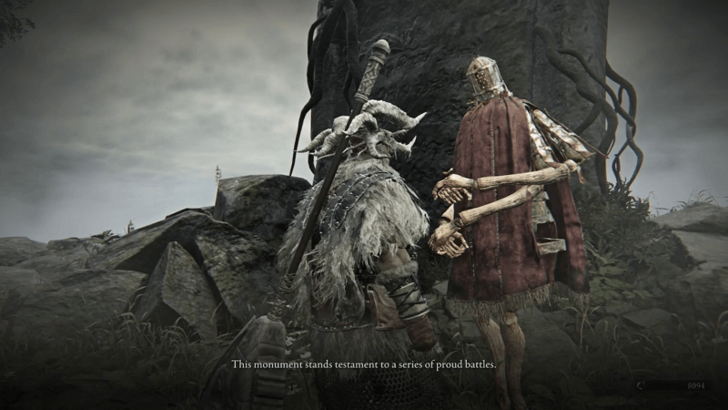 Once in the Realm of Remembrance, speak to the Iron Menial standing next to the massive stone monument. After exhausting his dialogue, interact with the stone monument. |
| 3 | 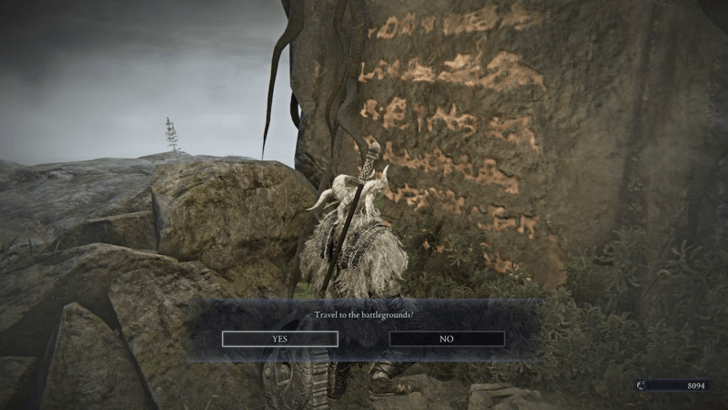 After touching the monument, it will begin glowing. Speak to the Iron Menial once more and exhaust its dialogue. You will eventually be able to ask it "About the Tourney Between", with it telling you that you are chosen for the tournament. Touch the monument once more, and confirm to travel to the battlegrounds for a mini-boss fight. |
| 4 | 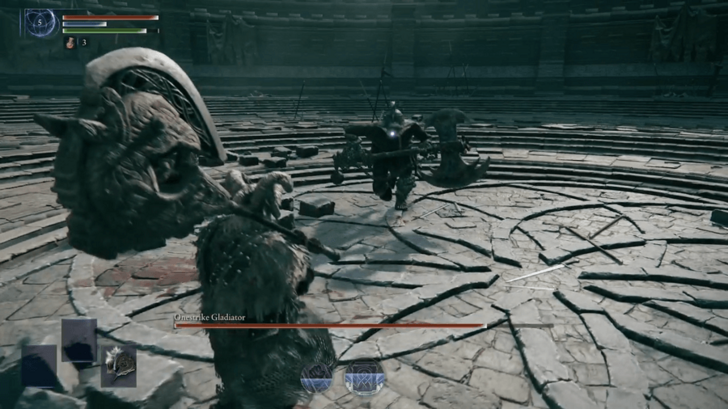 You will face the Onestrike Gladiator mini-boss, who is fairly easy for your Raider to defeat. You can easily stagger and overpower him with your Greataxe and the Retaliate skill, making this fight easy work. Upon his defeat, you will be rewarded with the Torn Braided Cord Relic, which grants +3 Strength and a buff to Raider's Character Skill. ▶︎ How to Beat Onestrike Gladiator |
| 5 | 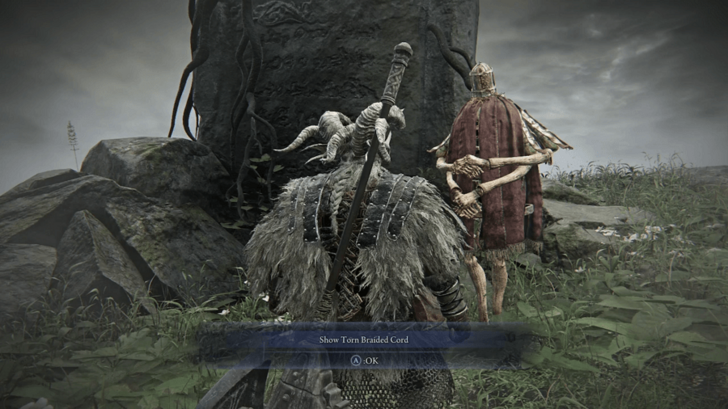 Once back in the Realm of Remembrance, speak to the Iron Menial again, and show it the Torn Braided Cord. After its dialogue, touch the monument again, but it will have no response. The Iron Menial will then tell you that you must wait for your next opponent, concluding the first objective of Raider's Remembrance. You can now return to the main world via the portal behind the Iron Menial. |
Chapter 4: Defeat the Blinding Elder Lion
| # | Blinding Elder Lion Walkthrough |
|---|---|
| 1 |  Do a few more expeditions as Raider to earn Memory Fragments that unlock Chapters 3–4 on his Journal. Memory Fragments are rewarded by chance, so you have to play a few runs to get them. After each run you do as Raider, check the Journal to see if you have anything new unlocked for Raider. Once unlocked, you can start the second Remembrance objective at the Roundtable Hold Journal, on Raider's Chapter 4 page. |
| 2 | 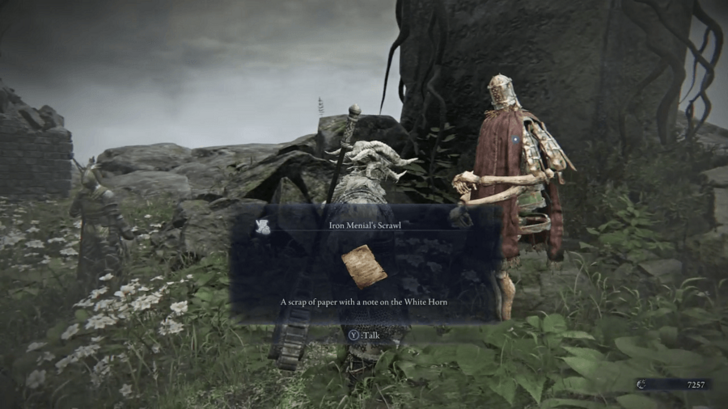 Back in the Realm of Remembrance, speak to the Iron Menial and receive the Iron Menial's Scrawl, a note containing Raider’s background lore, which you can read in the Key Items menu. After exhausting the Iron Menial's dialogue, touch the monument once more to fight your next battle. |
| 3 |  You will face the Blinding Elder Lion, a boss tougher than the Onestrike Gladiator. It is fast and hits hard, so be cautious of its quick sword swipes, bites, and jumping attacks. With Raider’s Greataxe and Retaliate, you can stagger the boss effectively. Well-timed strikes can interrupt its attacks and create openings for heavy damage. ▶︎ How to Beat Blinding Elder Lion |
| 4 | 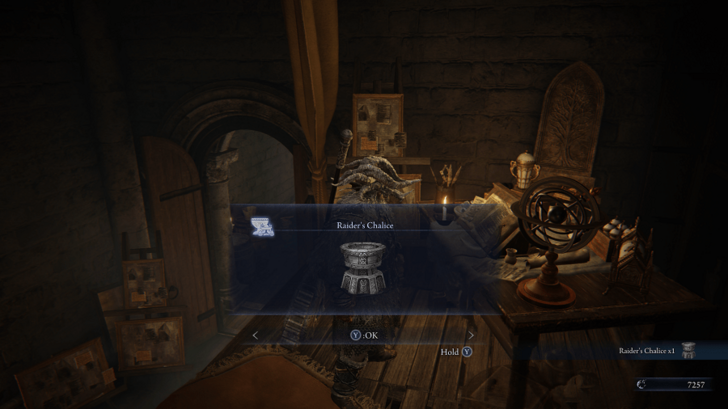 Once the boss is defeated, speak once more to the Iron Menial to complete the Remembrance and return to the Roundtable Hold via the portal. On your arrival, you will receive Raider's Chalice, a new Relic Rite setup exclusive to Raider that has 2 Red slots and 1 Universal slot. |
Chapter 7: Defeat White Horn
| # | White Horn Walkthrough |
|---|---|
| 1 | 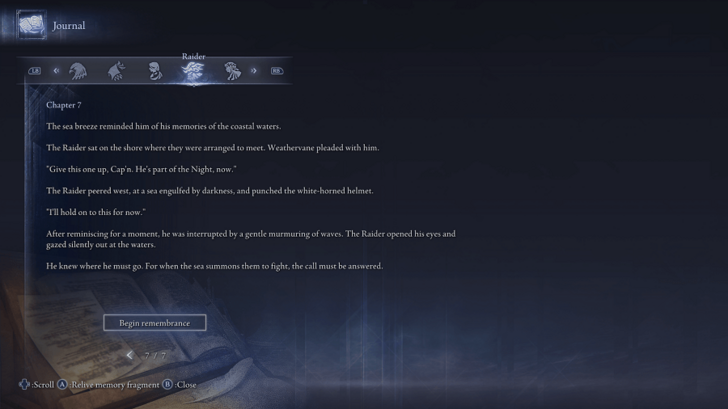 After defeating three different Nightlords, Chapter 7 will unlock in Raider's Journal, allowing you to begin the final Remembrance. |
| 2 | 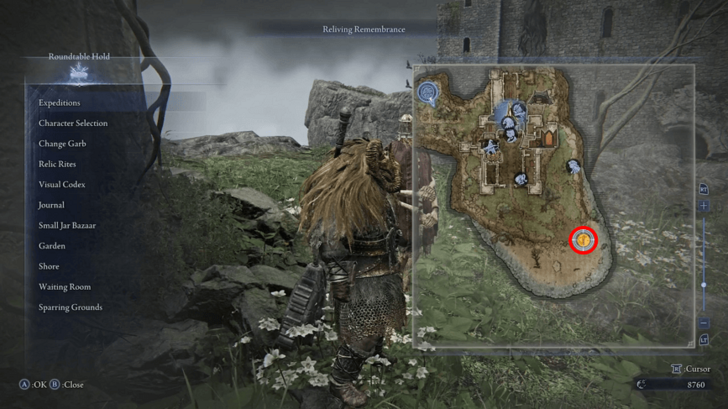 In the Realm of Remembrance, speak to the Iron Menial. This time, you will have no opponent by the monument and will have to go to the new exclamation point marker on the bottom right of the map. |
| 3 | 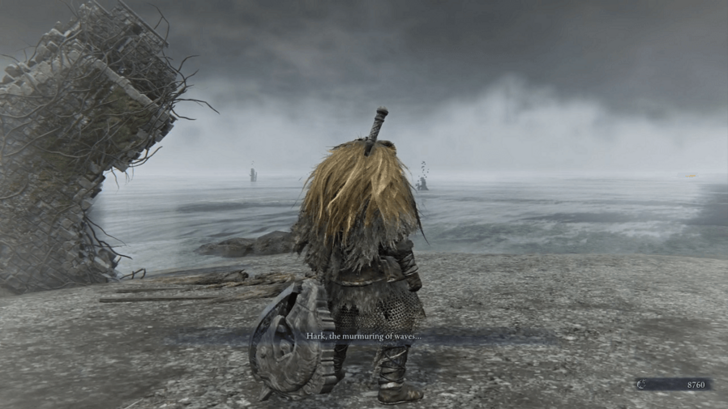 Once you reach the area marked on the map, you will automatically be transported into the battle arena you fought in previously. |
| 4 | 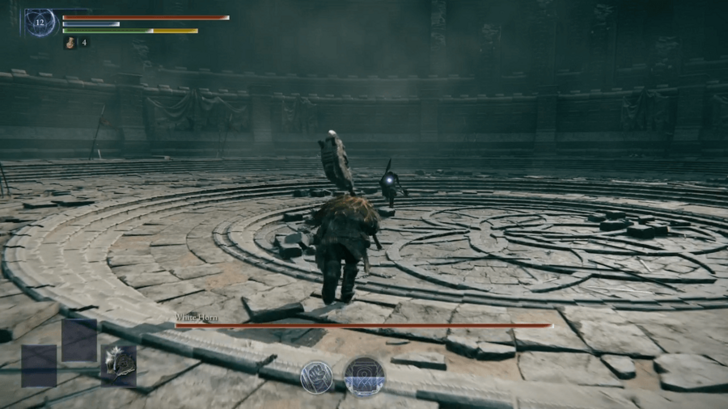 You final opponent will be White Horn, a two-phase boss fight. The first phase is a carbon copy of Raider with dual Colossal Weapons, who also has the Retaliate skill. He can easily be dodged and staggered, just be careful not to get hit when he does his own charged Retaliate skill. ▶︎ How to Beat White Horn |
| 5 | 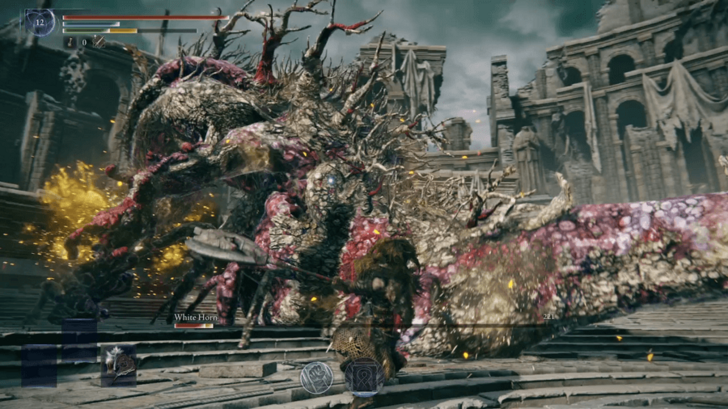 After White Horn goes down to around 2/3 HP, he will transform into an Ulcerated Tree Spirit. Be prepared to dodge a lot, using your rolls' invincibility frames to your advantage, having well-timed dodges towards its attacks instead of away. Use Totem Stela when you can, then strike while it’s staggered to capitalize on your ultimate’s attack and defense buffs. You will be rewarded the Black Claw Necklace Relic after its defeat. |
| 6 | 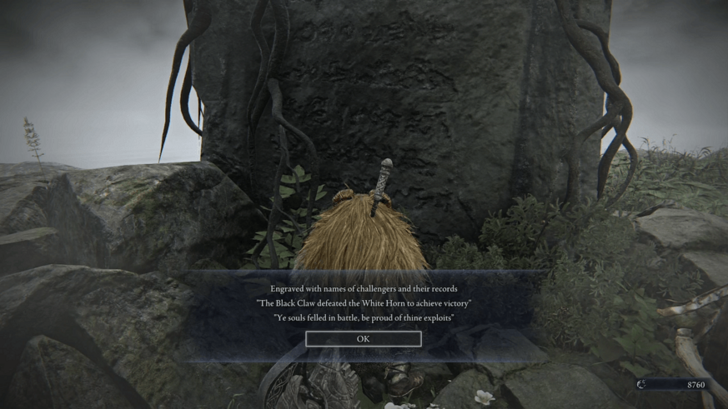 Back in the Realm of Remembrance, speak to the Iron Menial. Then, touch the monument one last time and speak to Iron Menial once more. The Iron Menial will prepare a tomb for you to pay your respects. Interact with the tomb to unlock Raider’s Remembrance skin and to conclude the Remembrance. |
| 7 |  You can head back to the Roundtable Hold via the portal, and will have the final Remembrance rewards unlocked, together with Chapter 8 of Raider's Journal. Final Remembrance Rewards: ・Black Claw Necklace ・Raider Remembrance Skin ・Chapter 8 of Raider's Journal (Ending) |
How to Unlock Raiders Remembrances
Unlocked via Raider's Journal Entries
| Unlock Condition | |
|---|---|
| Chapter 2 | Unlocked after defeating Gladius, Beast of Night. |
| Chapter 4 | Unlocked after completing Chapter 2 and doing a few expeditions to collect Memory Fragments. |
| Chapter 7 | Unlocked after defeating three different Nightlords as Raider. |
Raider's remembrance quests are unlocked by progressing his journal entries. Entries for Raider's journal are added simply after doing expeditions, with Chapter 2 showing after defeating Gladius.
Chapters 3–5 unlock after getting rewarded Memory Fragments from expeditions by chance, regardless if the run was successful or not. However, the final Remembrance that appears in Chapter 7 only unlocks after you have defeated at least three unique Nightlords as Raider.
Note: Some journal chapters don't have a remembrance quest and only offer lore or backstory.
Raider's Remembrance Rewards
All Raider's Remembrance Rewards
| Reward | Effect and How to Get |
|---|---|
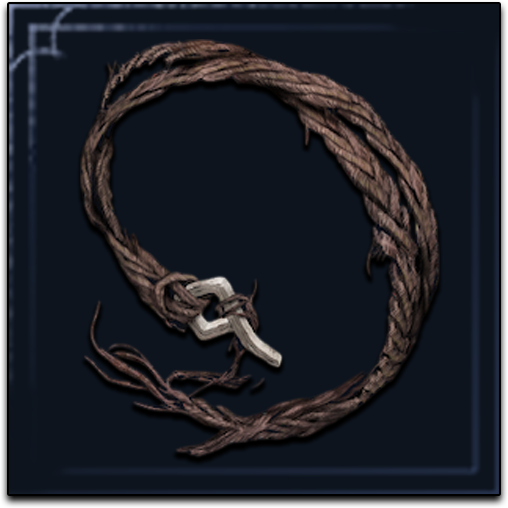 Torn Braided Cord Torn Braided Cord
|
Effect: ・[Raider] Damage taken while using Character Skill improves attack power and stamina ・Strength +3 How to Get: Complete Raider's Chapter 2 Remembrance Quest |
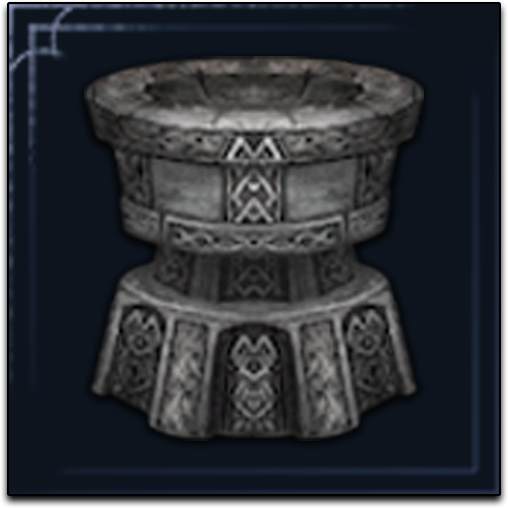 Raider's Chalice Raider's Chalice 
|
Effect: A new Relic setup exclusive to Raider, with 2 Red slots and 1 Universal slot for Relics. How to Get: Complete Raider's Chapter 4 Remembrance Quest |
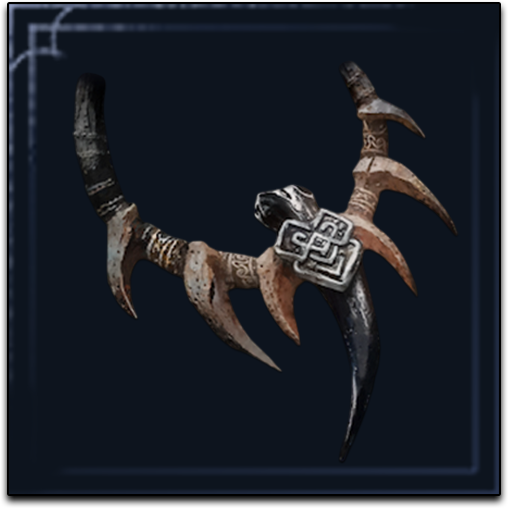 Black Claw Necklace Black Claw Necklace
|
Effect: ・Defeating enemies near Totem Stela restores HP ・Defeating enemies fills more of the Art gauge ・Poise +3 How to Get: Complete Raider's Chapter 7 Remembrance Quest |
 |
Effect: ・Unlocks Raider's Remembrance garb How to Get: Complete Raider's Chapter 7 Remembrance Quest. |
Raider Remembrance Skin
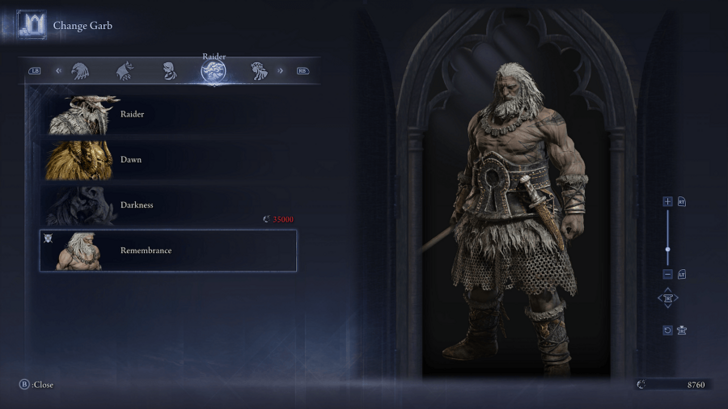
Raider will automatically equip the skin at the end of the final Remembrance objective. It will be available to equip or change at any time in the Change Garb section of the Roundtable Hold.
Related Guides

All Remembrances and Objectives
All Character Remembrances
 Wylder Wylder |
 Guardian Guardian |
 Duchess Duchess |
 Recluse Recluse |
 Ironeye Ironeye |
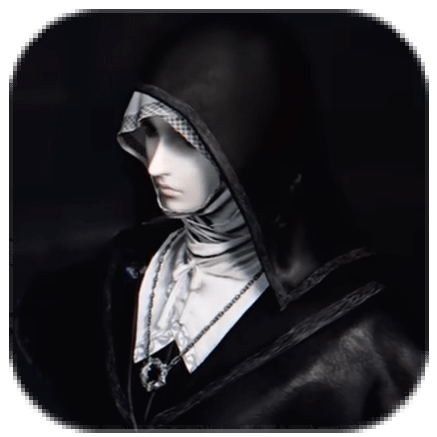
 Raider Raider |
 Executor Executor |
 Revenant Revenant |
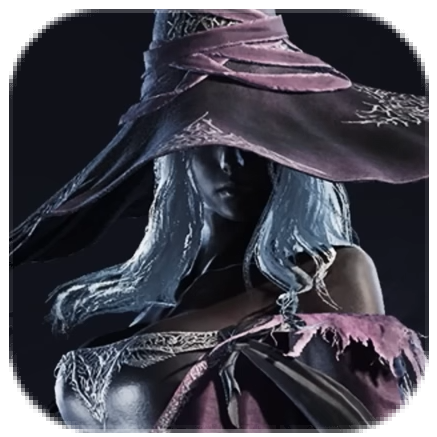
 Undertaker Undertaker
|
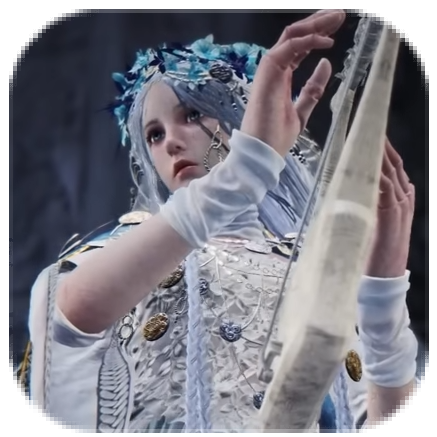
 Scholar Scholar |
||
Comment
Author
Raider Remembrance Quest Guide and How to Unlock
Please participate in our site
improvement survey
03/2026
improvement survey
03/2026
Would you assist in
improving Game8's site?
improving Game8's site?

×
We are listening to our users' valuable opinions and discussing how to act on them.
The information collected through this survey will be used for the purpose of improving our services. In addition, the information will only be disclosed a part of a statistic in a format that will not allow identification of personal information.
Begin Survey
Not Now
×
Please rate each item regarding Game8.co's Advertisements.
Amount of Ads
Very Dissatisfied
Somewhat Dissatisfied
Fine
Somewhat Satisfied
Highly Satisfied
Placement of Ads
Timing of Ad Display
Ad Loading Speed
Safeness of Ads
Content of Ads
×
Please rate each item regarding Game8.co's Quality of Articles.
Amount of information
Very Dissatisfied
Somewhat Dissatisfied
Fine
Somewhat Satisfied
Highly Satisfied
Frequency of updates
Speed of new information
Accuracy of articles
Understandibility of articles
Readability of sentences
×
Please rate each item regarding Game8.co's Usability of the Site.
Ease of finding information
Very Dissatisfied
Somewhat Dissatisfied
Fine
Somewhat Satisfied
Highly Satisfied
Loading Speed
Use of Color
Font Size
Visibility of Images
Easy to Understand Layout
×
Please rate each item regarding Game8.co's Message Boards, Comments.
Ease of Writing
Very Dissatisfied
Somewhat Dissatisfied
Fine
Somewhat Satisfied
Highly Satisfied
Readability
Ease in Finding Information
Comment Quality
Comment Quantity
Admin Response
×
Please rate each item regarding Game8.co's Site's new design.
Please rate our site's new design
Very Dissatisfied
Somewhat Dissatisfied
Fine
Somewhat Satisfied
Highly Satisfied
Do you think that the website's design change makes the site easier to use?
Has the new design made it easier for you to find information on the site?
Has the new design improved the overall visual appeal of the site?
How would you rate your overall satisfaction with the new design of the site?
×
How likely are you to recommend Game8 to someone you know?
Very Unlikely
0
1
2
3
4
5
6
7
8
9
10
Very Likely
If you have other opinions regarding potential improvement to the website, please share them with us. We would appreciate your honest opinion.
Note: This is a free response section, so you can proceed without entering anything.
Note: Please be sure not to enter any kind of personal information into your response.
Note: Please be sure not to enter any kind of personal information into your response.
×
Thank You
×
Thank you for participating in our survey! Your answers will help us to improve the quality of our website and services.
We hope you continue to make use of Game8.
We hope you continue to make use of Game8.
Close
Rankings
- We could not find the message board you were looking for.
Gaming News


![Slay the Spire 2 Review [Early Access] | Still the Deckbuilder to Beat](https://img.game8.co/4433115/44e19e1fb0b4755466b9e516ec7ffb1e.png/thumb)

![Resident Evil Village Review [Switch 2] | Almost Flawless Port](https://img.game8.co/4432790/e1859f64830960ce4248d898f8cd38d9.jpeg/thumb)
Popular Games

Genshin Impact Walkthrough & Guides Wiki
Honkai: Star Rail Walkthrough & Guides Wiki
Umamusume: Pretty Derby Walkthrough & Guides Wiki
Pokemon Pokopia Walkthrough & Guides Wiki
Resident Evil Requiem (RE9) Walkthrough & Guides Wiki
Monster Hunter Wilds Walkthrough & Guides Wiki
Wuthering Waves Walkthrough & Guides Wiki
Arknights: Endfield Walkthrough & Guides Wiki
Pokemon FireRed and LeafGreen (FRLG) Walkthrough & Guides Wiki
Pokemon TCG Pocket (PTCGP) Strategies & Guides Wiki


Recommended Games
Fire Emblem Heroes (FEH) Walkthrough & Guides Wiki
Diablo 4: Vessel of Hatred Walkthrough & Guides Wiki
Yu-Gi-Oh! Master Duel Walkthrough & Guides Wiki
Super Smash Bros. Ultimate Walkthrough & Guides Wiki
Pokemon Brilliant Diamond and Shining Pearl (BDSP) Walkthrough & Guides Wiki
Elden Ring Shadow of the Erdtree Walkthrough & Guides Wiki
Monster Hunter World Walkthrough & Guides Wiki
The Legend of Zelda: Tears of the Kingdom Walkthrough & Guides Wiki
Persona 3 Reload Walkthrough & Guides Wiki
Cyberpunk 2077: Ultimate Edition Walkthrough & Guides Wiki


All rights reserved
© 2010 - 2024 Bandai Namco Entertainment Europe S.A.S
The copyrights of videos of games used in our content and other intellectual property rights belong to the provider of the game.
The contents we provide on this site were created personally by members of the Game8 editorial department.
We refuse the right to reuse or repost content taken without our permission such as data or images to other sites.