This survey will take about 1 minute.
Your answers will help us to improve our website.
Elden Ring Nightreign
Beginner's Guide to Elden Ring Nightreign: Tips and Tricks
★ Team up using our Multiplayer Board!
☆ The Forsaken Hollows DLC: Scholar | Undertaker
★ The Great Hollow Guide and Rewards
☆ New Bosses: Balancers | Dreglord
★ Best Class Tier List and Best Teams
☆ How to Unlock Forsaken Hollows DLC
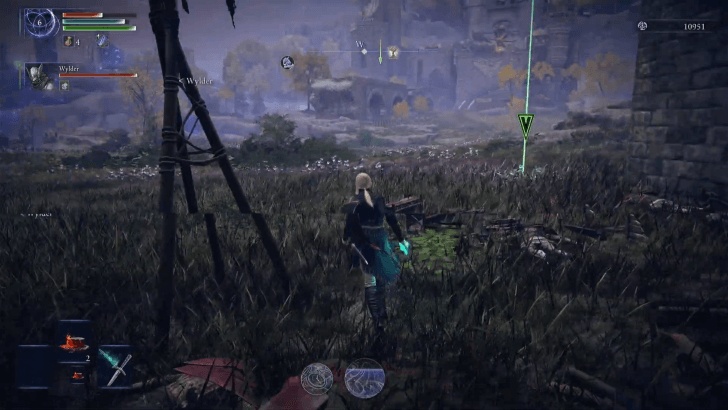
Here is a beginner's guide for Elden Ring Nightreign. Learn more about the basics of what a beginner may want to learn in the game, a beginner's guide to the game's combat system, and tips on what to do during an expedition.
List of Contents
Beginner's Guide to Elden Ring Nightreign
| Beginner's Guide |
|---|
|
|
Day 1 for Easy Levelling; Day 2 for Challenging POIs with Higher Rewards
| Start | |
|---|---|
| Day 1 Morning | 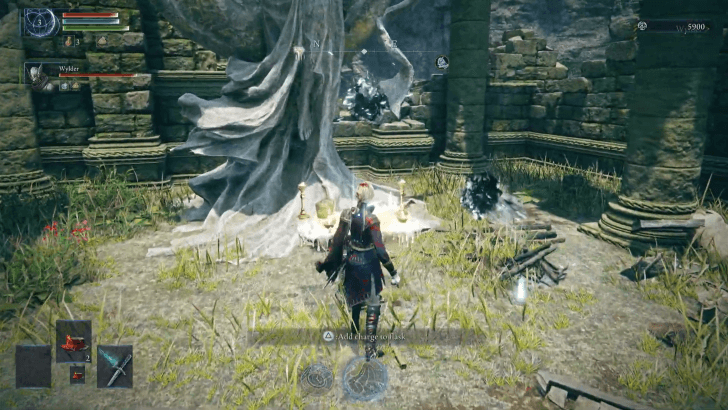 Focus on leveling your character and obtaining resources to help you progress through the stage such as flasks, runes, and new weapons.
 |
| Day 1 Evening | 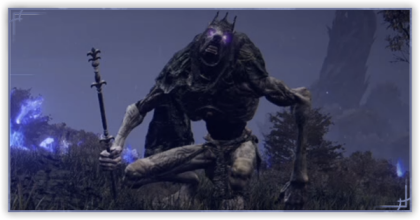 Begin to position your team near the inner circle then face the current day's boss when night begins. Begin to position your team near the inner circle then face the current day's boss when night begins.
|
| Day 2 Morning | 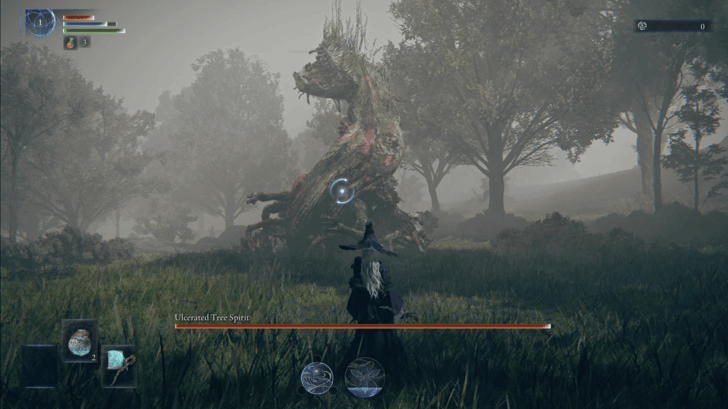 Begin with further strengthening your character but focus on more difficult content such as the castles and field bosses. Begin with further strengthening your character but focus on more difficult content such as the castles and field bosses. |
| Day 2 Evening | 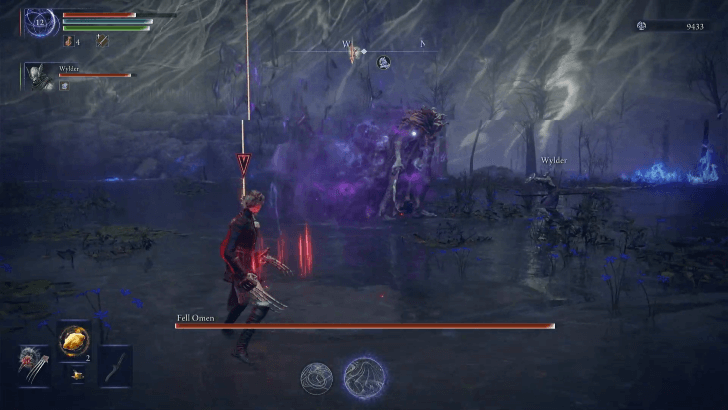 Repeat the second cycle by proceeding to the inner ring's area and then fighting the second day's boss.
 |
| Day 3 |  Face the Night Lord with all the gear, stats, and bonuses you've obtained in the run.
 |
One Night is About 15 Minutes
| Event/Notification | Shrink Start |
|---|---|
 |
4m 30s |
 |
11m |
| Boss Fight Begins | 14m |
The Night's tide which is the outer blue flame will shrink at a given time period in the current expedition. Overall, you have a short time to explore the entire map and then gain several minutes in a medium-sized area so be sure to play around the day cycle with the Night Tide's mechanics.
Night's Tide (Circle): Blue Flame Explained
8 Classes with Unique Playstyles
| Character | Description | Main Weapon |
|---|---|---|
 Wylder Wylder |
A well-rounded character with a flexible playstyle. | Greatswords |
 Guardian Guardian |
Tank that prioritizes defense. | Halberds |
 Duchess Duchess |
Stealth (invisibility) with fast attacks and even faster dodges. |
Daggers |
 Recluse Recluse |
Spell caster and support player. | Spells |
 Ironeye Ironeye |
Ranged specialist that deals damage from afar. | Bows |
 Raider Raider |
Berserker class that takes on damage from enemies and returns them in kind. | Greataxes, Great Hammers, Colossal Weapons |
 Executor Executor |
Parry specialist. | Katana |
 Revenant Revenant |
Summon specialist. |
- |
Before heading out on an expedition, you first have to pick a character that you want to run with. There are eight Nightfarers to pick from, each with their own Passive Ability, Character Skill, and an Ultimate Art.
Try to experiment with multiple Nightfarers and see which one will fit your playstyle the best!
Learn At Least 1 Melee Class and 1 Ranged Class
While having a class you main is great, it's recommended to learn at least 1 melee-focused class and 1 range-fcoused class. This will allow you to be flexible and adjust to your two ally's chosen Nightfarers and keep a balanced team.
You Can Practice Each Class at the Sparring Grounds
If you wish to test out the character's skills and capabilities, there's no need to test it out in a real expedition. You can head to the Sparring Grounds in the Roundtable Hold to check how the character feels, how to use its skills, and even test it out with all the possible weapons and spells you can get in a run!
Recommended Early Team Comps
| Canon Team |    |
|---|---|
| Tanky Team |  |
| Parry and Dodge |  |
| Ranged DPS |   |
| Glass Cannon | |
Learn Every Point of Interest and What They Have
| Important Locations | |
|---|---|
 Site of Grace Site of Grace |
Where to level up your character using runes. Simply passing over one replenishes health and your flasks. |
 Church Church |
Adds a charge to your flask. |
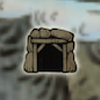 Mine Entrance Mine Entrance |
Obtain Smithing Stone 2 for upgrading your equipment from the large enemy deep in the mine. |
| Locations for Rune Farming | |
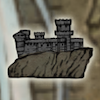 Forts Forts |
Checking the map inside the fort reveals buried treasure nearby and scarabs. The boss is located on top of the ramparts. |
 Great Church Great Church |
A place to obtain Stonesword Keys. The boss is located in the basement. |
 Main Encampment Main Encampment |
Can find chests and break open boxes for loot. The bosses are spread out throughout the camp. |
 Ruins Ruins |
Lots of items are found in the basement of the Ruins. The bosses are spread out throughout the ruins, with one being on the highest level. |
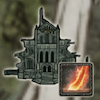
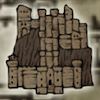 Castle Castle |
Good place to obtain dormant powers and fight enemies on Day 2. The boss is located on top of the castle (roof). |
 Field Boss Field Boss |
Difficult bosses marked on the map. |
 Evergaol Evergaol |
A boss will appear by using a Stonesword Key to break the seal. |
| Other Locations | |
 Village Village |
Use runes to purchase items from merchants. |
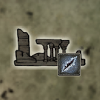
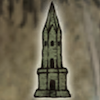 Sorcerer's Rise Sorcerer's Rise |
Solve the puzzle to lift the seal and enter the tower for loot. |
| Traversal Options | |
 Spiritstream Spiritstream |
Can be interacted with to make a big jump. |
 Spectral Hawk Tree Spectral Hawk Tree |
Summons a Spirit Falcon to travel by air and get to locations faster. The wind pattern on the map shows the direction the bird will fly in. |
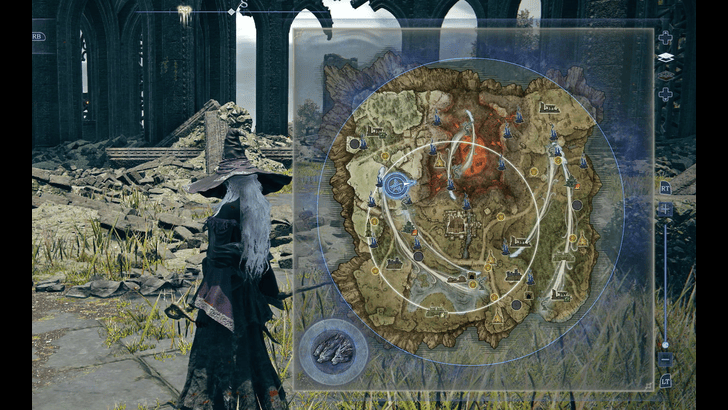
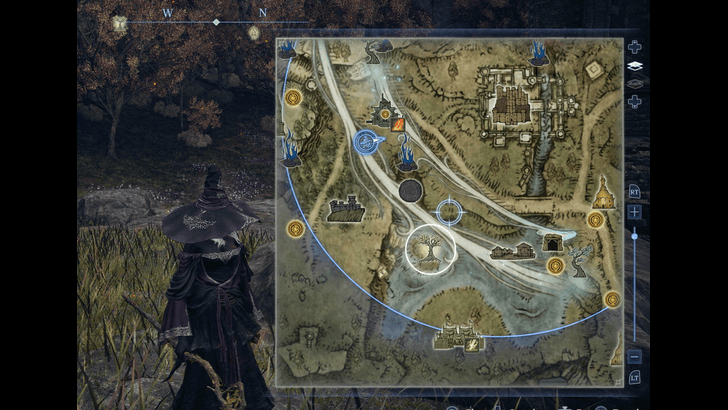
There are multiple map icons and legends you'll want to learn and understand as you progress through the game. Each point of interest has its benefits once conquered but most locations have their threats and challenges you may need to overcome.
Learn all of these points and understand how to plan a route to ensure that you're able to visit and complete the majority of areas in a single expedition.
Before Expedition: Equip Relics at the Relic Rites
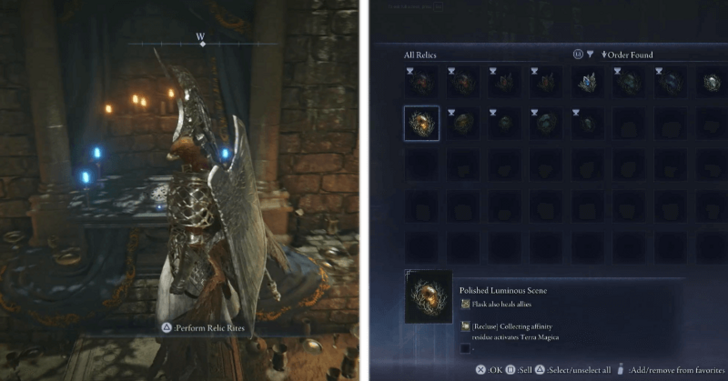
Relics are a new permanent item that can be equipped at the Relic Rites inside the Roundtable Hold and provide various passive buffs that can make or break your expeditions. You can find Relics during Expeditions and can be bought from the Small Jar Bazaar inside the Roundtable Hold using the Murks currency.
You can get more relic slots by buying the respective character's Goblets at the Bazaar in the Roundtable Hold.
Maximize the Features of the Roundtable Hold
| Roundtable Hold Feature | Summary |
|---|---|
| Change Garb (Dresser) |
Equip different skins for your character. |
| Relic Rites | Equip relics that you've obtained on previous expeditions. |
| Visual Codex | Where you can see all character stats, weapons, items, beginner tips, etc. |
| Journal | For character remembrances. |
| Small Jar Bazaar | Where you can buy goblets (for increasing relic slots) and relics. |
| Sparring Grounds | Where you can practice your character's moveset. |
Beginner's Combat Guide
Use Weapon Arts and Spells
Due to the game's roguelike design, using your resources to take down foes faster is highly recommended rather than saving them for tougher enemies.
Use Ultimate Arts and Character Skills
Skill and Ultimate Arts are abilities unique to each Nightfarer. This can even be said as the main thing that separates each Nightfarer from the others and decides what type of gameplay each Nightfarer has to offer.
Master the Use of I-Frame Dodges
I-Frame Dodges are dodge rolls that are executed at the same time an enemy attack will hit you. The initial dodge roll grants a brief immunity to attacks which you can use to avoid hits that would otherwise, deal damage to you.
Manage Your Stamina
Your Stamina Bar is often the lifeline of your entire playthrough. It replenishes quickly but is consumed when attacking, guarding, dodging, and almost every action you can do. Be sure to pace your attacks and movements unless you wish to run out of stamina while an enemy is about to attack you and suffer an abrupt death.
Nightreign Beginner Tips for Expeditions
| Tips and Strategies to use on Expeditions |
|---|
Prioritize The Right Content Per Day
| Key Location | Contents | Priority |
|---|---|---|
| Church |
Increase your number of Flasks. | ★★★★★ |
| Great Church |
A place to obtain Stonesword Keys and fight a good amount of enemies for relatively easy runes. | ★★★★ |
| Mine Entrance |
Contains Smithing Stone 2 to upgrade your equipment. | ★★★★ |
| Field Boss |
Strong foes that grant high rarity reward upon vanquishing them. Perfect targets on day 2. | ★★★★ |
| Castle |
Good loot and place to fight enemies in Day 2. | ★★★★ |
Upon starting an Expedition, the first thing you want to do is grab as much loot as you can to upgrade your character. We highly recommend heading for Churches so you can upgrade your Flasks for better survivability and completing Tunnels to gain Smithing Stones for improving the damage output of your weapons.
When it comes to loot quantity, your best bet would be to take on Great Church in the early game as there's a bunch of easy mobs and a boss in the basement. Only head for the Castle when you have leveled up a bit since this contains a Miniboss at the top. Keep in mind that you want to avoid taking on too many enemies and try to stick together with your teammates for cases when you get downed.
Always Move Fast and Focus Your Target Locations
While playing, you want to always be moving towards your next objective while being efficient and only taking crucial items you need most of the time. Avoid wasting time defeating weaker enemies, staying idle, or staying on loot too much and checking each item.
Avoid the Night's Tide
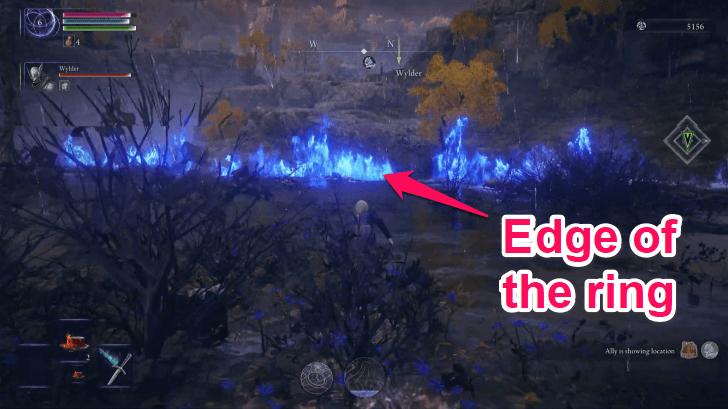
The Night's Tide is a ring that encompasses the entire map while it constantly gets smaller throughout the day. Anything outside of the ring will have their HP quickly depleted so make sure you are always inside the ring to avoid getting damaged.
Night's Tide (Circle): Blue Flame Explained
Use Your Character Skills and Arts Often

Skills and Arts have a huge impact on your survival on Expeditions so try to get a good understanding of what each of your character's skills do and how long their cooldowns are to pull off great plays.
Some skills provide good support for your teammates such as Wings of Salvation and Finale, while other skills can deal huge amounts of damage like the Wylder's Onslaught Stake.
Revive and Rescue Downed Allies

To revive your allies, you have to attack them until the near-death gauge is depleted. The outer circle represents how much time you have left before you die and respawn while the inner circle is the near-death gauge that needs to be depleted to revive you. Keep in mind that these gradually deplete and fill up respectfully so make sure to revive them as fast as you can.
This is important for the success of your expeditions, as dying will cause players to lose a level and drop all of their Runes, forcing them to retrieve them or leave them behind. However, be careful to think your rescues through before jumping in, as you might end up dying as well and hurting the team as a result.
How to Revive and Rescue Allies
Level Up When You Encounter Site of Grace
| Expedition Phase | Ideal Level |
|---|---|
| Day 1 |
Minimum: Levels 5
Recommended: Levels 6-8 |
| Day 2 |
Minimum: Levels 10-11
Recommended: Levels 12+ |
| Night Lord |
Minimum: Level 12
Recommended: Levels 13+ |
The best way to survive your expeditions is by leveling up to increase your HP, FP, Stamina, and all your other stats. Sites of Grace are commonly found throughout Limveld. Be sure to often level up when you are near one on the map or after defeating bosses.
It's also important to reach a certain level threshold to easily conquer each phase of the game. We recommend at least reaching level 5 before the first boss and 10 on the second boss as the minimum with higher than these values as ideal.
Avoid Overchasing Site of Grace to Level Up
While leveling up is great, it's usually better to just proceed with the points of interest you need to do rather than backtracking to a Site of Grace to level up.
Backtracking will take a lot of time on your already short and limited expedition time. It's recommended to not backtrack if you forgot to level up or obtained a decent amount of runes to reach the next level. Naturally defeating Bosses will reveal a Site of Grace so it's often better to just clear the boss of the next location to level up while also getting more Runes in the process.
Try to Use a Site of Grace Before Facing the Night's Boss
Once the ring tries to close for the eventual boss fight for the current day, plan your route so that you can reach a Site of Grace before the boss fight.
Entering the fight without flask charges and reduced HP may make the fight difficult and even potentially end a run.
Place Pins to Communicate Map Objectives
Since this is a co-op-based survival game, it is highly important for you to communicate with your teammates by pinning the map. This will allow your allies to understand your objective and cooperate with your current plan for the run.
Additionally, you can also place pins on items to share drops. Use it during idle time to share items you believe would work better for your ally's class.
Understand Which Content You Can Currently Clear
Make sure that during your runs you evaluate the kind of content you can currently do. It's best to tackle locations and points of interest that have lower difficulties and scale it up to harder content the more gear and levels you obtain.
Avoid immediately tackling Field Bosses or the Central Castle without prior preparation.
What to Do First on Days 1 and 2
Consume Items You Find
Consumables you find can be immediately consumed by pressing the item command + Dpad Up. This will allow you to save time and immediately consume items without managing your inventory slot. This is especially perfect for pickled feet items as you can get great boosts in item drops and runes as you journey in Limveld.
Try to Always Consume Boluses
Boluses are items that allow you to cleanse the resistance type of the Bolus. However, what isn't immediately apparent is that these boluses also provide a permanent resistance to its specific type. This means that Stimulating Boluses can allow you to resist Maris' sleeping attacks by consuming them as you go along your journey as well as Clarifying Boluses against Libra's madness attacks.
Pick Up Weapons With Passives That Synergize With Your Class
Each weapon you pick up in a run will have specific passives tied to it. Be sure to pick up weapons that give passives that work well with your current Nightfarer or playstyle. For example, playing a Duchess with two daggers would allow her to maximize weapons that grant bonus damage while dual-wielding weapons.
Additionally, these passives work even while not equipped. The only exceptions are passive effects with the red hand icon as these passives will only work if it's your currently equipped weapon.
Avoid Overcommitting on Revives
| Near-Death Gauge Count | Revive? |
|---|---|
| 1 Gauge | Revive when possible. |
| 2 Gauge | Revive if your class can easily revive or you're confident you can revive the ally in the current fight. |
| 3 Gauge | Revive only if you have moves that can instantly revive or a class that excels at reviving teammates. |
Reviving allies will often be a good thing to do as allies can dish out damage and relieve pressure from allies. However, always consider when reviving allies may not be the right call.
Certain classes like Ironeye can revive allies with ranged attacks. Certain ultimate moves like the Guardian's and Revenant's ultimate art can also instantly revive allies. Consider your options on whether you should help your allies or not during crucial moments.
How to Revive and Rescue Allies
Try to Always Reach the Nightlord with At Least Purple Rarity Weapons
Before reaching the Nightlord, try to aim and get a weapon ideal for your class that's of the purple rarity level. You can obtain rare equipment by besting strong Field Bosses or braving difficult areas like the Central Castle or the bosses of Shifting Earth areas.
If you haven't obtained any rare items, consider at least running a tunnel to obtain Smithing Stones to upgrade your gear to a higher rarity to deal more damage.
How to Upgrade Weapons and Get Smithing Stones
Use Your Weapon Skills
While it may be tempting to save FP only for crucial fights, we highly recommend using your weapon skills and spells as much as you can. Weapon skills are stronger moves tied to weapons and consume FP to use but this is often worth using to dish out more damage or gain extra buffs and utility.
Use the Sparring Ground to Test Weapon Skills
If you're unsure on how to use weapon skills in the game, you can head to the Sparring Ground to test out weapons and the skills tied to them to get a feel of each skill and their ideal usage.
Sparring Grounds Locations and Available Settings
All Tips and Tricks Guides
Elden Ring Nightreign Related Guides

Elden Ring Nightreign Walkthrough Wiki
Elden Ring Nightreign Wiki
| Elden Ring Nightreign Wiki Contents | |
|---|---|
 Forsaken Hollows DLC Forsaken Hollows DLC |
 Classes Classes |
 Remembrances Remembrances |
 Skins Skins |
 Bosses Bosses |
 Tips and Tricks Tips and Tricks |
 Shifting Earth Shifting Earth |
 Multiplayer Board Multiplayer Board |
 Vessels Vessels |
 Relics Relics |
 Weapons Weapons |
 Weapon Skills Weapon Skills |
 Spells Spells |
 Talismans Talismans |
 Items Items |
 News News |
 Patch Updates Patch Updates |
 Bugs and Errors Bugs and Errors |
 Map Map |
|
Recommended Guides
Comment
Author
Beginner's Guide to Elden Ring Nightreign: Tips and Tricks
Please participate in our site
improvement survey
03/2026
improvement survey
03/2026
Would you assist in
improving Game8's site?
improving Game8's site?

×
We are listening to our users' valuable opinions and discussing how to act on them.
The information collected through this survey will be used for the purpose of improving our services. In addition, the information will only be disclosed a part of a statistic in a format that will not allow identification of personal information.
Begin Survey
Not Now
×
Please rate each item regarding Game8.co's Advertisements.
Amount of Ads
Very Dissatisfied
Somewhat Dissatisfied
Fine
Somewhat Satisfied
Highly Satisfied
Placement of Ads
Timing of Ad Display
Ad Loading Speed
Safeness of Ads
Content of Ads
×
Please rate each item regarding Game8.co's Quality of Articles.
Amount of information
Very Dissatisfied
Somewhat Dissatisfied
Fine
Somewhat Satisfied
Highly Satisfied
Frequency of updates
Speed of new information
Accuracy of articles
Understandibility of articles
Readability of sentences
×
Please rate each item regarding Game8.co's Usability of the Site.
Ease of finding information
Very Dissatisfied
Somewhat Dissatisfied
Fine
Somewhat Satisfied
Highly Satisfied
Loading Speed
Use of Color
Font Size
Visibility of Images
Easy to Understand Layout
×
Please rate each item regarding Game8.co's Message Boards, Comments.
Ease of Writing
Very Dissatisfied
Somewhat Dissatisfied
Fine
Somewhat Satisfied
Highly Satisfied
Readability
Ease in Finding Information
Comment Quality
Comment Quantity
Admin Response
×
Please rate each item regarding Game8.co's Site's new design.
Please rate our site's new design
Very Dissatisfied
Somewhat Dissatisfied
Fine
Somewhat Satisfied
Highly Satisfied
Do you think that the website's design change makes the site easier to use?
Has the new design made it easier for you to find information on the site?
Has the new design improved the overall visual appeal of the site?
How would you rate your overall satisfaction with the new design of the site?
×
How likely are you to recommend Game8 to someone you know?
Very Unlikely
0
1
2
3
4
5
6
7
8
9
10
Very Likely
If you have other opinions regarding potential improvement to the website, please share them with us. We would appreciate your honest opinion.
Note: This is a free response section, so you can proceed without entering anything.
Note: Please be sure not to enter any kind of personal information into your response.
Note: Please be sure not to enter any kind of personal information into your response.
×
Thank You
×
Thank you for participating in our survey! Your answers will help us to improve the quality of our website and services.
We hope you continue to make use of Game8.
We hope you continue to make use of Game8.
Close
Rankings
- We could not find the message board you were looking for.
Gaming News


![Everwind Review [Early Access] | The Shaky First Step to A Very Long Journey](https://img.game8.co/4440226/ab079b1153298a042633dd1ef51e878e.png/thumb)

![Monster Hunter Stories 3 Review [First Impressions] | Simply Rejuvenating](https://img.game8.co/4438641/2a31b7702bd70e78ec8efd24661dacda.jpeg/thumb)
Popular Games

Genshin Impact Walkthrough & Guides Wiki
Honkai: Star Rail Walkthrough & Guides Wiki
Umamusume: Pretty Derby Walkthrough & Guides Wiki
Pokemon Pokopia Walkthrough & Guides Wiki
Resident Evil Requiem (RE9) Walkthrough & Guides Wiki
Monster Hunter Wilds Walkthrough & Guides Wiki
Wuthering Waves Walkthrough & Guides Wiki
Arknights: Endfield Walkthrough & Guides Wiki
Pokemon FireRed and LeafGreen (FRLG) Walkthrough & Guides Wiki
Pokemon TCG Pocket (PTCGP) Strategies & Guides Wiki


Recommended Games
Diablo 4: Vessel of Hatred Walkthrough & Guides Wiki
Fire Emblem Heroes (FEH) Walkthrough & Guides Wiki
Yu-Gi-Oh! Master Duel Walkthrough & Guides Wiki
Super Smash Bros. Ultimate Walkthrough & Guides Wiki
Pokemon Brilliant Diamond and Shining Pearl (BDSP) Walkthrough & Guides Wiki
Elden Ring Shadow of the Erdtree Walkthrough & Guides Wiki
Monster Hunter World Walkthrough & Guides Wiki
The Legend of Zelda: Tears of the Kingdom Walkthrough & Guides Wiki
Persona 3 Reload Walkthrough & Guides Wiki
Cyberpunk 2077: Ultimate Edition Walkthrough & Guides Wiki


All rights reserved
© 2010 - 2024 Bandai Namco Entertainment Europe S.A.S
The copyrights of videos of games used in our content and other intellectual property rights belong to the provider of the game.
The contents we provide on this site were created personally by members of the Game8 editorial department.
We refuse the right to reuse or repost content taken without our permission such as data or images to other sites.