This survey will take about 1 minute.
Your answers will help us to improve our website.
Elden Ring Nightreign
Combat Tips
★ Team up using our Multiplayer Board!
☆ The Forsaken Hollows DLC: Scholar | Undertaker
★ The Great Hollow Guide and Rewards
☆ New Bosses: Balancers | Dreglord
★ Best Class Tier List and Best Teams
☆ How to Unlock Forsaken Hollows DLC
This is a guide to the combat system of Elden Ring Nightreign. Learn all the mechanics you need to know to master the game's combat.
List of Contents
Elden Ring Nightreign Combat Tips
| Tips for Excelling in Combat |
|---|
|
|
Use Lock-On to Focus a Target
Whenever you're in a battle, remember to use the Lock-On feature. Not only will this allow you to track your enemy better, but this will also let you use projectile attacks much easier, as it'll automatically focus your target.
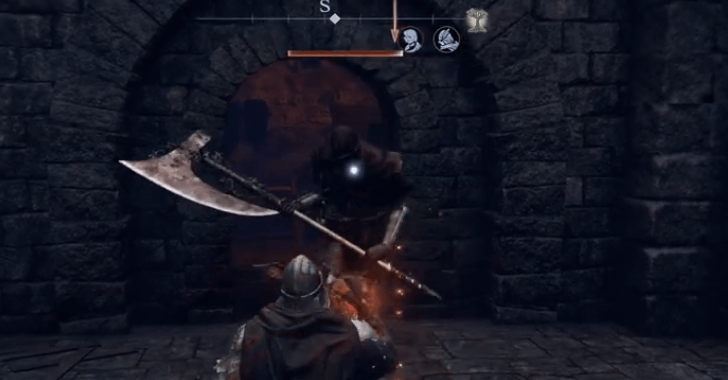
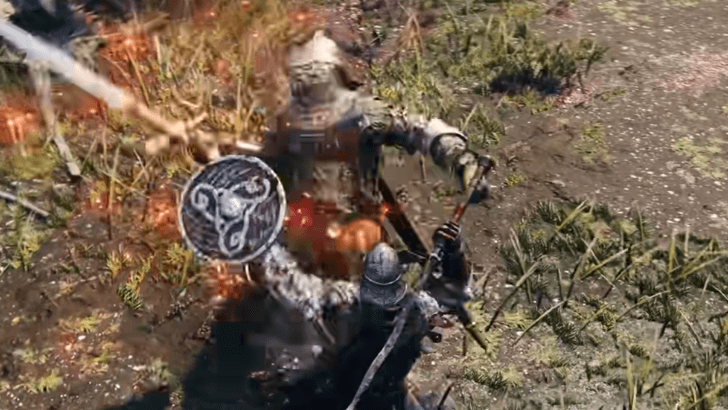
Attack Humanoids Behind Them to Use Backstabs
If you can sneak up on humanoid enemies, you can attack them from behind to launch a critical strike. These attacks deal massive amounts of damage and can easily take down strong enemies if the opportunity arises.
Maximize Your Equipped Armaments
Your character can equip a total of 6 armaments at the same time. Each armament can have its passive effect which is active even when not in use. Additionally, you may also want to have a ranged armament equipped at all times, as these can be used in a multitude of ways, such as attacking enemies from afar or even helping downed allies.
Equip Relics that Complement Your Playstyle or Nightfarer

Unlike armaments, Relics are equipment that are permanent to your account and do not disappear per session. Equipping Relics that will complement your playstyle or your Nightfarer is crucial to make your runs in Limveld much easier.
Some Relics provide stat bonuses that may be helpful to your nightfarer or provide unique effects such as healing on certain items or revealing treasures, so experiment on which relic will help you the most during your runs.
Obtain and Upgrade Equipment Throughout Limveld
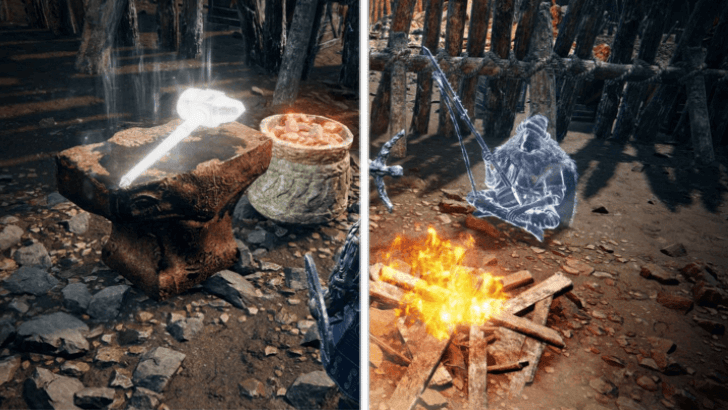
Obtaining items and equipment is necessary to make your runs at Limveld much smoother. You can obtain multiple weapons that can aid you as you play through the game.
You can obtain some by defeating bosses, and some may be purchased through merchants. You can also upgrade equipment by using Smithing Tables to strengthen your attacks.
Approach Fights Tactically With Your Mobility Options
Nightreign features a much faster movement than its previous Souls predecessors, so use these to your advantage. Use new moves like Wall Jumps to enter fights from a different angle or Surge Sprint to move around the area much faster.
Elden Ring Nightreign Combat Guide
| Jump to a Combat Guide |
|---|
|
|
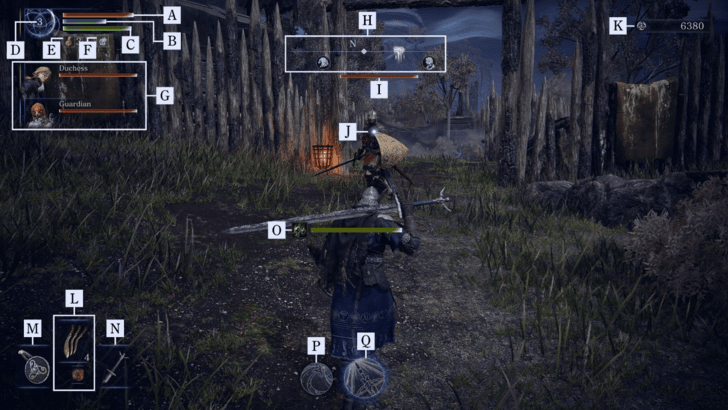
Learn the Game's UI
| UI | Explanation |
|---|---|
| (A) HP Gauge | Your current HP. It decreases as you receive damage, and you die when it reaches 0. |
| (B) FP Gauge | A secondary resource that certain actions use, such as Sorceries and Incantations. |
| (C) Stamina Gauge | Attacking, Dashing, Dodging, and many other actions consume stamina. Stamina will quickly regenerate if not used, and having zero stamina will prevent you from performing any action that consumes it. |
| (D) Level | Indicates your character's current level. |
| (E) Sacred Flask | Indicates the remaining number of Sacred Flasks in your character's possession. |
| (F) Status Icons | All buffs and debuffs will be shown in this area. |
| (G) Ally Status | Shows your ally's info, such as their name and HP. |
| (H) Compass | Indicates the direction. The location of Runes dropped at the time of death and the landmarks placed on the Map will also be displayed. |
| (I) Enemy HP | Indicates the enemy's HP. |
| (J) Lock-On Marker | Shows your lock-on target. Your camera will also focus on staying on this target. |
| (K) Runes | The number of runes you currently have. |
| (L) CurrentItem | The currently selected item. |
| (M) Current Left-Hand Armament | The currently equipped weapon for the Left Hand. If it includes any Skill/Sorceries/Incantations, they will appear on the upper left side of the weapon. |
| (N) Current Right-Hand Armament | The currently equipped weapon for the Right Hand. If it includes any Skill/Sorceries/Incantations, they will appear on the upper left side of the armament. |
| (O) Player's Status Ailment Gauge | Indicates how much more it will take for you to suffer a status ailment, and how long it will take to recover from it. There are different kinds of status effects. |
| (P) Skill Icon | Your skill icon indicator. You'll be able to use the skill once its gauge is full. |
| (Q) Ultimate Icon | Your Ultimate icon indicator. You'll be able to use your ultimate once its gauge is full. |
These are the basics of the game's combat UI. Learning each of its functionalities is key to understanding the intricacies of the game's combat system.
Recover HP Using Flasks

Flasks are handy items that can replenish your HP. Be sure to regularly but not overuse them, as their uses are limited.
How to Get More Flask Charges and Upgrade Flasks
Recover FP Using Starlight Shards
Starlight Shards are consumable items that allow you to replenish your FP. Unlike Flasks, these cannot be replenished at sites of graces. Be sure to conserve your FP as much as possible and use them only in situations that would be most beneficial for you and your team.
How to Recover and Increase FP
Replenish Flasks at Sites of Graces
Search for Sites of Grace in Limveld to replenish your flask charges to continue your journey much smoothly.
Avoid Overusing Your Stamina
Stamina is an important resource that gets used whenever you attack, guard, dodge, or perform many other moves. It will recover quickly once it's not being used, but be sure to avoid overusing your stamina, or you may end up in a situation where you cannot use a defensive move due to lack of stamina.
Use Guard and Dodge Rolls to Avoid Enemy Attacks
Dodge Rolls and Guarding are effective tools in deterring enemy aggression. Be sure to play defensively to avoid taking needless damage.
Attack Downed Allies to Revive Them
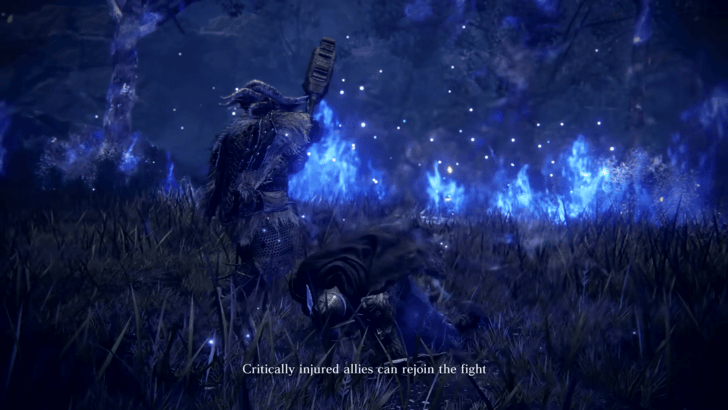
Allies will be put in a near-death state after getting their HP depleted. You can help allies by attacking them to revive them and let them keep the fight going.
How to Revive and Rescue Allies
Ranged Attacks Can be Used to Help Downed Allies
If you have ranged armaments like wands and bows, you can use those to resurrect allies from a safer distance. Be sure to keep one as a side weapon to give you more options on the battlefield!
Elden Ring Nightreign Related Guides
All Tips and Tricks Guides
Comment
Author
Please participate in our site
improvement survey
03/2026
improvement survey
03/2026
Would you assist in
improving Game8's site?
improving Game8's site?

×
We are listening to our users' valuable opinions and discussing how to act on them.
The information collected through this survey will be used for the purpose of improving our services. In addition, the information will only be disclosed a part of a statistic in a format that will not allow identification of personal information.
Begin Survey
Not Now
×
Please rate each item regarding Game8.co's Advertisements.
Amount of Ads
Very Dissatisfied
Somewhat Dissatisfied
Fine
Somewhat Satisfied
Highly Satisfied
Placement of Ads
Timing of Ad Display
Ad Loading Speed
Safeness of Ads
Content of Ads
×
Please rate each item regarding Game8.co's Quality of Articles.
Amount of information
Very Dissatisfied
Somewhat Dissatisfied
Fine
Somewhat Satisfied
Highly Satisfied
Frequency of updates
Speed of new information
Accuracy of articles
Understandibility of articles
Readability of sentences
×
Please rate each item regarding Game8.co's Usability of the Site.
Ease of finding information
Very Dissatisfied
Somewhat Dissatisfied
Fine
Somewhat Satisfied
Highly Satisfied
Loading Speed
Use of Color
Font Size
Visibility of Images
Easy to Understand Layout
×
Please rate each item regarding Game8.co's Message Boards, Comments.
Ease of Writing
Very Dissatisfied
Somewhat Dissatisfied
Fine
Somewhat Satisfied
Highly Satisfied
Readability
Ease in Finding Information
Comment Quality
Comment Quantity
Admin Response
×
Please rate each item regarding Game8.co's Site's new design.
Please rate our site's new design
Very Dissatisfied
Somewhat Dissatisfied
Fine
Somewhat Satisfied
Highly Satisfied
Do you think that the website's design change makes the site easier to use?
Has the new design made it easier for you to find information on the site?
Has the new design improved the overall visual appeal of the site?
How would you rate your overall satisfaction with the new design of the site?
×
How likely are you to recommend Game8 to someone you know?
Very Unlikely
0
1
2
3
4
5
6
7
8
9
10
Very Likely
If you have other opinions regarding potential improvement to the website, please share them with us. We would appreciate your honest opinion.
Note: This is a free response section, so you can proceed without entering anything.
Note: Please be sure not to enter any kind of personal information into your response.
Note: Please be sure not to enter any kind of personal information into your response.
×
Thank You
×
Thank you for participating in our survey! Your answers will help us to improve the quality of our website and services.
We hope you continue to make use of Game8.
We hope you continue to make use of Game8.
Close
Rankings
- We could not find the message board you were looking for.
Gaming News


![Monster Hunter Stories 3 Review [First Impressions] | Simply Rejuvenating](https://img.game8.co/4438641/2a31b7702bd70e78ec8efd24661dacda.jpeg/thumb)

Popular Games

Genshin Impact Walkthrough & Guides Wiki
Honkai: Star Rail Walkthrough & Guides Wiki
Umamusume: Pretty Derby Walkthrough & Guides Wiki
Pokemon Pokopia Walkthrough & Guides Wiki
Resident Evil Requiem (RE9) Walkthrough & Guides Wiki
Monster Hunter Wilds Walkthrough & Guides Wiki
Wuthering Waves Walkthrough & Guides Wiki
Arknights: Endfield Walkthrough & Guides Wiki
Pokemon FireRed and LeafGreen (FRLG) Walkthrough & Guides Wiki
Pokemon TCG Pocket (PTCGP) Strategies & Guides Wiki


Recommended Games
Diablo 4: Vessel of Hatred Walkthrough & Guides Wiki
Fire Emblem Heroes (FEH) Walkthrough & Guides Wiki
Yu-Gi-Oh! Master Duel Walkthrough & Guides Wiki
Super Smash Bros. Ultimate Walkthrough & Guides Wiki
Pokemon Brilliant Diamond and Shining Pearl (BDSP) Walkthrough & Guides Wiki
Elden Ring Shadow of the Erdtree Walkthrough & Guides Wiki
Monster Hunter World Walkthrough & Guides Wiki
The Legend of Zelda: Tears of the Kingdom Walkthrough & Guides Wiki
Persona 3 Reload Walkthrough & Guides Wiki
Cyberpunk 2077: Ultimate Edition Walkthrough & Guides Wiki


All rights reserved
© 2010 - 2024 Bandai Namco Entertainment Europe S.A.S
The copyrights of videos of games used in our content and other intellectual property rights belong to the provider of the game.
The contents we provide on this site were created personally by members of the Game8 editorial department.
We refuse the right to reuse or repost content taken without our permission such as data or images to other sites.