This survey will take about 1 minute.
Your answers will help us to improve our website.
Elden Ring Nightreign
What to Do First on Days 1 and 2
★ Team up using our Multiplayer Board!
☆ The Forsaken Hollows DLC: Scholar | Undertaker
★ The Great Hollow Guide and Rewards
☆ New Bosses: Balancers | Dreglord
★ Best Class Tier List and Best Teams
☆ How to Unlock Forsaken Hollows DLC
This is a guide for what to do on First on Day 1 and Day 2 of expeditions in Elden Ring Nightreign. Learn the best activities and routes you can take during each expedition day.
List of Contents
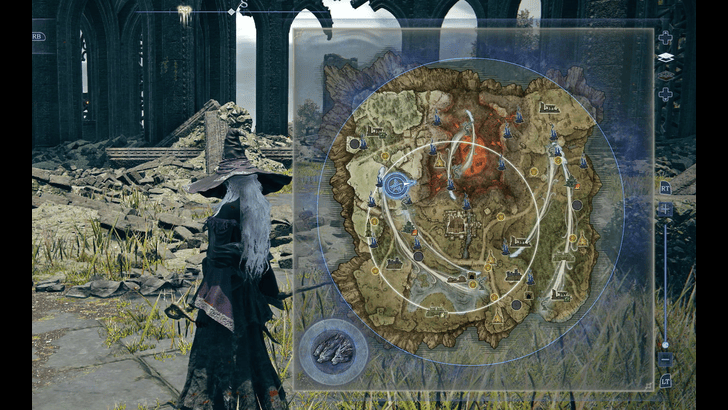
What to Do First on Day 1
| Day 1 Priorities |
|---|
|
|
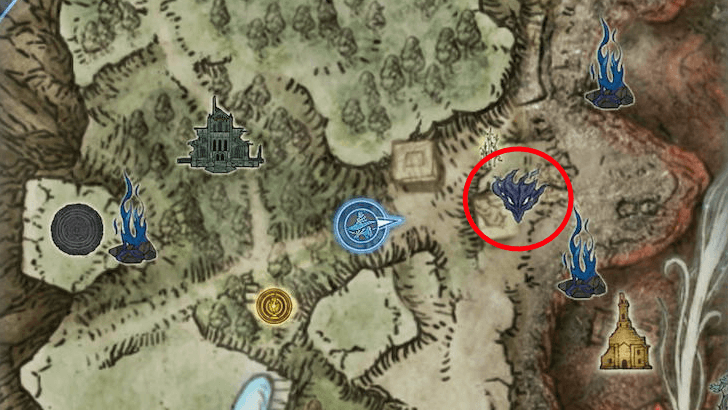
Best Day 1 Points of Interests (POI)
| Day 1 Recommended POIs | |
|---|---|
 Church Church★★★ |
If there are nearby Churches from your starting position, it is best to get them right away. For any POIs to take between the Church and you, we recommend Great Churches since they often have the easiest bosses. |
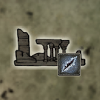
 Great Church Great Church★★★ |
Great source of early rune acquisition and levelling due to easy boss figths and a straightforward route. Common Bosses: Fire Monk, Guardian Golem, Oracle Envoys, Mausoleum Knight. |
 Forts Forts★★ |
Forts are the next easiest POIs to claim due to a limited pool of easy bosses along with a clues table at the top you can interact with to mark Scarabs (gives Talismans) and Buried Treasure on the map.
Common Bosses: Lordsworn Captain, Guardian Golem, Crystallians, Abductor Virgin |
 Campsites Campsites★★ |
Campsites are the next easiest POIs to claim, with the easiest boss of all being the Flame Chariots in Fire-afffinity campsites. |
 Ruins Ruins★★ |
Runes are the next easiest to claim. They have more varied enemies than campsites, and will have some bosses you'll want to reconsider even fighting (Runebears in Sleep-affinity Ruins, for example). |
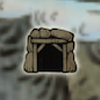
 Evergaol Evergaol★★ |
These Evergaols are fine boss sources for Runes and Levelling when you have Stonesword Keys. These keys have a high chance to drop from chests in Great Churches and Forts, so we recommend you go to them first. |
 Mines Mines★★ |
Mines are recommend if you already have a choice weapon you want to upgrade to Rare (Purple) Rarity. Defeating bosses inside here give Smithing Stone 2, and Smithing Stone 1 can also be obtained from enemies here. |
 Field Bosses (Weak) Field Bosses (Weak)★ |
Day 1 doesn't reveal you Field Bosses until you run into them, and it's unlikely you'll find a Field Boss that's easy to handle at a low-level. Fight if you and your team are confident in your speed, but we recommend you hold off on them for now until other POIs have been settled for the day. |
| ⓘ The recommended level when reaching the end of Day 1 is Level 7 or above.
ⓘ 3★ are recommended to take immediately. Ultimately, it is the team's decision on which nearby POIs are of its best interest. |
|
Clear the Nearest POIs
Upon dropping, there is usually a small camp with weak mobs you can clear. Take advantage of this and claim the nearest Site of Grace to immediately get yourself to Level 2.
Afterwards, you will want to prioritize getting the nearest clearable POI if it's on the route to a Church. It can be a Campsite, a Great Church, etc. Clear it to get the necessary equipment and Runes to increasing your character's level.
Focused Weapon Loot Areas
| Recluse (INT/FAI) Revenant (FAI/INT) |
・Great Churches (Sacred Seals)
・Forts (top tower, clue room) (Staffs) ・Rises (Staffs) |
|---|---|
| Ironeye (DEX/ARC) |
・Campsites (higher chance of ranged weapons) |
| Raider (STR) Executor (DEX/ARC) Guardian (STR/DEX) Duchess (INT/DEX/FAI) |
・Any general POI (Campsite, Ruins, Forts, etc.) ・Melee weapons can often be found from chests. |
The above is a table reference you can use for the best early POIs to take according to character needs.
Certain POIs will guarantee the drop of specific weapon types from loot points, such as Staffs when interacting with the loot points at the Fort's tower or Sacred Seals when interacting with the dungeon altar below the Great Church.
Make a Path to the Nearest Churches
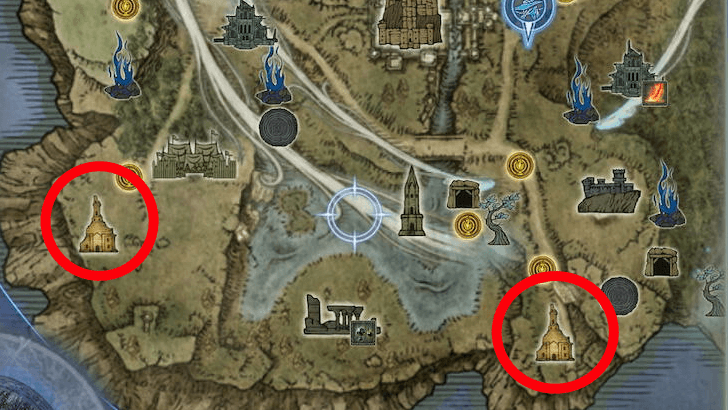
Getting to Churches is a high priority since they offer you extra Flask Charges when you interact with their altar (1 Flask Charge is given per Church). It's best you head to the one nearest to your drop point.
You'll want to prioritizing the nearest ones first, taking nearby POIs on the way, and reserve getting the distant Churches later. Gunning immediately to other distant Churches will eat up time that you can use to farm Runes from other locations.
Get Weapons for Night Lord Weaknesses
On Day 1, it's good to get weapons that exploits the weakness of the targeted Night Lord for that expedition.
Displayed on most clearable POIs are affinities of armaments. They can be found the bottom-right of their icons and signify that there is a higher chance of getting an armament with that affinity.
List of All Bosses and Weaknesses
All Attack Affinities
| Damage Type | Effect or Effective Against |
|---|---|
|
|
Unarmored and plant type enemies. Strong Against: Sentient Pest, Fissure in the Fog |
|
|
Highly armored enemies. Strong Against: Augur, Darkdrift Knight |
|
|
Undead, Albinaurics, and unholy enemies. Strong Against: Tricephalos, Final Boss |
|
|
Highly armored enemies. |
|
|
Inflicts Frostbite and slows down enemies. |
|
|
Inflicts Bleed, dealing burst damage through enough buildup. |
|
|
Inflicts Poison, dealing damage over time. Strong Against: Gaping Jaw |
|
|
Inflicts Scarlet Rot, dealing damage over time similar to Poison. |
|
|
Has a chance to cause a target to sleep. Hitting sleeping enemies deal extra damage. |
|
|
Deals Madness buildup on enemies, dealing additional damage. Strong Against: Equilibrious Beast |
|
|
Has a chance to cause Sudden Death, allowing you to sometimes kill non-boss enemies instantly from your strikes. |
Attack Affinities and Element Guide
Obtain Smithing Stones to Upgrade Your Weapons
| All Smithing Stones | |
|---|---|
|
|
Upgrades Common Weapons (White) to Uncommon (Blue) |
|
|
Upgrades Uncommon Weapons (Blue) to Rare (Purple) |
Getting upgrades for your weapons is an easy direct way to increase your damage. Consider running into Mines and getting Smithing Stones (especially Smithing Stone 2) on Tunnels to get a decent damage boost.
Once you have Smithing Stones, you'll want to drop by at a Merchant and upgrade your weapons at the nearby forging table.
How to Upgrade Weapons and Get Smithing Stones
Adjust Route Once The Night Tide Starts Shrinking
| Event/Notification | Shrink Start |
|---|---|
 |
4m 30s |
 |
11m |
| Boss Fight Begins | 14m |
Once the Night's Tide starts to shrink at around 4 minutes and 30 seconds, a white circle will appear on the map. You'll want to clear areas outside of that circle as much as you can, then head inside the safe zone before the Night's Tide catches up.
On the 11th minute mark as well, the zone will rapidly shrink into an extremely small zone where you'll have to fight the current boss of the day so its imperative to quickly move around the map during this period to avoid dying to the Night's Tide.
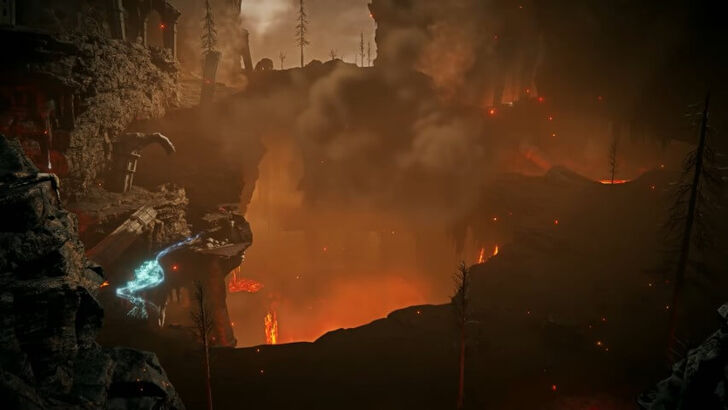
Night's Tide (Circle): Blue Flame Explained
Defeat Day 1 Night Boss
At the end of Day 1 will be the expeditions first Night Boss. Defeat this boss to earn a large amount of Runes along with Dormant Power rewards. Doing so will advance you to Day 2.
Respawning is locked during this event, so having all team members downed during this encounter will immediately conclude the expedition.
List of All Bosses and Weaknesses
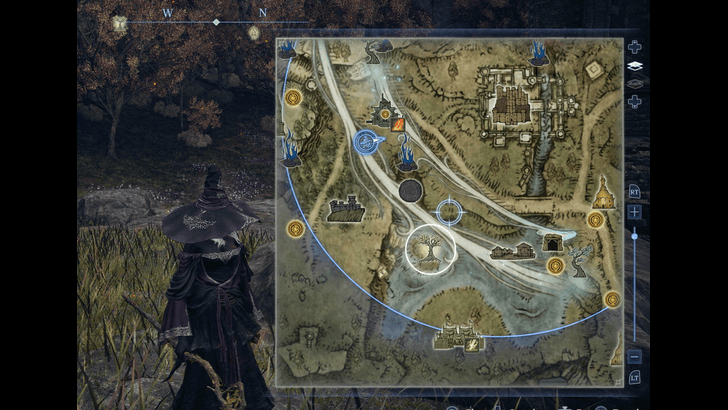
What to Do First on Day 2
| Day 2 Priorities |
|---|
|
|
Best Day 2 Points of Interests (POI)
| Day 2 Recommended POIs | |
|---|---|
 Castle Castle★★★ |
When tackling Castles, at least Level 9 or above is recommended for both the basement and roof bosses. You can take defeat the nearby Banished Knights, Crucible Knights, or Trolls at a lower level since they provide lots of runes. |
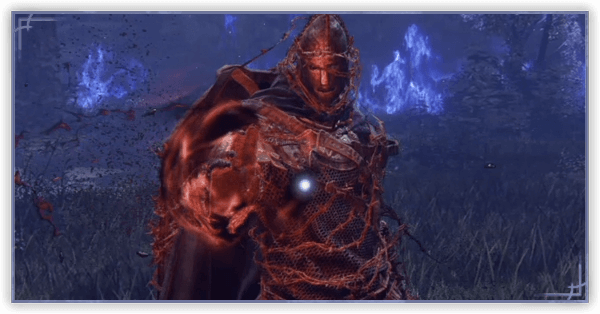
| Field Bosses (Strong) ★★★ |
If you are not taking the castle, your next best POIs to take on in Day 2 are Field Bosses. These can be taken as soon as the Day 2 has began – you'll want to be selective on who to fight depending no your skill level since certain bosses can be huge time sinks (such as the Bell Bearing Hunter).
Rankings for the Best Bosses to Kill and the Worst Bosses to Encounter can be found in our How to Level Up Fast guide. |
| Shifting Earth Events ★★ |
Priorities on Shifting Earth Event powers vary per playthrough, with the Rotted Woods power being one of the best to obtain on top of having a higher density of Field Bosses. |
| Evergaol ★★ |
Evergaols can be tackled again on Day 2 if you have Stonesword Keys available. Since you will be at a higher level at this point, Evergaols will be much easier to clear than Field Bosses. |
| Church ★ |
If there are any remaining unclaimed Churches from the 1st day, we recommend you go over to the remaining ones while there is still time. Otherwise, prioritize getting as much levels as you can. |
| ⓘ The recommended level when reaching the end of Day 2 is Level 12 or above.
ⓘ 3★ are recommended to take immediately. Ultimately, it is the team's decision on which nearby POIs are of its best interest. |
|
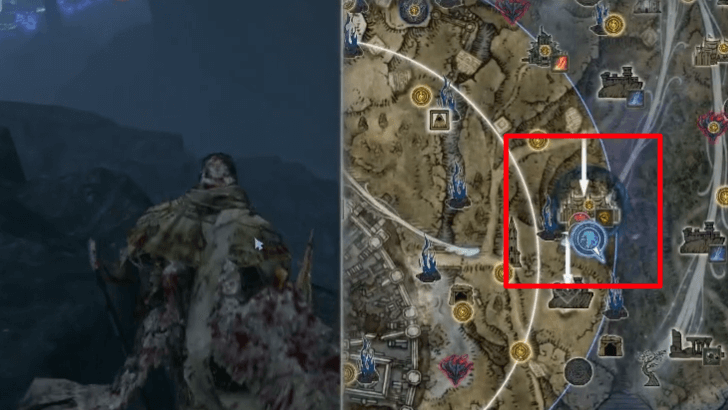
Conquer the Castle

The Castle is a highly valuable POI occupied by a large amount of bosses. Two (2) main bosses occupy this POI, specifically the basement and the roof. These main bosses have a high chance of dropping Legendary Weapons.
The rest of the castle is occupied by strong foes such as Giants, Crucible Knights, and Banished Knights. If you cannot fight the main bosses, the Runes you get from these enemies should be good enough.
A guaranteed Dormant Power orb rewarding only Talismans can be claimed at the center of the Castle, which is accessible by defeating the boss in the basement.
Tackle Field Bosses
By Day 2, Field Bosses begin to be the most valuable source of Runes for the rest of the expedition. Gain enough levels to prepare you and your team, then seek out these bosses in the overworld.
Before taking on a boss, you will want to be sure it's something you can handle, since some bosses can be harder than others due to their higher HP pool and varied moveset. Do not hesitate to pull back and go for another POI if the boss proves to be too much of a time sink.
Explore Shifting Earth Zones
Consider exploring Shifting Earth Zones during Day 2 for their powers and secrets. These zones have tougher challenges and foes, which means more Rune acquisition.
Unique rewards can also be found in these zones. Examples are the chance to upgrade your weapons to legendary on Crater Shifting Earth event and the chance to duplicate armaments at Noklateo.
List of Shifting Earth Events and Map Changes
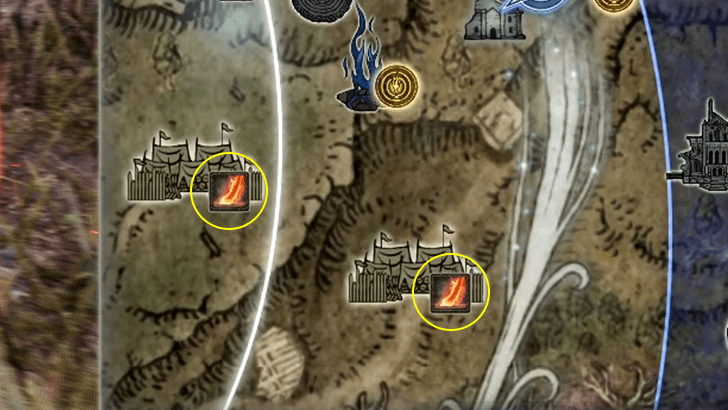
Conquer Invader Zones
Some Points of Interest will have a surrounding dark-blue circle, indicating that the POI has been overtaken by invaders. These invaders are NPC Nightfarers you can defeat to obtain Nightfarer-exclusive gear (such as the Nightfarer's starting weapon) with passives.
If you are not aiming for any of the equipment, they are still good go-to objectives on Day 2 for extra Runes and Dormant Powers.
Catch Up on Unfinished Day 1 Priorities
If you have cleared out the Castle and a couple of Field Bosses, it's best that you settle any remaining valuable POIs left for this day, such as unclaimed Churches, or use remaining Stonesword Keys on nearby Evergaols.
You'll also want to go for a last pass into the Mines and defeat the main bosses here for Smithing Stone 2 to upgrade your weapons to Rare if you haven't, since you'll only have access to buying Smithing Stone 1 once you are in the Shelter before the Night Lord arena.
Defeat Day 2 Night Boss
Just like Day 1, a Night Boss will appear at the final circle on Day 2. You will want to make sure everything needed has been settled prior to this fight, since what follows after is a portal to the Shelter, leading to the Day 3 fight with the Night Lord.
Elden Ring Nightreign Related Guides

All Tips and Tricks Guides
Comment
Author
What to Do First on Days 1 and 2
Please participate in our site
improvement survey
03/2026
improvement survey
03/2026
Would you assist in
improving Game8's site?
improving Game8's site?

×
We are listening to our users' valuable opinions and discussing how to act on them.
The information collected through this survey will be used for the purpose of improving our services. In addition, the information will only be disclosed a part of a statistic in a format that will not allow identification of personal information.
Begin Survey
Not Now
×
Please rate each item regarding Game8.co's Advertisements.
Amount of Ads
Very Dissatisfied
Somewhat Dissatisfied
Fine
Somewhat Satisfied
Highly Satisfied
Placement of Ads
Timing of Ad Display
Ad Loading Speed
Safeness of Ads
Content of Ads
×
Please rate each item regarding Game8.co's Quality of Articles.
Amount of information
Very Dissatisfied
Somewhat Dissatisfied
Fine
Somewhat Satisfied
Highly Satisfied
Frequency of updates
Speed of new information
Accuracy of articles
Understandibility of articles
Readability of sentences
×
Please rate each item regarding Game8.co's Usability of the Site.
Ease of finding information
Very Dissatisfied
Somewhat Dissatisfied
Fine
Somewhat Satisfied
Highly Satisfied
Loading Speed
Use of Color
Font Size
Visibility of Images
Easy to Understand Layout
×
Please rate each item regarding Game8.co's Message Boards, Comments.
Ease of Writing
Very Dissatisfied
Somewhat Dissatisfied
Fine
Somewhat Satisfied
Highly Satisfied
Readability
Ease in Finding Information
Comment Quality
Comment Quantity
Admin Response
×
Please rate each item regarding Game8.co's Site's new design.
Please rate our site's new design
Very Dissatisfied
Somewhat Dissatisfied
Fine
Somewhat Satisfied
Highly Satisfied
Do you think that the website's design change makes the site easier to use?
Has the new design made it easier for you to find information on the site?
Has the new design improved the overall visual appeal of the site?
How would you rate your overall satisfaction with the new design of the site?
×
How likely are you to recommend Game8 to someone you know?
Very Unlikely
0
1
2
3
4
5
6
7
8
9
10
Very Likely
If you have other opinions regarding potential improvement to the website, please share them with us. We would appreciate your honest opinion.
Note: This is a free response section, so you can proceed without entering anything.
Note: Please be sure not to enter any kind of personal information into your response.
Note: Please be sure not to enter any kind of personal information into your response.
×
Thank You
×
Thank you for participating in our survey! Your answers will help us to improve the quality of our website and services.
We hope you continue to make use of Game8.
We hope you continue to make use of Game8.
Close
Rankings
- We could not find the message board you were looking for.
Gaming News


![Monster Hunter Stories 3 Review [First Impressions] | Simply Rejuvenating](https://img.game8.co/4438641/2a31b7702bd70e78ec8efd24661dacda.jpeg/thumb)

Popular Games

Genshin Impact Walkthrough & Guides Wiki
Honkai: Star Rail Walkthrough & Guides Wiki
Umamusume: Pretty Derby Walkthrough & Guides Wiki
Pokemon Pokopia Walkthrough & Guides Wiki
Resident Evil Requiem (RE9) Walkthrough & Guides Wiki
Monster Hunter Wilds Walkthrough & Guides Wiki
Wuthering Waves Walkthrough & Guides Wiki
Arknights: Endfield Walkthrough & Guides Wiki
Pokemon FireRed and LeafGreen (FRLG) Walkthrough & Guides Wiki
Pokemon TCG Pocket (PTCGP) Strategies & Guides Wiki


Recommended Games
Diablo 4: Vessel of Hatred Walkthrough & Guides Wiki
Fire Emblem Heroes (FEH) Walkthrough & Guides Wiki
Yu-Gi-Oh! Master Duel Walkthrough & Guides Wiki
Super Smash Bros. Ultimate Walkthrough & Guides Wiki
Pokemon Brilliant Diamond and Shining Pearl (BDSP) Walkthrough & Guides Wiki
Elden Ring Shadow of the Erdtree Walkthrough & Guides Wiki
Monster Hunter World Walkthrough & Guides Wiki
The Legend of Zelda: Tears of the Kingdom Walkthrough & Guides Wiki
Persona 3 Reload Walkthrough & Guides Wiki
Cyberpunk 2077: Ultimate Edition Walkthrough & Guides Wiki


All rights reserved
© 2010 - 2024 Bandai Namco Entertainment Europe S.A.S
The copyrights of videos of games used in our content and other intellectual property rights belong to the provider of the game.
The contents we provide on this site were created personally by members of the Game8 editorial department.
We refuse the right to reuse or repost content taken without our permission such as data or images to other sites.