
This survey will take about 1 minute.
Your answers will help us to improve our website.
Wuthering Waves (WuWa)
Although Colors Have No Form Event Guide
★ Version 3.2 Banners → Livestream Codes
┣ Sigrika → Materials, Weapon, Banner
┣ Qiuyuan → Builds, Materials, Weapon
┗ Phase 2 → Lynae, Zani, Phoebe
★ Tapes of Last Words | Soliskin | 3.1 Trophies
★ Exclusives: Tier Maker | State of the Meta
Although Colors Have No Form is an event in Wuthering Waves 2.0. See how to play, how to unlock Although Colors Have No Form, event schedule, and all available rewards here!
List of Contents
Although Colors Have No Form Stages
| Jump to a Stage! | ||
|---|---|---|
| Stage 1: Lottie Lost with a Parasol |
Stage 2: Starry Night Over Ragunna |
Stage 3: Vitreum Dancer's Smile |
| Stage 4: Pilgrim in the Sea of Fog |
Stage 5: Acolyte with the Pearl Earrings |
Stage 6: Faith Leading the People |
| Stage 7: The Birth of Imperator |
||
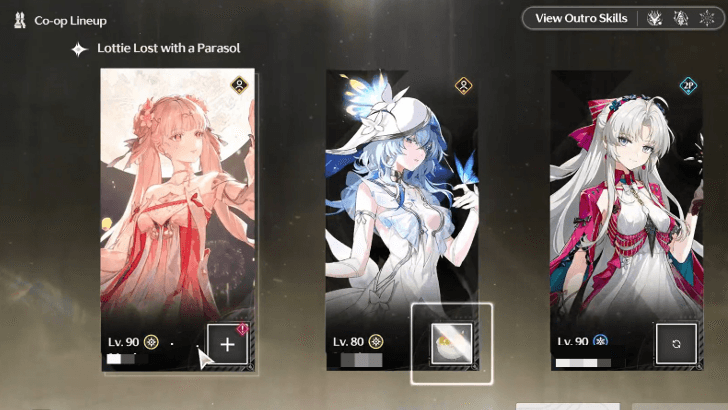
Stage I: Lottie Lost with a Parasol
| Stage Boss | |
|---|---|
| Trial Characters |
Recommended Teams (Trial Characters)
| Carlotta Glacio Team | ||
|---|---|---|
|
|
|
|
| Encore Fusion Team | ||
|
|
|
|
You have to defeat multipe waves of enemies in Lottie Lost with a Parasol. You would also have to use your grapple to move to the next area everytime they're defeated. The event offers trial characters you can use to clear the stage!
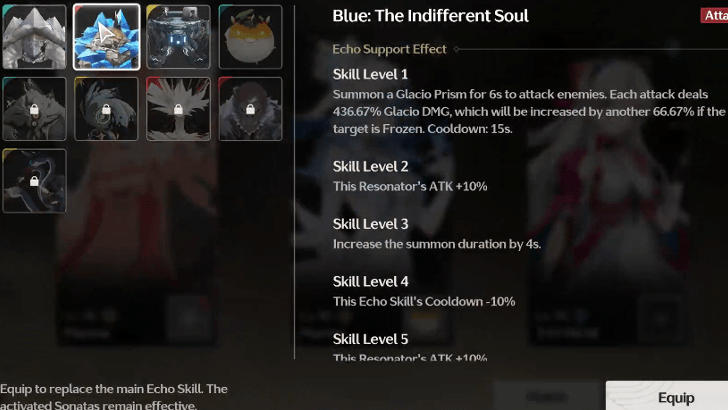
The Blue: The Indifferent Soul is a great DPS echo as it provides ATK buffs while dealing Glacio DMG! Meanwhile, Black: The Journey's End is perfect for a Sub-DPS as it can freeze enemies for your DPS unit - just make sure you are going to use the echo before switching to your DPS. Lastly, the support should have the Orange: The Furious Roar thanks to its heals.
Activate All Mechanisms
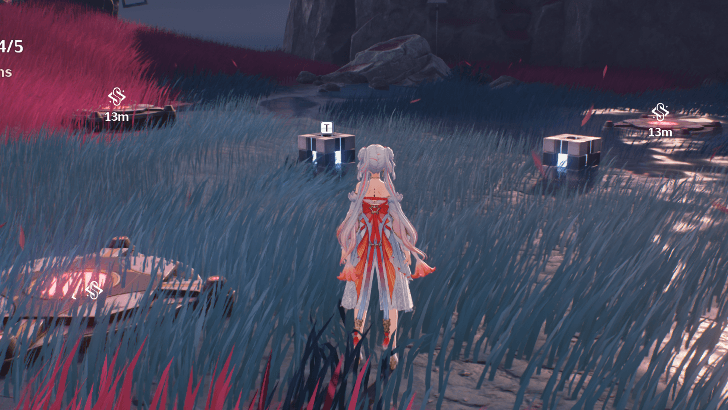
In the middle of Stage I, there will be three mechanisms you'd have to activate. If you are in co-op, the other players could easily step onto the mechanisms to trigger it. If you are playing solo, then you have to use the two boxes to trigger two mechanisms, and step on the last one.
Stage II: Starry Night Over Ragunna
| Stage Boss | |
|---|---|
| Trial Characters |
Recommended Teams (Trial Characters)
| Carlotta Glacio Team | ||
|---|---|---|
|
|
|
|
| Calcharo Electro Team | ||
|
|
|
|
Same with Stage I, you would have to fight multiple waves of enemies here and use the grapple to traverse the areas!
The recommended echo for the DPS is the Green: False Appearance. Despite its HP buff, it sucks in nearby enemies while dealing Aero damage over time which greatly helps your DPS. The echo for the support would be the Yellow: The Warning Sign due to its aggro and the shield it provides. Lastly, the echo for the sub-DPS would be Black: The Journey's End thanks to its freeze!
Beware of the Geography
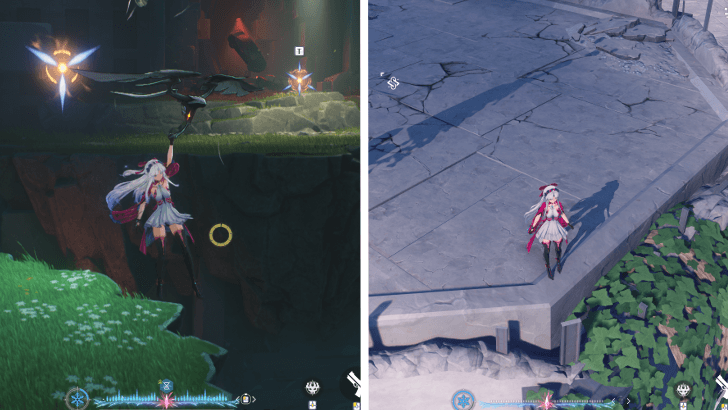
Stage II's area four and six have small islands where you have to fight. Be careful not to fall off its edges!
Stage III: Vitreum Dancer's Smile
| Stage Boss | |
|---|---|
| Trial Characters |
Recommended Teams (Trial Characters)
| Carlotta Glacio Team | ||
|---|---|---|
|
|
|
|
| Lingyang Glacio Team | ||
|
|
|
|
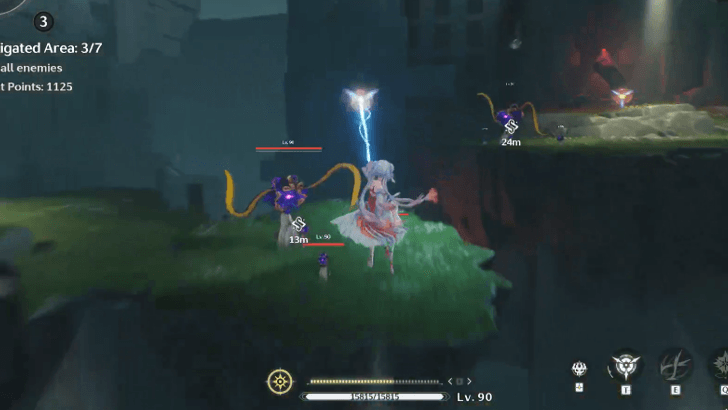
Similar to the first two stages, you would have to fight multiple waves of enemies here and use the grapple to traverse the areas!
The recommended echo for the DPS is the Purple: The Mysterious Flame which will slow down the movement speed of enemies. Use the echo at the start of the DPS's combos.
For Zhezhi, we suggest using Red: The Destructive Force for the +30% ATK Boost it provides. Use this towards the end of your Zhezhi's rotation.
Lastly, use Grey: The Insincere Face for your Verina, and use the Echo Skill before Verina uses her Resonance Liberation. This ensures good uptime for the pillar to deal passive damage.
Stage IV: Pilgrim in the Sea of Fog
| Stage Boss | |
|---|---|
| Trial Characters |
Recommended Teams (Trial Characters)
| Carlotta Glacio Team | ||
|---|---|---|
|
|
|
|
| Encore Fusion Team | ||
|
|
|
|
The recommended echo for the DPS is the Green: False Appearance. Despite its HP buff, it sucks in nearby enemies while dealing Aero damage over time which greatly helps your DPS. Meanwhile, Black: The Journey's End is perfect for a Sub-DPS as it can freeze enemies for your DPS unit - just make sure you are going to use the echo before switching to your DPS.
Lastly, the support should have the Orange: The Furious Roar thanks to its heals.
Activate All Mechanisms
Much like Stage I, Stage IV will also have the same pressure plate mechanism you'd have to activate. If you are in co-op, the other players could easily step onto the mechanisms to trigger it. If you are playing solo, then you have to use the two boxes to trigger two mechanisms, and step on the last one.
Stage V: Acolyte with the Pearl Earrings
| Stage Boss | |
|---|---|
| Trial Characters |
Recommended Teams (Trial Characters)
| Carlotta Glacio Team | ||
|---|---|---|
|
|
|
|
| Calcharo Electro Team | ||
|
|
|
|
Blue: The Indifferent Soul is back for being the best echo for your DPS. It deals Glacio DMG while providing your DPS units ATK boost! Black: The Journey's End is still the best echo for your sub-DPS as it freezes nearby enemies, making it easier for your DPS to kill them!
Lastly, Orange: The Furious Roar is the echo for your support thanks to its healing field. However, if you prefer shields then Yellow: The Warning Sign is also not a bad option!
Beware of the Geography
Stage V is very similar to Stage II in terms of its geography, not to mention the Roseshrooms can shoot you with its lasers as you grapple towards them. As such, you have to be careful once again when you fight on the small islands and not to fall off its edges!
Stage VI: Faith Leading the People
| Stage Boss | |
|---|---|
| Trial Characters |
Recommended Teams (Trial Characters)
| Carlotta Glacio Team | ||
|---|---|---|
|
|
|
|
| Lingyang Glacio Team | ||
|
|
|
|
Stage VI is very similar to Stage III in terms of its Trial Characters and Echoes. Purple: The Mysterious Flame is the best echo for DPS as it will slow down the movement speed of enemies. Remember to use the echo at the start of the DPS's combos.
For Zhezhi, Black: The Journey's End is a great echo due to its freeze. Alternatively, if you prefer stat boosts then Red: The Destructive Force is also great thanks to the +30% ATK Boost it provides!
As for Verina, Orange: The Furious Roar is great to sustain your team. This is more crucial due to the level 90 Lorelei boss. However, if you want to deal more damage, Grey: The Insincere Face is also a great alternative as the pillar deals damage over time!
Stage VII: Birth of Imperator
| Stage Boss | |
|---|---|
| Trial Characters |
Recommended Teams (Trial Characters)
| Carlotta Glacio Team | ||
|---|---|---|
|
|
|
|
This stage is the culmination of all the things that you have learned in the past 6 stages of this event. Beware that this stage is very challenging and will require utmost precision when fighting! Note that if you only want Astrites, you do not have to do this stage!
The most important echo to use is Orange: Furious Roar and you'd want it in your Support's echo slot. This ensures your Resonators are topped up especially on stages that have damage over time effects.
Tip 1: Take Out the Sources of DoT
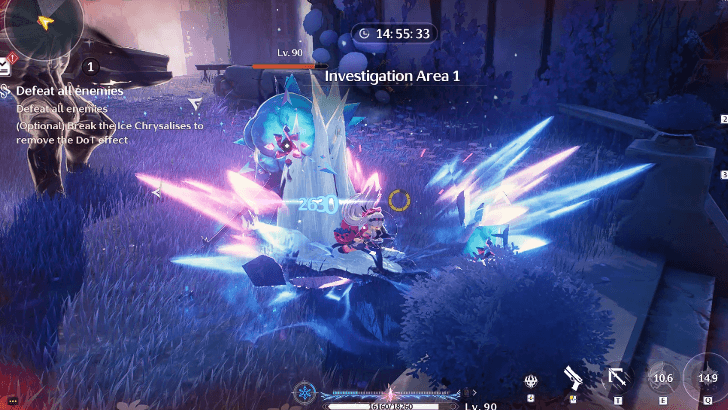
In some stages, there will be Damage Over Time Effects that will periodically hit your characters. Make sure to defeat the enemies causing the DoT first before the main enemies because it can quickly drain your characters' health ending your run.
Tip 2: There is Unlimited Revives But With Consequences
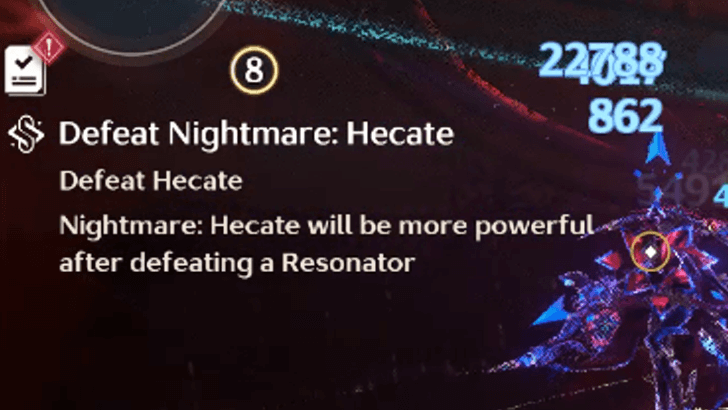
For this stage, there will be unlimited revives for your team and usually have a revive timer of 10 seconds. Make sure to keep atleast one Resonator alive during the revive process of you fail.
Of course, dying in this stage is not without repercussion. When fighting Hecate, all fallen Resonators will make Hecate stronger therefore making the fight harder. Make sure to be precise and evade all attacks thrown at you!
Tip 3: Defeat Enemies Within the Time Limit
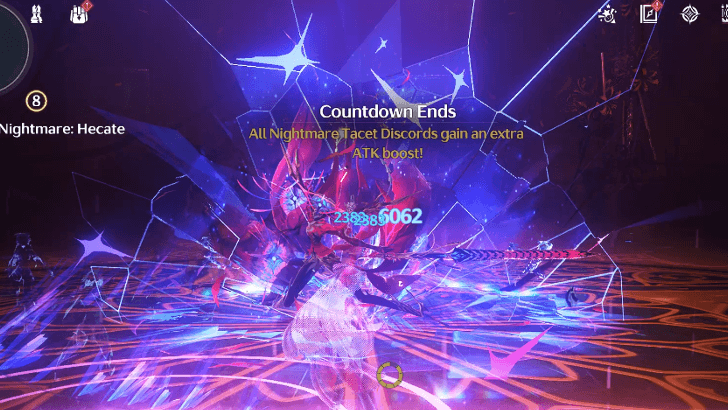
At the start of the stage, there will be a 15-minute timer that will countdown from the start of the stage until the end. Make sure to clear this stage within time limit, else all enemies will have increased ATK after the time runs out. This will make things a lot harder so make sure to avoid that.
How to Play Although Colors Have No Form
Assemble Your Team
Use your best team to complete the stages in the event. You could also try other characters using the event's Trial Resonators to enjoy their gameplay!
Choose The Best Support Echo
Make sure to equip support echos for your characters. There are specific echoes better suited for a DPS or a Support so be sure to understand their effects!
Playable in Co-Op Multiplayer
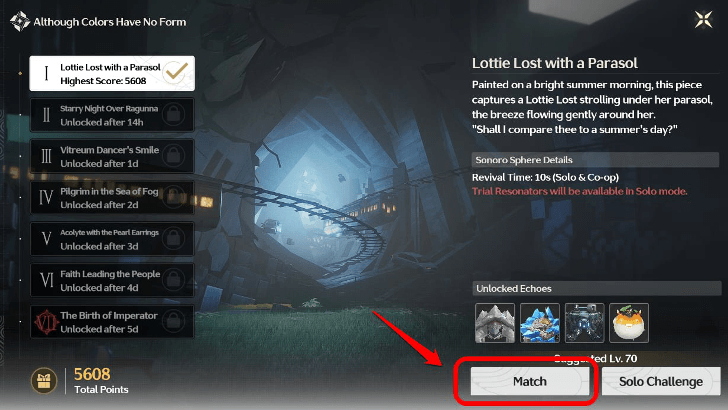
You can join other players by clicking Match or invite your friends during this event! This feature is available on all stages and can be extremely useful in the harder ones!
Defeat the Enemies Within the Time Limit
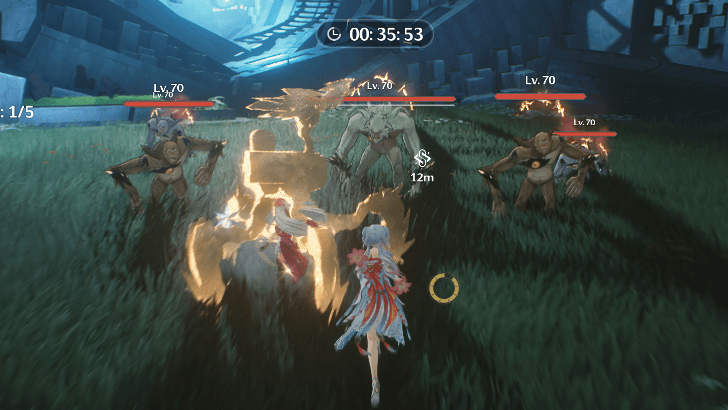
Each area has a time limit of one minute for you to defeat its enemies! You will gain additional points if you defeat them before the timer runs out so be sure to be efficient with your combat.
Kill the Nightmare Tacet Discord First
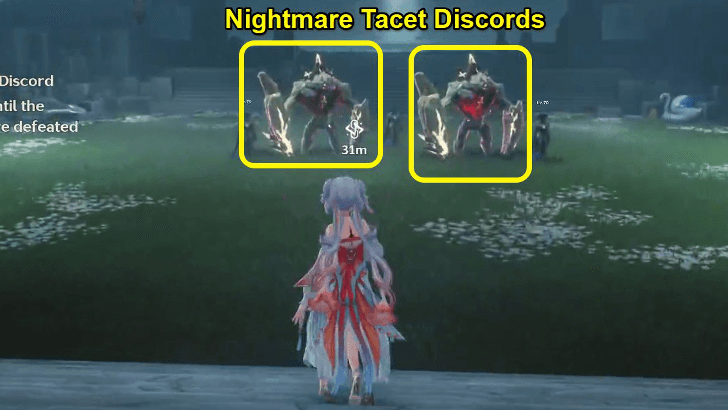
Some areas will spawn Nightmare Tacet Discords, which are enemies that have red auras. Make sure to defeat them first as they will spawn more enemies the longer they are alive.
How to Unlock Although Colors Have No Form
Do Although Colors Have No Form Side Quest

A side quest titled the same as the event will appear on your quest log upon logging into the game from January 9, 2025 - January 30, 2025. Be sure to complete it within this timeframe!
Note that you must unlock the Resonance Nexus in Ragunna City during the Main Quest The Sacred Breeze So Often Breathes and be Level 22 to unlock this!
Talk to Claudia
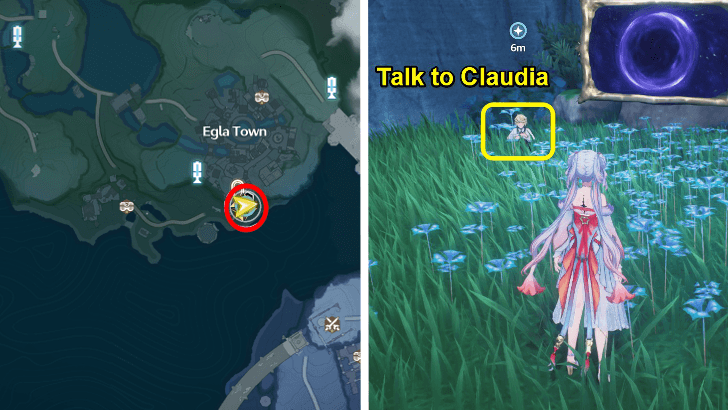
You can teleport straight to the event. Claudia is sitting on the grass next to an odd looking painting. Talk to her to progress!
Enter the Painting

After talking to Claudia you must now enter the painting to uncover its secrets!
Although Colors Have No Form Event Information
| Event Start | January 9, 2025 |
|---|---|
| Event End | January 30, 2025 |
| How to Unlock | Reach Union Level 22, Unlock Co-op Mode, and Unlock Resonance Nexus in Ragunna City during Main Quest The Sacred Breeze So Often Breathes |
Although Colors Have No Form Rewards
Total Rewards
| Although Colors Have No Form Rewards | ||
|---|---|---|
|
|
|
|
|
|
|
|
|
|
|
|
Stage Rewards
| Stage Points | Rewards |
|---|---|
| Obtain 2000 points in Lottie Lost with a Parasol |
|
| Obtain 2000 points in Starry Night Over Ragunna |
|
| Obtain 2000 points in Vitreum Dancer's Smile |
|
| Obtain 4400 points in Pilgrim in the Sea of Fog |
|
| Obtain 4400 points in Acolyte with the Pearl Earrings |
|
| Obtain 4400 points in Faith Leading the People |
|
| Obtain 10,000 points in The Birth of Imperator |
|
Points Rewards
| Total Points | Rewards |
|---|---|
| 4,000 |
|
| 6,000 |
|
| 10,000 |
|
| 14,000 |
|
| 16,000 |
|
| 18,000 |
|
| 22,000 |
|
| 24,000 |
|
| 26,000 |
|
| 28,000 |
|
Wuthering Waves Related Guides
Current Events
| All Events and End Dates | |
|---|---|
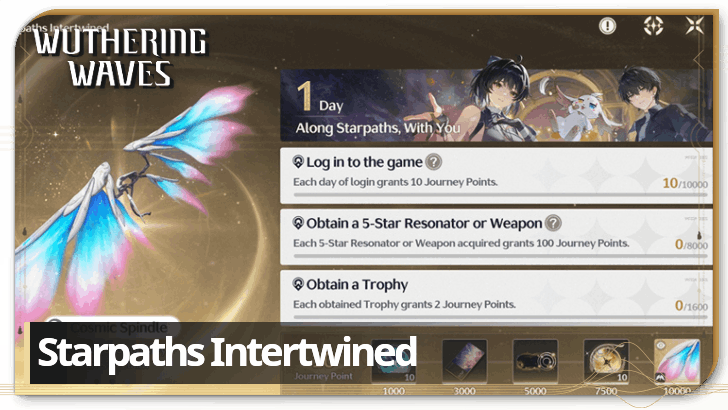 Starpaths Intertwined Starpaths Intertwined
Permanent |
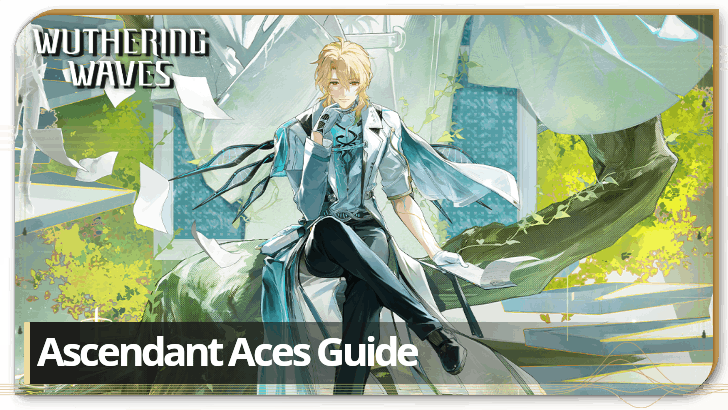 Ascendant Aces Ascendant Aces
March 18, 2026 |
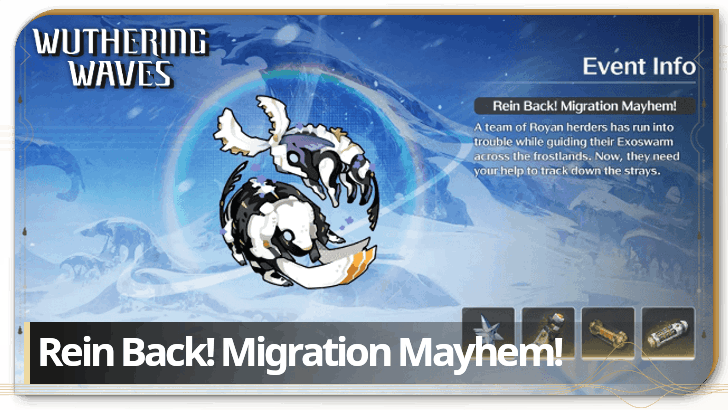 Rein Back! Migration Mayhem! Rein Back! Migration Mayhem!
March 9, 2026 |
 Veins of the Frostlands Veins of the Frostlands
March 12, 2026 |
 Blade Hunter: Wilderness Blade Hunter: Wilderness
March 16, 2026 |
 Lollo Campaign: Implementation Lollo Campaign: Implementation
March 18, 2026 |
 Where Stars Cascade Down Where Stars Cascade Down
March 18, 2026 |
 Unfrozen Traces Unfrozen Traces
March 18, 2026 |
 Full Throttle! Bolt & Blitz! Full Throttle! Bolt & Blitz!
March 18, 2026 |
 Gift of Soft Snow Gift of Soft Snow
March 18, 2026 |
 TERM-X Outreach TERM-X Outreach
March 18, 2026 |
 Moonlit Path Moonlit Path
March 18, 2026 |
 Unsigned Good Wishes Unsigned Good Wishes
March 19, 2026 |
 Footprints on Frostlands Footprints on Frostlands
Permanent |
 Startorch for You Startorch for You
Permanent | |
Upcoming Events
| Upcoming Events | Date and Summary |
|---|---|
 Chord Cleansing Chord Cleansing
|
March 11, 2026 - March 18, 2026 Earn double echo and echo leveling material drops during this event! |
Permanent Events
| Event Guide | Date and Rewards |
|---|---|
| Gifts of Thawing Frost |
Permanently Available
Lustrous Tides, Radiant Tides, Free Sanhua |
| Awakening Journey |
Permanently Available
Lustrous Tides, Astrites, Crystal Solvent, Rank 5 Weapon Supply Chest: Winter Blume |
| Rumbling Hollows |
Permanently Available
Shell Credit, Premium Energy Cores, Premium Resonance Potions, Free Yuanwu |
| Depths of Illusive Realm |
Permanently Available
Astrite, Premium Tuners, Phantom: Impermanence Heron |
| Voyage's Beginning |
Permanently Available
Astrites, Lustrous Tides, Resonators |
| Echo Hunters |
Permanently Available
Astrites |
| Somnium Labyrinth |
Permanently Available
Astrites, Premium Tuners, Premium Energy Cores, Shell Credits, Malleable Elite Class Echo |
| Tales of the Isles |
Permanently Available
Astrites, Forgery Premium Supply, Premium Tuners, Premium Energy Cores, Premium Resonance Potions, Shell Credits |
Comment
Author

Although Colors Have No Form Event Guide
Please participate in our site
improvement survey
03/2026
improvement survey
03/2026
Would you assist in
improving Game8's site?
improving Game8's site?

×
We are listening to our users' valuable opinions and discussing how to act on them.
The information collected through this survey will be used for the purpose of improving our services. In addition, the information will only be disclosed a part of a statistic in a format that will not allow identification of personal information.
Begin Survey
Not Now
×
Please rate each item regarding Game8.co's Advertisements.
Amount of Ads
Very Dissatisfied
Somewhat Dissatisfied
Fine
Somewhat Satisfied
Highly Satisfied
Placement of Ads
Timing of Ad Display
Ad Loading Speed
Safeness of Ads
Content of Ads
×
Please rate each item regarding Game8.co's Quality of Articles.
Amount of information
Very Dissatisfied
Somewhat Dissatisfied
Fine
Somewhat Satisfied
Highly Satisfied
Frequency of updates
Speed of new information
Accuracy of articles
Understandibility of articles
Readability of sentences
×
Please rate each item regarding Game8.co's Usability of the Site.
Ease of finding information
Very Dissatisfied
Somewhat Dissatisfied
Fine
Somewhat Satisfied
Highly Satisfied
Loading Speed
Use of Color
Font Size
Visibility of Images
Easy to Understand Layout
×
Please rate each item regarding Game8.co's Message Boards, Comments.
Ease of Writing
Very Dissatisfied
Somewhat Dissatisfied
Fine
Somewhat Satisfied
Highly Satisfied
Readability
Ease in Finding Information
Comment Quality
Comment Quantity
Admin Response
×
Please rate each item regarding Game8.co's Site's new design.
Please rate our site's new design
Very Dissatisfied
Somewhat Dissatisfied
Fine
Somewhat Satisfied
Highly Satisfied
Do you think that the website's design change makes the site easier to use?
Has the new design made it easier for you to find information on the site?
Has the new design improved the overall visual appeal of the site?
How would you rate your overall satisfaction with the new design of the site?
×
How likely are you to recommend Game8 to someone you know?
Very Unlikely
0
1
2
3
4
5
6
7
8
9
10
Very Likely
If you have other opinions regarding potential improvement to the website, please share them with us. We would appreciate your honest opinion.
Note: This is a free response section, so you can proceed without entering anything.
Note: Please be sure not to enter any kind of personal information into your response.
Note: Please be sure not to enter any kind of personal information into your response.
×
Thank You
×
Thank you for participating in our survey! Your answers will help us to improve the quality of our website and services.
We hope you continue to make use of Game8.
We hope you continue to make use of Game8.
Close
Premium Articles

Rankings

Gaming News


![Monster Hunter Stories 3 Review [First Impressions] | Simply Rejuvenating](https://img.game8.co/4438641/2a31b7702bd70e78ec8efd24661dacda.jpeg/thumb)
Popular Games

Genshin Impact Walkthrough & Guides Wiki
Honkai: Star Rail Walkthrough & Guides Wiki
Umamusume: Pretty Derby Walkthrough & Guides Wiki
Pokemon Pokopia Walkthrough & Guides Wiki
Resident Evil Requiem (RE9) Walkthrough & Guides Wiki
Monster Hunter Wilds Walkthrough & Guides Wiki
Wuthering Waves Walkthrough & Guides Wiki
Arknights: Endfield Walkthrough & Guides Wiki
Pokemon FireRed and LeafGreen (FRLG) Walkthrough & Guides Wiki
Pokemon TCG Pocket (PTCGP) Strategies & Guides Wiki


Recommended Games
Diablo 4: Vessel of Hatred Walkthrough & Guides Wiki
Cyberpunk 2077: Ultimate Edition Walkthrough & Guides Wiki
Fire Emblem Heroes (FEH) Walkthrough & Guides Wiki
Yu-Gi-Oh! Master Duel Walkthrough & Guides Wiki
Super Smash Bros. Ultimate Walkthrough & Guides Wiki
Pokemon Brilliant Diamond and Shining Pearl (BDSP) Walkthrough & Guides Wiki
Elden Ring Shadow of the Erdtree Walkthrough & Guides Wiki
Monster Hunter World Walkthrough & Guides Wiki
The Legend of Zelda: Tears of the Kingdom Walkthrough & Guides Wiki
Persona 3 Reload Walkthrough & Guides Wiki


All rights reserved
Copyright© 2024-2025 Kuro Games. All Rights Reserved.
The copyrights of videos of games used in our content and other intellectual property rights belong to the provider of the game.
The contents we provide on this site were created personally by members of the Game8 editorial department.
We refuse the right to reuse or repost content taken without our permission such as data or images to other sites.