This survey will take about 1 minute.
Your answers will help us to improve our website.
Avowed
Best Wizard Build (2.0 Update)
★ 02/17 Update: New Game Plus added!
┗ Character Creation: New Playable Races
☆ Builds: Wizard | Fighter | Ranger
★ Best Weapons | Best Armor | Best Spells
☆ Unique Weapons | Unique Armor
★ All Treasure Map Locations

This is a guide to the best Wizard build in Avowed as of the 2.0 Update. Read on to learn the best stats, spells and abilities, weapons, and armor to get in order to create a powerful Wizard build.
List of Contents
Best Wizard Build
Stat Priority for Wizard Builds
| Early Game |
Might and Resolve > Constitution > Intellect and Perception > Dexterity |
|---|---|
| Mid- to Endgame |
Intellect and Perception > Might > Constitution and Resolve > Dexterity |
For Wizard builds, the most important stats (attributes) will change depending on where you are during your playthrough. If you're still in Dawnshore and Emerald Stair, you'll want to prioritize Might and Resolve (since the best uniques in these regions buff Wand damage).
However, once you gain access to better armor and accessories in Shatterscarp and Galawain's Tusks, you can respec into a high Intellect and Perception build since this allows you to spam the more powerful spells and have an easier time proccing elemental accumulation buffs.
Constitution, while ranked high in the priority list above, is optional. You can comfortably complete the game with 0 base constitution if you want, but a few points in it will make Path of the Damned difficulty much more bearable.
Finally, Dexterity is more of a dump stat if you can't think of anything to raise since it does improve Action Speed (loadout swapping and chugging potions).
Is it Okay to Have 0 Constitution as a Wizard?
Yes, it's perfectly fine to have 0 Constitution as a Wizard. Enemy damage will usually depend on the quality of armor you're currently wearing. As long as you're facing enemies with the same quality armor as their tier, you should be good to go (e.g., facing a Tier IV enemy with Superb armor will keep you from getting 2-shot).
However, be warned, the bane of your existence as a glass cannon wizard will be the ranged enemies in the game. If you find yourself getting insta-killed during fights, you'll probably want to invest a few points in Constitution as well as 1 level in Arcane Veil (so you can cast Rank 2 Arcane Veil Rank 2 Arcane Veil
Incoming arrows or similar projectiles are reflected back at enemies. using a Grimoire).
Best Abilities and Spells for Wizards
| Spell and Ability Progression for Wizards | |
|---|---|
| Levels 1~11 | Levels 11~Beyond |
Rush Grimoire Mastery Until Level 11
Early game as a wizard is rough (especially on higher difficulties). You won't really be casting a lot of spells due to your poor Essence economy, so the strategy will be to rush Grimoire Mastery while also improving Wand damage.
The goal will be to have a maxed out Grimoire Mastery by the time you hit Level 11 all while getting abilities that help you auto-attack for high damage.
| Level | Ability Progression |
|---|---|
| Level 2 | |
| Level 3 |
Allows you to reduce the Essence penalty for Light and Medium armor. Alternative Options: |
| Level 4 |
Useful at higher difficulties since 1 point allows you to cast it at Rank 2 using a Grimoire (let's you reflect projectiles, return-to-sender style).
Or Pick a Survivability Option: Note: If you picked one of these during Level 3, you can only pick one of the other 2 since the next tier of each ability unlocks at Level 5. |
| Level 5 | First power spike in the early game, giving you boosted Wand damage and access to Level 5 spells like Blizzard and Fireball via Grimoires. |
| Level 6 | Only 1 level is needed since it allows you to get through blastable walls and proc shatter on Frozen enemies. |
| Level 7 | Allows you to now cast some of the more powerful Grimoire spells like Missile Salvo and Spirit Lance. |
| Level 8 | Any of the Level 1 Abilities: If you plan to get one of the spells, make sure you're casting them using an equipped Grimoire (so they're upcast to Rank 2). Note: Only get Corrosive Siphon if you're using Beothel’s Grimoire since it only becomes useful at Rank 2. |
| Level 9 | Ideally, you'll want to get this by the time you reach Emerald Stair since you'll get Grimoires there that can cast Freezing Pillar and Pull of Eora. |
| Level 10 | Harvest Essence is important since it makes it somewhat manageable to spam spells in fights without having to chug potions. |
| Level 11 | This is mostly for the -20% Essence cost when casting spells. |
Focus on Building Up Passives After Level 11
After Level 11, the order in which you get abilities or spells won't matter since you'll have access to all spells anyway via Grimoires. Here are some ability suggestions to keep in mind as you play:
 Scavenger - the earlier you get this, the better since it will help you double your Upgrade Material gain in later regions. You only need 1 point.
- Harvest Essence - with your access to powerful spells, you'll soon start to feel the strain on your Essence. Max this out to get more out of the Essence pickups from slain enemies.
- Constant Recovery or Toughness - if you find yourself dying often, get either of these from the Fighter ability tree.
- Wand Mastery - Make sure to max this out at Level 15 or before you reach Shatterscarp since you get a pretty good Unique Wand called the Whisper of Exiles in the desert.
Best Weapons for Wizards
| Main Hand | Off-Hand | |
|---|---|---|
| Loadout 1 | Wand | Grimoire |
| Loadout 2 | Axe or Sword | Grimoire |
Click on a link above to see recommendations!
If you want to maximize spellcasting then go with the combo of Wand + Grimoire and One-Handed Weapon + Grimoire. This gives you access to 8 different spells, wand attack spam, and a comfortable melee option.
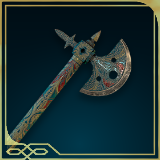
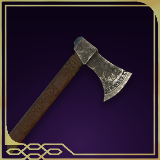
For melee weapons, the best to get will be Axes from early to mid-game due to Drawn in Winter and Woodman's Labor being available. Later on, switch to a Sword, since you'll get much stronger unique contenders for them in Shatterscarp and Galawain's Tusks.
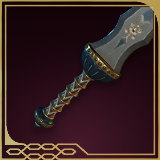
Unfortunately, Quarterstaves for Wizards aren't as good (especially at higher difficulties) since you'd have to spec into a decent melee build in order to get the most out of their damage.
Obtain the Whisper of Exiles to Get the Best Wand
For Wands, you'll want to stick to a regular Wand or to Minoletta's Conduit. Just make sure you upgrade either to Superb rarity before reaching Shatterscarp. Once at Shatterscarp, obtain the best wand - Whisper of Exiles - from a chest in the Great Sand Sea.
| 1 | Dawnshore (Early Game) |
Start off with a Common Wand then upgrade it to Fine Quality so you can explore the eastern side of Dawnshore. |
|---|---|---|
| 2 | Emerald Stair (Early Game) |
In Emerald Stair, go and buy Minoletta’s Conduit since its powerful Wand attack buff synergizes with the Scholar's Advantage light armor. However, if you want to be efficient, stick to your Fine Wand and upgrade it to Exceptional before you approach the vendor with Minoletta's Conduit so you can get this unique at Exceptional quality. |
| 3 | Shatterscarp (Mid-Game) |
 Before getting the Whisper of Exiles make sure you have at least one weapon upgraded to Superb. Once you do, get this wand from a locked chest in the Great Sand Sea. |
| 4 | Galawain's Tusks (Endgame) |
At Galawain's Tusks, you'll want to upgrade your Whisper of Exiles to at least Legendary +0. This'll help you complete all side content in the region. |
| 5 | The Garden (Point of No Return) |
Before or while inside the Garden, you can upgrade your Whisper of Exiles to Legendary +3. |
Note: If you want to stick to Minoletta's Conduit, just make sure to collect sufficient Adra (Awakened, Corrupted, and Ban) since Unique weapons require them to jump to a different rarity.
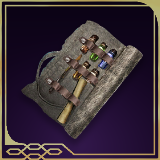
Get the Aurochs-Skin Grimoire During Face Your Fears
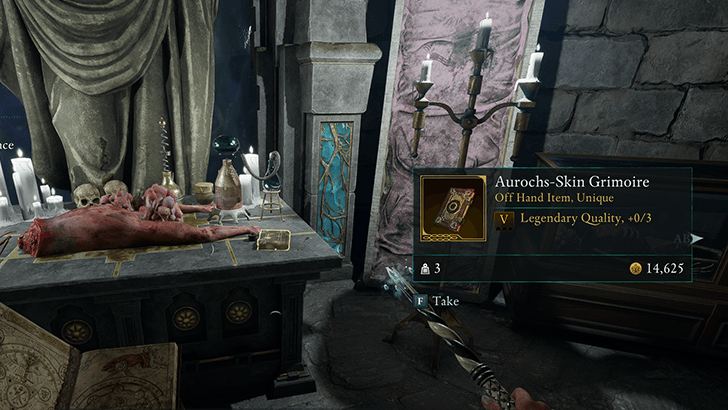
For Grimoires, you'll want the ones that grant Freezing Pillar, Blast of Frost, or Pull of Eora since all of them give you a crowd control option. At higher difficulties, this becomes essential since companions won't be able to pull much aggro away from you.
Your best-in-slot will be the Aurochs-Skin Grimoire you get during the main quest, Face Your Fears, in Shatterscarp.
| 1 | Northreach (Tutorial) You get a free copy of the Grimoire of Elements in the tutorial. |
|---|---|
| 2 | Dawnshore (Early Game) Replace your Grimoire of Elements with either of the following: ① Grimoire of Greater Elements ② Anextli's Grimorie Note: Beothel's Grimoire is a viable option if you have at least 1 level in both Corrosive Siphon and Arcane Veil. However, unlike the other 2 grimoires, this one isn't free and needs to be bought. |
| 2 | Emerald Stair (Early Game) Replace your current Grimoire with either of the following: ① Grimoire of Rime ② Grimoire of Sparks ③ Grimoire of the Spellblade ④ Od Caura's Grimoire Make sure to upgrade your Grimoire (or Wand) to Exceptional before leaving Emerald Stair. |
| 3 | Shatterscarp (Mid-Game) You can stick to your current Grimoire. As long as you have a Superb Wand or Grimoire by the time you do the main quest, Face Your Fears, you should be able to get the Aurochs-Skin Grimoire in Superb quality. |
| 4 | Galawain's Tusks (Endgame) Make sure to farm upgrade materials to upgrade your Aurochs-Skin Grimoire to at least Legendary +0. Then, go ahead and do the side quest, Keep History Alive, to get Eilara's Grimoire in the Living Archives. |
| 5 | The Garden (Point of No Return) As long as both Aurochs-Skin Grimoire and Eilara's Grimoire are already Legendary +0, you won't need to upgrade them to +3 (since the bonuses are very small at +3). |
How to Get the Aurochs-Skin Grimoire
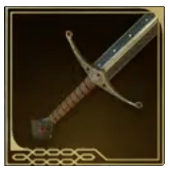
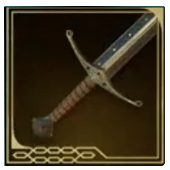
Use Axes or Swords for Your Melee Weapons

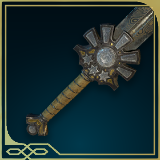
For one-handed weapons, you can choose between Axes or Swords. Unfortunately, Maces and Quarterstaves are off the table since they cost too much stamina to swing, while spears are easily replaced by the Spirit Lance spell. Some good weapons to get as you progress are:
| 1 | Dawnshore (Early Game) |
 Drawn in Winter Drawn in Winter
|
 Last Light of Day Last Light of Day
|
|---|---|---|---|
| 2 | Emerald Stair (Early Game) |
 Woodman’s Labor Woodman’s Labor
|
|
| 3 | Shatterscarp (Mid-Game) |
 The Emperor’s Reach The Emperor’s Reach
|
|
| 4 | Galawain's Tusks (Endgame) |
 Meteor Blade Meteor Blade
|
 Ondra’s Offense Ondra’s Offense
|
Best Armor for Wizards
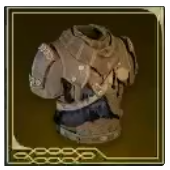
As of the 2.0 Update, the best early game armor for a Wizard will be Scholar's Advatange since it plays to the strength of Minoletta's Conduit, giving you a comfortable option when you still don't have enough Essence to make full use of spell spam.
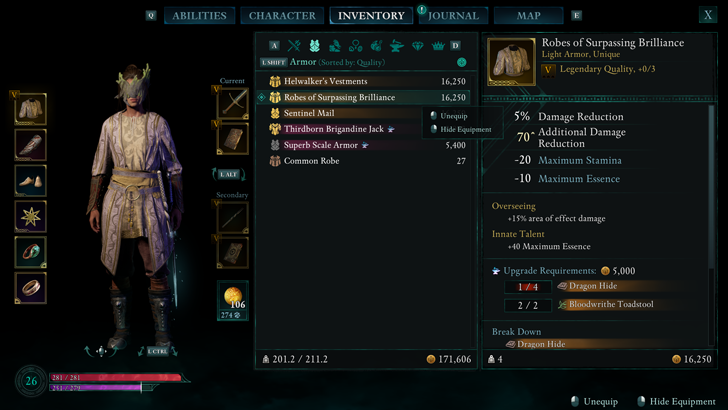
Later on, you can replace it with the Robes of Surpassing Brilliance since this allows you to wipe out enemies with ease using some of the more powerful AoE Wizard spells in the game.
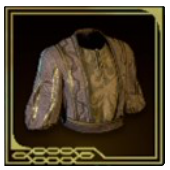
| 1 | Northreach (Tutorial) |
 Robe Robe
|
|
|---|---|---|---|
| 2 | Dawnshore (Early Game) |
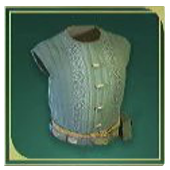
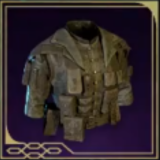
 Scholar's Advantage Scholar's Advantage Scholar's Advantage +10% Attack Damage with Wands, +10% Maximum Wand Range, and +10% Ability Casting Speed (Best Option) |
Common or Fine Robe |
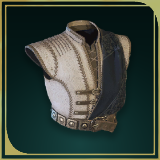
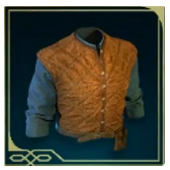
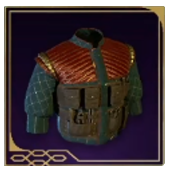
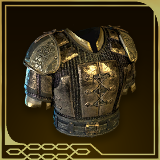
 Arcanist’s Gambeson Arcanist’s Gambeson
|
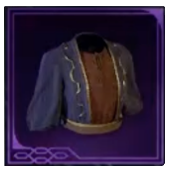
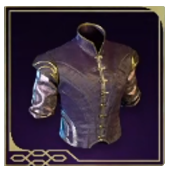
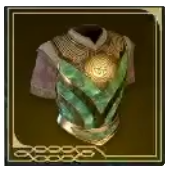
 Many-Hued Doublet Many-Hued Doublet
|
||
| 2 | Emerald Stair (Early Game) |
 Robe Robe
|
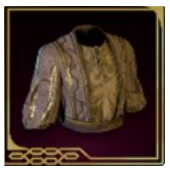
 Warmage’s Robe Warmage’s Robe
|
 Animancer’s Swallowtail Animancer’s Swallowtail
|
 Hjilde’s Handy Hide Hjilde’s Handy Hide
|
||
| 3 | Shatterscarp (Mid-Game) |
 Robes of Surpassing Brilliance Robes of Surpassing Brilliance
|
|
| 4 | Galawain's Tusks (Endgame) |
 Robes of Surpassing Brilliance Robes of Surpassing Brilliance
|
 Sentinel Mail Sentinel Mail |
| 5 | The Garden (Point of No Return) |
 Spiritmender Spiritmender
|
 Wildwalker Armor Wildwalker Armor
|
|
Robes of Surpassing Brilliance
(Best) |
|||
For those who don't want to overthink their choices, an upgraded Robe or the Scholar's Advantage unique will suffice for all regions. However, do note that most Wizard Armors look bad. Make sure you know how to Transmog if you plan to play as a Wizard.
Best Clothing for Wizards
| Best Clothing for Wizards | |
|---|---|
| Boots | Gloves |
You'll want an even spread of stats as you progress through the game, and the best way to do that is to equip gear that grant attribute bonuses. Ideally, you'll want to address the stats you didn't prioritize earlier in the stat priority section of this guide.
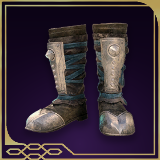
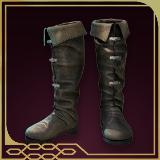
Use Boots with Attribute Bonuses
For early game, you can go with the Blackwing Boots. As you reach Emerald Stair you can use either the Shoes of the Glimmering Merchant if you plan to spam spells or the Eothasian Boots if you plan to use Minoletta's Conduit.
| 1 | Dawnshore (Early Game) |
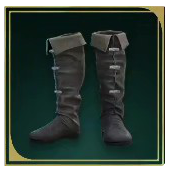 Arcanist's Boots Arcanist's Boots
|
 Blackwing Boots Blackwing Boots
|
|---|---|---|---|
| 2 | Emerald Stair (Early Game) |
 Vailian Boots Vailian Boots
|
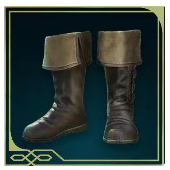 Eothasian Boots Eothasian Boots
|
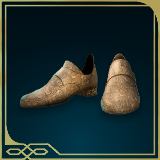 Shoes of the Glimmering Merchant Shoes of the Glimmering Merchant
|
 Warmage's Boots Warmage's Boots
|
||
| 3 | Shatterscarp (Mid-Game) |
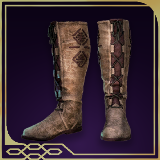 Wavebinder Boots Wavebinder Boots
|
 Stormdancer Boots Stormdancer Boots
|
| 4 | Galawain's Tusks (Endgame) |
 Imp Catchers Imp Catchers
|
|
 Shadowdancer's Boots Shadowdancer's Boots
|
|||
| 5 | The Garden (Point of No Return) |
 Wildwalker Boots Wildwalker Boots
|
|
Use Gloves that Boost Attributes, Raise Essence, or Buff Damage
For gloves, you'll want the ones that can either boost your attributes, raise your max essence, or buff damage. Here are some you can get from early to late-game:
| 1 | Dawnshore (Early Game) |
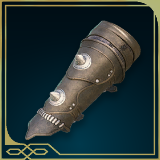
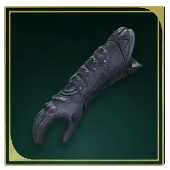 Blackwing Gloves Blackwing Gloves
|
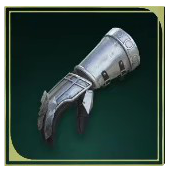 Steel Garrote Gauntlets Steel Garrote Gauntlets
|
|---|---|---|---|
| 2 | Emerald Stair (Early Game) |
 Wolf Gloves Wolf Gloves
|
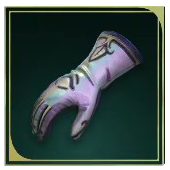 The Hands Occult The Hands Occult
|
| 3 | Shatterscarp (Mid-Game) |
 Trickster's Gloves Trickster's Gloves
|
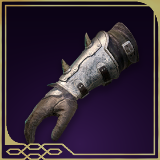 Stormdancer Gloves Stormdancer Gloves
|
| 4 | Galawain's Tusks (Endgame) |
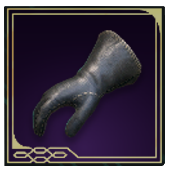
 Ninagauth's Gruesome Grasp Ninagauth's Gruesome Grasp
|
|
| 5 | The Garden (Point of No Return) |
 Wildwalker Gloves Wildwalker Gloves
|
|
During early game, a solid contender will be the Steel Garrote Gauntlets, mostly for its bonus Stamina. However, if you plan to lean into shock damage using Minoletta's Conduit and similar spells during mid-game, The Hands Occult will be a good option (offset by accessories to buff missing Crit Rate and Damage).
As you approach late game, your best-in-slot options will be the Trickster's Gloves (for auto-attack spam) or Ninagauth's Gruesome Grasp (for AoE spell spam).
Best Accessories for Wizards
| Best Accessories for Wizards | |
|---|---|
| Rings | Amulets and Trinkets |
For amulets, trinkets, and rings, you'll want ones that boost your attributes in one way or another. Rings are a bit more flexible since they have a bunch of buffs to Wizard-related stats, but amulets and trinkets will need to have attribute bonuses since they get the bigger bonuses in late game.
Use Rings that Boost Attributes or Wizard-Related Stats
With the buffs and changes to ring bonuses, some of the early game options can become mainstays of your build (at least until you reach Shatterscarp and Galawain's Tusks). Here are some of the best you can get for your Wizard:
| 1 | Dawnshore (Early Game) |
 Arcanist's Ring Arcanist's Ring
|
 Ring of Pain Amplification Ring of Pain Amplification
|
|---|---|---|---|
|
Other Options: |
|||
| 2 | Emerald Stair (Early Game) |
 The Packmule's Burden The Packmule's Burden
|
|
| 3 | Shatterscarp (Mid-Game) |
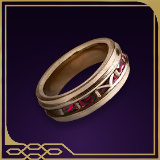
 Sigil of the Arcane Sigil of the Arcane
|
 The Ranga's Clarity The Ranga's Clarity
|
|
Other Options: |
|||
| 4 | Galawain's Tusks (Endgame) |
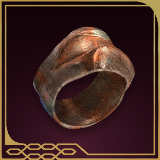 Disciple's Ring Disciple's Ring
|
|
|
Other Options: |
|||
The Arcanist's Ring is a good, early game stat adjuster, allowing you to spec at least 2 more points into Resolve, Constitution, or Might as needed since it frees up 2 Intellect.
Once you reach Shatterscarp, the Sigil of the Arcane and The Ranga's Clarity are a great pair that'll carry you to endgame. However, if you're still rocking Minoletta's Conduit, you'll probably want something like the Stormdancer Ring for it in lieu of the Sigil of the Arcane.
Stick to Attribute-Boosting Amulets or Trinkets Only
For amulets or trinkets, we'll be a bit more strict, focusing instead on attribute-only boosts since this helps us re-distribute our attribute points from leveling up, freely.
| 1 | Dawnshore (Early Game) |
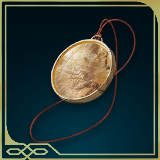
 Steel Garrote Medallion Steel Garrote Medallion
|
|
|---|---|---|---|
|
Other Options: |
|||
| 2 | Emerald Stair (Early Game) |
 Torc of the Warrior King Torc of the Warrior King
|
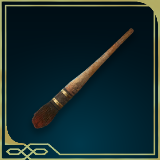 Painter's Brush Painter's Brush
|
 Tranton Family Talisman Tranton Family Talisman
|
|||
| 3 | Shatterscarp (Mid-Game) |
 Thirdborn Tira Nui Badge Thirdborn Tira Nui Badge
|
 Poisoner's Kit Poisoner's Kit
|
| 4 | Galawain's Tusks (Endgame) |
 Pearlescent Icosahedral Helstone Pearlescent Icosahedral Helstone
|
 Scout's Reach Scout's Reach
|
 Cartographer's Companion Cartographer's Companion
|
|||
For the early game, you'll want to grab the Steel Garrote Medallion to solve your Stamina issues (without it, you'll have to invest a few more points in Resolve to avoid getting winded at higher difficulties).
The rest of the early game options will for min-maxxing at Path of the Damned difficulty wherein you swap to them as needed during and after combat (White Key Cameo when reviving or Enchanted Suolenet when looting).
Later on, it'll be a matter of choosing between increasing Intellect, Might, or Perception. For Intellect, the Pearlescent Icosahedral Helstone will be your go-to. For Might, you'll have the Torc of the Warrior King and, later on, the better Thirdborn Tira Nui Badge. Perception will have the most options since the rest will buff it or Crit Chance in some way.
Avowed Related Guides

All Builds
| Best Builds | |
|---|---|
| Wizard | Fighter |
| Paladin | Ranger |
| Summoner | Gunslinger |
| Unarmed | Dual Wield |
| Wands | Gun Mage |
| Poison | - |
| Background Builds | |
| Arcane Scholar | Court Augur |
| Noble Scion | Vanguard Scout |
| War Hero | - |
Comment
12  BIGDADDYDANNY 19 days
BIGDADDYDANNY 19 daysfurther, there’s a relatively cheap amulet (it’s a scarf really but fills the amulet spot) that can be bought from the merchant that sells grimoires in Thirdborn called “Halma’s Fancy” that gives you +3 perception AND +20 maximum essence which is essentially a direct upgrade for the Tranton Family Talisman and imo better than the Tira Nui Badge since it’s a +3 attribute buff with something extra. This all assumes you’re using trinkets to mostly buff your attributes.
Author
Best Wizard Build (2.0 Update)
Please participate in our site
improvement survey
03/2026
improvement survey
03/2026
Would you assist in
improving Game8's site?
improving Game8's site?

×
We are listening to our users' valuable opinions and discussing how to act on them.
The information collected through this survey will be used for the purpose of improving our services. In addition, the information will only be disclosed a part of a statistic in a format that will not allow identification of personal information.
Begin Survey
Not Now
×
Please rate each item regarding Game8.co's Advertisements.
Amount of Ads
Very Dissatisfied
Somewhat Dissatisfied
Fine
Somewhat Satisfied
Highly Satisfied
Placement of Ads
Timing of Ad Display
Ad Loading Speed
Safeness of Ads
Content of Ads
×
Please rate each item regarding Game8.co's Quality of Articles.
Amount of information
Very Dissatisfied
Somewhat Dissatisfied
Fine
Somewhat Satisfied
Highly Satisfied
Frequency of updates
Speed of new information
Accuracy of articles
Understandibility of articles
Readability of sentences
×
Please rate each item regarding Game8.co's Usability of the Site.
Ease of finding information
Very Dissatisfied
Somewhat Dissatisfied
Fine
Somewhat Satisfied
Highly Satisfied
Loading Speed
Use of Color
Font Size
Visibility of Images
Easy to Understand Layout
×
Please rate each item regarding Game8.co's Message Boards, Comments.
Ease of Writing
Very Dissatisfied
Somewhat Dissatisfied
Fine
Somewhat Satisfied
Highly Satisfied
Readability
Ease in Finding Information
Comment Quality
Comment Quantity
Admin Response
×
Please rate each item regarding Game8.co's Site's new design.
Please rate our site's new design
Very Dissatisfied
Somewhat Dissatisfied
Fine
Somewhat Satisfied
Highly Satisfied
Do you think that the website's design change makes the site easier to use?
Has the new design made it easier for you to find information on the site?
Has the new design improved the overall visual appeal of the site?
How would you rate your overall satisfaction with the new design of the site?
×
How likely are you to recommend Game8 to someone you know?
Very Unlikely
0
1
2
3
4
5
6
7
8
9
10
Very Likely
If you have other opinions regarding potential improvement to the website, please share them with us. We would appreciate your honest opinion.
Note: This is a free response section, so you can proceed without entering anything.
Note: Please be sure not to enter any kind of personal information into your response.
Note: Please be sure not to enter any kind of personal information into your response.
×
Thank You
×
Thank you for participating in our survey! Your answers will help us to improve the quality of our website and services.
We hope you continue to make use of Game8.
We hope you continue to make use of Game8.
Close
Rankings
- We could not find the message board you were looking for.
Gaming News


![Monster Hunter Stories 3 Review [First Impressions] | Simply Rejuvenating](https://img.game8.co/4438641/2a31b7702bd70e78ec8efd24661dacda.jpeg/thumb)
Popular Games
Genshin Impact Walkthrough & Guides Wiki
Honkai: Star Rail Walkthrough & Guides Wiki
Umamusume: Pretty Derby Walkthrough & Guides Wiki
Pokemon Pokopia Walkthrough & Guides Wiki
Resident Evil Requiem (RE9) Walkthrough & Guides Wiki
Monster Hunter Wilds Walkthrough & Guides Wiki
Wuthering Waves Walkthrough & Guides Wiki
Arknights: Endfield Walkthrough & Guides Wiki
Pokemon FireRed and LeafGreen (FRLG) Walkthrough & Guides Wiki
Pokemon TCG Pocket (PTCGP) Strategies & Guides Wiki


Recommended Games
Diablo 4: Vessel of Hatred Walkthrough & Guides Wiki
Cyberpunk 2077: Ultimate Edition Walkthrough & Guides Wiki
Fire Emblem Heroes (FEH) Walkthrough & Guides Wiki
Yu-Gi-Oh! Master Duel Walkthrough & Guides Wiki
Super Smash Bros. Ultimate Walkthrough & Guides Wiki
Pokemon Brilliant Diamond and Shining Pearl (BDSP) Walkthrough & Guides Wiki
Elden Ring Shadow of the Erdtree Walkthrough & Guides Wiki
Monster Hunter World Walkthrough & Guides Wiki
The Legend of Zelda: Tears of the Kingdom Walkthrough & Guides Wiki
Persona 3 Reload Walkthrough & Guides Wiki


All rights reserved
© 2025 Obsidian Entertainment, Inc. Obsidian Entertainment, the Obsidian Entertainment logo, Avowed, and Avowed logos are trademarks or registered trademarks of Obsidian Entertainment, Inc. All rights reserved.
The copyrights of videos of games used in our content and other intellectual property rights belong to the provider of the game.
The contents we provide on this site were created personally by members of the Game8 editorial department.
We refuse the right to reuse or repost content taken without our permission such as data or images to other sites.
this is still just my first playthrough but there’s been a few inconsistencies in this guide from my playthrough that kept bugging me until I finally decided to address the biggest one that was bugging me (pushing for grimoire mastery 4 despite no change in essence cost, like I posted a few days ago). This guides been SUPER helpful, I’m not trying to bash it or anything but for the sake of min-maxing, it’s been just a little confusing. Hope this helps anyone else new to the game too!