What is Second Wind?
★ 02/17 Update: New Game Plus added!
┗ Character Creation: New Playable Races
☆ Builds: Wizard | Fighter | Ranger
★ Best Weapons | Best Armor | Best Spells
☆ Unique Weapons | Unique Armor
★ All Treasure Map Locations
Second Wind is a passive ability in Avowed that automatically revives the player when they die. Learn more about Second Wind and how to improve its effects.
What is Second Wind?
Free Revive Ability Tied to Resolve
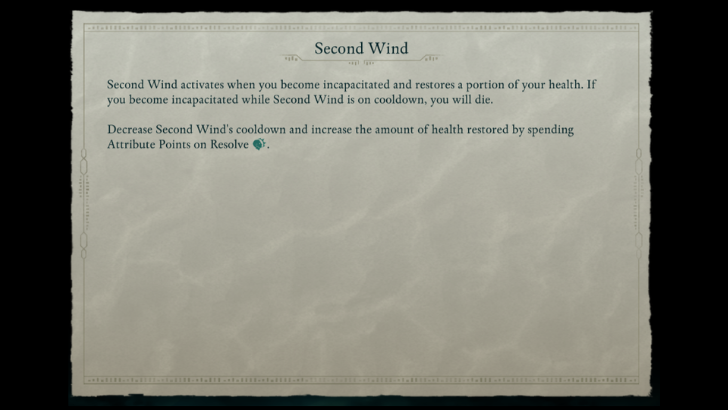
Second Wind is a passive ability you get at the start of the game that automatically activates when your health drops to zero. Once it activates, you are revived and the ability goes on cooldown.
This ability is tied to the Resolve attribute. Each point put into resolve will increase the efficieny of Second Wind, lowering its cooldown and increasing the amount of HP it restores upon revive.
Cooldown for Second Wind is Indicated by the Icon Above Your Health Bar
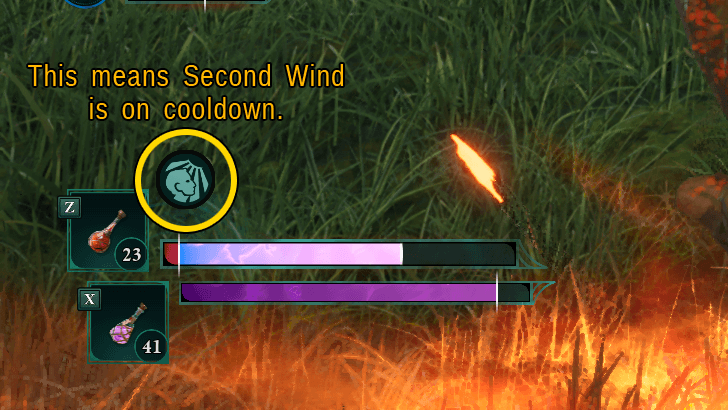
Once Second Wind triggers, an icon will appear above your health bar - this indicates that the ability is now on cooldown. When it fades, it means your Second Wind ability is now off cooldown and ready to use.
How to Improve Second Wind
Put Points Into the Resolve Attribute
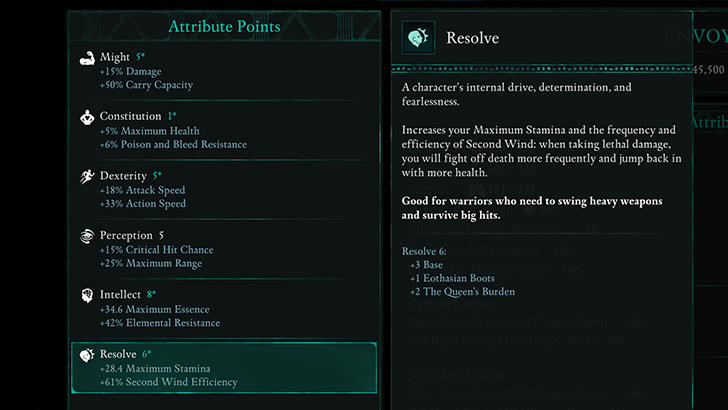
Allotting Attribute Points into Resolve decreases Second Wind's cooldown and increases the health it replenishes when activated. With high Resolve, the Second Wind ability becomes a more reliable safety net for new players.
List of All Attributes and Stats
Equip Accessories That Grant Resolve or Modify Second Wind
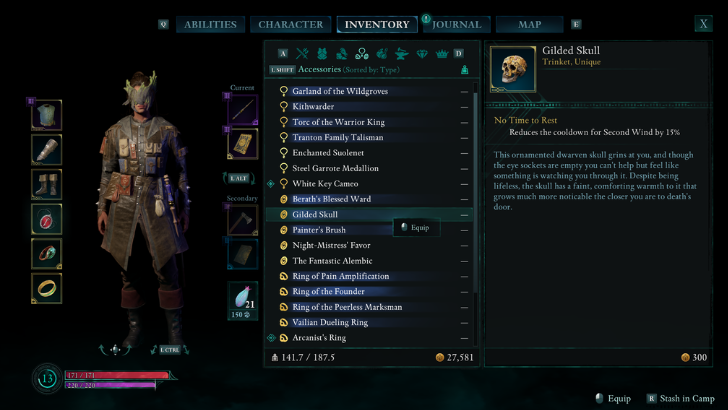
Aside from pumping points into Resolve, you can also opt to use Accessories that directly give bonuses to the Resolve attribute (like the Steel Garrote's Medallion) or that influence Second Wind directly (like how the Gilded Skull shortens the CD of Second Wind).
Assemble God Totems to Get Buffs
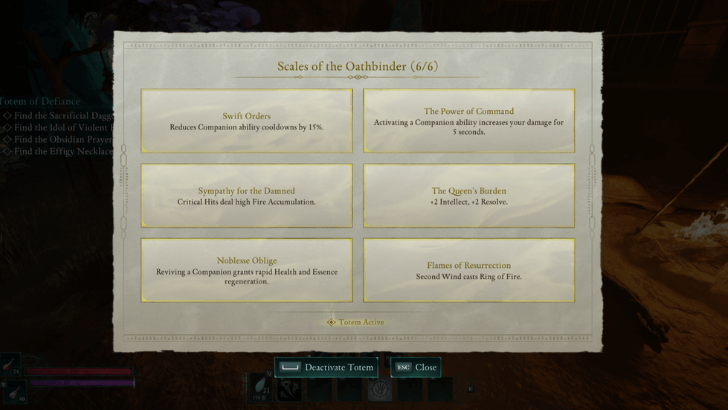
Some God Totems in the game like the Scales of the Oathbinder will provide players with buffs that modify your Second Wind ability. Try assembling the God Totem of each region to get ability and attribute buffs (like bonus Resolve) to Second Wind more effective.
Avowed Related Guides

All Tips and Tricks Guides
Comment
Author
What is Second Wind?
improvement survey
03/2026
improving Game8's site?

Your answers will help us to improve our website.
Note: Please be sure not to enter any kind of personal information into your response.

We hope you continue to make use of Game8.
Rankings
- We could not find the message board you were looking for.
Gaming News
Popular Games

Genshin Impact Walkthrough & Guides Wiki

Honkai: Star Rail Walkthrough & Guides Wiki

Umamusume: Pretty Derby Walkthrough & Guides Wiki

Pokemon Pokopia Walkthrough & Guides Wiki

Resident Evil Requiem (RE9) Walkthrough & Guides Wiki

Monster Hunter Wilds Walkthrough & Guides Wiki

Wuthering Waves Walkthrough & Guides Wiki

Arknights: Endfield Walkthrough & Guides Wiki

Pokemon FireRed and LeafGreen (FRLG) Walkthrough & Guides Wiki

Pokemon TCG Pocket (PTCGP) Strategies & Guides Wiki
Recommended Games

Fire Emblem Heroes (FEH) Walkthrough & Guides Wiki

Diablo 4: Vessel of Hatred Walkthrough & Guides Wiki

Yu-Gi-Oh! Master Duel Walkthrough & Guides Wiki

Super Smash Bros. Ultimate Walkthrough & Guides Wiki

Pokemon Brilliant Diamond and Shining Pearl (BDSP) Walkthrough & Guides Wiki

Elden Ring Shadow of the Erdtree Walkthrough & Guides Wiki

Monster Hunter World Walkthrough & Guides Wiki

The Legend of Zelda: Tears of the Kingdom Walkthrough & Guides Wiki

Persona 3 Reload Walkthrough & Guides Wiki

Cyberpunk 2077: Ultimate Edition Walkthrough & Guides Wiki
All rights reserved
© 2025 Obsidian Entertainment, Inc. Obsidian Entertainment, the Obsidian Entertainment logo, Avowed, and Avowed logos are trademarks or registered trademarks of Obsidian Entertainment, Inc. All rights reserved.
The copyrights of videos of games used in our content and other intellectual property rights belong to the provider of the game.
The contents we provide on this site were created personally by members of the Game8 editorial department.
We refuse the right to reuse or repost content taken without our permission such as data or images to other sites.




![Slay the Spire 2 Review [Early Access] | Still the Deckbuilder to Beat](https://img.game8.co/4433115/44e19e1fb0b4755466b9e516ec7ffb1e.png/thumb)

![Resident Evil Village Review [Switch 2] | Almost Flawless Port](https://img.game8.co/4432790/e1859f64830960ce4248d898f8cd38d9.jpeg/thumb)


