This survey will take about 1 minute.
Your answers will help us to improve our website.
Avowed
Best Summoner Build
★ 02/17 Update: New Game Plus added!
┗ Character Creation: New Playable Races
☆ Builds: Wizard | Fighter | Ranger
★ Best Weapons | Best Armor | Best Spells
☆ Unique Weapons | Unique Armor
★ All Treasure Map Locations
This is a guide to the best Summoner build in Avowed. Read on to learn the best stats, spells and abilities, weapons, and armor to get in order to create a powerful Summoner build.
List of Contents
Best Summoner Build
Stat Priority for Summoner Builds
|
Might = Perception > Resolve > Dexterity = Intellect = Constitution |
Summoner builds do not rely on a singular stat to be effective damage-wise, and only really benefit from the Intellect stat for one of your Summons later on, allowing you to virtually slot yourself into any build and still function as a Summoner.
However, since Summons have a variety of "summon conditions" (e.g., the Beetle requiring you to parry) with the best one falling under the Ranger tree, it may be better to simply pilot a Hybrid Ranger build in order to keep your build identity cohesive.
For stat priority, prioritize Might and Perception since you'll be maining a Bow for damage. After that, go with Resolve for more Stamina. The last three, Dexterity, Intellect, and Constitution can be interchanged depending on your playstyle.
List of All Attributes and Stats
Best Abilities for Summoners
With Bear Ally being in the Ranger Tree, you can focus on leveling abilities that help you with gaining access to more personal DMG within that tree, and invest some into the Warrior tree for Critical Hits.
When reaching Level 15, be sure to grab the Bear Summon ability and level it whenever possible to maximize its effectiveness, as it will provdie more mileage for your Summoner build than most other Summons you will acquire.
Focus on Damage Passives Until You Get Bear Ally at Level 15
| 2 |
 Tanglefoot Tanglefoot
|
11 |
 Steady Aim Steady Aim
|
|
|---|---|---|---|---|
| 3 |
Steady Aim
|
12 |
 Marksmanship Marksmanship
|
|
| 4 |
 Parry Parry
|
13 |
Marksmanship
|
|
| 5 |
Steady Aim
|
14 |
 Finesse Finesse
|
|
| 6 |
Marksmanship
|
15 |
 Bear Ally Bear Ally
|
|
| 7 |
Finesse
|
16 |
Finesse
|
|
| 8 |
 Devastating Criticals Devastating Criticals
|
17 |
Devastating Criticals
|
|
| 9 |
Devastating Criticals
|
18 |
Bear Ally
|
|
| 10 |
Steady Aim
|
19 |
 Critical Strike Critical Strike
|
|
| 20 |
Bear Ally
|
|||
Get 1 Level of Parry for the Beetle's Bulwark Summon
One of the Summoning Equipment, Beetle's Bulwark, requires you to have access to Parry in order to summon the Beetle from it.
You only need one level in Parry which you can get early, allowing you to consistently proc the Shield's effect with successful parries.
Best Summoning Equipment
When it comes to running a Summoner build, you need to get the proper summoning equipment that allows you to have access to these summons in the first place.
These equipment pieces occupy different slots on your person, enabling you to have multiple Summoning items equipped at the same time, maximizing your options during combat.
| Summoning Equipment | How to Get and Progression Explanation |
|
|---|---|---|
| 1 |
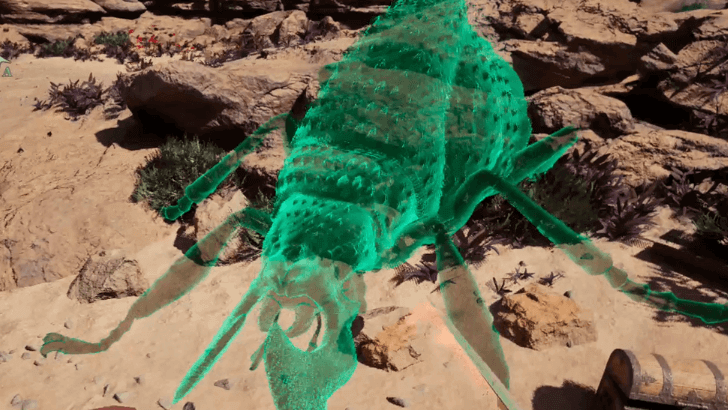
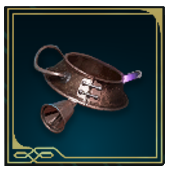
 Beetle’s Bulwark Beetle’s Bulwark Beetle’s Bulwark Unlikely Ally: While below 75% Maximum Health, a succesful Parry summons a Beetle to fight with you
Lesser Burn-Proofed: +20% resistance to Fire Accumulation |
How to Get: Can be purchased from Sanza in Northern Paradis, Dawnshore. Beetle's Bulwark is the most accessible summoning equipment on paper. However, you will likely be gated by its price during the early game, requiring you to come back and purchase it later. This will be your main Off-Hand shield and you should level this all the way to End Game. |
| 2 |
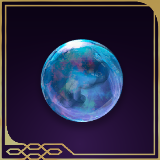
 Chanter's Panpipes Chanter's Panpipes
|
How to Get: Acquired from the Memory of the Deep side quest in Emerald Stair. Acquiring Chanter's Panpipes requires you to deliver the Mysterious Meteorite to Josep during the side quest to get it, or else you will be locked out from this summoning equipment. |
| 3 |
 Revenant Bell Collar Revenant Bell Collar
|
How to Get: Can be obtained during the Animancy Method by offering your corpse to Elia in Emerald Stair. Revenant Bell Collar can be easily acquired just by progressing through the game, as you will eventually reach this part of the story. Make sure to offer your corpse to Elia to receive this item. |
| 4 |
 Crystalline Egg Crystalline Egg
|
How to Get: Inside a container in a spider cave, found north from the the Sulfur Mines Basecamp in Shatterscarp. You can get this from open world exploration in Shatterscarp, and should find time to get this as it occupies a trinket slot instead of an amulet slot. You can keep this until End Game if you value the extra summons. |
| 5 |
 Necropants Necropants
|
How to Get: Acquired from a locked chest that needs 3 lockpicks on a temple near Tago's Tower in Shatterscarp. The Necropants occupies an Armor slot, giving you another summon unit without sacrificing your current Amulet or Trinket slot. These can be leveled with you all the way until End Game, but can be traded for more traditional armor options if you are struggling to survive. |
| 6 |
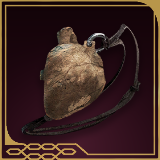 Stoneheart Stoneheart
|
How to Get: Acquired from Galawain's Tusks after completing the A Cure For Rage side quest. In terms of Summons, Stoneheart is used in order to soak up damage from enemies and draw aggro away from you. This is more valuable than most Amulet summons, and you can already settle for Late Game with this if you value its tankiness more than summon damage. |
| 7 |
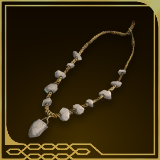 Charm of Bones Charm of Bones
|
How to Get: Acquired from a container within The Garden. This amulet will be the last summon item you acquire, and will overpower all other amulet summons if you have no issues with survivability. Summons three skeletons that can be used after your initial Bear Ally summon expires. |
Not Many Summoning Equipment Choices Before Shatterscarp
Prior to Shatterscarp, you will have very few sources for summons, with only Beetle's Bulwark, Chandler's Panpipes, and Revenant Bell Collar as your only options.
Keep this in mind as you progress through the game, as you will have to rely on these few summons as well as your current build in order to make it to this point.
Best Weapons for Summoners
| Main Hand | Off-Hand | |
|---|---|---|
| Loadout 1 | Bow | - |
| Loadout 2 | Axe or Sword or Spear | Shield (Beetle's Bulwark) |
Click on a link above to see recommendations!
For a Summoner, you will be running a standard Ranged and Melee loadout similar to a Ranger, but you trade off the Ranger's standard Pistol off-hand for a Shield, as that will later on allow you to use Beetle's Bulwark.
Aim For Unique DPS Bows Like The Long Touch and Ancient Alacrity
Since the Bow is your main personal damage source, it is important that you go through substantial upgrade milestones for your Bow so that you are well-equipped for most of the game's combat at each phase.
| 1 | Dawnshore (Early Game) |
Start off with any Common Bow then reach Paradis to acquire The Long Touch. This will be your main weapon for most of the game and you can explore the eastern side of Dawnshore using this. |
|---|---|---|
| 2 | Emerald Stair (Early Game) |
Upgrade The Long Touch to Exceptional quality and continue using this weapon until you make it to Shatterscarp, or keep it on Fine quality and rely on your melee weapons for the meantime. |
| 3 | Shatterscarp (Mid-Game) |
You have the option of trading The Long Touch for Storm-Sworn once you reach Shatterscarp. While this is generally an upgrade, you do need to re-invest into the weapon and upgrade it to Superb. |
| 4 | Galawain's Tusks (Endgame) |
At Galawain's Tusks, you'll want to upgrade Storm-Sworn to at least Legendary +0. This'll help you complete all side content in the region. |
| 5 | The Garden (Point of No Return) |
Before or while inside the Garden, you can acquire Ancient Alacrity as the last Bow in your arsenal and level it all the way to Legendary +3. |
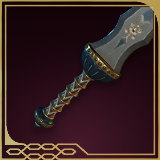
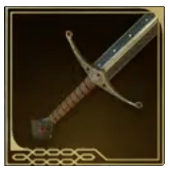
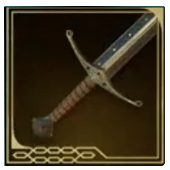
Use Axes, Swords, or Spears For Melee Weapons
Similar to a typical Ranger, you can choose between Axes, Swords, or even Spears. Maces are off the table since they cost too much stamina to swing, and two-handed weapons will slow you down too much. Some good ones to get are:
| 1 | Dawnshore (Early Game) |
 Last Light of Day Last Light of Day Last Light of Day Golden Sun's Ascent: Killing an enemy restores 3% of your Maximum Health
Dawn's Remembrance: Hits deal +10% bonus Fire Damage |
 Drawn in Winter Drawn in Winter Drawn in Winter Rising Chill: Power Attacks deal moderate Frost Accumulation to nearby enemies
Freezing Lash: Hits deal +10% bonus Frost Damage |
|---|---|---|---|
| 2 | Emerald Stair (Early Game) |
 Giant’s Slumber Giant’s Slumber Giant’s Slumber Toppling Strike: Power Attacks deal moderate Stun
Vessel Slaying: +20% Damage against Vessels |
 Woodman’s Labor Woodman’s Labor Woodman’s Labor Hack and Hew: A Full Combo Attack creates an area of effect that damages nearby enemies
Woodland Woe: +15% Attack Damage against Beasts and Primordials |
| 3 | Shatterscarp (Mid-Game) |
 The Emperor’s Reach The Emperor’s Reach The Emperor’s Reach Rightful Annexation: Killing an enemy gives you +10% Attack Damage and +10% Move Speed for 6 seconds
Bend the Knee: Special Attacks Stun nearby Kith, cannot be chained |
|
| 4 | Galawain's Tusks (Endgame) |
 Meteor Blade Meteor Blade Meteor Blade Lamenting Flurry: A Full Combo Attack gives the hit enemy +20% Damage for 15 seconds.
Freezing Lash: Hits deal +10% bonus Frost Damage |
 Ondra’s Offense Ondra’s Offense Ondra’s Offense Lamenting Flurry: A Full Combo gives the hit enemy -20% Damage for 15 seconds
Freezing Lash: Hits deal +10% bonus Frost Damage |
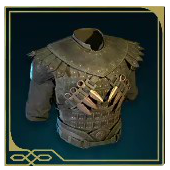
Best Armor for Summoners
Apart from the Necropants, none of the armor in the game affects summons or directly boosts them, which means you are better off just running armor that buff Dexterity, Perception, damage, Critical Hits, or all of the above.
| 1 | Northreach (Tutorial) |
 Robe Robe
|
|
|---|---|---|---|
| 2 | Dawnshore (Early Game) |
 Blackwing Armor Blackwing Armor
|
|
| 2 | Emerald Stair (Early Game) |
 Wolf Armor Wolf Armor
|
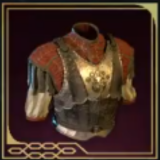 Vailian Breastplate Vailian Breastplate
|
| 3 | Shatterscarp (Mid to End Game) |
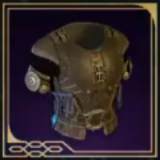
 Necropants Necropants
|
|
Use standard Ranger armor pieces until you reach Shatterscarp and acquire the Necropants, which grant you another Summon to aid you in combat.
At this point, you can continue to level the Necropants to scale with you until the End of the Game.
Best Clothing for Summoners
| Best Clothing for Summoners | |
|---|---|
| Boots | Gloves |
Clothing pieces that directly benefit Summoners are not available, so equip clothing that gives you personal attribute bonuses. Look for and level up Dexterity and Perception to grant yourself damage bonuses so it allows you to invest into Might with your stat points.
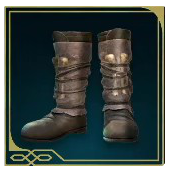
Use Boots with Dexterity, Dodge Distance, or Attribute Bonuses
For early game, you can focus on getting Dodge Distance boots, and continue to find items related to dodge distance, dexterity, or perception until End Game.
| 1 | Dawnshore (Early Game) |
 Boots of the Bricklayer Boots of the Bricklayer Boots of the Bricklayer Item Bonus: +10% Dodge Distance Lesser Porter: +15 Carry Capacity |
 Blackwing Boots Blackwing Boots Blackwing Boots Item Bonus: +10 Dodge Distance Quick: +1 Dexterity |
|---|---|---|---|
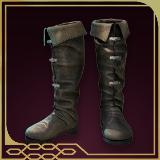
| 2 | Emerald Stair (Early - Mid Game) |
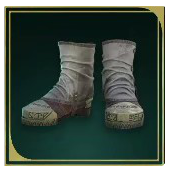
 Wolf Boots Wolf Boots Wolf Boots Item Bonus: +10% Dodge Distance Fit: +1 Constitution |
|
 Vailian Boots Vailian Boots Vailian Boots Item Bonus: +5 Carry Capacity Duelist's Dance: +1 Dexterity and +20% Dodge Distance |
 Tranton Family Greaves Tranton Family Greaves Tranton Family Greaves Item Bonus: +20 Maximum Health Outlaw's Escape: +20% Dodge Distance and +10% Move Speed |
||
| 3 | Galawain's Tusks (Endgame) |
 Shadowdancer's Boots Shadowdancer's Boots Shadowdancer's Boots Item Bonus: Increases your Health restoration from all sources by 5% Ephemeral Evasion: +40% Dodge Distance |
 Imp Catchers Imp Catchers Imp Catchers Item Bonus: +10% Dodge Distance And Their Champion Fell, Sundered: +25 Maximum Stamina and +15% Move Speed |
| 4 | The Garden (Point of No Return) |
 Wildwalker Boots Wildwalker Boots Wildwalker Boots Item Bonus: +10% Dodge Distance Stalker's Grace: +3 Dexterity |
|
Use Gloves that Boost Attributes, Raise Essence, or Buff Damage
For gloves, you'll want the ones that can either boost your attributes or buff damage. Here are some you can get from early to late-game:
| 1 | Dawnshore (Early Game) |
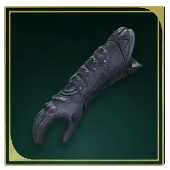 Blackwing Gloves Blackwing Gloves Blackwing Gloves Item Bonus: +1% Critical Hit Chance Lesser Annihilation: +10% Critical Damage |
 Gloves of the Strangler Gloves of the Strangler Gloves of the Strangler Item Bonus: +3% Critical Hit Chance Lesser Ambushing: +15% Stealth Attack Damage |
|---|---|---|---|
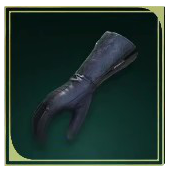
| 2 | Emerald Stair (Early Game) |
 Tranton Family Gauntlets Tranton Family Gauntlets Tranton Family Gauntlets Item Bonus: +5% Power Attack Damage Shocking Lash: Power Attacks deal +5% bonus Shock Damage |
|
 Vailian Gauntlets Vailian Gauntlets Vailian Gauntlets Item Bonus: +10% Parry Efficiency Duelist's Edge: +15% Attack Damage with swords and daggers |
 Wolf Gloves Wolf Gloves Wolf Gloves Item Bonus: +1% Critical Hit Chance Quick: +1 Dexterity |
||
| 3 | Shatterscarp (Mid-Game) |
 Bracers of Bloodletting Bracers of Bloodletting Bracers of Bloodletting Item Bonus: +10% Parkour Speed Bloodletting: Hits deal +5% bonus Bleed Damage |
 Trickster's Gloves Trickster's Gloves Trickster's Gloves Item Bonus: +1% Critical Hit Chance Fatal Misdirection: +25% Critical Damage |
| 4 | The Garden (Point of No Return) |
 Wildwalker Gloves Wildwalker Gloves Wildwalker Gloves Item Bonus: +1% Critical Hit Chance Ensnaring Strike: Critical Hits have a 15% chance to Root the Enemy in place |
|
Avowed Related Guides

All Builds
| Best Builds | |
|---|---|
| Wizard | Fighter |
| Paladin | Ranger |
| Summoner | Gunslinger |
| Unarmed | Dual Wield |
| Wands | Gun Mage |
| Poison | - |
| Background Builds | |
| Arcane Scholar | Court Augur |
| Noble Scion | Vanguard Scout |
| War Hero | - |
Comment
Author
Best Summoner Build
Please participate in our site
improvement survey
03/2026
improvement survey
03/2026
Would you assist in
improving Game8's site?
improving Game8's site?

×
We are listening to our users' valuable opinions and discussing how to act on them.
The information collected through this survey will be used for the purpose of improving our services. In addition, the information will only be disclosed a part of a statistic in a format that will not allow identification of personal information.
Begin Survey
Not Now
×
Please rate each item regarding Game8.co's Advertisements.
Amount of Ads
Very Dissatisfied
Somewhat Dissatisfied
Fine
Somewhat Satisfied
Highly Satisfied
Placement of Ads
Timing of Ad Display
Ad Loading Speed
Safeness of Ads
Content of Ads
×
Please rate each item regarding Game8.co's Quality of Articles.
Amount of information
Very Dissatisfied
Somewhat Dissatisfied
Fine
Somewhat Satisfied
Highly Satisfied
Frequency of updates
Speed of new information
Accuracy of articles
Understandibility of articles
Readability of sentences
×
Please rate each item regarding Game8.co's Usability of the Site.
Ease of finding information
Very Dissatisfied
Somewhat Dissatisfied
Fine
Somewhat Satisfied
Highly Satisfied
Loading Speed
Use of Color
Font Size
Visibility of Images
Easy to Understand Layout
×
Please rate each item regarding Game8.co's Message Boards, Comments.
Ease of Writing
Very Dissatisfied
Somewhat Dissatisfied
Fine
Somewhat Satisfied
Highly Satisfied
Readability
Ease in Finding Information
Comment Quality
Comment Quantity
Admin Response
×
Please rate each item regarding Game8.co's Site's new design.
Please rate our site's new design
Very Dissatisfied
Somewhat Dissatisfied
Fine
Somewhat Satisfied
Highly Satisfied
Do you think that the website's design change makes the site easier to use?
Has the new design made it easier for you to find information on the site?
Has the new design improved the overall visual appeal of the site?
How would you rate your overall satisfaction with the new design of the site?
×
How likely are you to recommend Game8 to someone you know?
Very Unlikely
0
1
2
3
4
5
6
7
8
9
10
Very Likely
If you have other opinions regarding potential improvement to the website, please share them with us. We would appreciate your honest opinion.
Note: This is a free response section, so you can proceed without entering anything.
Note: Please be sure not to enter any kind of personal information into your response.
Note: Please be sure not to enter any kind of personal information into your response.
×
Thank You
×
Thank you for participating in our survey! Your answers will help us to improve the quality of our website and services.
We hope you continue to make use of Game8.
We hope you continue to make use of Game8.
Close
Rankings
- We could not find the message board you were looking for.
Gaming News


![Monster Hunter Stories 3 Review [First Impressions] | Simply Rejuvenating](https://img.game8.co/4438641/2a31b7702bd70e78ec8efd24661dacda.jpeg/thumb)
Popular Games

Genshin Impact Walkthrough & Guides Wiki
Honkai: Star Rail Walkthrough & Guides Wiki
Umamusume: Pretty Derby Walkthrough & Guides Wiki
Pokemon Pokopia Walkthrough & Guides Wiki
Resident Evil Requiem (RE9) Walkthrough & Guides Wiki
Monster Hunter Wilds Walkthrough & Guides Wiki
Wuthering Waves Walkthrough & Guides Wiki
Arknights: Endfield Walkthrough & Guides Wiki
Pokemon FireRed and LeafGreen (FRLG) Walkthrough & Guides Wiki
Pokemon TCG Pocket (PTCGP) Strategies & Guides Wiki


Recommended Games
Diablo 4: Vessel of Hatred Walkthrough & Guides Wiki
Cyberpunk 2077: Ultimate Edition Walkthrough & Guides Wiki
Fire Emblem Heroes (FEH) Walkthrough & Guides Wiki
Yu-Gi-Oh! Master Duel Walkthrough & Guides Wiki
Super Smash Bros. Ultimate Walkthrough & Guides Wiki
Pokemon Brilliant Diamond and Shining Pearl (BDSP) Walkthrough & Guides Wiki
Elden Ring Shadow of the Erdtree Walkthrough & Guides Wiki
Monster Hunter World Walkthrough & Guides Wiki
The Legend of Zelda: Tears of the Kingdom Walkthrough & Guides Wiki
Persona 3 Reload Walkthrough & Guides Wiki


All rights reserved
© 2025 Obsidian Entertainment, Inc. Obsidian Entertainment, the Obsidian Entertainment logo, Avowed, and Avowed logos are trademarks or registered trademarks of Obsidian Entertainment, Inc. All rights reserved.
The copyrights of videos of games used in our content and other intellectual property rights belong to the provider of the game.
The contents we provide on this site were created personally by members of the Game8 editorial department.
We refuse the right to reuse or repost content taken without our permission such as data or images to other sites.