This survey will take about 1 minute.
Your answers will help us to improve our website.
Avowed
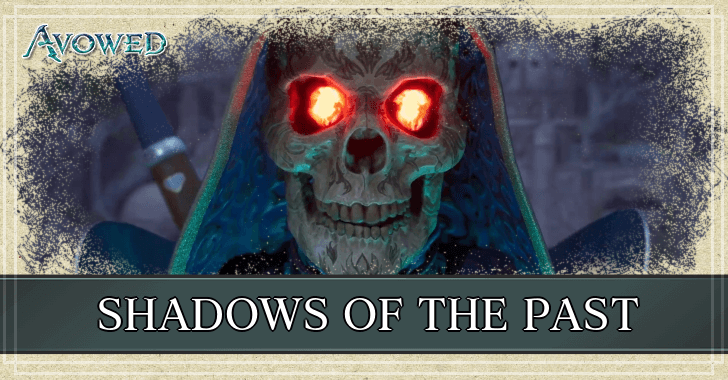
Shadows of the Past Walkthrough and Bug Solution
★ 02/17 Update: New Game Plus added!
┗ Character Creation: New Playable Races
☆ Builds: Wizard | Fighter | Ranger
★ Best Weapons | Best Armor | Best Spells
☆ Unique Weapons | Unique Armor
★ All Treasure Map Locations
Shadows of the Past is a main quest in Avowed. Read on for a complete walkthrough of Shadows of the Past, the choices you can make, as well as the rewards for completing the quest.
| Previous Quest | Next Quest |
|---|---|
| Face Your Fears | Our Dreams Divide Us Still |
List of Contents
Shadows of the Past Bug Solution
Reload to Save Prior Entering Naku Kubel
There is a bug with the Shadows of the Past quest where the quest objective doesn't progress past the Complete the trials of the Tebaru Sanakis with Yatzli objective.
The walkthrough team has confirmed that to fix the bug, you have to reload into a save prior entering Naku Kubel. Reloading into saves later in the quest/dungeon did not result in the quest objective getting fixed.
Shadows of the Past Walkthrough
| List of Objectives | ||
|---|---|---|
| 1 | Journey to Naku Kubel | |
| 2 | Investigate Naku Kubel | |
| 3 | Complete the Trial of Strength | |
| 4 | Complete the Trial of Wisdom | |
| 5 | Complete the Third and Final Trial | |
| 6 | Escape Naku Kubel | |
| 7 | Speak with Ryngrim and Lodwyn | |
| Option 1 | Option 2 | |
| Destroy the Ruins | Sever the Adra | |
| 8 | Speak to Temertri in Thirdborn | |
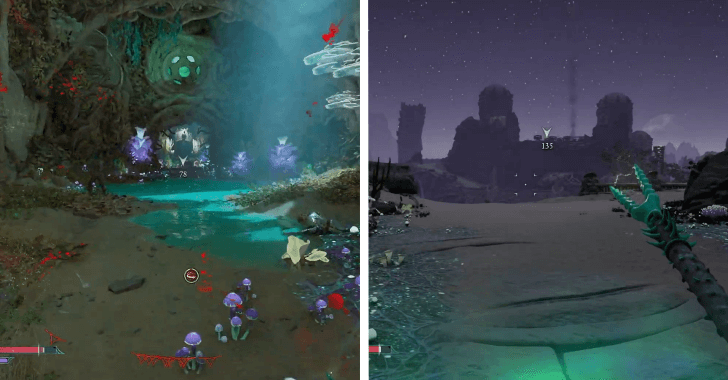
Journey to Naku Kubel
| # | Step-by-step Walkthrough |
|---|---|
| 1 |  From Shark’s Teeth, head northwest until you reach a desolate plaza with a broken statue. Be careful of Dreamthralls and Xaurips patrolling the area. |
| 2 |  Enter the archway to the north and follow the trail. As you progress, you will unlock the Naku Kubel Beacon. Be sure to loot any chests or treasures along the way for valuable items. |
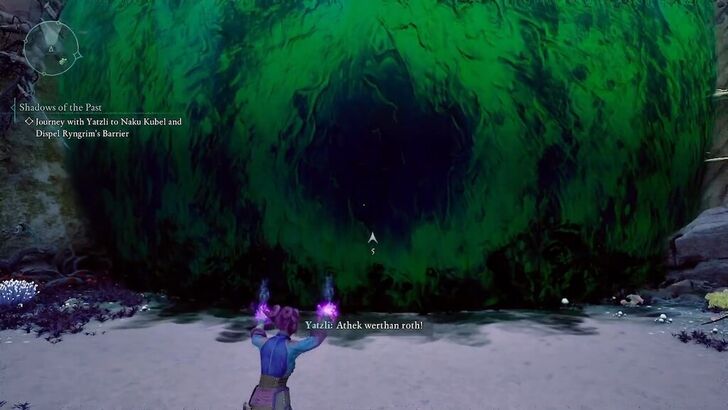
| 3 | 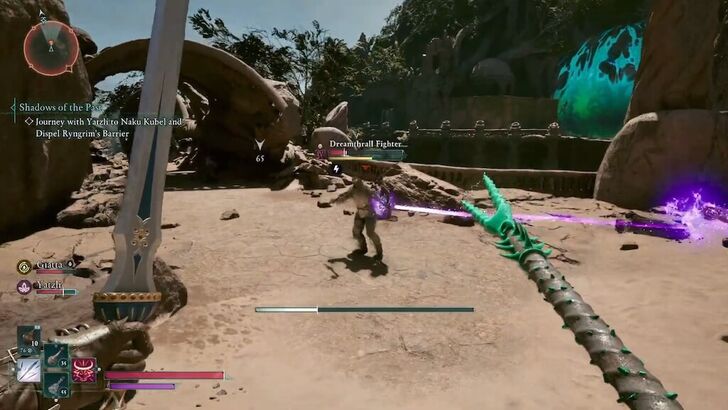 Continue along the trail, and as you descend, you’ll notice a large magical green barrier in the distance to your right. Be prepared to face more Dreamthralls! |
| 4 | 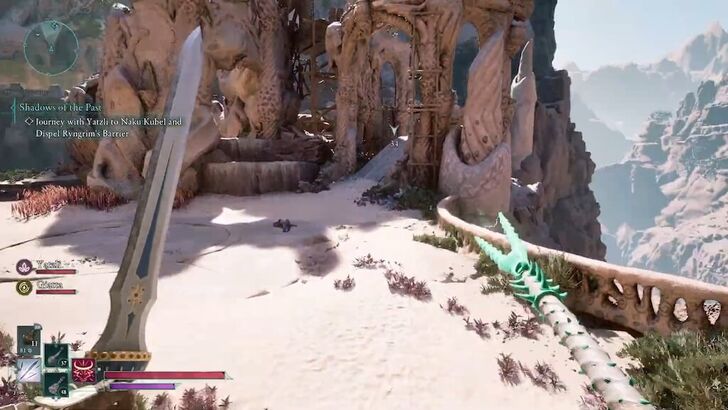 Push forward, traversing obstacles and jumping across platforms until you reach a structure with scaffolding. Climb the ladder to reach the top, then jump across to the other side. |
| 5 | Once you arrive at the barrier, interact with it to have Yatzli tear it down, allowing you to enter Naku Kubel. Make sure to stock up on heals/consumables and get settled with a good loadout before entering. |
Investigate Naku Kubel
| # | Step-by-step Walkthrough |
|---|---|
| 1 | 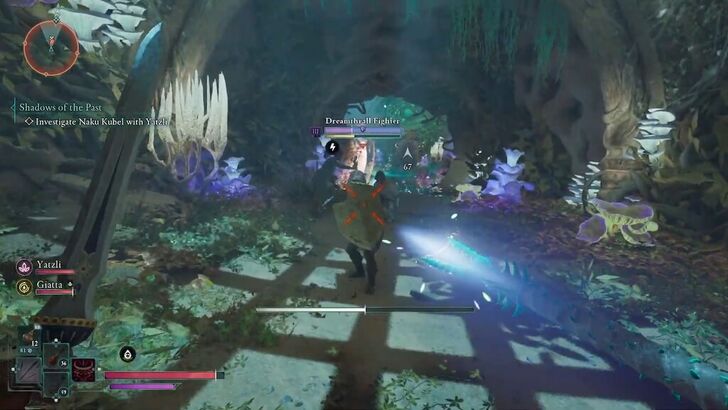 Inside Naku Kubel, proceed forward while battling enemies along the way. Open the door to enter a hall with a large Adra stone at its center. |
| 2 | 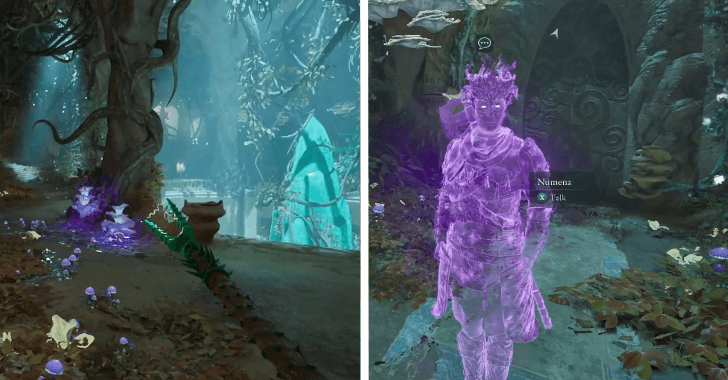 To the right, an Ekidan spirit named Numena will appear. Speak with her to begin your trial. |
Complete the Trial of Strength
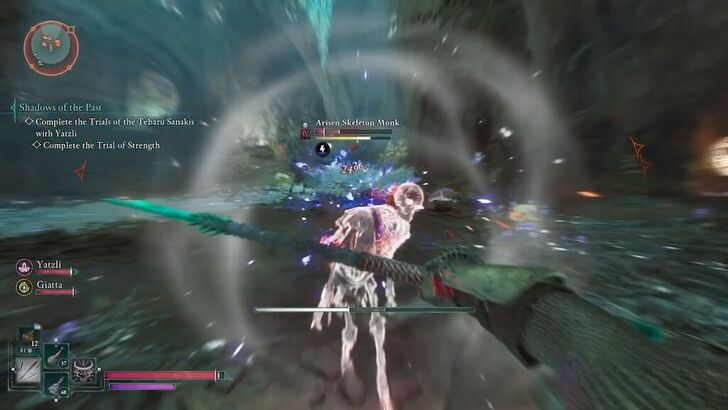
Open the door behind Numena to start the Trial of Strength. You'll face waves of enemies across three main areas, with each battle increasing in difficulty.
In the final area, defeat all enemies and open the door to return to the hall.
Complete the Trial of Wisdom
| # | Step-by-step Walkthrough |
|---|---|
| 1 | 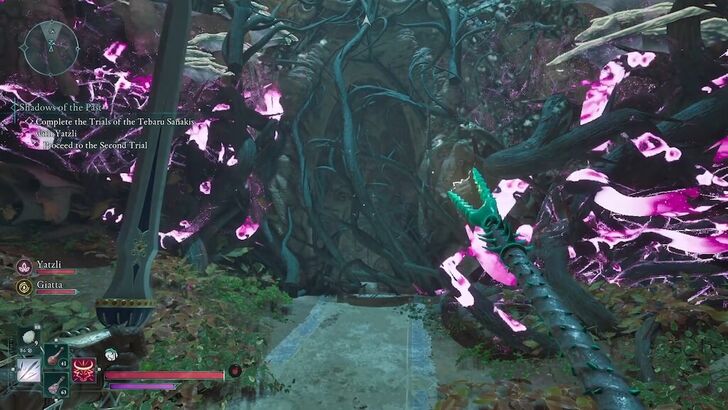 On the left side, approach the door covered in vines. Wait for the vines to disappear and talk to Tanusa to start your next trial. |
| 2 | 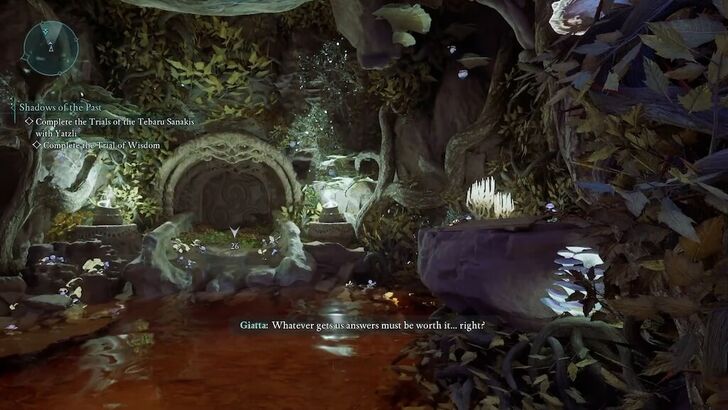 Enter the room filled with murky red water. Note that standing in the water will cause damage. To cross, jump onto the ledge on the right and use it to reach the other side. Proceed through the door to exit outside. |
| 3 | 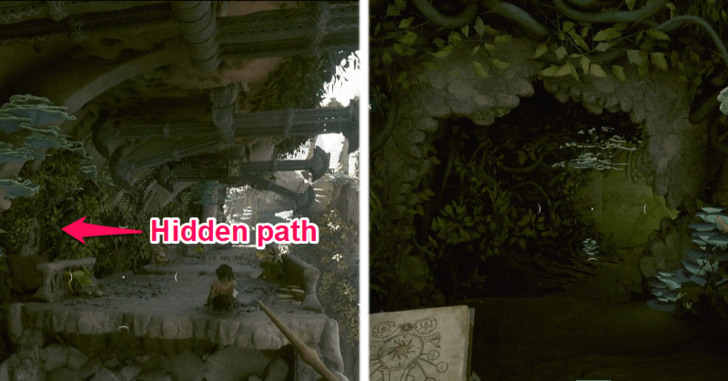 Once outside, you will encounter a corridor of pendulum blades. For the first set of blades, wait until both blades have swung through the gap, and jump immediately to cross. You can then skip the rest of these vertical blades by burning the roots blocking a hidden tunnel to the left. Go through this tunnel to find the last set of blades. There is a brief moment when the path will be completely clear, and you can run past these horizontal blades. |
| 4 | 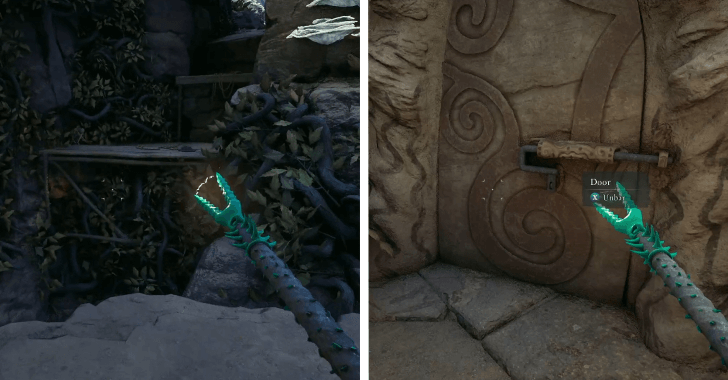 After crossing, climb up the ledges and unbar the door next to a chest to move forward to the next area. |
| 5 | 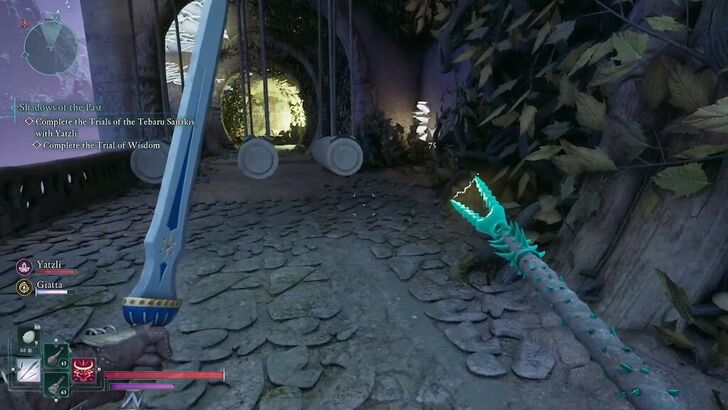 Head up to a hallway and avoid the pressure plates on the floor to prevent triggering swinging logs. You can also bait the traps by stepping on a plate and quickly stepping back, allowing the logs to swing before safely crossing. |
| 6 | 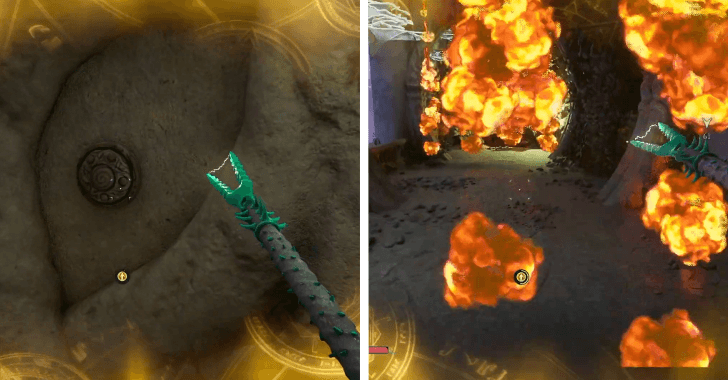 On the right, destroy the breakable wall and interact with the switch to disable the fire trap above. Then, crouch and jump over the horizontal fire traps to proceed. |
| 7 | 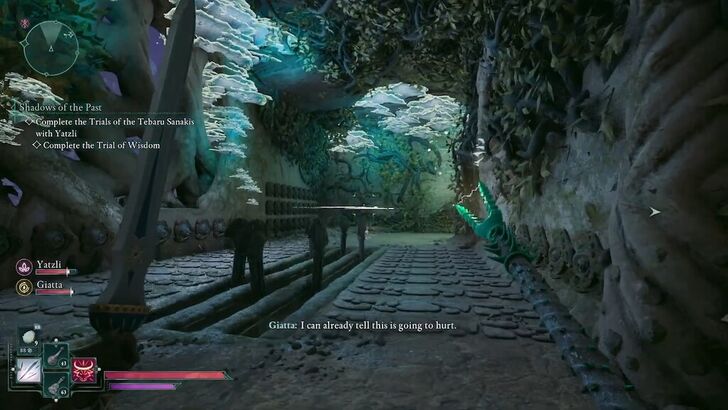 Take the stairs to a trap room. Run through the swinging blades when they're down, and jump and crouch to avoid the arrow traps in the corridor. |
| 8 | Enter the door to return to Naku Kubel. Once you're inside, open the door to the balcony and jump down, bringing you back to the hall. |
Complete the Third and Final Trial
| # | Step-by-step Walkthrough |
|---|---|
| 1 | 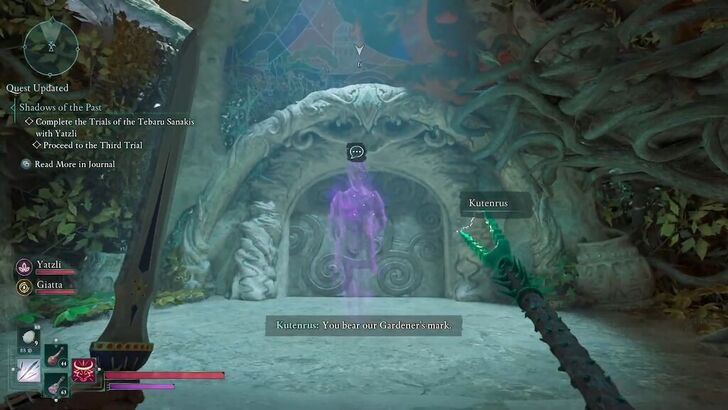 Head to the last unopened door to the north in the hall and speak with Kutenrus to begin your third and final trial. |
| 2 | 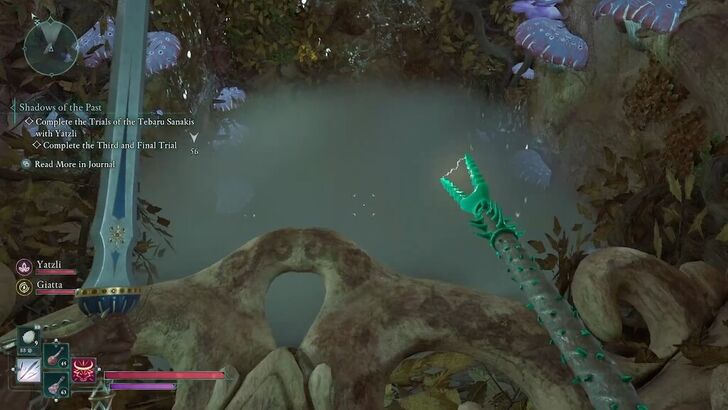 Enter the door and jump down into the water below. |
| 3 | 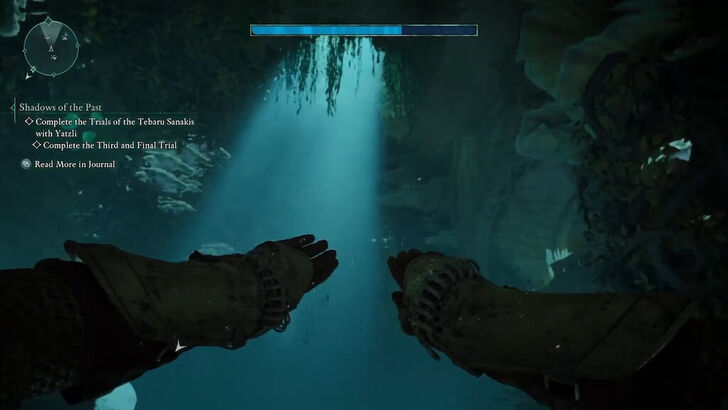 Swim forward and climb onto the ledge on the left. Be prepared for a tough battle in the next room! |
| 4 | 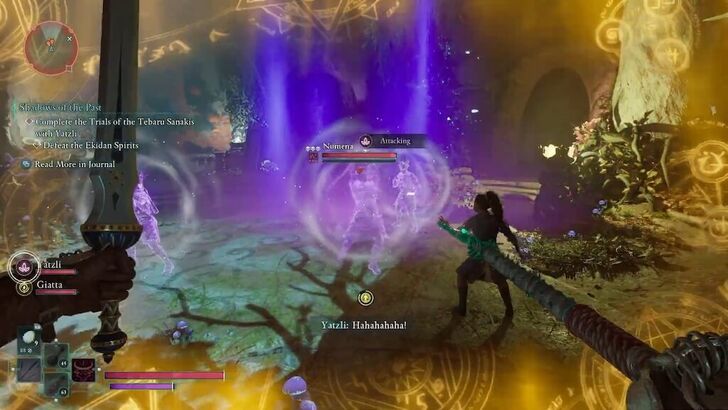 When you're ready, open the door to confront the three Ekidan spirits. Defeat them to continue. |
| 5 | 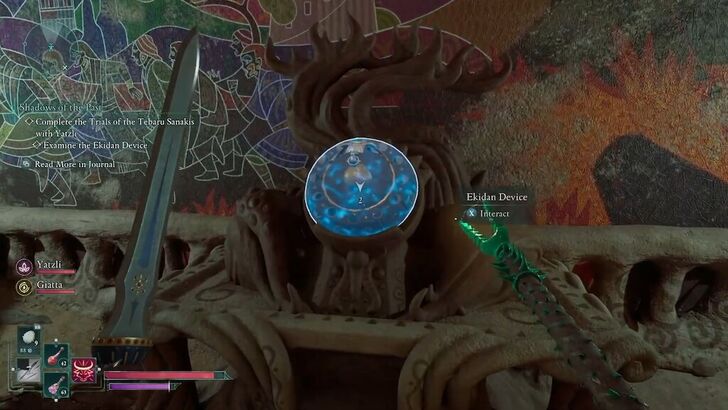 After the battle, interact with the blue Ekidan device and this will open a new path on the left side of the room. |
| 6 | 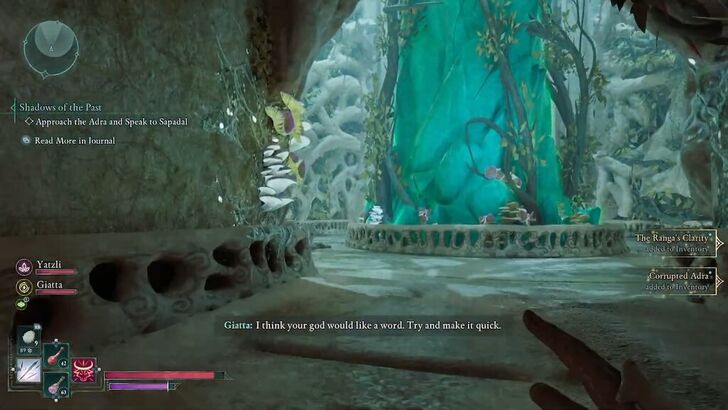 Follow the path and interact with the Adra stone to speak with Sapadal. |
Escape Naku Kubel
After speaking with Sapadal, the floor will ascend, returning you to the hall. From there, escape Naku Kubel from where you came in and make your way back to the Naku Kubel Beacon.
Naku Kubel XP Farm Method

While escaping Naku Kubel, enemies will spawn infinitely in the hall. You can use this opportunity to farm XP by continuously defeating them.
However, it’s best to do this after completing this quest, as you’ll still be able to return to the hall later. Make sure to bring plenty of healing items and your best gear, as these enemies can be tough.
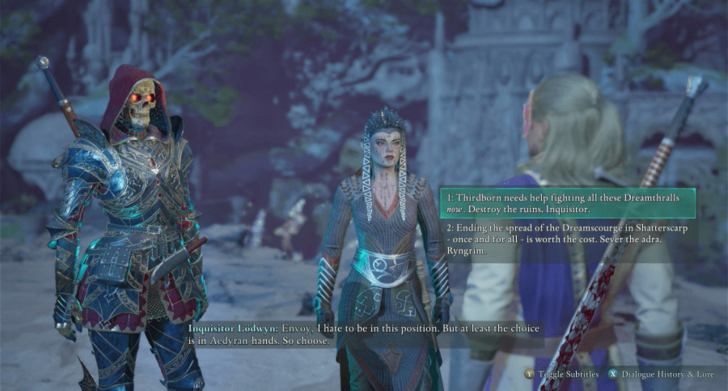
Speak with Ryngrim and Lodwyn
| Choices | |
|---|---|
| Destroy the Ruins | Sever the Adra |
Once you arrive, speak with Ryngrim and Lodwyn. You then must choose whether to destroy Naku Kubel or sever the Adra from the Dreamscourge. No matter which decision you make, talk to Ryngrim again afterward.
Should You Destroy the Ruins or Sever the Adra?
Destroy the Ruins
At the end of your conversation, choose the dialogue option, “Destroy the ruins, Inquisitor,” and Lodwyn and the Steel Garote will blow up Naku Kubel. If you previously accepted Sapadal’s offer, you will receive the Scion of the Immortal Land ability.
Sever the Adra
If you choose the dialogue option, “Sever the adra, Ryngrim,” she will sever the Adra from the Dreamscourge but at the cost of innocent lives. If you previously accepted Sapadal’s offer, you will receive the Severed Branch ability.
Speak to Temertri in Thirdborn
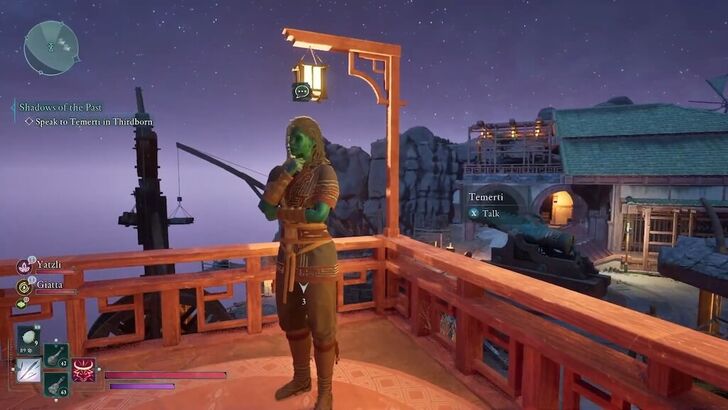
Return to Thirdborn and speak with Temertri at the Loading Docks to complete the quest.
Shadows of the Past Rewards
Gain a Godlike Ability
Depending on your choices regarding Sapadal during the Ancient Soil main quest, you will gain a Godlike Ability after speaking with Ryngrim and Lodwyn.
| Choice | Reward |
|---|---|
| Accept the Offer and Destroy the Ruins | Obtain the Scion of the Immortal Land ability, which increases your damage and grants Health regeneration for 12 seconds. |
| Accept the Offer and Sever the Adra Network | Obtain the Severed Branch, which grants maximum Move Speed for 20 seconds. |
| Reject the Offer | Get the Godlike's Will ability for rejecting the offer. This gives you an Ability Point to spend in the Fighter, Ranger, or Wizard Ability Trees. |
Should You Accept or Reject Sapadal's Offer?
Shadows of the Past Overview
Location and Mission Info
| Shadows of the Past Quest Info | |
|---|---|
 |
|
| Quest Type | Main Quest |
| Starting Location | Shark's Teeth, Shatterscarp |
| Mission Description | |
| Ryngrim gave Yatzli a grimoire that will dispell an arcane barrier the archmage conjured - one that blocks entry into Naku Kubel, an ancient Godless site in Shatterscarp. The path is now clear for you to enter the ruins, where Yatzli believes you will find clues to the location of the Garden - and perhaps the origins of the Dreamscourge. | |
Avowed Related Guides

All Main Quests
| List of All Main Quests | |
|---|---|
| 1 | On Strange Shores |
| 2 | Message from Afar |
| 3 | An Untimely End |
| 4 | The Animancy Method |
| 5 | Ancient Soil |
| 6 | A Path to the Garden |
| 7 | Face Your Fears |
| 8 | Shadows of the Past |
| 9 | Our Dreams Divide Us Still |
| 10 | The Heart of the Living Lands |
| Pulling Back the Veil | |
| 11 | The Siege of Paradis |
Author
Shadows of the Past Walkthrough and Bug Solution
Please participate in our site
improvement survey
03/2026
improvement survey
03/2026
Would you assist in
improving Game8's site?
improving Game8's site?

×
We are listening to our users' valuable opinions and discussing how to act on them.
The information collected through this survey will be used for the purpose of improving our services. In addition, the information will only be disclosed a part of a statistic in a format that will not allow identification of personal information.
Begin Survey
Not Now
×
Please rate each item regarding Game8.co's Advertisements.
Amount of Ads
Very Dissatisfied
Somewhat Dissatisfied
Fine
Somewhat Satisfied
Highly Satisfied
Placement of Ads
Timing of Ad Display
Ad Loading Speed
Safeness of Ads
Content of Ads
×
Please rate each item regarding Game8.co's Quality of Articles.
Amount of information
Very Dissatisfied
Somewhat Dissatisfied
Fine
Somewhat Satisfied
Highly Satisfied
Frequency of updates
Speed of new information
Accuracy of articles
Understandibility of articles
Readability of sentences
×
Please rate each item regarding Game8.co's Usability of the Site.
Ease of finding information
Very Dissatisfied
Somewhat Dissatisfied
Fine
Somewhat Satisfied
Highly Satisfied
Loading Speed
Use of Color
Font Size
Visibility of Images
Easy to Understand Layout
×
Please rate each item regarding Game8.co's Message Boards, Comments.
Ease of Writing
Very Dissatisfied
Somewhat Dissatisfied
Fine
Somewhat Satisfied
Highly Satisfied
Readability
Ease in Finding Information
Comment Quality
Comment Quantity
Admin Response
×
Please rate each item regarding Game8.co's Site's new design.
Please rate our site's new design
Very Dissatisfied
Somewhat Dissatisfied
Fine
Somewhat Satisfied
Highly Satisfied
Do you think that the website's design change makes the site easier to use?
Has the new design made it easier for you to find information on the site?
Has the new design improved the overall visual appeal of the site?
How would you rate your overall satisfaction with the new design of the site?
×
How likely are you to recommend Game8 to someone you know?
Very Unlikely
0
1
2
3
4
5
6
7
8
9
10
Very Likely
If you have other opinions regarding potential improvement to the website, please share them with us. We would appreciate your honest opinion.
Note: This is a free response section, so you can proceed without entering anything.
Note: Please be sure not to enter any kind of personal information into your response.
Note: Please be sure not to enter any kind of personal information into your response.
×
Thank You
×
Thank you for participating in our survey! Your answers will help us to improve the quality of our website and services.
We hope you continue to make use of Game8.
We hope you continue to make use of Game8.
Close
Rankings
- We could not find the message board you were looking for.
Gaming News


![Everwind Review [Early Access] | The Shaky First Step to A Very Long Journey](https://img.game8.co/4440226/ab079b1153298a042633dd1ef51e878e.png/thumb)

![Monster Hunter Stories 3 Review [First Impressions] | Simply Rejuvenating](https://img.game8.co/4438641/2a31b7702bd70e78ec8efd24661dacda.jpeg/thumb)
Popular Games

Genshin Impact Walkthrough & Guides Wiki
Honkai: Star Rail Walkthrough & Guides Wiki
Umamusume: Pretty Derby Walkthrough & Guides Wiki
Pokemon Pokopia Walkthrough & Guides Wiki
Resident Evil Requiem (RE9) Walkthrough & Guides Wiki
Monster Hunter Wilds Walkthrough & Guides Wiki
Wuthering Waves Walkthrough & Guides Wiki
Arknights: Endfield Walkthrough & Guides Wiki
Pokemon FireRed and LeafGreen (FRLG) Walkthrough & Guides Wiki
Pokemon TCG Pocket (PTCGP) Strategies & Guides Wiki


Recommended Games
Diablo 4: Vessel of Hatred Walkthrough & Guides Wiki
Fire Emblem Heroes (FEH) Walkthrough & Guides Wiki
Yu-Gi-Oh! Master Duel Walkthrough & Guides Wiki
Super Smash Bros. Ultimate Walkthrough & Guides Wiki
Pokemon Brilliant Diamond and Shining Pearl (BDSP) Walkthrough & Guides Wiki
Elden Ring Shadow of the Erdtree Walkthrough & Guides Wiki
Monster Hunter World Walkthrough & Guides Wiki
The Legend of Zelda: Tears of the Kingdom Walkthrough & Guides Wiki
Persona 3 Reload Walkthrough & Guides Wiki
Cyberpunk 2077: Ultimate Edition Walkthrough & Guides Wiki


All rights reserved
© 2025 Obsidian Entertainment, Inc. Obsidian Entertainment, the Obsidian Entertainment logo, Avowed, and Avowed logos are trademarks or registered trademarks of Obsidian Entertainment, Inc. All rights reserved.
The copyrights of videos of games used in our content and other intellectual property rights belong to the provider of the game.
The contents we provide on this site were created personally by members of the Game8 editorial department.
We refuse the right to reuse or repost content taken without our permission such as data or images to other sites.
- Destroying the ruins (side with inquisitor Lödwyn) makes your companions unhappy - Severing the adra (side with Ryngrim) kills like 30 innocent people in Thirdborn