This survey will take about 1 minute.
Your answers will help us to improve our website.
Avowed
An Untimely End Walkthrough
★ 02/17 Update: New Game Plus added!
┗ Character Creation: New Playable Races
☆ Builds: Wizard | Fighter | Ranger
★ Best Weapons | Best Armor | Best Spells
☆ Unique Weapons | Unique Armor
★ All Treasure Map Locations
An Untimely End is a main quest in Avowed. Read on for a complete walkthrough of An Untimely End, the choices you can make, as well as the rewards for completing the quest.
| Previous Quest | Next Quest |
|---|---|
| Message from Afar | The Animancy Method |
List of Contents
An Untimely End Walkthrough
At the start of An Untimely End, you can choose between two objectives: Report to the Ambassador or Find the Watcher. The choice of which one you do first has no impact on the quest’s outcome.
However, we recommend starting Report to the Ambassador first in order to unlock the second companion, and because the Watcher is located much farther, outside of Paradis.
Report to the Ambassador

Travel southwest of Paradis to the Aedyran Embassy and speak with Ambassador Falseen Hylgard to begin the quest.
Find Marius at the Grinning Balarok
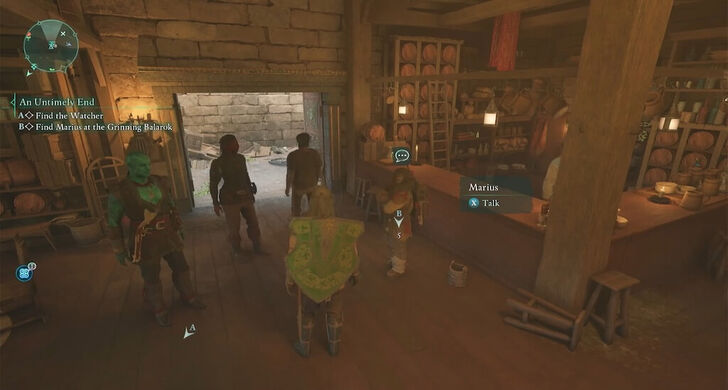
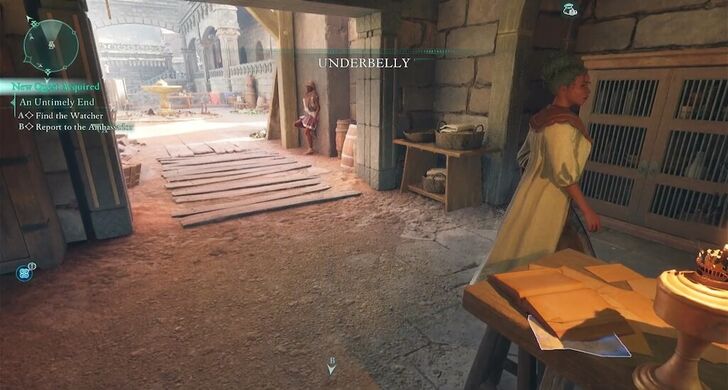
Head southeast to the Grinning Balarok in the Underbelly district. You’ll find Marius at the bar, standing next to Maili and Culburn. Talk to him, and he will join your party as a companion.
Investigate the Scene of the Crime
| # | Step-by-step Walkthrough |
|---|---|
| 1 | 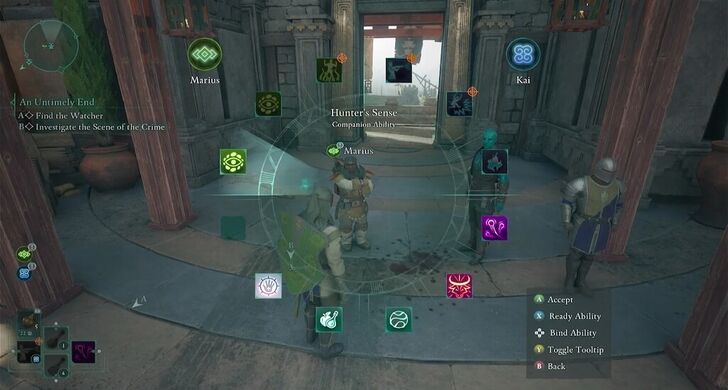 Go to the Main Gate (where you were previously shot with an arrow). Use Command on Marius and select Hunter’s Sense to have him scan the crime scene for clues or wait until Kai investigates the blood on the floor. |
| 2 |
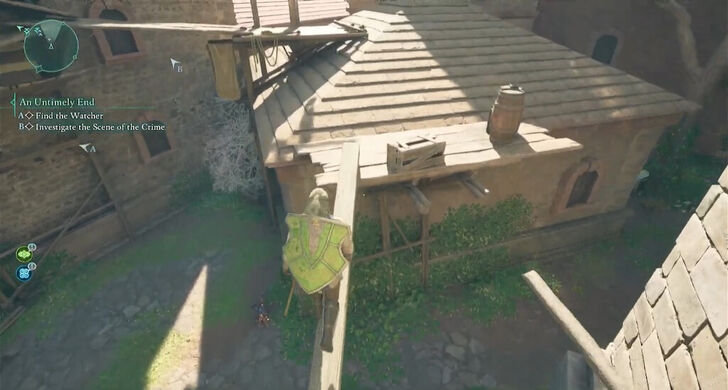 Next, make your way to the balcony above the Aedyran Embassy. Use the scaffolding behind the building to climb up, but be careful of Spiderlings in the area. |
| 3 |
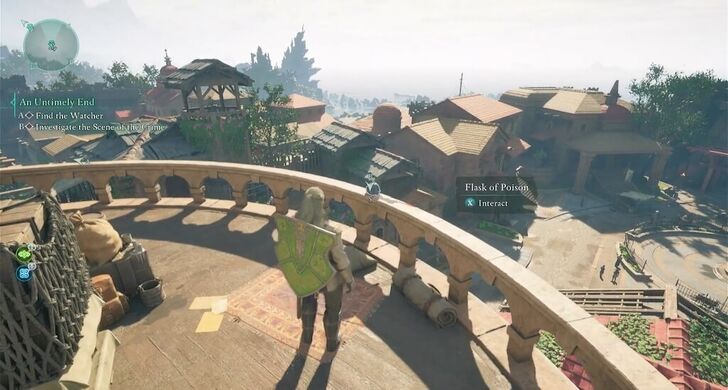 Once on the balcony, interact with the Flask of Poison on the perch. |
Speak with the Apothecarist
| # | Step-by-step Walkthrough |
|---|---|
| 1 | 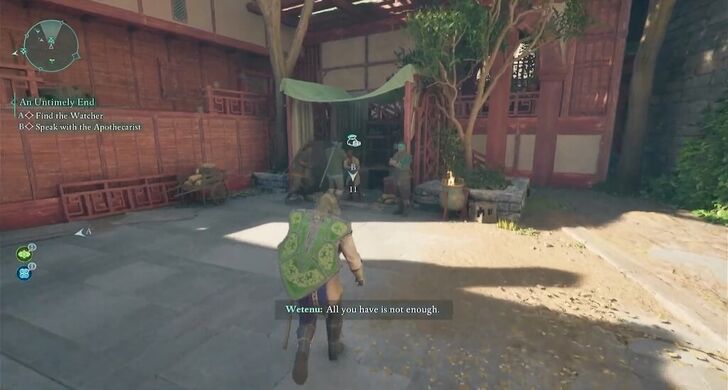 Head to the Apothecary’s Shop in the Pearl District, located in the city center. As you approach, you’ll see Wetenu and his lackeys threatening the Apothecarist, leading to a fight. Make sure to stock up on heals/consumables and get settled with a good loadout before this step, as a rather long combat sequence begins afterward. |
| 2 | 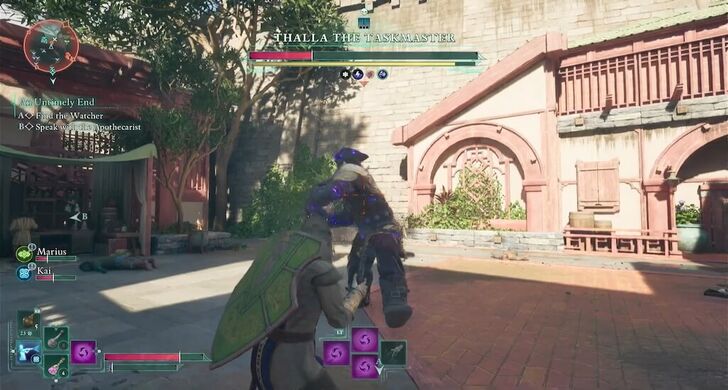 Defeat the enemies and Thalla the Taskmaster. It’s best to eliminate the weaker enemies first to minimize distractions before focusing on the boss. |
| 3 | 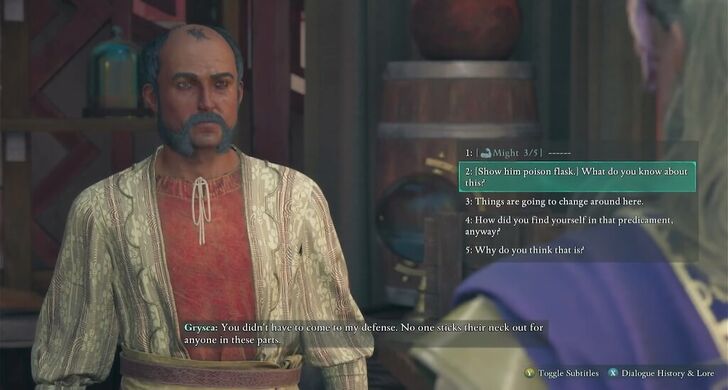 After the battle, speak with the Apothecarist to gather information about the poison. Afterward, you'll have to fight your way out of the district, as fast travelling is disabled. |
Search for More Clues About Your Assassin
You can either Investigate the Area Around the Temple of Ondra or Search Around Claviger’s Estate for clues about your assassin. Choosing either will automatically complete both objectives.
Investigating the Temple of Ondra will require you to either bribe or attack Elowe, while searching around the Claviger’s Estate requires you to defeat a group of rebels that are looting the place. Searching the Claviger’s estate may be the better choice to avoid losing money or killing a mostly innocent person.
Search the Claviger’s Estate
| # | Step-by-step Walkthrough |
|---|---|
| 1 | 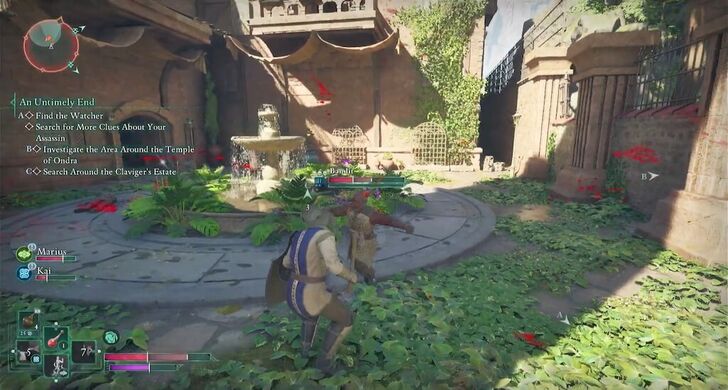 Travel to Claviger’s Estate in Northern Paradis. Upon opening the door, you will immediately be met with a group of bandits. Defeat them and proceed. |
| 2 |  Enter the estate and take the stairs on the left to reach the exterior. Use the ladder, then head left to access the upper level. |
| 3 | 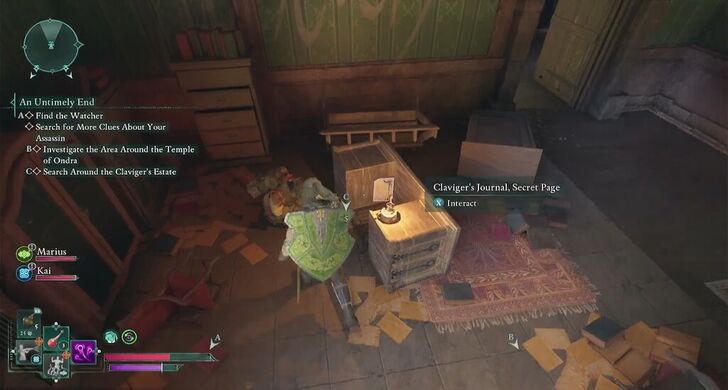 Inside, interact with Claviger’s Journal, Secret Page on the toppled desk to read the journal, as well as obtain the Cistern Key. |
| * |
In the attic, you’ll find a chest containing the White Key Cameo, a unique amulet that restores 50% health when reviving a companion. ▶︎ Best Accessories Tier List |
Enter the Cistern Beneath the Temple of Ondra
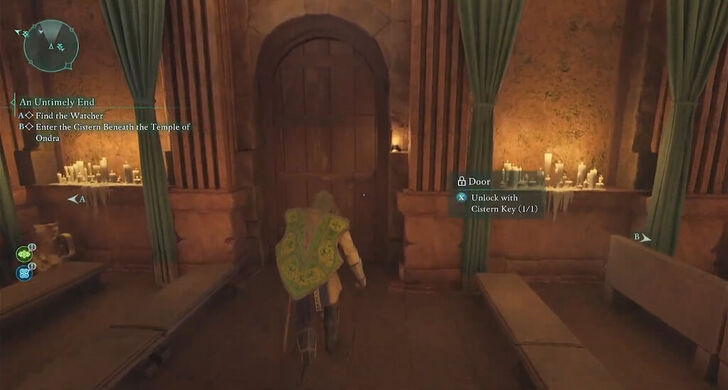
Head to the Temple of Ondra in the Street of the Gods district. You can talk to Elowe if you want more information on your killer and the rebellion.
Inside, use the Cistern Key on the locked door to the left and descend into the Cistern to continue.
Track Down Your Killer
| # | Step-by-step Walkthrough |
|---|---|
| 1 | 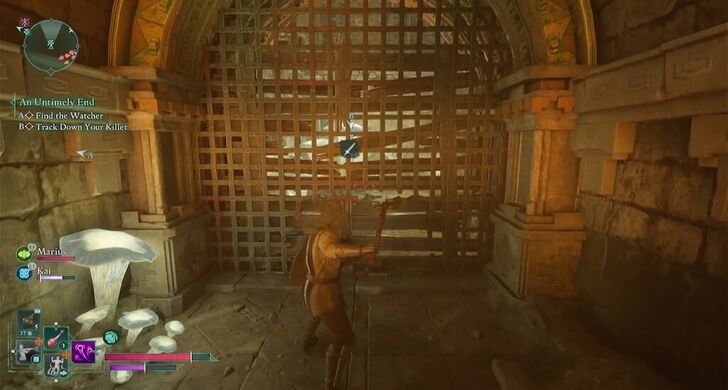 Move forward through the tunnels, but be careful of the Paradisian Rebels patrolling the entire area. Defeat them, and go to the corner with a boarded-up gate. Use your weapon to break the wooden barrier blocking the gate, then crouch down to proceed. |
| 2 | 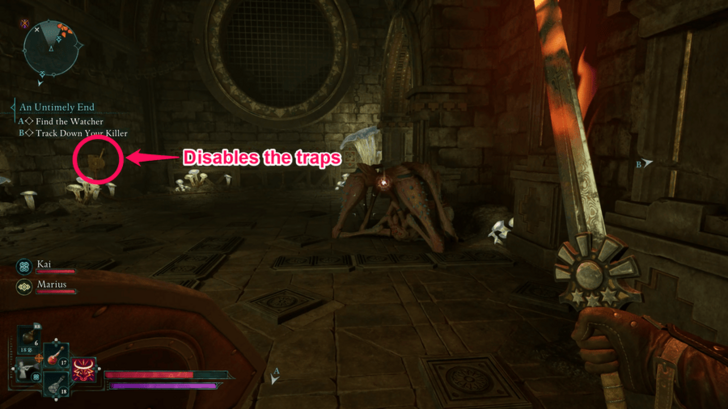 Avoid stepping on the pressure plates, as they trigger traps. You can disable the traps in this room by pulling the lever on the left wall after jumping past the traps. |
| 3 | 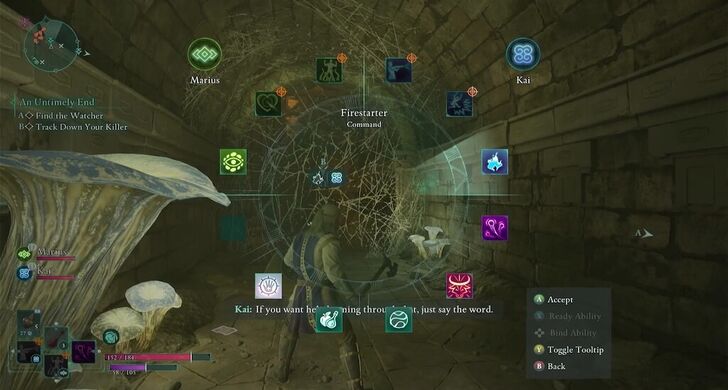 Continue forward until you encounter a wall of webs. Use Kai’s Firestarter or a fire-producing weapon to burn the webs and clear the path. Defeat or avoid the Spiderlings in this area. |
| 4 | 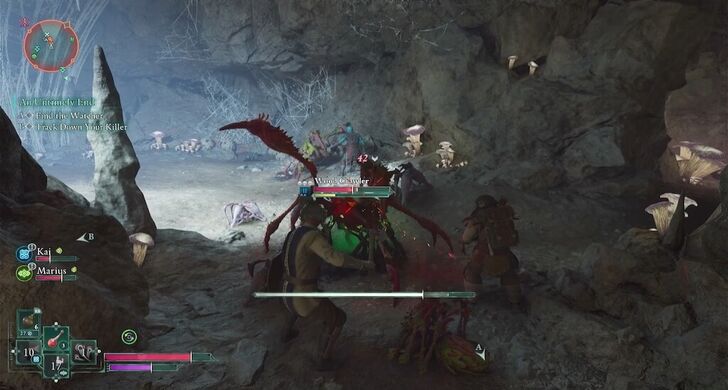 Turn left and burn another web wall. This allows you to enter a tunnel cave infested with Spiderlings, Ivory Spinners, and Wood Crawlers. Be ready to fight your way through! |
| * | 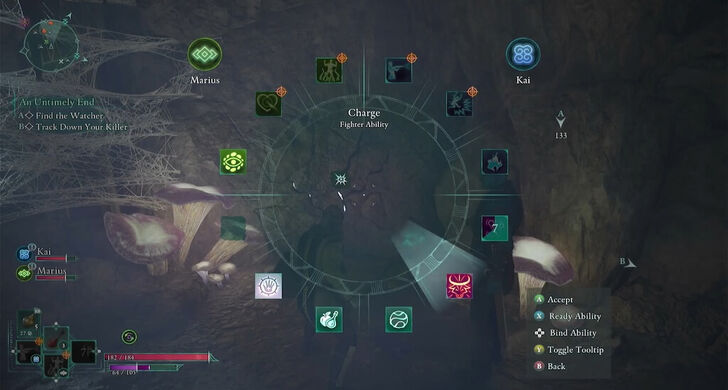 If you take the right path in the tunnel, you can use your Charge ability or a grenade to break a destructible wall at the end of the cave. This opens up a hidden room where you can find supplies as well as a locked chest containing gold and materials. ▶︎ How to Get Lockpicks |
| 5 | 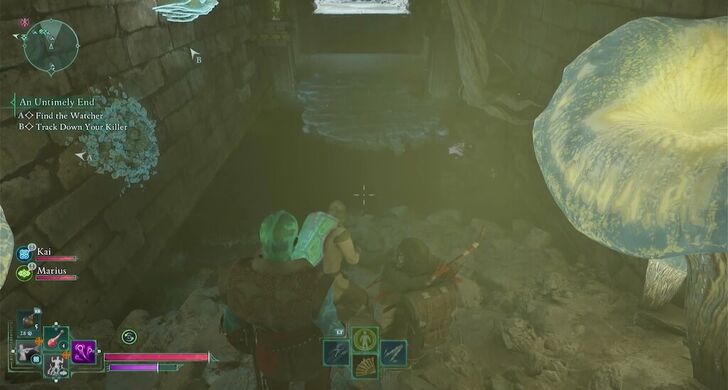 Taking the left fork of the tunnel leads you to a flooded area with a high platform. Take a ranged weapon out and aim it at the Eye of Rymrgand glittering on the ceiling near the platform to freeze the water below. This creates a platform you can stand on. You can also pick up and throw the Eye of Rymrgand from the nearby spores or use freezing abilities like Chill Blades to solidify the water. |
| 6 | 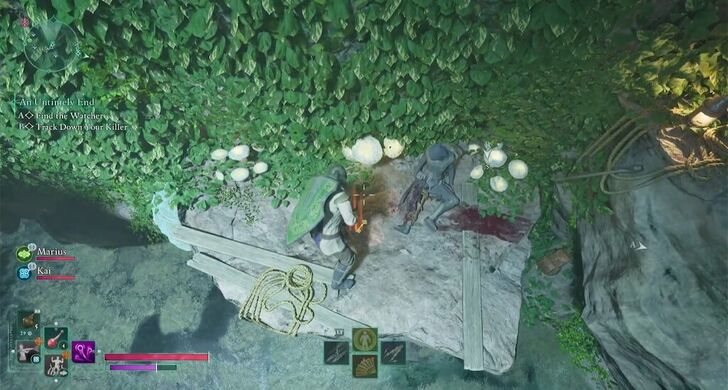 Cross and climb the platform. You’ll need to freeze the water again in the next area to reach the ledge. Interact with the corpse there to obtain the Lower Cistern Key. |
| 7 | 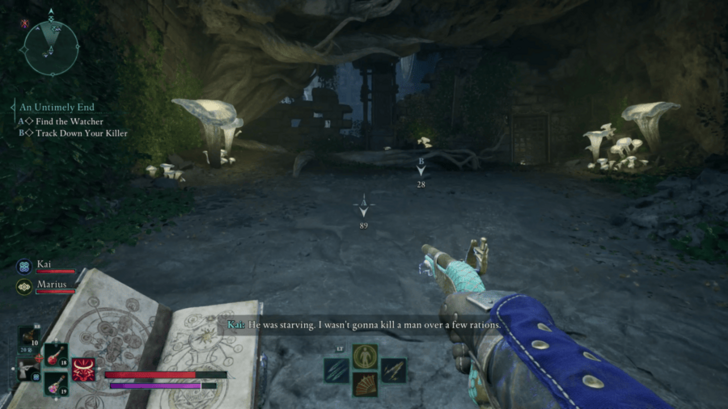 Keep climbing upward until you reach a locked gate. Use the Lower Cistern Key to unlock the gate ahead. |
| 8 | 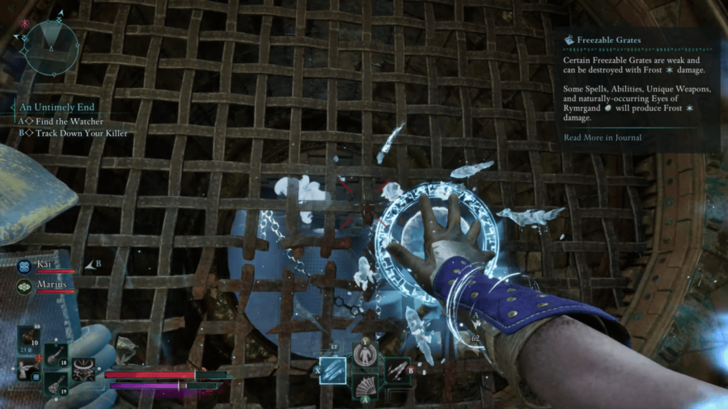 Repeat the process of freezing the water to cross to the other side. To break open the grate blocking the way, you need to freeze it either by throwing an Eye of Rymrgand at the rusty grate or by using a freezing spell. |
| 9 | 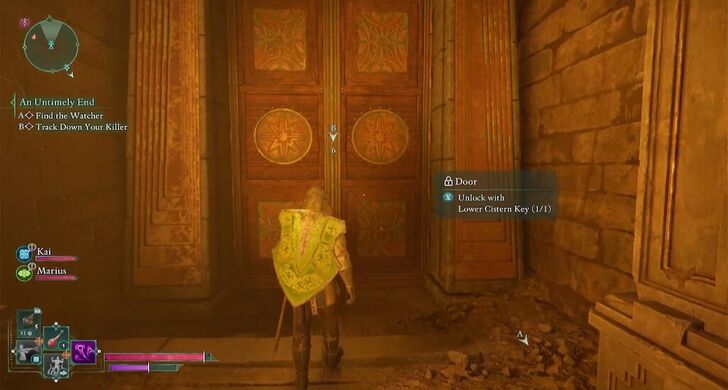 Continue forward, jump down into the hall, and use the key again to open the large door. |
| 10 | 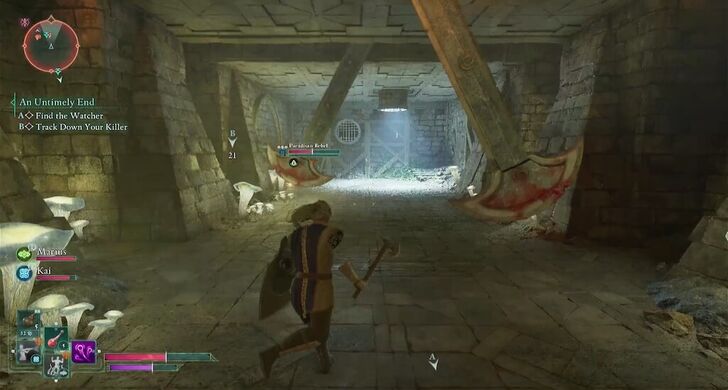 Move forward, and you'll see a hallway with pendulum blades. You could try to do a ranged kill on the enemy throwing projectiles from the other end, but take note that there is an enemy healer in the room beside it. You can disable the blades by pulling the lever at the end of the room after making your way through the blades. |
| 11 | Once past the blades, enter the room on the left and proceed through the door leading to a large open area. More hostile rebels will fight you here. |
| 12 | 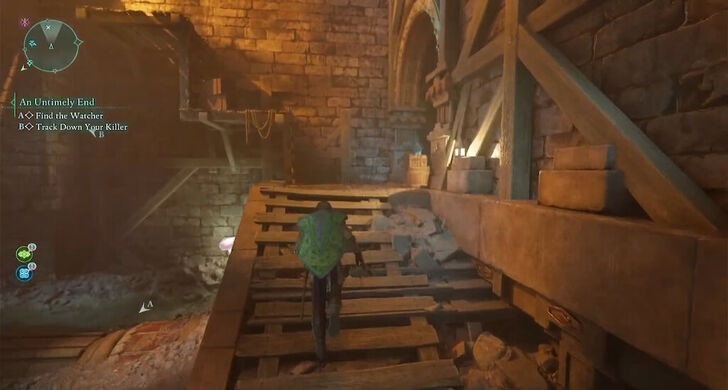 After defeating them, use the scaffolding to climb to the upper level. |
| 13 |  Move forward and turn left. Jump across to the wooden platform, and keep following the path until you are faced with a door. |
| 14 |  Kai will warn you that your assassin is likely to be on the other side of the door. Prepare yourself, then open the door to confront Ygwulf, your assassin. |
During your conversation with Ygwulf, you can either spare him or kill him as revenge for his attempt on your life. Regardless of your choice, this will complete the first objective and allow you to continue the quest.
| Choices | |
|---|---|
| Spare Ygwulf | Kill Ygwulf |
Spare Ygwulf
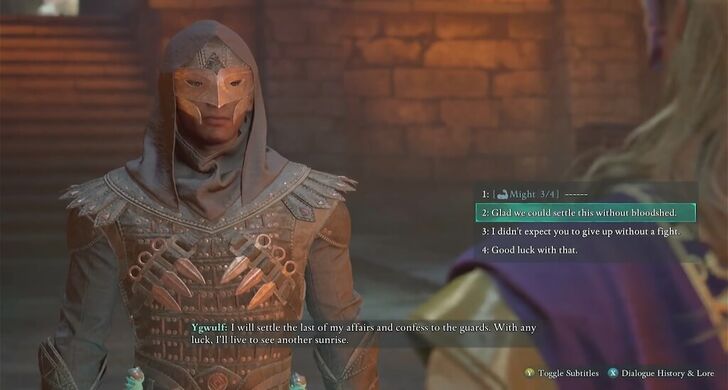
You can persuade Ygwulf to surrender to the authorities or convince him and his people to leave Paradis. Sparing him rewards you with 625 Coins, an Adra, and 355 XP.
Kill Ygwulf
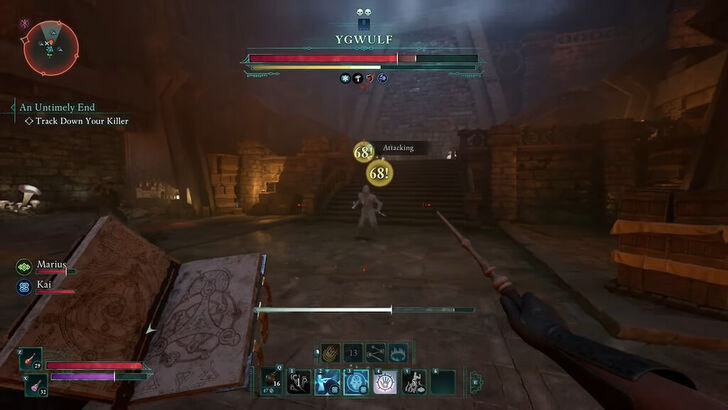
Choosing the [Attack] option will trigger a boss fight against Ygwulf. Defeating him grants 391 XP, and you can loot the Blackwing Armor from his corpse.
However, killing Ygwulf will have consequences, as Paradisian Rebels will threaten you later when leaving the city.
Find the Watcher
| # | Step-by-step Walkthrough |
|---|---|
| 1 | Exit through the easternmost gate of Paradis and follow the path north until you reach the Shrine to Woedica. |
| 2 | 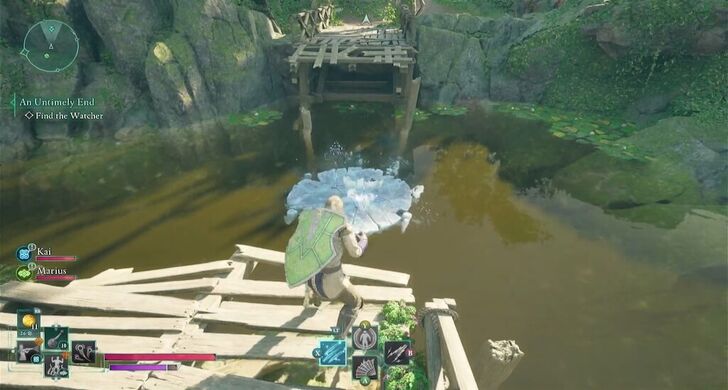 Freeze the water beneath the broken bridge on the right to create a path across the gap. |
| 3 | 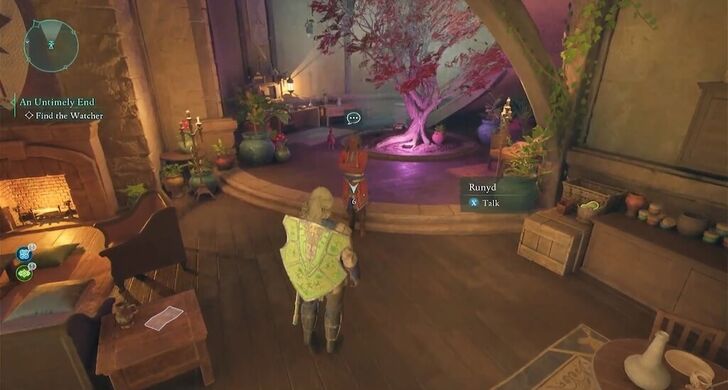 Follow the uphill path until you see Runyd’s House. Enter and speak with Runyd, the Watcher. Once your conversation is over, you can throw the coin quest item (obtained from the man in front of the Watcher's House) in the pond. |
Return to the Ambassador
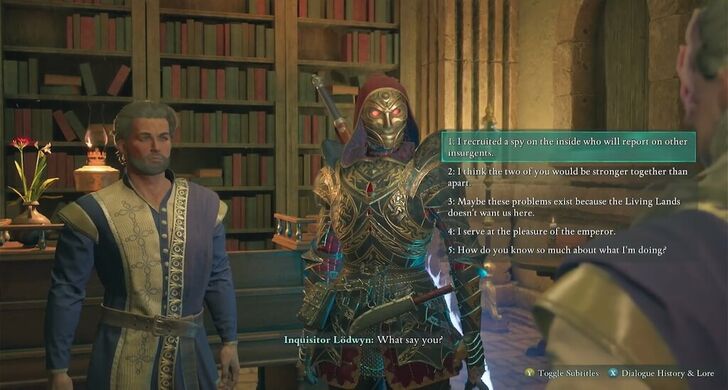
After completing both main objectives, return to Ambassador Falseen Hylgard at the Aedyran Embassy to report your findings. During your conversation, you will meet Inquisitor Lodwyn, marking the completion of the quest.
An Untimely End Rewards
Gain Marius as a Companion and Unlock the Emerald Stair
You can recruit Marius as a companion early on and unlock the Emerald Stair region by the end. Additionally, you will obtain various common weapons and items, along with XP as you progress through the quest.
Marius Best Abilities and Outfits
An Untimely End Overview
Location and Mission Info
| An Untimely End Quest Info | |
|---|---|
 |
|
| Quest Type | Main Quest |
| Starting Location | Paradis, Dawnshore |
| Mission Description | |
| Before you could deliver your missive from the emperor, a mysterious assailant attacked you in the streets of Paradis. You died… yet you live. With this new lease on life, the time has come to track down the assassin and unravel the mystery of your survival. | |
Avowed Related Guides

All Main Quests
| List of All Main Quests | |
|---|---|
| 1 | On Strange Shores |
| 2 | Message from Afar |
| 3 | An Untimely End |
| 4 | The Animancy Method |
| 5 | Ancient Soil |
| 6 | A Path to the Garden |
| 7 | Face Your Fears |
| 8 | Shadows of the Past |
| 9 | Our Dreams Divide Us Still |
| 10 | The Heart of the Living Lands |
| Pulling Back the Veil | |
| 11 | The Siege of Paradis |
Comment
Author

An Untimely End Walkthrough
Please participate in our site
improvement survey
03/2026
improvement survey
03/2026
Would you assist in
improving Game8's site?
improving Game8's site?

×
We are listening to our users' valuable opinions and discussing how to act on them.
The information collected through this survey will be used for the purpose of improving our services. In addition, the information will only be disclosed a part of a statistic in a format that will not allow identification of personal information.
Begin Survey
Not Now
×
Please rate each item regarding Game8.co's Advertisements.
Amount of Ads
Very Dissatisfied
Somewhat Dissatisfied
Fine
Somewhat Satisfied
Highly Satisfied
Placement of Ads
Timing of Ad Display
Ad Loading Speed
Safeness of Ads
Content of Ads
×
Please rate each item regarding Game8.co's Quality of Articles.
Amount of information
Very Dissatisfied
Somewhat Dissatisfied
Fine
Somewhat Satisfied
Highly Satisfied
Frequency of updates
Speed of new information
Accuracy of articles
Understandibility of articles
Readability of sentences
×
Please rate each item regarding Game8.co's Usability of the Site.
Ease of finding information
Very Dissatisfied
Somewhat Dissatisfied
Fine
Somewhat Satisfied
Highly Satisfied
Loading Speed
Use of Color
Font Size
Visibility of Images
Easy to Understand Layout
×
Please rate each item regarding Game8.co's Message Boards, Comments.
Ease of Writing
Very Dissatisfied
Somewhat Dissatisfied
Fine
Somewhat Satisfied
Highly Satisfied
Readability
Ease in Finding Information
Comment Quality
Comment Quantity
Admin Response
×
Please rate each item regarding Game8.co's Site's new design.
Please rate our site's new design
Very Dissatisfied
Somewhat Dissatisfied
Fine
Somewhat Satisfied
Highly Satisfied
Do you think that the website's design change makes the site easier to use?
Has the new design made it easier for you to find information on the site?
Has the new design improved the overall visual appeal of the site?
How would you rate your overall satisfaction with the new design of the site?
×
How likely are you to recommend Game8 to someone you know?
Very Unlikely
0
1
2
3
4
5
6
7
8
9
10
Very Likely
If you have other opinions regarding potential improvement to the website, please share them with us. We would appreciate your honest opinion.
Note: This is a free response section, so you can proceed without entering anything.
Note: Please be sure not to enter any kind of personal information into your response.
Note: Please be sure not to enter any kind of personal information into your response.
×
Thank You
×
Thank you for participating in our survey! Your answers will help us to improve the quality of our website and services.
We hope you continue to make use of Game8.
We hope you continue to make use of Game8.
Close
Rankings
- We could not find the message board you were looking for.
Gaming News


Popular Games

Genshin Impact Walkthrough & Guides Wiki
Honkai: Star Rail Walkthrough & Guides Wiki
Umamusume: Pretty Derby Walkthrough & Guides Wiki
Pokemon Pokopia Walkthrough & Guides Wiki
Resident Evil Requiem (RE9) Walkthrough & Guides Wiki
Monster Hunter Wilds Walkthrough & Guides Wiki
Wuthering Waves Walkthrough & Guides Wiki
Arknights: Endfield Walkthrough & Guides Wiki
Pokemon FireRed and LeafGreen (FRLG) Walkthrough & Guides Wiki
Pokemon TCG Pocket (PTCGP) Strategies & Guides Wiki


Recommended Games
Diablo 4: Vessel of Hatred Walkthrough & Guides Wiki
Fire Emblem Heroes (FEH) Walkthrough & Guides Wiki
Yu-Gi-Oh! Master Duel Walkthrough & Guides Wiki
Super Smash Bros. Ultimate Walkthrough & Guides Wiki
Pokemon Brilliant Diamond and Shining Pearl (BDSP) Walkthrough & Guides Wiki
Elden Ring Shadow of the Erdtree Walkthrough & Guides Wiki
Monster Hunter World Walkthrough & Guides Wiki
The Legend of Zelda: Tears of the Kingdom Walkthrough & Guides Wiki
Persona 3 Reload Walkthrough & Guides Wiki
Cyberpunk 2077: Ultimate Edition Walkthrough & Guides Wiki


All rights reserved
© 2025 Obsidian Entertainment, Inc. Obsidian Entertainment, the Obsidian Entertainment logo, Avowed, and Avowed logos are trademarks or registered trademarks of Obsidian Entertainment, Inc. All rights reserved.
The copyrights of videos of games used in our content and other intellectual property rights belong to the provider of the game.
The contents we provide on this site were created personally by members of the Game8 editorial department.
We refuse the right to reuse or repost content taken without our permission such as data or images to other sites.