This survey will take about 1 minute.
Your answers will help us to improve our website.
Avowed
The Wasteland Courier Walkthrough
★ 02/17 Update: New Game Plus added!
┗ Character Creation: New Playable Races
☆ Builds: Wizard | Fighter | Ranger
★ Best Weapons | Best Armor | Best Spells
☆ Unique Weapons | Unique Armor
★ All Treasure Map Locations
The Wasteland Courier is a side quest from the Shatterscarp region in Avowed. Read on for a The Wasteland Courier walkthrough and learn its location, how to unlock it, and both the rewards for completing this quest.
List of Contents
The Wasteland Courier Location and How to Unlock
The Wasteland Courier Overview
| The Wasteland Courier Quest Info | |
|---|---|
| Quest Type | Side Quest |
| Starting Location | Thirdborn, Shatterscarp |
| Quest Giver | Daiko |
| Mission Description | |
| A Thirdborn merchant lost contact with his supplier and needs help locating him. | |
How to Unlock The Wasteland Courier
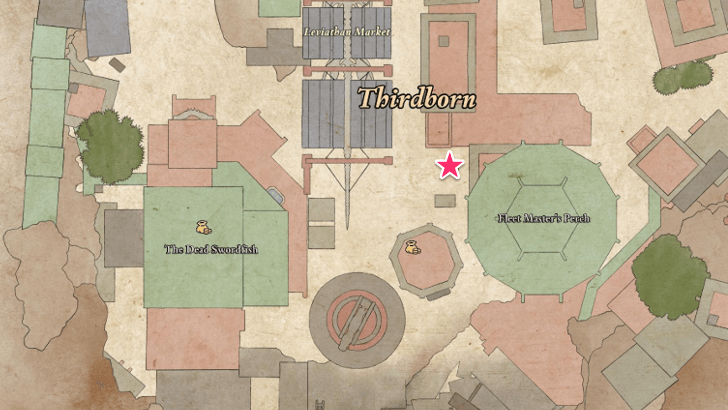
The Wasteland Courier can be unlocked in the Shatterscarp region by talking to Daiko at Thirdborn in the Shatterscarp region.
The Wasteland Courier Walkthrough
| List of Objectives | ||
|---|---|---|
| 1 | Speak to Daiko | |
| 2 | Find the Graffiti | |
| 3 | Find the Meeting Spot | |
| 4 | Talk with the Shady Supplier | |
| 5 | Return with the Illicit Goods | |
| Option 1 | Option 2 | |
| Give to Daiko | Give to the Tira Nui | |
Speak to Daiko
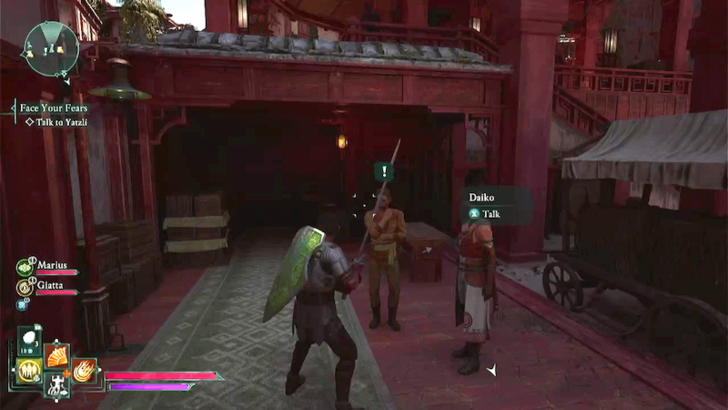
To start the quest, speak to Daiko at the Fleet Master's Perch in Thirdborn. He will task you with locating his supplier in the Deadfall Highlands.
Find the Graffiti

You can follow the white graffiti arrows behind Daiko to reach the meeting spot. But to save you some time, head directly to the back of The Dead Swordfish, southwest of Thirdborn, and interact with the graffiti map on the wall. This will give you the location of the meeting spot.
Find the Meeting Spot
| # | Step-by-step Walkthrough |
|---|---|
| 1 | 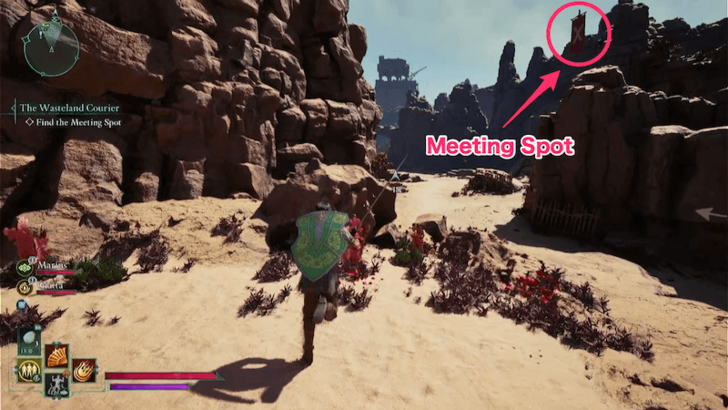 From the Deadfall Highlands Party Camp, head west until you see a large red flag with a white X above the rocky mountain on the right. |
| 2 | 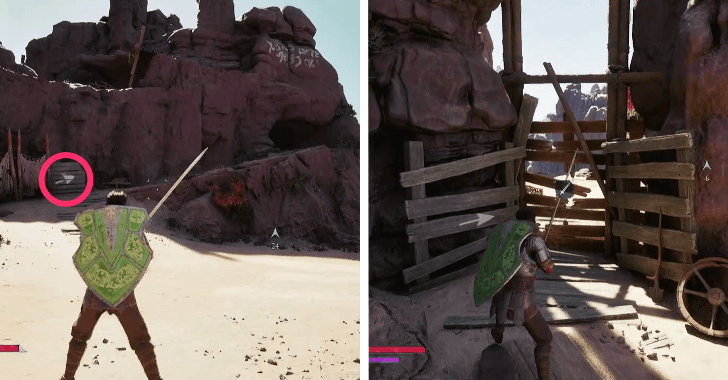 To reach the meeting spot, go behind the smaller rocky mountain on the left and follow the sloped path until you come across a breakable wooden barrier. Look for the familiar white arrows guiding your way. Break the barrier and clear the area of Spiderlings. |
| 3 | 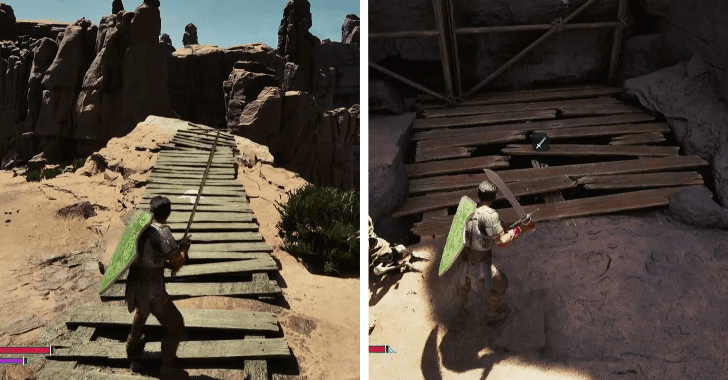 Jump across the ramp, then turn left toward another breakable wooden barrier. Be sure to loot any chests or treasures along the way for valuable items! |
| 4 |  Break the barrier, drop down, and eliminate the Spiderlings in the area. |
| 5 | 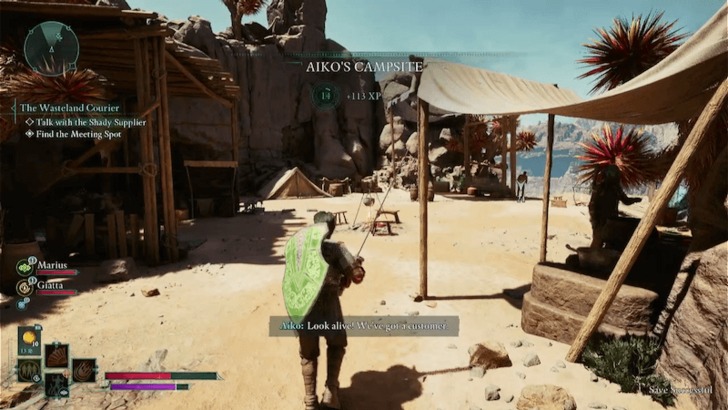 Follow the uphill path until you reach the large red flag with a white X, which is Aiko's Campsite, the meeting spot. |
Talk with the Shady Supplier
| # | Step-by-step Walkthrough |
|---|---|
| 1 | 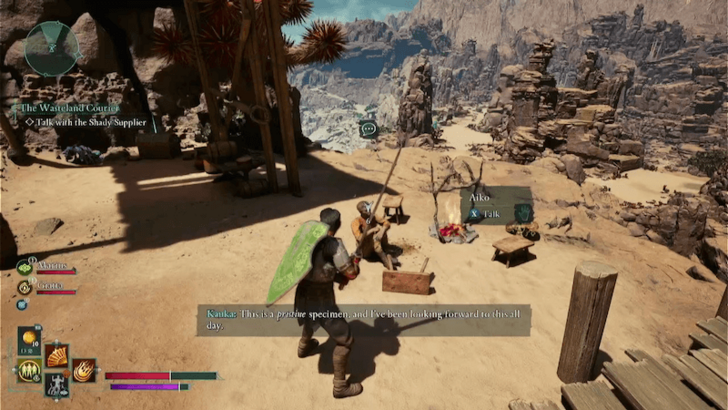 Talk to Aiko, Daiko's twin brother, by the campfire. Regardless of how the conversation goes, you will receive the Suspicious Package. |
| 2 | 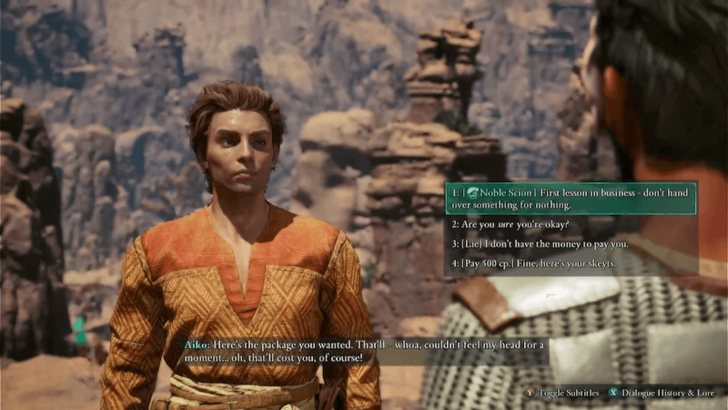 Aiko will then demand 500 Coins as payment for the package. You can either refuse or pay him. However, no matter your choice, Aiko will suddenly drop dead afterward. |
| * | We recommend paying him, as this allows you to loot his body for 1,000 Coins, earning you a 500 Coin profit. If you refuse to pay, you won’t be able to loot his body. |
| 3 |  Leave the meeting spot by blowing up the nearby red barrels to destroy the breakable wall behind them. |
| 4 | 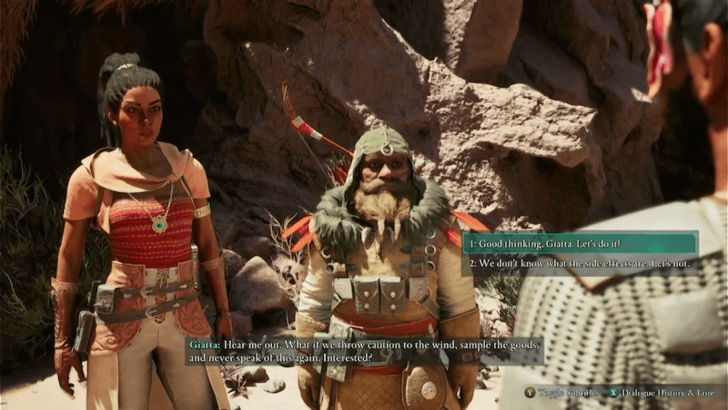 As you head down the path, your companions will suggest trying the substance yourselves. You can respond however you like, as this interaction is purely for comedic roleplay. ▶︎ How to Try Aiko's Drugs |
Return with the Illicit Goods
Return to Thirdborn with the Suspicious Package and decide whether to deliver it to Daiko or hand it over to the Tira Nui.
| Choices | |
|---|---|
| Give to Daiko | Give to the Tira Nui |
Give to Daiko
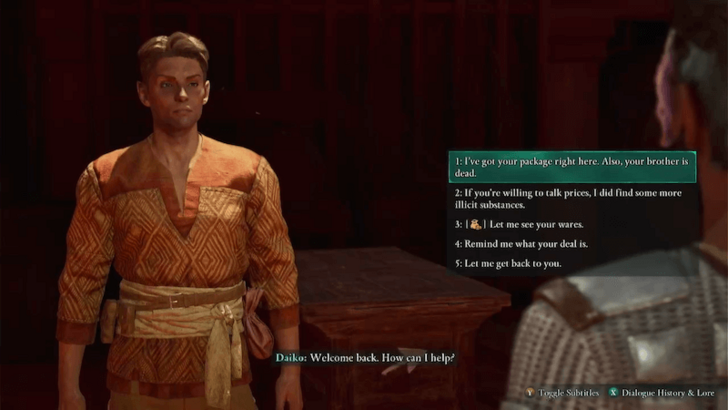
If you choose to give it to Daiko, simply return to him. You can decide how to break the news of his twin brother’s death. At the end of your conversation, he will reward you with the Poisoner’s Kit, completing the quest.
Give to the Tira Nui
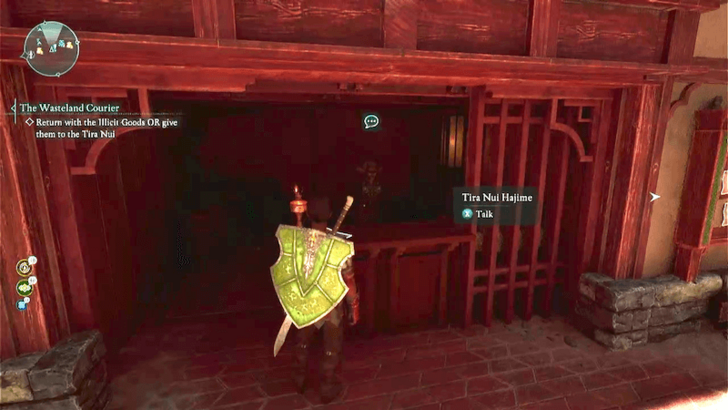
If you want to turn the package over to the Tira Nui, speak with Tira Nui Hajime at the stall just next to Daiko to get the Thirdborn Tira Nui Badge.
You can also get the Poisoner's Kit by choosing this option if you talk to Daiko afterwards and choose the correct dialogue options.
How to Get Both Rewards
| How to Get Both Rewards | ||
|---|---|---|
| 1 | Once you receive the package, go to Tira Nui Hajime first and give him the package. Choose the dialogue options that lets you learn more about Daiko's family. He will give you the Thirdborn Tira Nui Badge. | |
| 2 | Go to Daiko after you get the badge and tell him you gave the package to Tira Nui Hajime. Break the news to him that his brother died from an easily treatable spider bite. Finally, tell him that the package does not work and he will still give you the Poisoner’s Kit. | |
The Wasteland Courier Rewards
Get Poisoner's Kit from Daiko
Once you have the Suspicious Package, you must decide who to give it to, which also determines your reward.
Giving it to Daiko rewards you with the Poisoner’s Kit, a Unique Trinket that grants +5% bonus Poison Damage to your weapons. You can also get the Poisoner’s Kit from Daiko after talking to Tira Nui Hajime as long as you choose the correct dialoge options.
Get Thirdborn Tira Nui Badge from Tira Nui Hajime
Handing the Suspicious Package over to Tira Nui Hajime earns you the Thirdborn Tira Nui Badge, a Unique Trinket that provides +2 Might.
If you choose to talk to Daiko first and give him the package, you will miss out on this reward.
500 Coins
If you paid Aiko 500 Coins after receiving the Suspicious Package, you can loot his body when he drops dead for 1,000 Coins, earning you a 500 Coin profit.
Avowed Related Guides

All Side Quests
Comment
1  Etu'Ilu about 1 year
This way, you can obtain both rewards: 1. Go to Tira Nui, give him the package, and choose the options to learn more about Daiko's family. (Reward: The badge.) 2. Go to Daiko, tell him you delivered the package, inform him that his brother died, and that the package doesn’t work. (Reward: The kit.) That's how I got both.
Author
The Wasteland Courier Walkthrough
Please participate in our site
improvement survey
03/2026
improvement survey
03/2026
Would you assist in
improving Game8's site?
improving Game8's site?

×
We are listening to our users' valuable opinions and discussing how to act on them.
The information collected through this survey will be used for the purpose of improving our services. In addition, the information will only be disclosed a part of a statistic in a format that will not allow identification of personal information.
Begin Survey
Not Now
×
Please rate each item regarding Game8.co's Advertisements.
Amount of Ads
Very Dissatisfied
Somewhat Dissatisfied
Fine
Somewhat Satisfied
Highly Satisfied
Placement of Ads
Timing of Ad Display
Ad Loading Speed
Safeness of Ads
Content of Ads
×
Please rate each item regarding Game8.co's Quality of Articles.
Amount of information
Very Dissatisfied
Somewhat Dissatisfied
Fine
Somewhat Satisfied
Highly Satisfied
Frequency of updates
Speed of new information
Accuracy of articles
Understandibility of articles
Readability of sentences
×
Please rate each item regarding Game8.co's Usability of the Site.
Ease of finding information
Very Dissatisfied
Somewhat Dissatisfied
Fine
Somewhat Satisfied
Highly Satisfied
Loading Speed
Use of Color
Font Size
Visibility of Images
Easy to Understand Layout
×
Please rate each item regarding Game8.co's Message Boards, Comments.
Ease of Writing
Very Dissatisfied
Somewhat Dissatisfied
Fine
Somewhat Satisfied
Highly Satisfied
Readability
Ease in Finding Information
Comment Quality
Comment Quantity
Admin Response
×
Please rate each item regarding Game8.co's Site's new design.
Please rate our site's new design
Very Dissatisfied
Somewhat Dissatisfied
Fine
Somewhat Satisfied
Highly Satisfied
Do you think that the website's design change makes the site easier to use?
Has the new design made it easier for you to find information on the site?
Has the new design improved the overall visual appeal of the site?
How would you rate your overall satisfaction with the new design of the site?
×
How likely are you to recommend Game8 to someone you know?
Very Unlikely
0
1
2
3
4
5
6
7
8
9
10
Very Likely
If you have other opinions regarding potential improvement to the website, please share them with us. We would appreciate your honest opinion.
Note: This is a free response section, so you can proceed without entering anything.
Note: Please be sure not to enter any kind of personal information into your response.
Note: Please be sure not to enter any kind of personal information into your response.
×
Thank You
×
Thank you for participating in our survey! Your answers will help us to improve the quality of our website and services.
We hope you continue to make use of Game8.
We hope you continue to make use of Game8.
Close
Rankings
- We could not find the message board you were looking for.
Gaming News


![Monster Hunter Stories 3 Review [First Impressions] | Simply Rejuvenating](https://img.game8.co/4438641/2a31b7702bd70e78ec8efd24661dacda.jpeg/thumb)
Popular Games

Genshin Impact Walkthrough & Guides Wiki
Honkai: Star Rail Walkthrough & Guides Wiki
Umamusume: Pretty Derby Walkthrough & Guides Wiki
Pokemon Pokopia Walkthrough & Guides Wiki
Resident Evil Requiem (RE9) Walkthrough & Guides Wiki
Monster Hunter Wilds Walkthrough & Guides Wiki
Wuthering Waves Walkthrough & Guides Wiki
Arknights: Endfield Walkthrough & Guides Wiki
Pokemon FireRed and LeafGreen (FRLG) Walkthrough & Guides Wiki
Pokemon TCG Pocket (PTCGP) Strategies & Guides Wiki


Recommended Games
Diablo 4: Vessel of Hatred Walkthrough & Guides Wiki
Cyberpunk 2077: Ultimate Edition Walkthrough & Guides Wiki
Fire Emblem Heroes (FEH) Walkthrough & Guides Wiki
Yu-Gi-Oh! Master Duel Walkthrough & Guides Wiki
Super Smash Bros. Ultimate Walkthrough & Guides Wiki
Pokemon Brilliant Diamond and Shining Pearl (BDSP) Walkthrough & Guides Wiki
Elden Ring Shadow of the Erdtree Walkthrough & Guides Wiki
Monster Hunter World Walkthrough & Guides Wiki
The Legend of Zelda: Tears of the Kingdom Walkthrough & Guides Wiki
Persona 3 Reload Walkthrough & Guides Wiki


All rights reserved
© 2025 Obsidian Entertainment, Inc. Obsidian Entertainment, the Obsidian Entertainment logo, Avowed, and Avowed logos are trademarks or registered trademarks of Obsidian Entertainment, Inc. All rights reserved.
The copyrights of videos of games used in our content and other intellectual property rights belong to the provider of the game.
The contents we provide on this site were created personally by members of the Game8 editorial department.
We refuse the right to reuse or repost content taken without our permission such as data or images to other sites.
Not a nitpick at all, just a little bonus: If you have and put on the Enchanted Suolenet before looting Aiko's 1000 skeyts (provided you paid him the 500 beforehand, as suggested above), you'll pick up 1200 skeyts, thereby getting 700 in profit by doing basically nothing! Nice!