This survey will take about 1 minute.
Your answers will help us to improve our website.
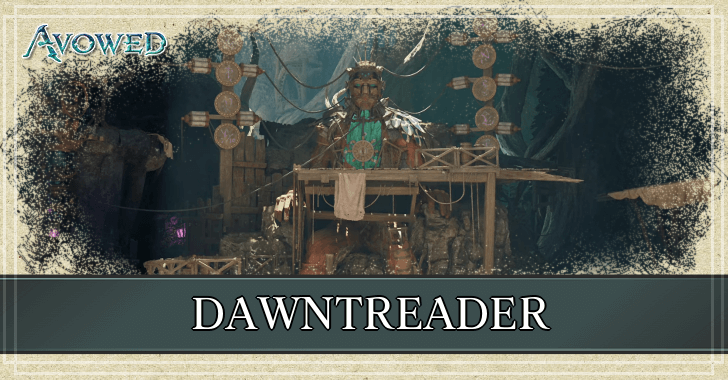
Avowed
Dawntreader Walkthrough and Outcomes
★ 02/17 Update: New Game Plus added!
┗ Character Creation: New Playable Races
☆ Builds: Wizard | Fighter | Ranger
★ Best Weapons | Best Armor | Best Spells
☆ Unique Weapons | Unique Armor
★ All Treasure Map Locations
Dawntreader is a side quest from Dawnshore in Avowed that can be completed in different ways. Read on for a complete Dawntreader walkthrough and find out all Dawntreader outcomes and the best choice you can make.
Dawntreader Walkthrough
| Objectives | |||
|---|---|---|---|
| 1 | Talk to Ofryc | ||
| 2 | Find the Aedyran Expedition Team | ||
| 3 | Retrieve the Relic | ||
| 4 | Optional: Continue Searching for the Aedyran Expedition | Skipping the Optional Objectives ↓ |
|
| 5 | Optional: Speak to the Oracle | ||
| 6 | ① |
② |
|
| 7 | Optional: Speak to the Voice | ||
| 8 | ① |
② |
|
| 9 | Report to the Embassy | ||
Talk to Ofryc to Start Dawntreader

An injured Ofryc can be found outside the Aedyran Embassy in Paradis. Talk to him and agree to help him out to start the Dawntreader side quest.
You can also start this quest by talking to Seegwin and Kauia at Pilgrim’s Path north of Paradis.
Find the Aedyran Expedition Team
| # | Step-by-step Walkthrough |
|---|---|
| 1 | 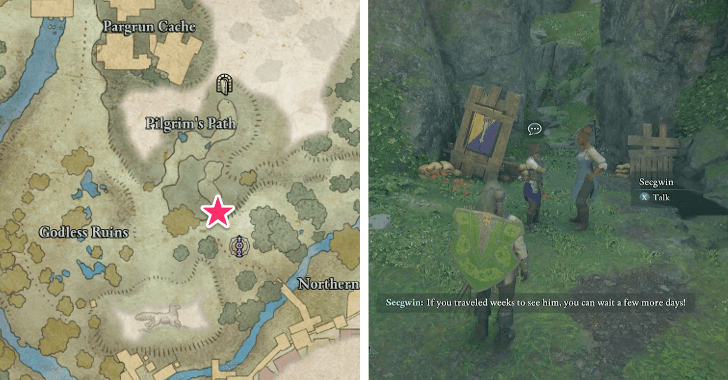 From Paradis, head north toward Pilgrim’s Path. You’ll know you’re on the right track when you encounter two women, Seegwin and Kauia, standing near a narrow passage. |
| 2 |  Continue through the narrow passage and move forward to enter the Eothasian Temple. |
| 3 |  Once inside, turn right and just follow the designated path while navigating through obstacles. Be careful of Xaurips, who are roaming throughout the area. |
| * |  On the right, you’ll find a gate locked by an Essence Generator. You can use Electric Lily Seeds nearby to throw them at the orange-sealed generator to activate it and open the gate. You can also use any Shock-based abilities or weapons such as Jolting Touch or Caeroc’s Pride to power the generator. Once the gate is open, head inside, clear enemies, and loot the area for valuable items. |
| 4 |  Keep moving forward until you reach a wrecked library illuminated by purple light. Head upstairs and speak with Caedmon. |
Retrieve the Relic
| # | Step-by-step Walkthrough |
|---|---|
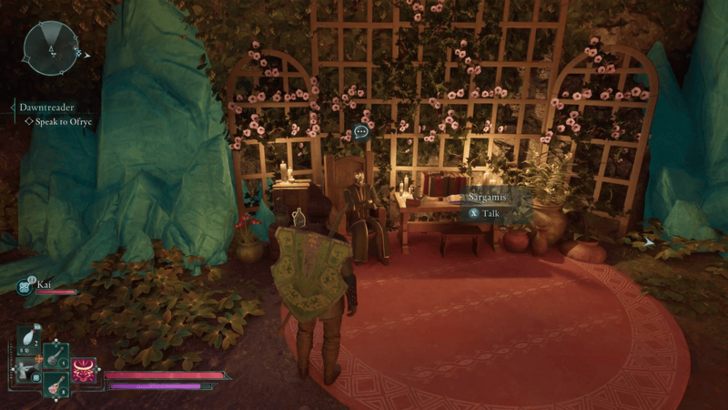
| 1 |  From the library, jump down to the ground and continue moving forward until you reach a workstation. You can ask Sargamis, the Oracle of Eothas, about the expedition team's whereabouts or ignore him and continue north to the cave ahead. |
| 2 |  Turn right and swim through the water to reach another library. Be cautious of Spiders that lurk in the area. |
| 3 |  Burn the webbed wall on the left and proceed into another cave. |
| 4 |  Jump up the ledge on the right and continue forward until you reach what appears to be a shrine. Interact with the relic, the Splinter of Eothas. Upon obtaining the relic, the earth will shake, and a horde of Skeletons will appear. |
| * | 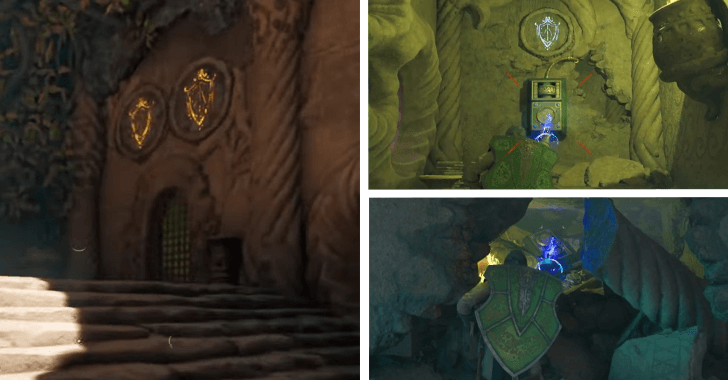 To the right of the relic, there is another gate locked by an Essence Generator. The first generator is inside the relic room, while the second is just below the gate, behind a cracked wall. Use any Shock-based item, weapon, or ability to power the generators. Once activated, open the Sarcophagus inside to collect valuable loot. |
| 5 |  Head back the way you came. You’ll notice that the environment has flooded and opened up a new pathway. Follow this path to the exit. Note that if you stay too long in the shrine, a Godless Executioner will spawn. You can choose whether to fight the boss or run away from it. |
Optional: Continue Searching for the Aedyran Expedition
| # | Step-by-step Walkthrough |
|---|---|
| 1 | 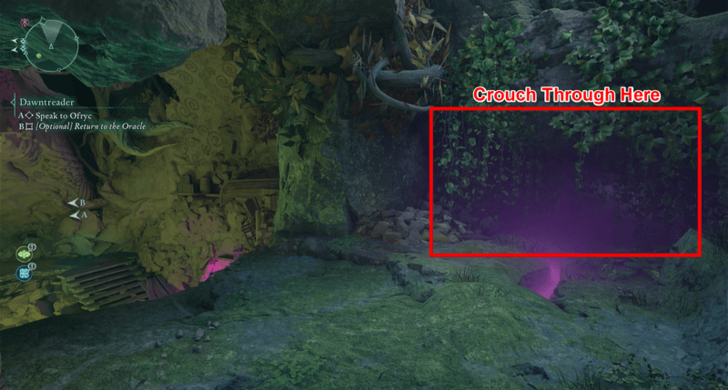 Before returning to Sargamis' workstation, jump to the ledge on the right and follow the purple light leading to a small opening. |
| 2 |  Drop down to enter a purple-lit room, where you'll find the corpses of the expedition team. Pick up Gjeda’s Journal to complete the objective, then leave the room. |
Optional: Speak to the Oracle of Eothas
With the relic in hand, you can speak to Sargamis about it or just run past him and deliver the relic to the Aedyran Embassy in Paradis:
| Options | |
|---|---|
| 1 | Attacking the Oracle |
| 2 | Putting the Relic in the Statue |
| 3 | Destroying the Statue |
| 4 | Going Back to the Embassy (Skipping optional objective) |
Should You Give Sargamis the Relic?
Path 1: Attacking the Oracle

Upon returning to the Oracle, you could immediately be aggressive towards the Oracle for having killed the expedition team. You can refuse to put the relic in the statue and choose the subsequent Attack option. This wil trigger a boss fight with the Oracle. Upon beating him, you can obtain the Last Light of Day Unique Sword.
Path 2: Putting the Relic in the Statue
| # | Step-by-step Walkthrough |
|---|---|
| 1 |  If you speak to Sargamis and choose to give him the relic, he will ask you to place it in the wheel of the statue. |
| 2 |  Pull the lever, but nothing will happen. Talk to Sargamis again, and he will suggest sacrificing someone in the Animancy device. There's 3 main outcomes here: Sacrificng Yourself (leading to death and reload), Sacrificing Sargamis, and Persuading Sargamis to Stop. |
| Option A: Sacrificing Yourself | |
| 3a |  If you volunteer to sacrifice yourself, select “Sure. I'll let you put my soul in the statue,” then stand beneath the Animancy device. Getting sacrificed will result in your death and the Get in the Statue, Envoy achievement. You'll respawn to the last autosave. If you volunteered yourself but want to back out: Step away just as Sargamis is about to activate it. This will trigger a boss fight against Sargamis, that leads you down Path #1. Defeat him to complete the objective. |
| Option B: Sacrificing Sargamis | |
| 3b | Choose the dialogue option “The chime of an unknown godlike wouldn’t interest Eothas. It has to be you,” and Sargamis will then volunteer himself. |
 Wait for him to stand beneath the Animancy device, then activate the switch to electrocute him. He dies, and you can loot the Last Light of Day Unique Sword without a boss fight. |
|
| Option C: Persuading Sargamis to Stop | |
| 3c |  Select the 3 Intellect / 3 Perception or the Background-specific option in order to persuade Sargamis to stop his experiment. This results in Sargamis walking away from the device without a fight. You can then get the Last Light of Day from him by going up the lift near the statue and talking to him in his room. |
Optional: Speak to the Voice

If you choose to kill Sargamis or persuade him to walk away, the Voice will want to speak to you. Interact with the adra pillar on the opposite side of the experiment area, and the Voice will present you with two major choices: fusing the voice with the statue (The statue is yours.) or destroying the statue (Everything about that statue is wrong. I have to destroy it.).
| Options | |
|---|---|
| 1 | Destroying the Statue |
| 2 | Fusing the Voice with the Statue |
| 3 | Not Choosing Either (Skipping optional objective) |
Should You Put the Relic in the Statue or Destroy It?
Choice 1: Destroying the Statue
You can choose to destroy the Eothas statue by overloading the three Essence Generators with Electric Lily Seed or a weapon/spell that causes shock damage.
| # | Essence Generator Locations |
|---|---|
| 1 | 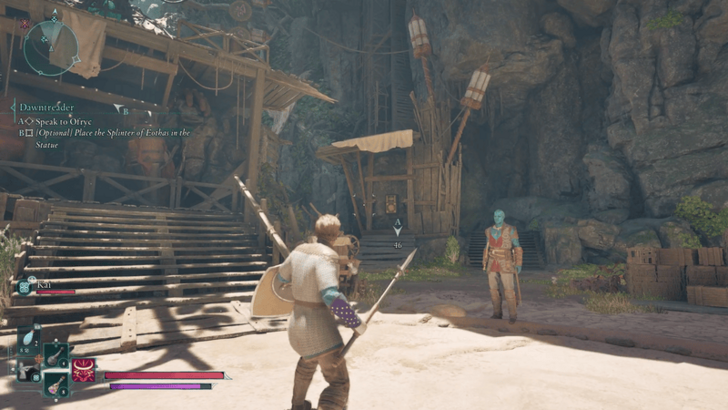 The first generator is located directly to the left of the Eothas statue, behind the destroyable plank. |
| 2 |  The second generator is located to the left of the Eothas statue. Just follow the path until you see a destroyable plank where the generator is located. |
| 3 | 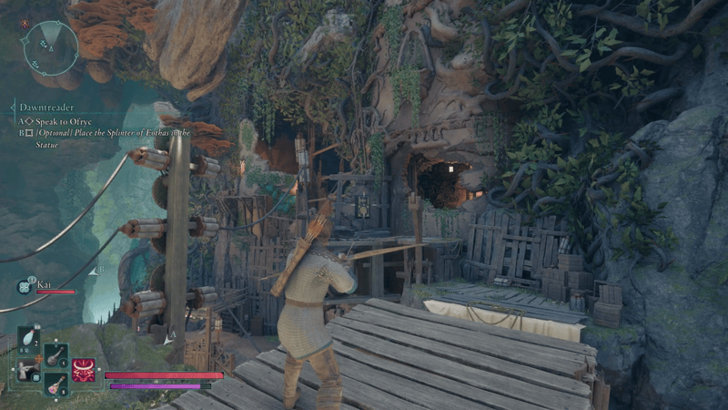 The third generator is located at the top of the Eothas statue and look to the platform above the lever. |
Take note that doing this before killing Sargamis or talking him out of the experiment will trigger a boss fight with Sargamis.
Choice 2: Fusing the Voice with the Statue
If Sargamis was defeated or gave up on his experiment, the Voice will ask to be fused with the statue. Pull the lever to grant the Voice's desire. This unlocks a unique ending after beating the story.
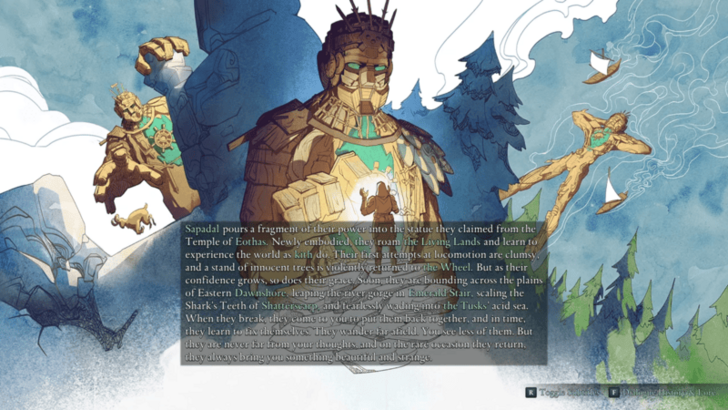 Sapadal pours a fragment of their power into the statue they claimed from the Temple of Eothas. Newly embodied, they roam the Living Lands and learn to experience the world as kith do. Their first attempts at locomotion are clumsy, and a stand of innocent trees is violently returned to the Wheel. But as their confidence grows, so does their grace. Soon, they are bounding across the plains of Eastern Dawnshore, leaping the river gorge in Emerald Stair, scaling the Shark's Teeth of Shatterscarp, and fearlessly wading into the Tusks' acid sea. When they break, they come to you to put them back together, and in time, they learn to fix themselves. They wander far afield. You see less of them. But they are never far from your thoughts, and on the rare occassion they return, they always bring you something beautiful and strange. |
Skipping the Optional Objectives
If you skip the optional objectives (speaking to the Oracle, choosing to destroy the statue or fuse it with the Voice), then you can head straight back to the Embassy in Paradis and complete the quest by talking to Ofryc. This unlocks a unique ending after beating the story.
 "When his energy flags, he recalls the compassion you extended him, and he returns to his work with renewed devotion. His new labors cannot fill the hole left by his god's passing from the world, but they give him succor during the long hours of the night. He dies alone in the Dyrwood - beloved of no one, but remembered by all he knew. He does not forget you." |
Report to the Embassy

Leave the temple through the elevator on the right side of the statue. No matter what you decide to do with the relic—whether you decide to use it, keep it, or avoid the Oracle altogether—your last objective is to report to Ofryc at the embassy. The dialogue will vary based on how much you uncovered about the expedition team's fate.
After speaking with Ofryc, the quest will be complete and you will recieve the Delver’s Caution as a reward.
Dawntreader Outcomes and Best Choice
Dawntreader Endings
| Outcomes | Unlock Condition |
|---|---|
|
Sargamis is alive, and the statue is neither destroyed nor fused with the Voice |
|
① The statue is fused with the Voice and not destroyed. ② Free Sapadal during The Heart of the Living Lands. |
The best choices in Dawntreader are to persuade Sargamis to stop his experiment, in order to get the Unique Sword Last Light of Day without hassle as well as keep him alive, and to let the Voice take over the statue, as it's depicted to be a good ending after beating the story.
Destroying the statue or killing Sargamis while leaving the statue behind will result in no unique Dawntreader ending.
Dawntreader Rewards
Delver's Caution from Ofryc
Completing the quest in whatever way will reward you with the Delver's Caution from Ofryc. This unique ring adds +1 Dexterity and +15% Parkour Speed.
You will not get any additional rewards if you decide to give the relic to Ofryc and the embassy.
Last Light of Day from Sargamis
You can obtain the Last Light of Day sword from Sargamis whether he's dead or alive by either defeating him, convincing him to sacrifice himself, or convincing him to stop the experiment.
If you convinced him to stop the experiment, just take the lift near the statue to find him. Once at the top, move forward to see him sitting in his study room. Talk to him, and he will give you the sword regardless of your dialogue choices.
Dawntreader Location and How to Unlock
Dawntreader Overview
| Dawntreader Quest Info | |
|---|---|
|
|
| Quest Type | Side Quest |
| Starting Location | Southern Paradis, Dawnshore |
| Quest Giver | Ofrye |
How to Unlock Dawntreader

You can unlock Dawntreader by speaking with Ofrye outside the Aedyran Embassy in Southern Paradis or with Seegwin and Kauia at Pilgrim's Path.
Missable During The Animancy Method

Dawntreader is a missable side quest that disappears when you progress through The Animancy Method main quest.
It disappears during the middle of this main quest.
List of Missables and Points of No Return
Avowed Related Guides

All Side Quests
Comment
2  Anonymous@Game8@Game8 about 1 year
Thank you for your feedback! We have updated our guide with more information.
Author
Dawntreader Walkthrough and Outcomes
Please participate in our site
improvement survey
03/2026
improvement survey
03/2026
Would you assist in
improving Game8's site?
improving Game8's site?

×
We are listening to our users' valuable opinions and discussing how to act on them.
The information collected through this survey will be used for the purpose of improving our services. In addition, the information will only be disclosed a part of a statistic in a format that will not allow identification of personal information.
Begin Survey
Not Now
×
Please rate each item regarding Game8.co's Advertisements.
Amount of Ads
Very Dissatisfied
Somewhat Dissatisfied
Fine
Somewhat Satisfied
Highly Satisfied
Placement of Ads
Timing of Ad Display
Ad Loading Speed
Safeness of Ads
Content of Ads
×
Please rate each item regarding Game8.co's Quality of Articles.
Amount of information
Very Dissatisfied
Somewhat Dissatisfied
Fine
Somewhat Satisfied
Highly Satisfied
Frequency of updates
Speed of new information
Accuracy of articles
Understandibility of articles
Readability of sentences
×
Please rate each item regarding Game8.co's Usability of the Site.
Ease of finding information
Very Dissatisfied
Somewhat Dissatisfied
Fine
Somewhat Satisfied
Highly Satisfied
Loading Speed
Use of Color
Font Size
Visibility of Images
Easy to Understand Layout
×
Please rate each item regarding Game8.co's Message Boards, Comments.
Ease of Writing
Very Dissatisfied
Somewhat Dissatisfied
Fine
Somewhat Satisfied
Highly Satisfied
Readability
Ease in Finding Information
Comment Quality
Comment Quantity
Admin Response
×
Please rate each item regarding Game8.co's Site's new design.
Please rate our site's new design
Very Dissatisfied
Somewhat Dissatisfied
Fine
Somewhat Satisfied
Highly Satisfied
Do you think that the website's design change makes the site easier to use?
Has the new design made it easier for you to find information on the site?
Has the new design improved the overall visual appeal of the site?
How would you rate your overall satisfaction with the new design of the site?
×
How likely are you to recommend Game8 to someone you know?
Very Unlikely
0
1
2
3
4
5
6
7
8
9
10
Very Likely
If you have other opinions regarding potential improvement to the website, please share them with us. We would appreciate your honest opinion.
Note: This is a free response section, so you can proceed without entering anything.
Note: Please be sure not to enter any kind of personal information into your response.
Note: Please be sure not to enter any kind of personal information into your response.
×
Thank You
×
Thank you for participating in our survey! Your answers will help us to improve the quality of our website and services.
We hope you continue to make use of Game8.
We hope you continue to make use of Game8.
Close
Rankings
- We could not find the message board you were looking for.
Gaming News


![Everwind Review [Early Access] | The Shaky First Step to A Very Long Journey](https://img.game8.co/4440226/ab079b1153298a042633dd1ef51e878e.png/thumb)

![Monster Hunter Stories 3 Review [First Impressions] | Simply Rejuvenating](https://img.game8.co/4438641/2a31b7702bd70e78ec8efd24661dacda.jpeg/thumb)
Popular Games

Genshin Impact Walkthrough & Guides Wiki
Honkai: Star Rail Walkthrough & Guides Wiki
Umamusume: Pretty Derby Walkthrough & Guides Wiki
Pokemon Pokopia Walkthrough & Guides Wiki
Resident Evil Requiem (RE9) Walkthrough & Guides Wiki
Monster Hunter Wilds Walkthrough & Guides Wiki
Wuthering Waves Walkthrough & Guides Wiki
Arknights: Endfield Walkthrough & Guides Wiki
Pokemon FireRed and LeafGreen (FRLG) Walkthrough & Guides Wiki
Pokemon TCG Pocket (PTCGP) Strategies & Guides Wiki


Recommended Games
Diablo 4: Vessel of Hatred Walkthrough & Guides Wiki
Fire Emblem Heroes (FEH) Walkthrough & Guides Wiki
Yu-Gi-Oh! Master Duel Walkthrough & Guides Wiki
Super Smash Bros. Ultimate Walkthrough & Guides Wiki
Pokemon Brilliant Diamond and Shining Pearl (BDSP) Walkthrough & Guides Wiki
Elden Ring Shadow of the Erdtree Walkthrough & Guides Wiki
Monster Hunter World Walkthrough & Guides Wiki
The Legend of Zelda: Tears of the Kingdom Walkthrough & Guides Wiki
Persona 3 Reload Walkthrough & Guides Wiki
Cyberpunk 2077: Ultimate Edition Walkthrough & Guides Wiki


All rights reserved
© 2025 Obsidian Entertainment, Inc. Obsidian Entertainment, the Obsidian Entertainment logo, Avowed, and Avowed logos are trademarks or registered trademarks of Obsidian Entertainment, Inc. All rights reserved.
The copyrights of videos of games used in our content and other intellectual property rights belong to the provider of the game.
The contents we provide on this site were created personally by members of the Game8 editorial department.
We refuse the right to reuse or repost content taken without our permission such as data or images to other sites.
I can give Ofrye the splinter of Eothas? Idk what they'll give me for it so I'll just lie and I can't find the answer anywhere tbh