How to Beat The Lifer - Oakheart Highcourt Puzzle Solution
★ Version 3.2 Banners → Livestream Codes
┣ Sigrika → Materials, Weapon, Banner
┣ Qiuyuan → Builds, Materials, Weapon
┗ Phase 2 → Lynae, Zani, Phoebe
★ Tapes of Last Words | Soliskin | 3.1 Trophies
★ Exclusives: Tier Maker | State of the Meta
Beating The Lifer requires you to solve a chess puzzle in Oakheart Highcourt in Wuthering Waves. See how to find it in Oakheart Highcourt, how to solve its puzzle, and how to find the debuffs, and defeat it here!
List of Contents
How to Find The Lifer
Navigate the Maze in Oakheart Highcourt
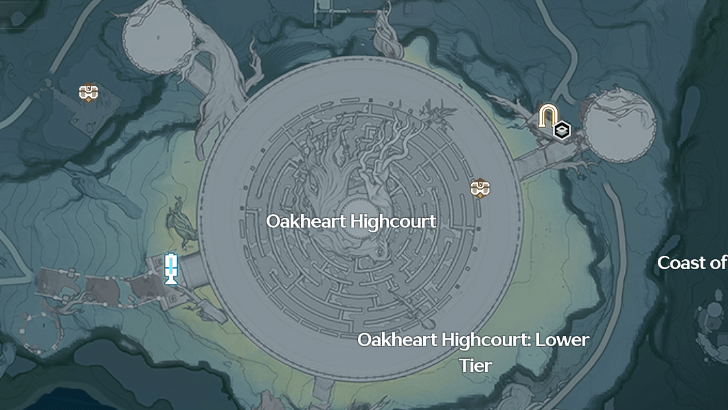
The Lifer can be found in the middle of the maze in Oakheart Highcourt. Only one entrance is available upon arriving there, thus you must navigate which one allows entry to their domain.
Fly Over The Maze
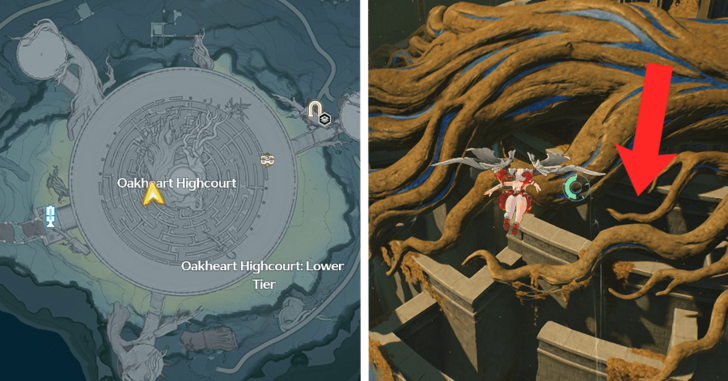
To make it easier, players can simply fly over the maze using the Flight Utility while looking for the entrance.
Aim for the side on the east, where the gigantic tree at the center of the maze has overgrown roots over the top.
How to Beat The Lifer's Board Game
Match Three Black Pieces in a Line
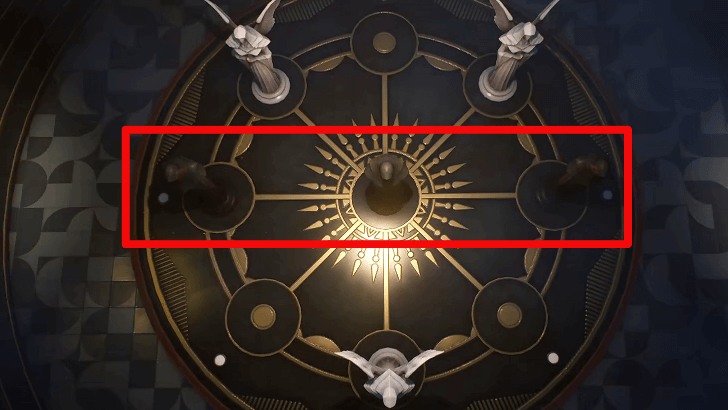
The goal of the board game The Lifer lets you play is to match three pieces of the same color in a line, by moving pieces to an unobstructed space to the side or at the center. You control the black pieces, and The Lifer controls White. The first one to get their pieces in a single line wins.
Block the White Pieces from Winning
Be careful about the positions of the pieces on the board! As soon as you see an opening for White to get three in a row, block it with the nearest available piece to force The Lifer to make a different move!
If it is already blocked, do not move the piece blocking the win, and instead choose a piece that's safer to maneuver.
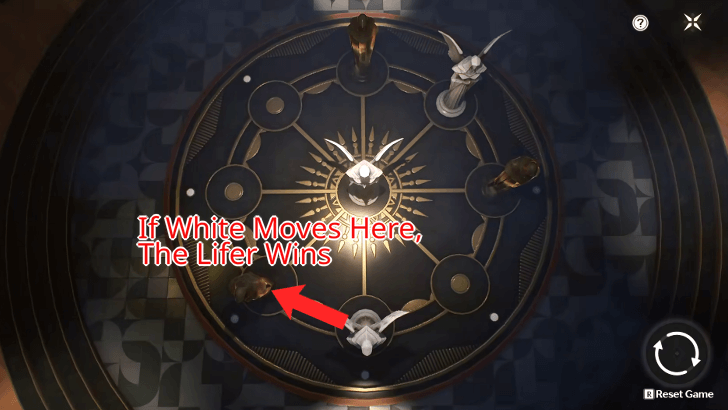
Do Not Let Black Pieces from being Trapped
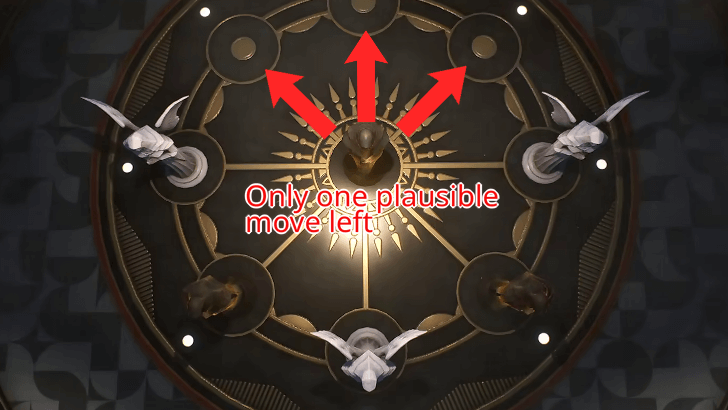
Do not let your pieces get surrounded by The Lifers. If they end up being sandwiched together on one side, the game is as good as lost, as it only guarantees one move left for The Lifer to win.
Control the Center Positon ASAP
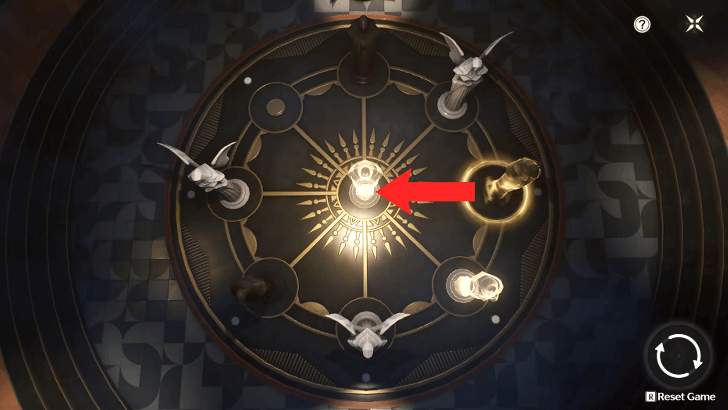
The center position is very crucial to winning the game. Leverage your moves to get the Center, and be strategic when giving it up to get it again at a later gamestate.
Statue Moves are Random
Based on our observation, The Lifer's moves in the board game will be different for each run, making them as unpredictable as ours. There is no defined step-by-step process, but the video should be a sample of the moves taken to win the mini-game.
|
Each run will be different as The Lifer's moves in the board game are randomized. The video is only an example of a winning run, and should only be loosely used as a guide. |
|||
| List of Movements | |||
|---|---|---|---|
| # | Player's Moves | Lifer's Moves | |
| 1 | Center Black → North | Southeast White → Center | |
| 2 | South Black → Southwest | Center White → South | |
| 3 | North Black → Northwest | West White → Center | |
| 4 | Northwest Black → North | Center White -> West | |
| 5 | East Black → Southeast | South White → Center | |
| 6 | Southeast Black → East | Center White → Southeast | |
| 7 | North Black → Center | Southeast White → South | |
| 8 | Center Black → Northwest | South White → Southeast | |
| 9 | Southwest Black → South | Southwest White → Center | |
| 10 | South Black → Southwest | Center White → South | |
| 11 | Northwest Black → Center | White White → Northwest | |
| 12 | Southwest Black → West | - | |
| 13 | You win! | ||
Black Pieces at the Edge Open Doors
You can leave the board game at any point in time, and the pieces remain where you last moved them. Use this to your advantage, as black pieces being at the edge of the board opens doors to certain parts of the Oakheart Highcourt maze; some of which hides treasure, and others provide a way to debuff The Lifer.
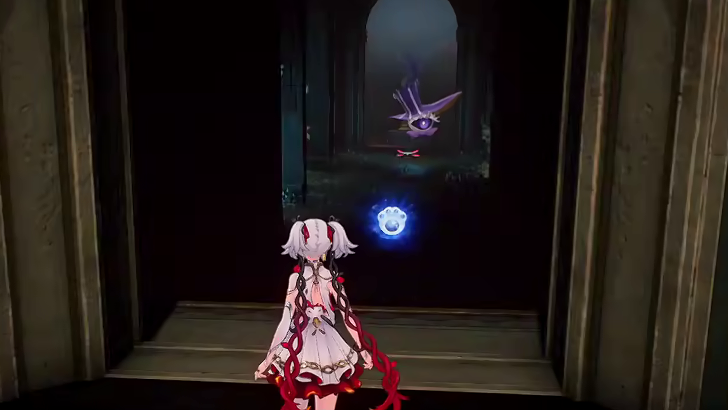
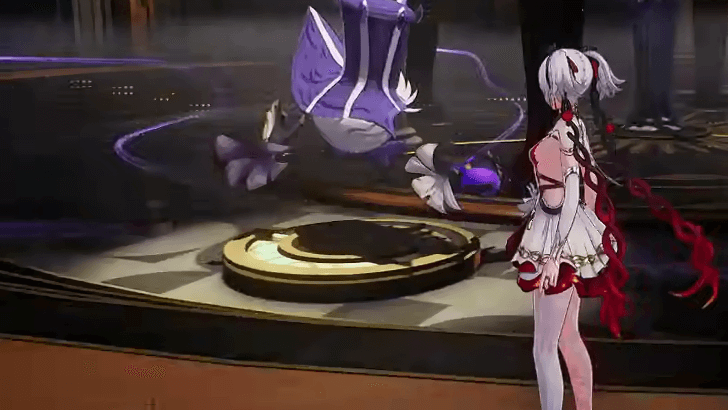
How to Defeat and Debuff The Lifer
After defeating The Lifer in the board game, Rover must battle against the Tacet Discord afterwards. It comes with extremely strong buffs that make it difficult to defeat.
There are four buffs that can be removed from it by locating certain Terminals to deactivate them:
| Buff Name | Buff Effect |
|---|---|
| Growing Loneliness | Recovery: Heals 10% HP after taking no damage for 2 seconds |
| Desire for Escape | Inspiration: 100% ATK buff every 20 seconds, scaling infinitely |
| Impending Stalemate | Increases ATK each time it deals damage, stacks up until it does not do any damage |
| Decay of Time |
Resonance RES: Damage cut to Attribute DMG received by 200% Toughness: 25% more HP |
Use Sensor to Look for Terminals
Make use of the Sensor Utility to scout out potential locations of the locations where debuffs can be activated against The Lifer.
Look for Stakes of Imbalance
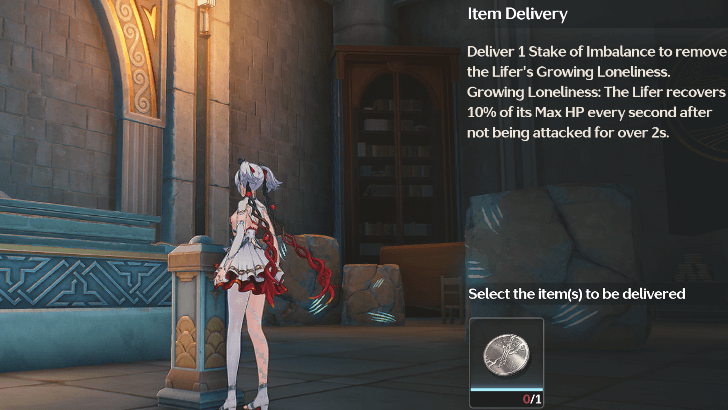
To inflict debuffs against The Lifer, players must find Stakes of Imbalance that are nearby their respective Terminals. After the first activation, players can choose to re-enable and disable the buffs as they see fit.
Location of Stakes and Terminals
| # | Location Details |
|---|---|
| 1 | 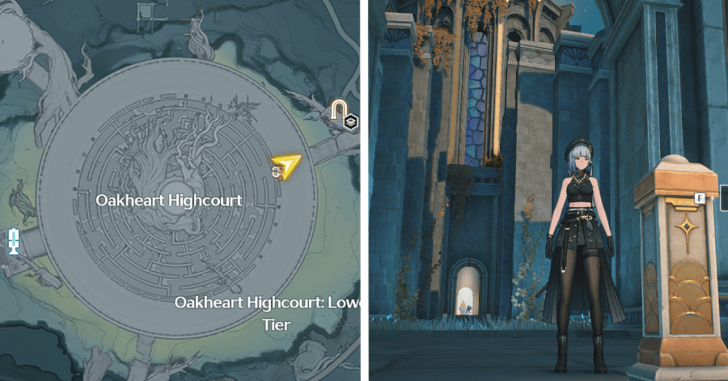 Just west of the terminal, hidden under blocks that can be broken by transforming into a Cuddle Wuddle and use its Plushie Punch. |
| 2 | 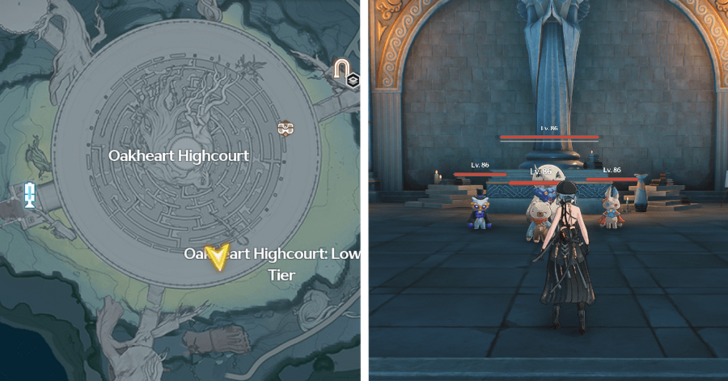 Defeat two waves of Tacet Discords to spawn the Stake near the Terminal itself. |
| 3 | 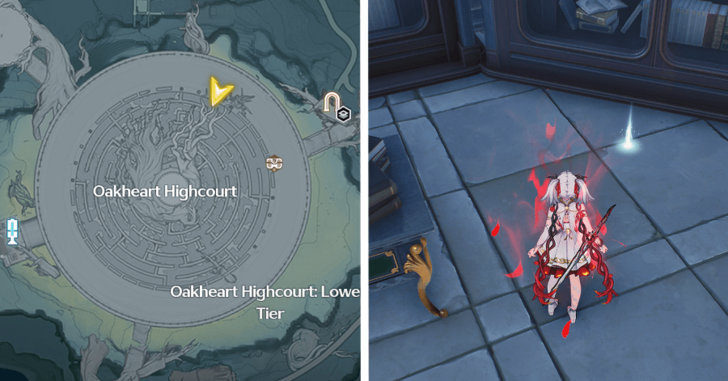 Defeat the Chest Mimic at the lower right corner of the Terminal location to spawn the Stake. |
| 4 | 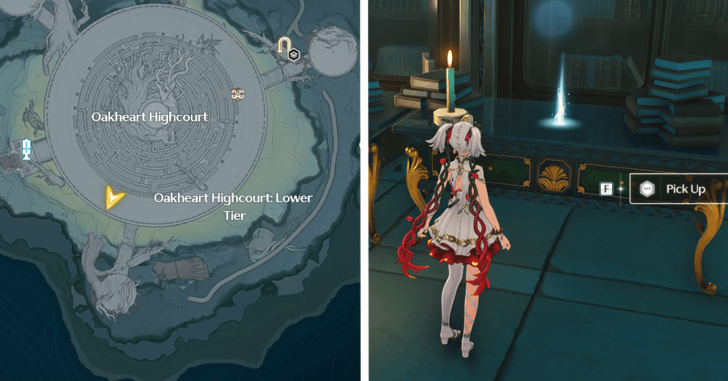 Found at the east side of the Terminal location, sitting on top of a table. |
Can The Lifer Be Defeated at Full Strength?
Very Hard to Defeat While Buffed
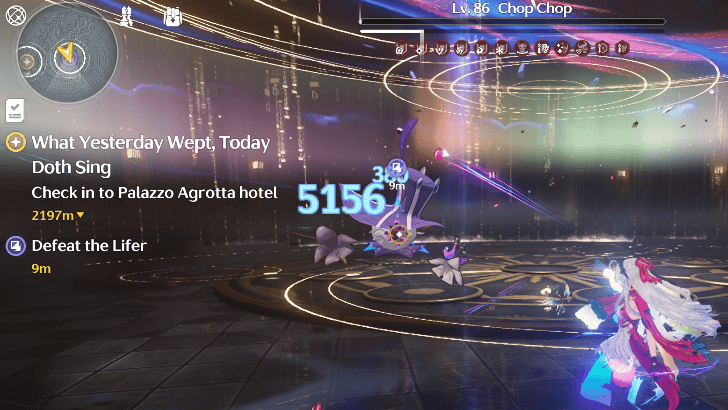
The Lifer's buffs make taking down this Chop Chop Tacet Discord very hard to do. It will take a lot of time and preparation, but it is not impossible.
What makes The Lifer difficult is the combination of the Growing Loneliness and Decay of Time buffs, which makes it a very tanky enemy. It may be for the best to deactivate these two buffs at least first before attempting to defeat The Lifer.
Wuthering Waves Related Guides

Beginner's Guide: Tips and Tricks
Tips and Tricks
Echo Guides
Puzzle Guides
Utilities
| Utilities | |
|---|---|
| All Utilities | Grappling Hook |
| Sensor | Waypoint |
| Casket Sonar | Levitator |
| Projector | Lootmapper |
| Camera | Ultrasonic Pulse Chip |
| New Flight Mechanics | Expedition Motorbike |
Unmarked Challenges
| Unmarked Challenges | |
|---|---|
| Unmarked Challenge Locations | How to Complete the Backflip Challenge |
| Travel in Jinzhou Gulpuff Challenge | Mingming and Doudou Hide And Seek |
FAQs
Comment
Step 9 ( Southeast black) is actually Southwest black
Author

How to Beat The Lifer - Oakheart Highcourt Puzzle Solution
Premium Articles

Rankings

Gaming News


![Monster Hunter Stories 3 Review [First Impressions] | Simply Rejuvenating](https://img.game8.co/4438641/2a31b7702bd70e78ec8efd24661dacda.jpeg/thumb)
![The Seven Deadly Sins: Origin [First Impressions] | A Promising Start](https://img.game8.co/4440581/584e0bfb87908f12c4eab6e846eb1afd.png/thumb)

Popular Games

Genshin Impact Walkthrough & Guides Wiki
Umamusume: Pretty Derby Walkthrough & Guides Wiki
Pokemon Pokopia Walkthrough & Guides Wiki
Honkai: Star Rail Walkthrough & Guides Wiki
Monster Hunter Stories 3: Twisted Reflection Walkthrough & Guides Wiki
Arknights: Endfield Walkthrough & Guides Wiki
Wuthering Waves Walkthrough & Guides Wiki
Zenless Zone Zero Walkthrough & Guides Wiki
Pokemon TCG Pocket (PTCGP) Strategies & Guides Wiki
Monster Hunter Wilds Walkthrough & Guides Wiki


Recommended Games
Diablo 4: Vessel of Hatred Walkthrough & Guides Wiki
Cyberpunk 2077: Ultimate Edition Walkthrough & Guides Wiki
Fire Emblem Heroes (FEH) Walkthrough & Guides Wiki
Yu-Gi-Oh! Master Duel Walkthrough & Guides Wiki
Super Smash Bros. Ultimate Walkthrough & Guides Wiki
Pokemon Brilliant Diamond and Shining Pearl (BDSP) Walkthrough & Guides Wiki
Elden Ring Shadow of the Erdtree Walkthrough & Guides Wiki
Monster Hunter World Walkthrough & Guides Wiki
The Legend of Zelda: Tears of the Kingdom Walkthrough & Guides Wiki
Persona 3 Reload Walkthrough & Guides Wiki


All rights reserved
Copyright© 2024-2025 Kuro Games. All Rights Reserved.
The copyrights of videos of games used in our content and other intellectual property rights belong to the provider of the game.
The contents we provide on this site were created personally by members of the Game8 editorial department.
We refuse the right to reuse or repost content taken without our permission such as data or images to other sites.
Honestly, guys at Game8, if you're gonna write something, please make it helpful. Don’t just throw random bits of info to fill up the page. There are 4 terminals - what’s the problem with signing them up? Which terminal deactivates which buff? It feels like most of the pages are written like this. It’s really frustrating ...