Sorceress Sellen Quest and Location

Sorceress Sellen is an NPC in Elden Ring initially found in Limgrave. Read on to learn more about Sorceress Sellen's questline walkthrough, location, armor and weapon drops, and lore!
List of Contents
Sorceress Sellen Quest Walkthrough
Sorceress Sellen, also known as the Graven Witch, is an apostate witch of Raya Lucaria. Become her apprentice and complete Sellen's quest to get different sorcery-related spells and items for your Intelligence builds.
| Quest Objectives |
|---|
|
|
Become Sellen's Apprentice
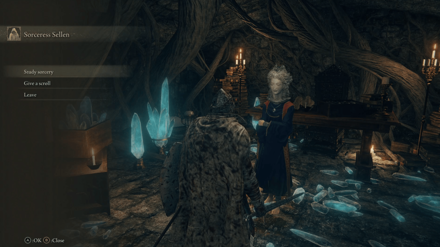
In order to begin Sellen's quest, you will need to become her apprentice. Select I want to learn sorcery and I still want to learn when you first meet her to start learning from her.
Once you become Sellen's apprentice, you will be rewarded with the Nod In Thought gesture. She will also become available as a merchant of Sorceries, allowing you to give her different scrolls to expand her inventory.
Find Primeval Sorcerer Azur
| Map Location |
|---|
 |
| World View |
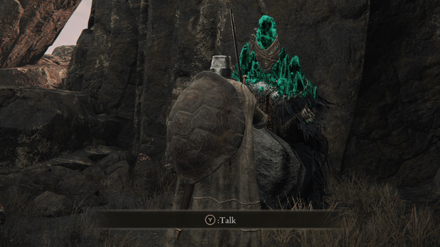 |
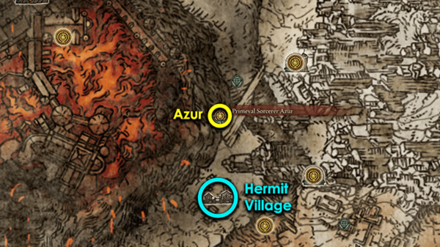
To begin this portion of the quest, players will need to find Primeval Sorcerer Azur on Mt. Gelmir in the Altus Plateau. Interact with him to receive the Comet Azur spell. Return and show the spell to Sellen back at the Waypoint Ruins.
After the spell is shown, select the new dialogue option I have a favor to ask. Listen to her plea for help and accept by selecting the option, Let us Journey Together. This triggers the Finding Lusat segment of the questline.
Search for Lusat
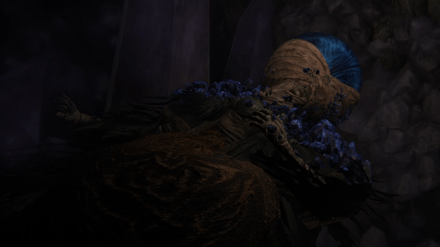
In order to trigger the next phase of Sellen's questline, players will need to meet Primeval Sorcerer Azur Once spoken to, return to Sellen to trigger the quest to look for Master Lusat.
After locating Lusat's body, return and speak to Sellen. She will reward you with a Starlight Shard for your efforts before telling you the location of her real body. Exhaust whatever dialogue is left to progress her questline.
| Quest Objectives |
|---|
Find the Sellia Hideaway
| Location | Map Location |
|---|---|
 |
 |
While Sellen will tell you the last location of Lusat was in Sellia, this will not be true. Instead, to find the sorcerer, head over to the Church of Plague in Caelid. Ride to the northeast and hit the illusory wall that opens the way to the Sellia Hideaway.
Unlock the Glinstone Seal and Find Lusat

Sellen will provide you with a key item called the Sellian Sealbreaker to break the seal of Lusat's resting place. With the Sellia Hideaway discovered, progress through the dungeon until you reach a lit crystal cavern.
Lusat will be at the bottom floor of this area, right after the enemy mage you have to jump over to. Drop down to the small river area and look for a large, Glinstone Seal glowing in the dark. Speak to Lusat and he will give you the spell, Stars of Ruin.
Defeat Starscourge Radahn
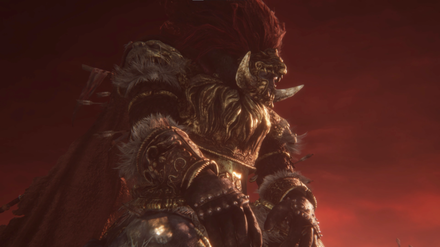
To unlock the next step of Sellen's questline, players will need to defeat Starscourge Radahn in Caelid. After defeating the general, return and speak to Sellen to help her get a new body.
How to Beat Starscourge Radahn
Give Sellen a New Body
| Map Location |
|---|
 |
| World View |
 |
After you defeat Radahn, Sellen will share that her real body is actually trapped somewhere in the Weeping Peninsula. To find it, head over to the Witchbane Ruins in the Weeping Peninsula. She will be in the basement of the ruins.
Speak to Sellen's restrained form and she will give you her Primal Glinstone. Players will have to put this into a new body to free Sellen from her prison.
| Quest Objectives |
|---|
Defeat Royal Knight Loretta and Unlock the Three Sisters
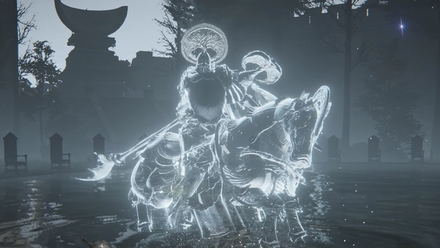
Sellen's new body can only be found in the Three Sisters area to the north of the Caria Manor. For players who have not yet unlocked this area, you will need to defeat Royal Knight Loretta to get there.
How to Beat Royal Knight Loretta
Find Seluvis' Puppet Dungeon
| World View | Map Location |
|---|---|
 |
 |
Sellen's new body can be found inside the puppet dungeon of the wizard named Seluvis. You will have to go through two different illusory walls to find it
The location of the first wall is pictured above, while the second illusory wall will be the large brick wall at the back of the dungeon. Hit it or roll towards it to reveal the other side.
Transplant the Primal Glintstone
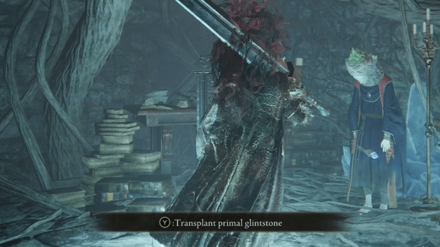
Approach the puppet that looks like Sellen and transplant the Primal Glintstone into it. This will allow Sellen to return to the Academy of Raya Lucaria and continue her work.
Note: If the prompt to transplant the Primal Glintstone does not appear, quit to the main menu and re-enter the game to reload the area without having to fast travel away.
Help Sellen Defeat Jerren
| Map Location |
|---|
 |
| World View |
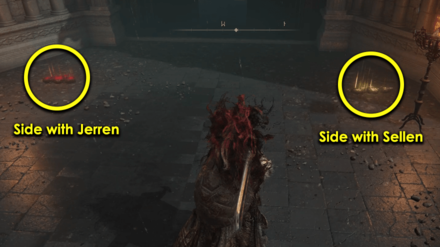 |
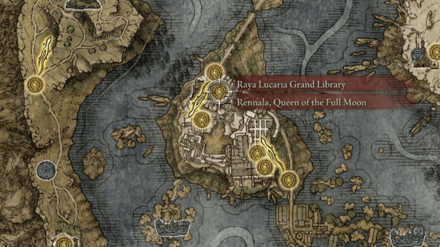
With Sellen free to resume her work as the Graven Witch, head over to the Grand Library of Raya Lucaria for the finale. Side with either Sellen or Jerren to complete Sellen's questline.
Note: A lot of events need to be triggered or completed to get to this point. The following section will detail each step that needs to be completed to get to this point of the quest.
| Quest Objectives |
|---|
Defeat Rennala, Queen of the Full Moon
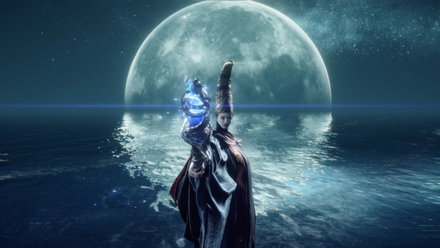
The final showdown between Sellen and Jerren will be at the Grand Library of Raya Lucaria. In order to unlock this location, players will need to defeat Rennala, Queen of the Full Moon.
For players who have beaten Lorreta but not Rennala (this is possible), you will need to explore the Academy of Raya Lucaria and defeat its shardbearer to progress.
How to Beat Rennala, Queen of the Full Moon
Speak to Jerren in Redmane Castle
| World View | Map Location |
|---|---|
 |
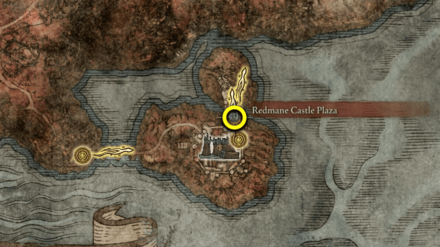 |
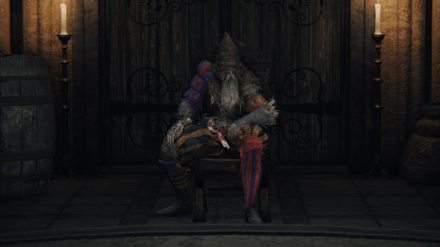
Once Radahn is beaten and Sellen acquires her new body, return to Redmane Castle and speak to Castellan Jerren. He should be seated on a chair in front of the castle's chapel. Exhaust his dialogue to get him to move on to the next location of the quest.
Meet Jerren at the Witchbane Ruins
| World View | Map Location |
|---|---|
 |
 |
Reload Redmane Castle to make sure Jerren is gone from his position. If he is, return to the Witchbane Ruins in the Weeping Peninsula. Go to the basement and Jerren should be there, examining Sellen's supposedly dead body.
Side with Sellen

Once the above steps are complete, head back to the Grand Library of the Academy and exit through the main door. Just outside should be two summoning signs. Choose the gold sign to help out Sellen.
Defeat the now hostile Witch-Hunter Jerren and he will drop his Eccentric's Armor, Eccentric's Hood, Eccentric's Manchettes, and Eccentric's Breeches. Additionally, Sellen will reward you with her Glintstone Kris.
Side with Jerren
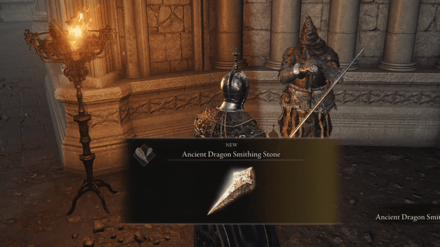
For players siding with Jerren, use the red summoning sign instead. Defeat Sellen to receive a Rune Arc, a Furlcalling Finger Remedy, her Bell Bearing, as well as the Witch's Glintstone Crown.
After the battle, exit through the main doors of the Grand Library. Jerren should be standing right outside. Speak to him to receive an Ancient Dragon Smithing Stone.
Speak to Sellen After the Battle
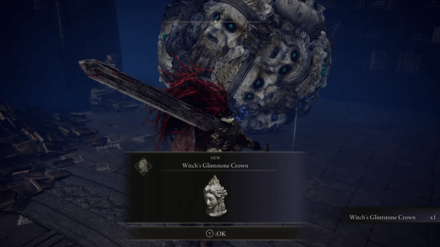
For players who sided with Sellen, speak to her after the battle. She will be standing at the center of the Grand Library where Rennala once sat. Exhaust her dialogue before leaving the area.
Once the area is reloaded, Rennala will return to her usual location and Sellen will have transformed into a Graven Ball of Mages. She will drop her Witch's Glintstone Crown after the transformation.
Still Available as a Merchant
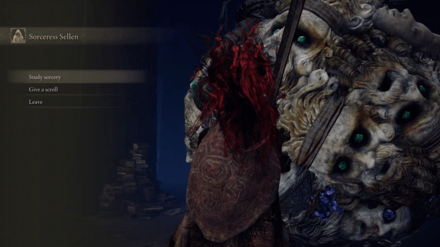
Despite the unfortunate consequences of her forbidden research into Glinstone Sorcery, Sellen will remain interactable. Speak to her if you want to buy Sorceries or give her scrolls to unlock other spells for purchase.
Sorceress Sellen Location
Located Under the Waypoint Ruins
| Map Location | World View |
|---|---|
 |
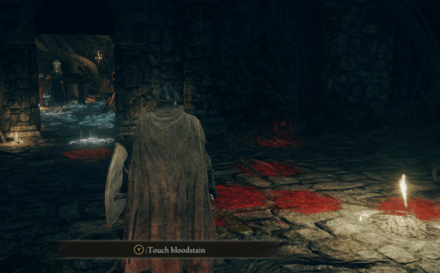 |
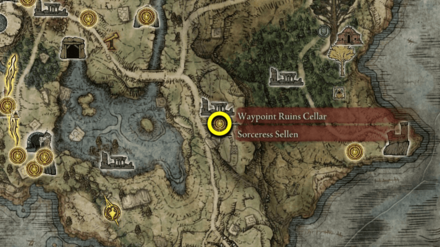
Sorceress Sellen can be found in the Waypoint Ruins Cellar, underneath the Waypoint Ruins in Limgrave. This area can be found on a cliff at the east side of Agheel Lake.
Sorceress Sellen Armor and Weapon Drops
| This NPC has no Drops |
Sorceress Sellen Shop Items
| Shop Items | Price |
|---|---|
| Glintstone Pebble | 1000 Runes |
| Glintstone Stars | 3000 Runes |
| Glintstone Arc | 1500 Runes |
| Crystal Barrage | 1500 Runes |
| Scholar's Armament | 3000 Runes |
| Scholar's Shield | 2500 Runes |
Sorceress Sellen Information and Lore
Lore
- According to her fellow student, Thops, Sorceress Sellen was once regarded as the most promising sorceress in the history of the Academy of Raya Lucaria.
- However, following accusations of her killing off mages in an attempt to glimpse the Primeval Current, she was expelled from the academy and labeled as an apostate. It was after her questionable practices came to light that Sellen was dubbed the Graven Witch after the Graven-Masses that follow the study of forbidden magic.
- Later on, the Tarnished learns from Sellen herself that the witch's real body is shackled by the academy under the Witchbane Ruins in the Weeping Peninsula. There the Graven Witch is imprisoned and kept from terrorizing the world anew.
- Eventually, after reconnecting with the lost sorcery of her Master Azur, Sellen enlists the Tarnished to help her recover the bodies of her former masters. In light of this new thirst for knowledge regarding the Primeval Current, her apprentice complies and finds the body of Master Lusat in Sellia.
- With the preparations complete, all that is left is to leave her shackled form underneath the Witchbane Ruins. The Tarnished helps her, transplanting her Primordial Glintstone into a new body within Seluvis' dungeon.
- Having tasted freedom and a renewed thirst for the arcane, the Graven Witch returns to the Academy of Raya Lucaria to usurp what she calls the restricting rule of the Carian Queen, Rennala.
- With the help of the Tarnished, Sellen slays Witch-Hunter Jerren and manages to secure her spot as the head of the academy. It is with high hopes and a renewed vigour that the Tarnished leaves Sellen to manage the academy.
- However, by delving too far and too deep into the research of the Primeval Current, Sellen's new attempt to restore forbidden magic, spells her tragic end. If the Tarnished returns to the Grand Library of Raya Lucaria after helping Sellen, she will already have turned into an abominable Graven-Mass.
Trivia
- Players can have an additional interaction with Sellen by following the questlines of Blaidd and Ranni. During the search for Nokron, Blaidd will suggest asking Seluvis for help. The dodgy preceptor will refer you to Sorceress Sellen and she will tell you that the only way to find Nokron is to defeat Radahn.
- Players can skip the fight between Sellen and Jerren by killing Jerren at the Witchbane Ruins. Jerren still drops his Eccentric Armor Set and Sellen's quest simply fast forwards to her standing where Rennala once sat.
Sorceress Sellen Quotes
| "Tarnished, are we? A wonder you should turn up here. I am Sellen, a sorcerer, quite plainly." |
|---|
| "Ahh, a yen for glintstone sorceries? Well, your aptitude does appear... passable. But one must choose one's masters wisely. I was exiled from the Academy of Raya Lucaria, as a reviled, apostate witch. Do you still wish to learn from me?" |
|---|
| "The form you see before you is merely a projection. My body lies elsewhere. But the academy's shackles prevent it being moved. My body is on the Weeping Peninsula, at the southern tip of the Lands Between, imprisoned in the ruins just down from the Church of Marika, past the plain of the Wandering Mausoleum. Can you make the journey to my body? I have something that I can only trust with you." |
|---|
| "My apprentice, thank you for coming. These shackles take a toll on us all. There is something I need you to look after. My primal glintstone. A star has fallen, and my fortunes waver. Someone may come for my life. And so, I entrust it with you. My self." |
|---|
| "Jerren, bringer of my death. You have my gratitude. For freeing me from my shackles. But I am afraid your work is done. Join the school. To reflect on your mistake." |
|---|
| "Ahh, my apprentice. You've saved my skin once again. Do you see this? The Queen of Caria is no more. With the bodies of Masters Azur and Lusat returned, the academy can hone the primeval current. So that we, fallen children of the stars, shall beam with brilliance once again." |
|---|
| "My apprentice. Will you stay with us, here at the academy? Oh, I know it's not possible. You have your own calling. To be the next Elden Lord. But do think of me. Of your teacher. On the eve of your crowning. You will always be my darling pupil. Rest assured that I... No, the entire academy, will swear allegiance to the new monarch. My apprentice. Become Elden Lord." |
|---|
| "Hmm, perhaps I'm jumping ahead, but here is a symbol of my allegiance, and the academy's. Do you recall what once I told you? That glintstone is the amber of the cosmos, and sorcery is the study of the stars, and the life therein. When you become Elden Lord, please illuminate me. Lay bare the secrets of life which course the Elden Ring. Next time, I will be your student." |
|---|
Elden Ring Related Guides

| All NPC Guides | |
|---|---|
| All NPC Questlines | DLC NPC Questlines |
Shadow of the Erdtree NPCs
| All NPC Guides | |
|---|---|
| Needle Knight Leda | Hornsent |
| Redmane Freyja | Hornsent Grandam |
| Moore | Sir Ansbach |
| Dryleaf Dane | Thiollier |
| Fire Knight Queelign | Igon |
| Jolan | St. Trina |
| Dragon Communion Priestess | Ymir |
All Elden Ring NPCs
Other NPC Guides
| NPCs Guides | |
|---|---|
| All Merchant Locations | All Nomadic & Isolated Merchants |
| How to Make Hostile NPCs Friendly | |
Author
Sorceress Sellen Quest and Location
improvement survey
03/2026
improving Game8's site?

Your answers will help us to improve our website.
Note: Please be sure not to enter any kind of personal information into your response.

We hope you continue to make use of Game8.
Rankings
- We could not find the message board you were looking for.
Gaming News
Popular Games

Genshin Impact Walkthrough & Guides Wiki

Honkai: Star Rail Walkthrough & Guides Wiki

Umamusume: Pretty Derby Walkthrough & Guides Wiki

Pokemon Pokopia Walkthrough & Guides Wiki

Resident Evil Requiem (RE9) Walkthrough & Guides Wiki

Monster Hunter Wilds Walkthrough & Guides Wiki

Wuthering Waves Walkthrough & Guides Wiki

Arknights: Endfield Walkthrough & Guides Wiki

Pokemon FireRed and LeafGreen (FRLG) Walkthrough & Guides Wiki

Pokemon TCG Pocket (PTCGP) Strategies & Guides Wiki
Recommended Games

Diablo 4: Vessel of Hatred Walkthrough & Guides Wiki

Fire Emblem Heroes (FEH) Walkthrough & Guides Wiki

Yu-Gi-Oh! Master Duel Walkthrough & Guides Wiki

Super Smash Bros. Ultimate Walkthrough & Guides Wiki

Pokemon Brilliant Diamond and Shining Pearl (BDSP) Walkthrough & Guides Wiki

Elden Ring Shadow of the Erdtree Walkthrough & Guides Wiki

Monster Hunter World Walkthrough & Guides Wiki

The Legend of Zelda: Tears of the Kingdom Walkthrough & Guides Wiki

Persona 3 Reload Walkthrough & Guides Wiki

Cyberpunk 2077: Ultimate Edition Walkthrough & Guides Wiki
All rights reserved
ELDEN RING™ & ©BANDAI NAMCO Entertainment Inc. / ©2021 FromSoftware, Inc.
The copyrights of videos of games used in our content and other intellectual property rights belong to the provider of the game.
The contents we provide on this site were created personally by members of the Game8 editorial department.
We refuse the right to reuse or repost content taken without our permission such as data or images to other sites.


![Everwind Review [Early Access] | The Shaky First Step to A Very Long Journey](https://img.game8.co/4440226/ab079b1153298a042633dd1ef51e878e.png/thumb)

![Monster Hunter Stories 3 Review [First Impressions] | Simply Rejuvenating](https://img.game8.co/4438641/2a31b7702bd70e78ec8efd24661dacda.jpeg/thumb)


