Monk Flying Dragon PvP Build Guide: Gems, Items, and How to Play
Check out Game8's Diablo 4 Wiki for our latest guides!
☆Diablo 4 Best Builds
☆Diablo 4 Interactive Map
☆Diablo 4 Class Tier List
☆Diablo 4 Story Walkthrough
☆Diablo 4 Leveling Guide
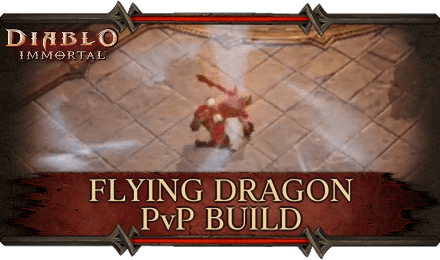
This is a guide to the Flying Dragon PvP Build, a PvP Monk Build in Diablo Immortal! Dash around with ease, and gather enemies into an ambush! Read on to learn how to play this party build, which excels at general PvP, and what gear, skill, and gem setups to use.
| All Monk Guides | ||
|---|---|---|
 Monk Class Overview Monk Class Overview |
 Best Monk Builds Best Monk Builds |
|
Flying Dragon PvP Build Profile
Build Profile and Rating
| Flying Dragon PvP | |
|---|---|
| Class |
 Monk Monk
|
| Build Rating |
|
| Preference | Solo and Party |
| Build Focus | PvP |
| Stat Priorities |
・Strength ・Critical Hit Chance ・Critical Hit Damage ・Movement Speed ・Vitality |
Build Strengths and Weaknesses
| Strengths | Weaknesses |
|---|---|
| ・Agile, High Mobility
・High Damage ・Good at Duels |
・Low Defense
・No Support Skills ・Weak Against Multiple Enemies |
Build Gear and Skill Summary
| Main Hand | Off Hand | ||
|---|---|---|---|
| Dragon's Indignation | Respite's Sigh | ||
| Head | Shoulder | Chest | Legs |
| Solace of the Peaks | Discipline's Weight | Disciplined Respite | Tiger's Flight |
| Set (Windloft Perfection) | |||
| Neck | Ring 1 | Ring 2 | Waist |
 Wisdom's Edge Wisdom's Edge
|
 Fairfleet Fairfleet
|
 Foulfleet Foulfleet
|
 Whipcrack Whipcrack
|
| Hands | Feet | ||
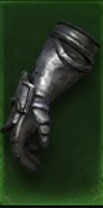 Hurtling Steel Hurtling Steel
|
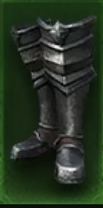 Stump-Stir Stump-Stir
|
||
| Paragon Trees | |||
| Vanquisher > Gladiator > Mastermind | |||
| Skills | |||
|
|
|||
|
|
|
||
|
|
|
||
| Charm Priority | |||
Gem Setup
| Gem Name | Effect |
|---|---|
| + 8 Armor | |
| + 8 Potency | |
| + 80 Life | |
| + 8 Armor Penetration | |
| + 8 Resistance | |
| + 8 Damage |
| Gem Name | Effect |
|---|---|
 Blessing of the Worthy Blessing of the Worthy | When you take damage, you have 20% chance to unleash retribution on all nearby enemies, dealing damage equal to 12% of your maximum Life. Cannot occur more often than once every 20 seconds. For 6 seconds after unleashing divine retribution, you take 4% decreased damage. Unlocks at Rank 3 |
 Blood-Soaked Jade Blood-Soaked Jade | Increases all damage you deal by up to 8% while at full Life, with a minimum bonus of 4% while at low Life. Increases your Movement Speed by 10%. Take 2% decreased damage while below 50% Life. Unlocks at Rank 3 |
 Everlasting Torment Everlasting Torment | Your critical hits inflict agony, dealing 16.7% Base damage + 202 every second for 3 seconds. Each enemy can only be affected by this once every 6 seconds. Each nearby enemy afflicted with agony increases your Attack Speed by 1%. Each enemy can only be affected by this once every 6 seconds. Unlocks at Rank 3 |
 Fervent Fang Fervent Fang | Each time you deal damage to an enemy, that enemy now takes 0.80% increased from your attacks, up to a maximum increase of 8% at 10 stacks. All damage you deal to Elite monsters increased by 1.5% Unlocks at Rank 3 |
 Howler's Call Howler's Call | Your Primary Attack has a 10% chance to summon a charging spirit wolf that inflicts 150% base damage + 1458 to all enemies in its path. Cannot occur more often than once every 20 seconds. The spirit wolf has a 12% chance to Stun enemies for 3 seconds. Unlocks at Rank 3 |
 Power and Command Power and Command | Power and Command alternates states every 9 seconds. Power increases your Primary Attack damage by 8%. Command increases all other skill damage by 8%. You have a 7.5% chance to dispel a negative effect on you each time Power and Command states alternate. Unlocks at Rank 3 |
Indicated gem effects only display their base effect. Values will be higher depending on the gem's upgrade level.
Pull & Assassinate

The main function of this build is to forcefully pull enemies close to your party members or into an ambush with Gather skills, then distract or slow them down before taking them out.
Damage Over Time
The Dragon's Indignation main hand weapon adds damage over time (DoT) to Seven-Sided Strike, as it now continually burns enemies. The Everlasting Torment Gem adds to the DoT, inflicting Agony. Lastly, Solace of the Peaks turns Inner Sanctuary into an area effect skill that continually deals damage and Chills opponents, slowing them down. All of these combined will make it difficult for an enemy to escape and survive.
Huge Buffs to DPS
The Legendary Gems Blood-Soaked Jade, Fervent Fang, are vital for any DPS build, and all work to increase your primary attack and skill damage.
Windloft Perfection Set for Speed and Damage
The Windloft Perfection Set grants you increased speed, and increased damage while the buff is active. Having all six parts of the Set will let you keep this speed and damage buff for longer.
Gear Improves Inner Sanctuary and Seven-Sided Strike
Flying Dragon is already a very powerful skill that is not improved by any Legendary gear, so it's good to focus on improving the other skills in your arsenal, like Inner Sanctuary and Seven-Sided Strike.
Note: Feel free to choose any Leg gear, as none of them synergize with this build's skill loadout.
Stats and Paragon Priorities
Attribute Priorities
| Strength | Strength is top priority to increase your damage output to beat your enemy before they beat you. |
|---|---|
| Critical Hit Chance | Increasing Critical Hit Chance increases your DPS, effectively making enemies go down faster. |
| Critical Hit Damage | Critical Hit Damage is tied in with Critical Hit Chance. The harder your crits hit, the faster enemies will lose their HP. |
| Movement Speed | High movement speed is important, so that you can either run away from enemies chasing after you, or quickly sneak up on unsuspecting foes. |
| Vitality | Some HP would be welcome, when squaring off against enemies. |
Paragon Priorities
| Vanquisher > Gladiator > Mastermind |
|---|
Start off with Vanquisher to up your Damage output. Then, move over to Gladiator to increase your survivability in PvP. Finally, get onto the Mastermind Paragon tree to further increase your damage and combat effectiveness in a party.
How to Play
|
|
Charge in with Mystic Strike
Once you see an enemy within range of your allies, rush in with Mystic Strike to get up close. You can get just get close enough so that your primary attack Fists of Thunder can send you the rest of the way.
Pull The Enemy Into Harm's Way
Alternatively, you can attempt to get behind the enemy with your active speed buff, then use Mystic Strike to dash past the enemy and Gather them close to your allies. Right after the enemy gets pulled, use Flying Dragon to pull them right into the center of an ambush.
Chill and Destroy
Immediately cast Inner Sanctuary to inflict Chill on them and slow their movements. Then, use Seven-Sided Strike alongside your primary attack to deal tons of damage to the repositioned enemy, while your allies gang up on them as well.
When in Trouble, Escape with Mystic Strike
If things are starting to look dicey, making a tactical retreat with Mystic Strike is sometimes the best route. Get used to the flow of battle, then you'll be able to make snap decisions on when best to attack or retreat.
Diablo Immortal Related Guides

Builds By Class
| Diablo Immortal Builds | ||
|---|---|---|
All Monk Builds
| Diablo Immortal Builds | ||
|---|---|---|
 Exploding Palm Elder Rift Exploding Palm Elder Rift
(PvE) |
 Flying Dragon PvP Flying Dragon PvP
(PvP) |
 Imprisoned Fist PvP Imprisoned Fist PvP
(PvP) |
 Inner Sanctuary Elder Rift Inner Sanctuary Elder Rift
(PvE) |
 Inner Sanctuary PvP Inner Sanctuary PvP
(PvP) |
 Monk Leveling Build Monk Leveling Build
(PvE) |
 Mystic Allies Challenge Rift Mystic Allies Challenge Rift
(PvE) |
 Mystic Strike Challenge Rift Mystic Strike Challenge Rift
(PvE) |
 Wave of Light PvP Wave of Light PvP
(PvP) |
Comment
Author
Monk Flying Dragon PvP Build Guide: Gems, Items, and How to Play
improvement survey
03/2026
improving Game8's site?

Your answers will help us to improve our website.
Note: Please be sure not to enter any kind of personal information into your response.

We hope you continue to make use of Game8.
Rankings
- We could not find the message board you were looking for.
Gaming News
Popular Games

Genshin Impact Walkthrough & Guides Wiki

Honkai: Star Rail Walkthrough & Guides Wiki

Umamusume: Pretty Derby Walkthrough & Guides Wiki

Pokemon Pokopia Walkthrough & Guides Wiki

Resident Evil Requiem (RE9) Walkthrough & Guides Wiki

Monster Hunter Wilds Walkthrough & Guides Wiki

Wuthering Waves Walkthrough & Guides Wiki

Arknights: Endfield Walkthrough & Guides Wiki

Pokemon FireRed and LeafGreen (FRLG) Walkthrough & Guides Wiki

Pokemon TCG Pocket (PTCGP) Strategies & Guides Wiki
Recommended Games

Diablo 4: Vessel of Hatred Walkthrough & Guides Wiki

Cyberpunk 2077: Ultimate Edition Walkthrough & Guides Wiki

Fire Emblem Heroes (FEH) Walkthrough & Guides Wiki

Yu-Gi-Oh! Master Duel Walkthrough & Guides Wiki

Super Smash Bros. Ultimate Walkthrough & Guides Wiki

Pokemon Brilliant Diamond and Shining Pearl (BDSP) Walkthrough & Guides Wiki

Elden Ring Shadow of the Erdtree Walkthrough & Guides Wiki

Monster Hunter World Walkthrough & Guides Wiki

The Legend of Zelda: Tears of the Kingdom Walkthrough & Guides Wiki

Persona 3 Reload Walkthrough & Guides Wiki
All rights reserved
©2022 BLIZZARD ENTERTAINMENT, INC. ALL RIGHTS RESERVED.
All trademarks referenced herein are the properties of their respective owners.
The copyrights of videos of games used in our content and other intellectual property rights belong to the provider of the game.
The contents we provide on this site were created personally by members of the Game8 editorial department.
We refuse the right to reuse or repost content taken without our permission such as data or images to other sites.


![Monster Hunter Stories 3 Review [First Impressions] | Simply Rejuvenating](https://img.game8.co/4438641/2a31b7702bd70e78ec8efd24661dacda.jpeg/thumb)


