All Set Item Drop Locations & Bonuses
Check out Game8's Diablo 4 Wiki for our latest guides!
☆Diablo 4 Best Builds
☆Diablo 4 Interactive Map
☆Diablo 4 Class Tier List
☆Diablo 4 Story Walkthrough
☆Diablo 4 Leveling Guide
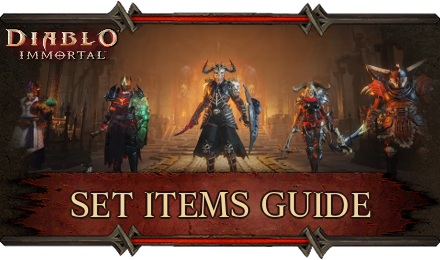
Set items are the highest quality, end-game tier equipment for your secondary gear slots in Diablo Immortal. Read on to learn more about Set Items, where they drop, what bonuses they grant, and how to get them!
List of Contents
Set Item Drop Locations & Bonuses
| All Set Items | |||
|---|---|---|---|
| Feasting Baron's Pack | Grace of the Flagellant | Issatar Imbued | Shepherd's Call to Wolves |
| Untouchable Mountebank | Vithu's Urges | War Rags of Shal'baas | Windloft Perfection |
Feasting Baron's Pack
| Set Item | Slot | Drop Location |
|---|---|---|
|
|
Feet | Cave of Echoes (Hell I+) |
|
|
Hands | Kikuras Rapids (Hell II+) |
 The Subjugator The Subjugator
|
Neck | Destruction's End (Hell II+) |
 The Turnkey The Turnkey
|
Ring | Tomb of Fahir (Hell IV) |
 The Prisoner The Prisoner
|
Ring | Forgotten Tower (Hell IV) |
 The Gaoler The Gaoler
|
Waist | Temple of Namari (Hell I+) |
Set Bonus
| No. of Pieces Equipped | Bonus |
|---|---|
| 2 out of 6 Set Item Bonus | Duration of abilities that induce Loss of Control increases by 30% |
| 4 out of 6 Set Item Bonus | Enemies suffering Loss of Control take 15% more damage. |
| 6 out of 6 Set Item Bonus | Freezes and damages nearby enemies when you kill an enemy affected by your Loss of Control effect. |
This set is recommended for builds that can consistently apply Control effects and/or deal burst damage within the debuff's duration.
| Builds Using the Feasting Baron's Pack Set |
|---|
Grace of the Flagellant
| Set Item | Slot | Drop Location |
|---|---|---|
|
|
Feet | Mad King's Breach (Hell I+) |
|
|
Hands | Cavern of Echoes (Hell II+) |
 Slit Throat Slit Throat
|
Neck | Destruction's End (Hell II+) |
 Broken Palm Broken Palm
|
Ring | Kikuras Rapids (Hell IV+) |
 Severed Thumb Severed Thumb
|
Ring | Temple of Namari (Hell IV+) |
 Open Gut Open Gut
|
Waist | Pit of Anguish (Hell I+) |
Set Bonus
| No. of Pieces Equipped | Bonus |
|---|---|
| 2 out of 6 Set Item Bonus | Persistent Ground, Channeled, and Continual Damage are all increased by 15% |
| 4 out of 6 Set Item Bonus | Deals additional damage to enemies after 5 successive hits. |
| 6 out of 6 Set Item Bonus | 4% chance to summon lightning when damaging an enemy. Lightning will damage and stun enemies for 2 seconds upon hitting. |
Recommended Set if your build is using Channel skills as the main source of damage. However, the 6-piece Set bonus is only useful in PvP as most of the powerful enemies in PvE are immune to Control.
| Builds Using the Grace of the Flagellant Set |
|---|
Issatar Imbued
| Set Item | Slot | Drop Location |
|---|---|---|
|
|
Feet | Destruction's End (Hell I+) |
|
|
Hands | Forgotten Tower (Hell II+) |
 Issatar At Rest Issatar At Rest
|
Neck | Mad King's Breach (Hell II+) |
 Issatar Enraged Issatar Enraged
|
Ring | Pit of Anguish (Hell IV) |
 Issatar Undone Issatar Undone
|
Ring | Cavern of Echoes (Hell IV) |
 Issatar Contained Issatar Contained
|
Waist | Tomb of Fahir (Hell I+) |
Set Bonus
| No. of Pieces Equipped | Bonus |
|---|---|
| 2 out of 6 Set Item Bonus | Movement speed increases by 30% for 2 seconds every time an enemy is defeated |
| 4 out of 6 Set Item Bonus | Damage dealt increases by 2.5% for every 5% increase in movement speed. Damage buff stacks up to 25%. |
| 6 out of 6 Set Item Bonus | 10% chance to obtain a soul orb for 10 seconds every time an enemy is defeated. Cannot be used successively. |
Great Set for speedrunning PvE areas like Dungeons, Rifts, or roaming zones while farming.
| Builds Using the Issatar Imbued Set |
|---|
Shepherd's Call to Wolves
| Set Item | Slot | Drop Location |
|---|---|---|
| Shepherd and Leader | Feet | Temple of Namari (Hell I+) |
| Shepherd and Beastmaster | Hands | Destruction's End (Hell II+) |
| Shepherd and Architect | Neck | Tomb of Fahir (Hell II+) |
| Shepherd and Father | Ring | Forgotten Tower (Hell IV+) |
| Shepherd and Mother | Ring | Mad King's Breach (Hell IV) |
 Shepherd and Begetter Shepherd and Begetter
|
Waist | Kikuras Rapids (Hell I+) |
Set Bonus
| No. of Pieces Equipped | Bonus |
|---|---|
| 2 out of 6 Set Item Bonus | Summons deal 15% more damage. |
| 4 out of 6 Set Item Bonus | Critical Hit Chance increases by 3% every time you summon. Stacks up to 18%. |
| 6 out of 6 Set Item Bonus | Summons enter a Frenzy state for 10 seconds every time you land a critical hit. |
Perfect Set for Necromancers as they rely heavily on their summons, both for offense and defense.
| Builds Using the Shepherd's Call to Wolves Set |
|---|
Untouchable Mountebank
| Set Item | Slot | Drop Location |
|---|---|---|
| Mountebank's Slyness | Feet | Forgotten Tower (Hell I+) |
| Mountebank's Shirking | Hands | Pit of Anguish (Hell II+) |
| Mountebank's Flourish | Neck | Cavern of Echoes (Hell II+) |
| Mountebank's Marvel | Ring | Kikuras Rapids (Hell IV+) |
| Mountebank's Misdirection | Ring | Temple of Namari (Hell IV) |
 Mountebank's Bravado Mountebank's Bravado
|
Waist | Mad King's Breach (Hell I+) |
Set Bonus
| No. of Pieces Equipped | Bonus |
|---|---|
| 2 out of 6 Set Item Bonus | 20% Chance to gain a shield that absorbs damage up to 13% of your Max HP when you get hit. |
| 4 out of 6 Set Item Bonus | Chance to gain a shield that absorbs damage up to 33% of your Max HP when you get hit. |
| 6 out of 6 Set Item Bonus | 25% chance for shield to explode dealing damage equivalent to 40% of Max HP to nearby enemies. |
Choose this set for your Crusader or Barbarian if you want it to be tankier in PvP. The 2-piece and 4-piece Set bonuses are also an excellent choice in PvP for squishy classes like the Demon Hunter and Wizard.
| Builds Using the Untouchable Mountebank Set |
|---|
Vithu's Urges
| Set Item | Slot | Drop Location |
|---|---|---|
| Beacon's Urge | Feet | Pit of Anguish (Hell I+) |
| Luminary's Urge | Hands | Temple of Namari (Hell II+) |
| Awakener's Urge | Neck | Kikuras Rapids (Hell II+) |
| Modest Urge | Ring | Destruction's End (Hell IV) |
| Shameless Urge | Ring | Tomb of Fahir (Hell IV) |
 Exemplar's Urge Exemplar's Urge
|
Waist | Cavern of Echoes (Hell I+) |
Set Bonus
| No. of Pieces Equipped | Bonus |
|---|---|
| 2 out of 6 Set Item Bonus | Buff Duration of you and your party increases by 30% |
| 4 out of 6 Set Item Bonus | Every time you use a buff on yourself or a party member, attack speed of that buff's target will increase by 30% for 3 seconds. |
| 6 out of 6 Set Item Bonus | Create an area of 15% Life Drain when you use a Buff Skill. Last for 40 seconds. Cannot be used successively |
A useful set if you usually play in a party and are running a build that can continuously use Buff skills to proc the Set bonuses as often as possible.
War Rags of Shal'baas
| Set Item | Slot | Drop Location |
|---|---|---|
|
|
Feet | Tomb of Fahir (Hell I+) |
|
|
Hands | Mad King's Breach (Hell II+) |
 Burning Heart of Shal'baas Burning Heart of Shal'baas
|
Neck | Pit of Anguish (Hell II+) |
 Braided Serpent of Shal'baas Braided Serpent of Shal'baas
|
Ring | Cavern of Echoes (Hell IV) |
 Resting Fangs of Shal'baas Resting Fangs of Shal'baas
|
Ring | Temple of Namari (Hell IV) |
 Storm-Tack of Shal'baas Storm-Tack of Shal'baas
|
Waist | Forgotten Tower (Hell I+) |
Set Bonus
| No. of Pieces Equipped | Bonus |
|---|---|
| 2 out of 6 Set Item Bonus | Primary Attack damage increases by 15% |
| 4 out of 6 Set Item Bonus | Attack Speed increases slowly as Primary Attack is used. Stacks up to 25%. |
| 6 out of 6 Set Item Bonus | Chance to increase Primary Attack's attack speed for 10 seconds. |
An excellent Set for classes that use their Primary Attacks a lot like Barbarians and Demon Hunters.
| Builds Using the War Rags of Shal'baas Set |
|---|
Windloft Perfection
| Set Item | Slot | Drop Location |
|---|---|---|
|
|
Feet | Kikuras Rapids (Hell I+) |
|
|
Hands | Tomb of Fahir (Hell II+) |
 Wisdom's Edge Wisdom's Edge
|
Neck | Forgotten Tower (Hell II+) |
 Foulfleet Foulfleet
|
Ring | Pit of Anguish (Hell IV) |
 Fairfleet Fairfleet
|
Ring | Mad King's Breach (Hell IV) |
 Whipcrack Whipcrack
|
Waist | Destruction's End (Hell I+) |
Set Bonus
| No. of Pieces Equipped | Bonus |
|---|---|
| 2 out of 6 Set Item Bonus | Gain Thousand Winds. Increases movement speed by 15%, but will deactivate for 3 seconds if hit. |
| 4 out of 6 Set Item Bonus | Damage dealt increases by 20% when Thousand Winds is active. |
| 6 out of 6 Set Item Bonus | Chance to get a shield buff that protects you from damage from up to 5 hits while Thousand Winds is active. |
A great Set for any class and build but is more effective when worn by ranged classes as the Thousand Winds buff deactivates upon taking damage.
| Builds Using the Windloft Perfection Set |
|---|
How to Get Set Items
Found Only in Hell Difficulties
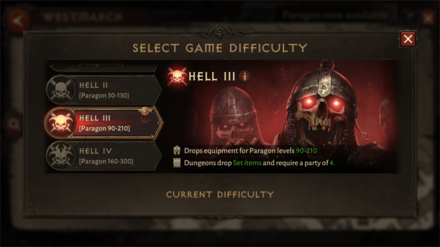
Because they are end-game tier equipment, Set Items can only be found in the Hell difficulties, which are unlocked after reaching Character Level 60.
To elaborate, Hands, Waist, and Feet Set items only drop from Hell I difficulty and above, while Set Rings and Set Amulets only drop from Hell II difficulty and above.
Complete the Necessary Dungeons
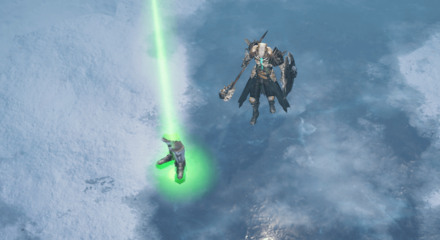
The main way to get Set items in Diablo Immortal is to clear out Dungeons.
The final boss of each Dungeon in the Hell difficulties has a chance to award the player with a Set item upon defeat.
The drop rate of Set items can be quite low, so prepare to clear Dungeons multiple times whenever you decide to farm for Set items.
Visit the Recommended Builds Menu
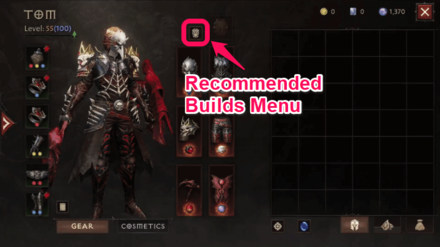
To help you find specific Set items, Diablo Immortal has a built-in Set item finder within the Recommended Builds menu.
To access this menu, go to your Inventory and select the Recommended Builds button found above your primary gear slots.
After opening the menu, scroll down any build to find the Secondary Gear Set section and select a Set Item.
After choosing a Set Item, select the How to Get button to open up a menu which shows you which Dungeons drop the Set Item, and on what difficulty.
Certain Dungeons Have Boosted Set Drop Rates Each Week
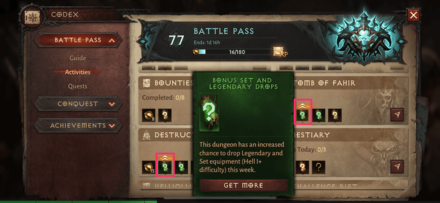
Check your Codex under Activities to see a list of dungeons. Each week, two dungeons will have a boosted chance to drop legendary and set items. Look for the dungeons with arrows above the Bonus Set and Legendary Drops Icon and try farming Set pieces you need.
What are Set Items?
Highest Quality Gear for Secondary Slots
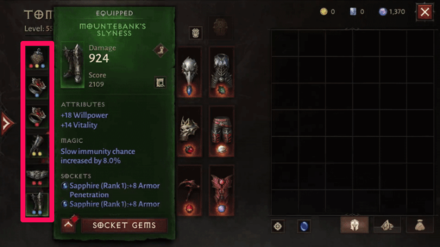
In Diablo Immortal, Set items are the strongest and highest quality items you can equip in your secondary gear slots.
Each Set is made up of six items, or one for each secondary gear slot: Neck, Rings (2), Hands, Waist, and Feet.
Multiple Pieces Provide Set Bonuses
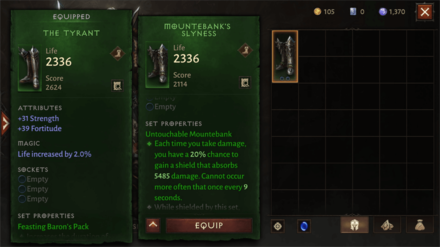
When multiple items belonging to the same Set are equipped, they provide the player with Set Bonuses.
Set Bonuses are additional effects that can be obtained from wearing three items from the same set, with another Set Bonus gained upon wearing all six items of a set.
With this in mind, you can choose to wear a complete Set to obtain its two Set Bonuses or mix and match items from two different Sets to gain two different three-part Set Bonuses.
Additionally, since Set Bonus effects are different for every Set of items, you will want to look for Set Bonuses that benefit your class or build the most.
Can Be Upgraded and Socketed
Much like Legendary items for your primary gear slots, Set Items also provide significant attribute boosts when worn, can also be socketed and upgraded.
However, it is important to note that Set items can only be socketed with normal Gems and not Legendary Gems, as they are secondary gear.
Diablo Immortal Related Guides

All Equipment by Class
| All Equipment | ||
|---|---|---|
| All Set Items | ||
All Equipment by Rarity
| All Equipment Rarities | |
|---|---|
| Legendary | Rare |
| Magic | Normal |
Author
All Set Item Drop Locations & Bonuses
improvement survey
03/2026
improving Game8's site?

Your answers will help us to improve our website.
Note: Please be sure not to enter any kind of personal information into your response.

We hope you continue to make use of Game8.
Rankings
Gaming News
Popular Games

Genshin Impact Walkthrough & Guides Wiki

Honkai: Star Rail Walkthrough & Guides Wiki

Umamusume: Pretty Derby Walkthrough & Guides Wiki

Pokemon Pokopia Walkthrough & Guides Wiki

Resident Evil Requiem (RE9) Walkthrough & Guides Wiki

Monster Hunter Wilds Walkthrough & Guides Wiki

Wuthering Waves Walkthrough & Guides Wiki

Arknights: Endfield Walkthrough & Guides Wiki

Pokemon FireRed and LeafGreen (FRLG) Walkthrough & Guides Wiki

Pokemon TCG Pocket (PTCGP) Strategies & Guides Wiki
Recommended Games

Diablo 4: Vessel of Hatred Walkthrough & Guides Wiki

Cyberpunk 2077: Ultimate Edition Walkthrough & Guides Wiki

Fire Emblem Heroes (FEH) Walkthrough & Guides Wiki

Yu-Gi-Oh! Master Duel Walkthrough & Guides Wiki

Super Smash Bros. Ultimate Walkthrough & Guides Wiki

Pokemon Brilliant Diamond and Shining Pearl (BDSP) Walkthrough & Guides Wiki

Elden Ring Shadow of the Erdtree Walkthrough & Guides Wiki

Monster Hunter World Walkthrough & Guides Wiki

The Legend of Zelda: Tears of the Kingdom Walkthrough & Guides Wiki

Persona 3 Reload Walkthrough & Guides Wiki
All rights reserved
©2022 BLIZZARD ENTERTAINMENT, INC. ALL RIGHTS RESERVED.
All trademarks referenced herein are the properties of their respective owners.
The copyrights of videos of games used in our content and other intellectual property rights belong to the provider of the game.
The contents we provide on this site were created personally by members of the Game8 editorial department.
We refuse the right to reuse or repost content taken without our permission such as data or images to other sites.





![Monster Hunter Stories 3 Review [First Impressions] | Simply Rejuvenating](https://img.game8.co/4438641/2a31b7702bd70e78ec8efd24661dacda.jpeg/thumb)


