Monk Wave of Light PvP Build Guide: Gems, Items, and How to Play
Check out Game8's Diablo 4 Wiki for our latest guides!
☆Diablo 4 Best Builds
☆Diablo 4 Interactive Map
☆Diablo 4 Class Tier List
☆Diablo 4 Story Walkthrough
☆Diablo 4 Leveling Guide
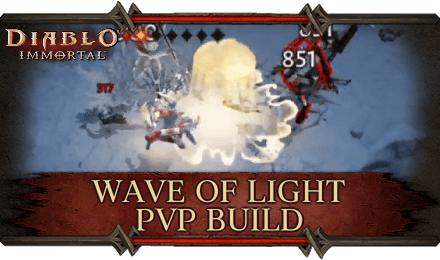
This is a guide to the Wave of Light PvP Build, a PvP Monk Build in Diablo Immortal! Zip around with Mystic Strike, then immobilize foes with Wave of Light! Read on to learn how to play this party build, which excels at general PvE in Dungeons and Rifts, and what gear, skill, and gem setups to use.
| All Monk Guides | ||
|---|---|---|
 Monk Class Overview Monk Class Overview |
 Best Monk Builds Best Monk Builds |
|
Wave of Light PvP Build Profile
Build Profile and Rating
| Wave of Light PvP | |
|---|---|
| Class |
 Monk Monk
|
| Build Rating |
|
| Preference | Solo and Party |
| Build Focus | PvP |
| Stat Priorities |
・Strength ・Critical Hit Chance ・Critical Hit Damage ・Movement Speed ・Attack Speed |
Build Strengths and Weaknesses
| Strengths | Weaknesses |
|---|---|
| ・Amazing Mobility
・Great Control Skills ・Powerful Against Enemies with Loss of Control |
・Low Defense
・No Support Skills ・Weak Against Multiple Opponents |
Build Gear and Skill Summary
| Main Hand | Off Hand | ||
|---|---|---|---|
| Rod of Echoes | Scolding Storm | ||
| Head | Shoulder | Chest | Legs |
| The Open Mind | Heaven's Bonds | Harmony's Song | Chastising Radiance |
| Set (Feasting Baron's Pack & War Rags of Shal'baas) | |||
| Neck | Ring 1 | Ring 2 | Waist |
 The Subjugator The Subjugator
|
 The Prisoner The Prisoner
|
 The Turnkey The Turnkey
|
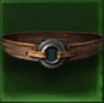 The Gaoler The Gaoler
|
| Hands | Feet | ||
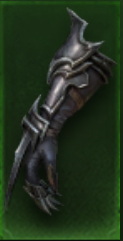 Dozen Strikes of Shal'baas Dozen Strikes of Shal'baas
|
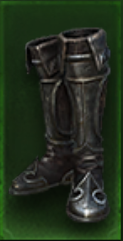 Wind-Trods of Shal'baas Wind-Trods of Shal'baas
|
||
| Paragon Trees | |||
| Vanquisher > Gladiator > Mastermind | |||
| Skills | |||
|
|
|||
|
|
|
||
|
|
|
||
| Charm Priority | |||
Gem Setup
| Gem Name | Effect |
|---|---|
| + 8 Armor | |
| + 8 Potency | |
| + 8 Armor Penetration | |
| + 8 Damage |
| Gem Name | Effect |
|---|---|
 Blood-Soaked Jade Blood-Soaked Jade | Increases all damage you deal by up to 8% while at full Life, with a minimum bonus of 4% while at low Life. Increases your Movement Speed by 10%. Take 2% decreased damage while below 50% Life. Unlocks at Rank 3 |
 Chained Death Chained Death | Increases damage done by your attacks by 1.50% per target hit, up to a maximum of 4.5% with 3 targets. Chained death bonus damage increases to a maximum of 4 targets. Unlocks at Rank 3 |
 Fervent Fang Fervent Fang | Each time you deal damage to an enemy, that enemy now takes 0.80% increased from your attacks, up to a maximum increase of 8% at 10 stacks. All damage you deal to Elite monsters increased by 1.5% Unlocks at Rank 3 |
 Pain of Subjugation Pain of Subjugation | You deal 5.50% increased damage to enemies suffering loss of control. Decreases all damage you take by 1% while suffering loss of control of your character. Unlocks at Rank 3 |
 Phoenix Ashes Phoenix Ashes | Prevents fatal damage, and then grants a shield for 6 seconds that absorbs damage equal to 450% of your base damage. Cannot occur more often than once every 180 seconds. When this shield expires, heal for 20% of the remaining value. Unlocks at Rank 3 |
 Power and Command Power and Command | Power and Command alternates states every 9 seconds. Power increases your Primary Attack damage by 8%. Command increases all other skill damage by 8%. You have a 7.5% chance to dispel a negative effect on you each time Power and Command states alternate. Unlocks at Rank 3 |
Indicated gem effects only display their base effect. Values will be higher depending on the gem's upgrade level.
Fast & Highly Aggressive Control Build

This build makes it a priority to square in on your opponent, slow them down, and take them out. This build is ideal for 1-on-1 showdowns, and can zip in and out of battle when things start to get dicey.
Heavy Buffs for Wave of Light
The skills Wave of Light is the centerpiece of this build. First of all, it is the Monk skill that deals the highest single-hit damage, and has 2 charges to boot. Furthermore, not only does it Immobilize enemies in the area due to Heaven's Bonds, but its range and damage are increased as well, thanks to Harmony's Song and Chastising Radiance.
Set Items Increase Loss of Control Damage
Four Set Items from the Feasting Baron's Pack Set will increase the duration of Loss of Control on enemies as well as increase the damage they receive. Furthermore, the Pain of Subjugation Gem increases damage against enemies with Loss of Control. This will make it easier to defeat enemies Immobilized due to Wave of Light.
Large Damage Buffs
The Legendary Gems Blood-soaked Jade, Chained Death, Fervent Fang, and Power & Command all work together to greatly boost your overall damage and movement speed. Even the skill Mystic Allies gets a damage buff due to the head armor The Open Mind. Additionally, two parts of the War Rags of Shal'baas set will increase your primary attack damage by a whole 15%.
Stats and Paragon Priorities
Attribute Priorities
| Strength | The more strength, the more damage you do, and the faster you can assassinate your opponent. |
|---|---|
| Critical Hit Chance | Having higher critical hit chance would make defeating your enemies even faster. |
| Critical Hit Damage | This is tied in with Critical Hit Chance. Deal even more damage when those crits land, so the enemy won't even know what hit them. |
| Movement Speed | Movement Speed is useful for this build, as it is weak in defense and relies on zooming in and out of battle with Mystic Strike. |
| Attack Speed | It's advisable to bump your Attack Speed to make yourself even more deadly. |
Paragon Priorities
| Vanquisher > Gladiator > Mastermind |
|---|
Your First priority would be the Vanquisher Paragon tree, since it ups your DPS and HP, two very vital things to have. Then, the Gladiator tree would be your most important Paragon skillset to have, as it greatly increases your prowess in PvP. Last would be the Mastermind, as it gives your party buffs to skill damage, critical hit chance, and defense, which are all also important in PvP.
How to Play
|
|
Bring Out Mystic Allies and Keep your Distance
With this build, it's not a good idea to rush in, lest you get clobbered. Let your Mystic Allies engage with the enemy first. If you have party members, let your Crusaders or Barbarians do it.
Charge in with Mystic Strike
If the enemy is engaged, or has used their skills and are on a cooldown, rush in with Mystic Strike to get up close. You don't need to hit the enemy with it, just get close enough so that your primary attack Fists of Thunder can send you the rest of the way.
Unleash Wave of Light
When you're in melee range, use Wave of Light to immobilize them, then beat them up with your primary attack. If you still haven't brought out Mystic Allies, now would be a good time. If the enemy tries to escape, use your second charge of Wave of Light to stall them again.
Use Exploding Palm to Slow Their Escape
Your Exploding Palm should have a Chilling effect due to Scolding Storm. This should slow their movements and make it even harder for them to escape.
When in Trouble, Escape with Mystic Strike
If things are starting to look dicey, or if you see your opponent's party members on the way to save them, making a tactical retreat with Mystic Strike is sometimes the best route. Get used to the flow of battle, then you'll be able to make snap decisions on when best to attack or retreat.
Diablo Immortal Related Guides

Builds By Class
| Diablo Immortal Builds | ||
|---|---|---|
All Monk Builds
| Diablo Immortal Builds | ||
|---|---|---|
 Exploding Palm Elder Rift Exploding Palm Elder Rift
(PvE) |
 Flying Dragon PvP Flying Dragon PvP
(PvP) |
 Imprisoned Fist PvP Imprisoned Fist PvP
(PvP) |
 Inner Sanctuary Elder Rift Inner Sanctuary Elder Rift
(PvE) |
 Inner Sanctuary PvP Inner Sanctuary PvP
(PvP) |
 Monk Leveling Build Monk Leveling Build
(PvE) |
 Mystic Allies Challenge Rift Mystic Allies Challenge Rift
(PvE) |
 Mystic Strike Challenge Rift Mystic Strike Challenge Rift
(PvE) |
 Wave of Light PvP Wave of Light PvP
(PvP) |
Author
Monk Wave of Light PvP Build Guide: Gems, Items, and How to Play
improvement survey
03/2026
improving Game8's site?

Your answers will help us to improve our website.
Note: Please be sure not to enter any kind of personal information into your response.

We hope you continue to make use of Game8.
Rankings
- We could not find the message board you were looking for.
Gaming News
Popular Games

Genshin Impact Walkthrough & Guides Wiki

Honkai: Star Rail Walkthrough & Guides Wiki

Umamusume: Pretty Derby Walkthrough & Guides Wiki

Pokemon Pokopia Walkthrough & Guides Wiki

Resident Evil Requiem (RE9) Walkthrough & Guides Wiki

Monster Hunter Wilds Walkthrough & Guides Wiki

Wuthering Waves Walkthrough & Guides Wiki

Arknights: Endfield Walkthrough & Guides Wiki

Pokemon FireRed and LeafGreen (FRLG) Walkthrough & Guides Wiki

Pokemon TCG Pocket (PTCGP) Strategies & Guides Wiki
Recommended Games

Diablo 4: Vessel of Hatred Walkthrough & Guides Wiki

Cyberpunk 2077: Ultimate Edition Walkthrough & Guides Wiki

Fire Emblem Heroes (FEH) Walkthrough & Guides Wiki

Yu-Gi-Oh! Master Duel Walkthrough & Guides Wiki

Super Smash Bros. Ultimate Walkthrough & Guides Wiki

Pokemon Brilliant Diamond and Shining Pearl (BDSP) Walkthrough & Guides Wiki

Elden Ring Shadow of the Erdtree Walkthrough & Guides Wiki

Monster Hunter World Walkthrough & Guides Wiki

The Legend of Zelda: Tears of the Kingdom Walkthrough & Guides Wiki

Persona 3 Reload Walkthrough & Guides Wiki
All rights reserved
©2022 BLIZZARD ENTERTAINMENT, INC. ALL RIGHTS RESERVED.
All trademarks referenced herein are the properties of their respective owners.
The copyrights of videos of games used in our content and other intellectual property rights belong to the provider of the game.
The contents we provide on this site were created personally by members of the Game8 editorial department.
We refuse the right to reuse or repost content taken without our permission such as data or images to other sites.





![Monster Hunter Stories 3 Review [First Impressions] | Simply Rejuvenating](https://img.game8.co/4438641/2a31b7702bd70e78ec8efd24661dacda.jpeg/thumb)


