This survey will take about 1 minute.
Your answers will help us to improve our website.
Diablo Immortal
Crusader Draw and Quarter Challenge Rift Build Guide: Gems, Items, and How to Play
Check out Game8's Diablo 4 Wiki for our latest guides!
☆Diablo 4 Best Builds
☆Diablo 4 Interactive Map
☆Diablo 4 Class Tier List
☆Diablo 4 Story Walkthrough
☆Diablo 4 Leveling Guide
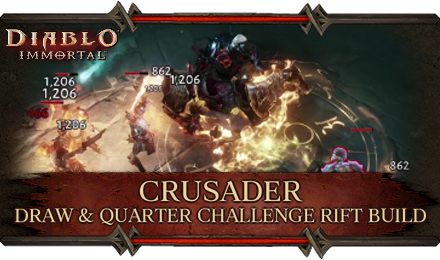
This is a guide to the Draw and Quarter Challenge Rift Build, a PvE Crusader Build in Diablo Immortal! This Elder and Challenge Rift build clears through mobs with its great single-target and aoe damage, supplemented with guaranteed crits during Holy Banner's uptime. Read on to learn this build's gear, skill, and gem setups, including a guide on how to play it!
| All Crusader Guides | ||
|---|---|---|
 Crusader Class Overview Crusader Class Overview |
 Best Crusader Builds Best Crusader Builds |
|
Spinning Shield Challenge Rift Build Profile
Build Profile and Rating
| Draw and Quarter Challenge Rift | |
|---|---|
| Class |
 Crusader Crusader
|
| Build Rating |
|
| Preference | Solo and Party |
| Build Focus | PvE: Dungeon, Elder Rift, Challenge Rift |
| Stat Priorities |
・Strength ・Vitality ・Critical Hit Damage ・Fortitude ・Cooldown Reduction |
Build Strengths and Weaknesses
| Strengths | Weaknesses |
|---|---|
| ・Guaranteed Critical Hits
・Strong Single Target Damage ・Strong AoE Damage ・Decent Mobility |
・Holy Banner's High Cooldown
・Requires Proper Skill Aim and Usage |
Build Gear and Skill Summary
| Main Hand | Off Hand | ||
|---|---|---|---|
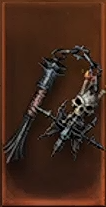 The Bristle The Bristle
|
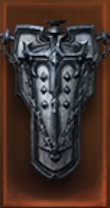 Sinkhole Cross Sinkhole Cross
|
||
| Head | Shoulder | Chest | Legs |
| Arrowkeeper |
 Sivket's Advantage Sivket's Advantage
|
Besieger |
 Bladed Jambeau Bladed Jambeau
|
| Set (Grace Of The Flagellant + Issatar Imbued) | |||
| Neck | Ring 1 | Ring 2 | Waist |
 Issatar At Rest Issatar At Rest
|
 Issatar Enraged Issatar Enraged
|
Issatar Undone
|
 Open Gut Open Gut
|
| Hands | Feet | ||
 Issatar's Open Hand Issatar's Open Hand
|
 Torn Sole Torn Sole
|
||
| Paragon Trees | |||
| Vanquisher > Treasure Hunter > Survivor > Mastermind | |||
| Skills | |||
|
|
|||
|
|
|
||
|
|
|
||
| Charm Priority | |||
Gem Setup
Normal Gems
Legendary Gems
| Gem Name | Effect |
|---|---|
| + 8 Armor | |
| + 8 Potency | |
| + 80 Life | |
| + 8 Armor Penetration | |
| + 8 Resistance | |
| + 8 Damage |
| Gem Name | Effect |
|---|---|
 Berserker's Eye Berserker's Eye | Increases all damage you deal by 5.00%, but increases all damage you take by 6%. Increases your Critical Hit Chance by 1%. Unlocks at Rank 3 |
 Blood-Soaked Jade Blood-Soaked Jade | Increases all damage you deal by up to 8% while at full Life, with a minimum bonus of 4% while at low Life. Increases your Movement Speed by 10%. Take 2% decreased damage while below 50% Life. Unlocks at Rank 3 |
 Chained Death Chained Death | Increases damage done by your attacks by 1.50% per target hit, up to a maximum of 4.5% with 3 targets. Chained death bonus damage increases to a maximum of 4 targets. Unlocks at Rank 3 |
 Fervent Fang Fervent Fang | Each time you deal damage to an enemy, that enemy now takes 0.80% increased from your attacks, up to a maximum increase of 8% at 10 stacks. All damage you deal to Elite monsters increased by 1.5% Unlocks at Rank 3 |
 Howler's Call Howler's Call | Your Primary Attack has a 10% chance to summon a charging spirit wolf that inflicts 150% base damage + 1458 to all enemies in its path. Cannot occur more often than once every 20 seconds. The spirit wolf has a 12% chance to Stun enemies for 3 seconds. Unlocks at Rank 3 |
 Power and Command Power and Command | Power and Command alternates states every 9 seconds. Power increases your Primary Attack damage by 8%. Command increases all other skill damage by 8%. You have a 7.5% chance to dispel a negative effect on you each time Power and Command states alternate. Unlocks at Rank 3 |
Indicated gem effects only display their base effect. Values will be higher depending on the gem's upgrade level.
Bulldoze Enemies With Guaranteed Crits
This build is great at virtually any form of content, but really shines in pushing Challenge Rifts.
An augmented Draw and Quarter lets you cut through mobs and bosses alike with its increased attack and movement speed, flame trails, and bombardment. This skill also lets you phase through enemies, making it an invaluable skill for overall mobility and survivability.
Consecration, Spinning Shield, and Sacred Fire ups the ante with their incredible aoe damage. The latter's added effect is extremely strong when aimed properly as well, essentially turning it into your most potent boss killer outside of Draw and Quarter.
All these skills are taken even further through the addition of Holy Banner. This insane skill grants you 11 seconds of guaranteed critical hits. Its uptime is maximized as well via our recommended head piece — you won't have to worry about where to place your banner if it's attached to you instead!
Legendary Gear Setup
Our recommended legendary gears are set up to improve the effectiveness of almost all of our skills, with Draw and Quarter taking the most space as it is the centerpiece of this build.
Besieger, Bladed Jambeau, and Sivket's Advantage improves the effectiveness of the aforementioned centerpiece by either giving it additional damage effects during its uptime or increasing the duration the uptime itself.
Arrowkeeper ensures your Holy Banner's uptime by attaching you to the banner itself. Sinkhole Cross makes your Spinning Shield stay in place, turning it into a high-damage skill that shreds anything within the target area. Lastly, The Bristle is added to give your Sacred Fire more cleave and AoE potential, resulting in faster ultimate charges.
Two-Set Combo
Grace of the Flagellant and Issatar Imbued are the best sets for this build as they perfectly compliment the its two main strengths: continuous damage and high movement speed.
Start off by grabbing Torn Sole and Open Gut as soon as you land in Hell Mode I Difficulty. The Grace of the Flagellant's two-set effect will grant you a greater power spike due to how many continuous damage skills you have. Start grabbing the Issatar pieces as soon as you reach Hell Mode II and above to complete the setup.
Gem Setup
Your Normal Gems lean towards bolstering your damage capabilities, while still maintain a decent level of survivability. Consider swapping the Sapphire and Aquamarine counts if you prefer more defense.
Legendary Gems, on the other hand, is all about letting you run through everything in sight. Take note that this build runs Power and Command. Knowing when to use your skills and your primary attack (Sacred Fire) is absolutely paramount to achieve maximum dps.
Stats and Paragon Priorities
Attribute Priorities
| Strength | Your main stat should always be your top priority. Pumping Strength significantly increases your damage as a Crusader. |
|---|---|
| Vitality | You will be in the thick of things most of the time. Increase your survivability by investing in Vitality (max HP). |
| Critical Hit Damage | Make the most out of Holy Banner's 100% critical hit chance buff by investing in more Critical Hit Damage. |
| Fortitude | Fortitude pumps your Armor and Armor Penetration at the same time, making it a solid addition to any build that likes to play in close quarters. |
| Cooldown Reduction | Lastly, Cooldown Reduction is a solid stat to invest in for this build as this build deals with medium to long cooldowns across the board. |
Paragon Priorities
| Vanquisher > Treasure Hunter > Survivor > Mastermind |
|---|
Paragon Priorities are pretty straightforward for this build. Start off by investing in the Vanquisher tree to get that much-needed DPS boost at the early stages of the endgame. You will constantly hop back to this tree when you grab key skills and nodes from other trees later on.
Start investing in the Treasure Hunter tree and get Swift Learner as soon as possible to gain more XP from elite packs, which you will find more of as you clear higher-level rifts. Once you start feeling the pain at higher levels, start getting a few life and armor nodes from the Survivor tree.
Lastly, the Mastermind tree grants you insanely good party-wide boons depending on your party composition. This is a great tree to invest in as soon as possible since almost all forms of PvE content in the Hell I and above are group-based.
How to Play
| |
Time Your Holy Banners
Your Holy Banners are the key to maximum DPS. Only use it when most, if not all of your skills are off cooldown. This ensures maximum value off the banner's uptime and quick work of any target.
Coordinate With Your Party
Take note that this applies to Group Play as well! The best time to activate this is when your party or raid has most, if not all their cooldowns off to ensure maximum value. Hit your team up and strategize accordingly!
Aim Spinning Shields at Key Targets
Spinning Shield positioning is crucial because planting all three shields correctly results in extremely high damage during Holy Banner's uptime.
Wait until your mobs group up tightly, then chuck the shields out. You don't have to release every shield from the get-go either — staggering them depending on the mob's size is fine as well.
For bosses, learn their attack patterns and identify times where they stand in place for a considerable amount of time. This lets them receive the full duration of the shields' uptimes.
Create Flame Trails Across Targets
Besieger and Bladed Jambeau turns Draw and Quarter into a devastating skill that leaves flame trails and bombards random enemy positions for its entire duration. Make sure you maximize these by constantly running across your targets and luring them together.
Sivket's Advantage increases this skill's duration by 30% as well, granting you even more uptime and which leads to even more damage — especially during Holy Banner's uptime.
Use Your Ultimate Wisely
Sacred Fire's ultimate is extremely powerful and can turn the tide in most scenarios. This ultimate takes a while to charge up. Only use this under two conditions to ensure its maximum value:
- When your HP is low and in need of an emergency shield
- When you have Holy Banner up.
Diablo Immortal Related Guides
Builds By Class
| Diablo Immortal Builds | ||
|---|---|---|
All Crusader Builds
| Diablo Immortal Builds | ||
|---|---|---|
 Crusader Leveling Guide Crusader Leveling Guide
(PvE) |
 Draw and Quarter Challenge Rift Draw and Quarter Challenge Rift
(PvE) |
 Draw and Quarter PvP Draw and Quarter PvP
(PvP) |
 Holy Banner Raid Holy Banner Raid
(PvE) |
||
Author

Crusader Draw and Quarter Challenge Rift Build Guide: Gems, Items, and How to Play
Please participate in our site
improvement survey
03/2026
improvement survey
03/2026
Would you assist in
improving Game8's site?
improving Game8's site?

×
We are listening to our users' valuable opinions and discussing how to act on them.
The information collected through this survey will be used for the purpose of improving our services. In addition, the information will only be disclosed a part of a statistic in a format that will not allow identification of personal information.
Begin Survey
Not Now
×
Please rate each item regarding Game8.co's Advertisements.
Amount of Ads
Very Dissatisfied
Somewhat Dissatisfied
Fine
Somewhat Satisfied
Highly Satisfied
Placement of Ads
Timing of Ad Display
Ad Loading Speed
Safeness of Ads
Content of Ads
×
Please rate each item regarding Game8.co's Quality of Articles.
Amount of information
Very Dissatisfied
Somewhat Dissatisfied
Fine
Somewhat Satisfied
Highly Satisfied
Frequency of updates
Speed of new information
Accuracy of articles
Understandibility of articles
Readability of sentences
×
Please rate each item regarding Game8.co's Usability of the Site.
Ease of finding information
Very Dissatisfied
Somewhat Dissatisfied
Fine
Somewhat Satisfied
Highly Satisfied
Loading Speed
Use of Color
Font Size
Visibility of Images
Easy to Understand Layout
×
Please rate each item regarding Game8.co's Message Boards, Comments.
Ease of Writing
Very Dissatisfied
Somewhat Dissatisfied
Fine
Somewhat Satisfied
Highly Satisfied
Readability
Ease in Finding Information
Comment Quality
Comment Quantity
Admin Response
×
Please rate each item regarding Game8.co's Site's new design.
Please rate our site's new design
Very Dissatisfied
Somewhat Dissatisfied
Fine
Somewhat Satisfied
Highly Satisfied
Do you think that the website's design change makes the site easier to use?
Has the new design made it easier for you to find information on the site?
Has the new design improved the overall visual appeal of the site?
How would you rate your overall satisfaction with the new design of the site?
×
How likely are you to recommend Game8 to someone you know?
Very Unlikely
0
1
2
3
4
5
6
7
8
9
10
Very Likely
If you have other opinions regarding potential improvement to the website, please share them with us. We would appreciate your honest opinion.
Note: This is a free response section, so you can proceed without entering anything.
Note: Please be sure not to enter any kind of personal information into your response.
Note: Please be sure not to enter any kind of personal information into your response.
×
Thank You
×
Thank you for participating in our survey! Your answers will help us to improve the quality of our website and services.
We hope you continue to make use of Game8.
We hope you continue to make use of Game8.
Close
Rankings
- We could not find the message board you were looking for.
Gaming News


![Monster Hunter Stories 3 Review [First Impressions] | Simply Rejuvenating](https://img.game8.co/4438641/2a31b7702bd70e78ec8efd24661dacda.jpeg/thumb)
Popular Games

Genshin Impact Walkthrough & Guides Wiki
Honkai: Star Rail Walkthrough & Guides Wiki
Umamusume: Pretty Derby Walkthrough & Guides Wiki
Pokemon Pokopia Walkthrough & Guides Wiki
Resident Evil Requiem (RE9) Walkthrough & Guides Wiki
Monster Hunter Wilds Walkthrough & Guides Wiki
Wuthering Waves Walkthrough & Guides Wiki
Arknights: Endfield Walkthrough & Guides Wiki
Pokemon FireRed and LeafGreen (FRLG) Walkthrough & Guides Wiki
Pokemon TCG Pocket (PTCGP) Strategies & Guides Wiki


Recommended Games
Diablo 4: Vessel of Hatred Walkthrough & Guides Wiki
Cyberpunk 2077: Ultimate Edition Walkthrough & Guides Wiki
Fire Emblem Heroes (FEH) Walkthrough & Guides Wiki
Yu-Gi-Oh! Master Duel Walkthrough & Guides Wiki
Super Smash Bros. Ultimate Walkthrough & Guides Wiki
Pokemon Brilliant Diamond and Shining Pearl (BDSP) Walkthrough & Guides Wiki
Elden Ring Shadow of the Erdtree Walkthrough & Guides Wiki
Monster Hunter World Walkthrough & Guides Wiki
The Legend of Zelda: Tears of the Kingdom Walkthrough & Guides Wiki
Persona 3 Reload Walkthrough & Guides Wiki


All rights reserved
©2022 BLIZZARD ENTERTAINMENT, INC. ALL RIGHTS RESERVED.
All trademarks referenced herein are the properties of their respective owners.
The copyrights of videos of games used in our content and other intellectual property rights belong to the provider of the game.
The contents we provide on this site were created personally by members of the Game8 editorial department.
We refuse the right to reuse or repost content taken without our permission such as data or images to other sites.