Crusader Draw and Quarter PvP Build Guide: Gems, Items, and How to Play
Check out Game8's Diablo 4 Wiki for our latest guides!
☆Diablo 4 Best Builds
☆Diablo 4 Interactive Map
☆Diablo 4 Class Tier List
☆Diablo 4 Story Walkthrough
☆Diablo 4 Leveling Guide

This is a guide to the Draw and Quarter PvP Build, a PvP Crusader Build in Diablo Immortal! This PvP build is all about mowing your enemies down with your steed and stacked AoE skills, while ensuring survivability with Conjuration of Light. Read on to learn this build's gear, skill, and gem setups, including a guide on how to play it!
| All Crusader Guides | ||
|---|---|---|
 Crusader Class Overview Crusader Class Overview |
 Best Crusader Builds Best Crusader Builds |
|
Draw and Quarter PvP Build Profile
Build Profile and Rating
| Draw and Quarter PvP | |
|---|---|
| Class |
 Crusader Crusader
|
| Build Rating |
|
| Preference | Party |
| Build Focus | PvP |
| Stat Priorities |
・Strength ・Vitality ・Critical Hit Chance ・Critical Hit Damage ・Fortitude |
Build Strengths and Weaknesses
| Strengths | Weaknesses |
|---|---|
| ・Incredible Mobility
・Solid Survivability ・Strong damage |
・Draw and Quarter can be interrupted By CC
・Poor skill usage often leads to death |
Build Gear and Skill Summary
| Main Hand | Off Hand | ||
|---|---|---|---|
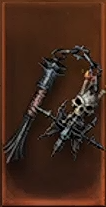 The Bristle The Bristle
|
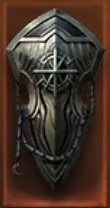 Zaynula's Last Hymn Zaynula's Last Hymn
|
||
| Head | Shoulder | Chest | Legs |
 Many-Eyed Aegis Many-Eyed Aegis
|
 Sivket's Advantage Sivket's Advantage
|
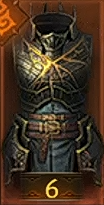 Iron Suzerain Iron Suzerain
|
 Bladed Jambeau Bladed Jambeau
|
| Set (Untouchable Mountebank & Issatar Imbued) | |||
| Neck | Ring 1 | Ring 2 | Waist |
 Issatar At Rest Issatar At Rest
|
 Issatar Enraged Issatar Enraged
|
 Issatar Undone Issatar Undone
|
 Mountebank's Bravado Mountebank's Bravado
|
| Hands | Feet | ||
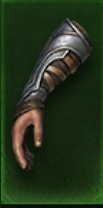 Issatar's Open Hand Issatar's Open Hand
|
Mountebank's Slyness | ||
| Paragon Trees | |||
| Vanquisher > Gladiator > Soldier > Mastermind | |||
| Skills | |||
|
|
|||
|
|
|
||
|
|
|
||
| Charm Priority | |||
Gem Setup
| Gem Name | Effect |
|---|---|
| + 8 Armor | |
| + 8 Potency | |
| + 80 Life | |
| + 8 Armor Penetration | |
| + 8 Resistance | |
| + 8 Damage |
| Gem Name | Effect |
|---|---|
 Blessing of the Worthy Blessing of the Worthy | When you take damage, you have 20% chance to unleash retribution on all nearby enemies, dealing damage equal to 12% of your maximum Life. Cannot occur more often than once every 20 seconds. For 6 seconds after unleashing divine retribution, you take 4% decreased damage. Unlocks at Rank 3 |
 Blood-Soaked Jade Blood-Soaked Jade | Increases all damage you deal by up to 8% while at full Life, with a minimum bonus of 4% while at low Life. Increases your Movement Speed by 10%. Take 2% decreased damage while below 50% Life. Unlocks at Rank 3 |
 Fervent Fang Fervent Fang | Each time you deal damage to an enemy, that enemy now takes 0.80% increased from your attacks, up to a maximum increase of 8% at 10 stacks. All damage you deal to Elite monsters increased by 1.5% Unlocks at Rank 3 |
 Power and Command Power and Command | Power and Command alternates states every 9 seconds. Power increases your Primary Attack damage by 8%. Command increases all other skill damage by 8%. You have a 7.5% chance to dispel a negative effect on you each time Power and Command states alternate. Unlocks at Rank 3 |
 Seeping Bile Seeping Bile | Your attacks 4% chance to poison enemies, inflicting 25% base damage + 263 every second for 6 seconds. This poison spreads to nearby enemies if the victim dies. Cannot affect the same target more often than once every 20 seconds. This poison also decreases enemy movement speed by 6% Unlocks at Rank 3 |
 The Black Rose The Black Rose | Each time you are attacked, you have a 10% chance to summon vines that Immobilize the attacker for 1.5 seconds. Each enemy cannot be affected by this more than once every 12 seconds. Chance to summon vines increased to 12%. Unlocks at Rank 3 |
Indicated gem effects only display their base effect. Values will be higher depending on the gem's upgrade level.
Charge and Overwhelm
This PvP is all about closing the distance and staying on top of your targets.
Shred their HPs with a barrage of continuous damage through upgraded versions of Consecration, Condemn, and Draw and Quarter. You easily deter their allies from diving in to save the day as well since these AoE ground skills travel with you — turning the very ground beneath you and your steed's feet into kill zones.
Lastly, survivability is bolstered through Conjuration of Light. Allowing you to push through groups of enemies without fear of getting nuked down. Take note that you are still vulnerable to CCs while the skill is active though.
Legendary Gear Setup
Legendary pieces of this build focus on enhancing your offensive capabilities across all damage skills.
Bladed Jambeau and Sivket's Advantage enhances Draw and Quarter by improving its damage and duration respectively.
Zaynula's Last Hymn and Many-Eyed Aegis, on the other hand, turns Consecration into a moving AoE skill that also slows enemies within it's effect radius. This turns Consecration into a deadly skill when combined with Draw and Quarter's mobility and stacked on top of Condemn.
Speaking of Condemn, this skill is converted from a powerful nuke with a three-second delay to a pulsating AoE skill that deals constant damage and pulls enemies closer to you via Iron Suzerain.
Lastly, The Bristle is added to your Main Hand to give Sacred Fire a ranged attack, turning it into a surprisingly potent finisher for those who manage to escape from your initial burst of damage.
Two-Set Combo
We recommend a 2/4 split between Untouchable Mountebank and Issatar Imbued for a good balance of damage and survivability.
Start off by grabbing the 2-piece combo for Untouchable Mountebank at Hell I. The remaining four slots can be filled with Issatar pieces once you reach Hell II and above.
Gem Setup
Normal Gems offer a well-balanced blend of damage and survivability. This PvP build only works when you can stay within melee range of your targets, which means you'll be in the line of fire more often than your team. This is addressed by a 3/3 split for your red gems and 3/1 split for blues in favor of armor.
Legendary Gems, on the other hand, are pretty straightforward. Blood-soaked Jade, Power and Command, Fervent Fang, and Seeping Bile are the best offensive gems for this build as they all play around its damage types incredibly well.
Blessing of the Worthy and The Black Rose bolster overall survivability. The latter, in particular, can be used in offensive and defensive scenarios as the ensnare effect makes enemies think twice to strike you. A poorly timed attack from them can result in them being stuck in place for just long enough for you to escape or trample them with your steed.
Stats and Paragon Priorities
Attribute Priorities
| Strength | Pumping the main stat is the top priority regardless of the build you use. |
|---|---|
| Vitality | This PvP build thrives in close quarters. Ensure your survivability by pumping as much HP as possible through Vitality. |
| Critical Hit Chance | You deal an insanely high number of continuous damage. Increase their potency by investing in high Critical Hit Chance. |
| Critical Hit Damage | You can't have high crit chance without high crit damage! Increasing both of these is one of the most straightforward ways to improve overall DPS. |
| Fortitude | Fortitude is a great 5th stat to invest in as it increases your armor and armor penetration. An efficient stat that offers better offense and defense. |
Paragon Priorities
| Vanquisher > Gladiator > Soldier > Mastermind |
|---|
Start off your paragon nodes by investing in Vanquisher from the start. This tree will give you a ton of much-needed damage at the earliest stages of endgame, while allowing you to increase your HP through its Life node.
Once you hit plvl100, Gladiator and Soldier will be available to you. Work on the former first since it grants you strong personal effects such as Cheat Death and Uncontrollable. The Soldier grants you a wide-array of party buffs that increase your overall survivability. For solo players, Gladiator is more than enough at the start. Players with pre-made parties, on the other hand, would benefit from investing in Soldier for those party-wide buffs — weigh your options and plan accordingly.
Lastly, the Mastermind tree offers another set of strong party-wide buffs for you and your allies.
How to Play
| |
Dive and Stay Close
Identify your target and wait for an opportunity to strike. Once said opportunity arrives, activate your Consecration and close the distance with Draw and Quarter. Stay on top of your target and run flame trails across them with your steed. Condemn can be popped to gather them to you and deals incredible damage when stacked on top of Consecration.
Your Conjuration of Light can be used for offense and defense. Use it to either charge through enemy groups unharmed or escape fatal damage and shots.
Watch Out For CCs While Mounted!
It is very important to note that your steed disappears when you are crowd controlled. Losing your steed in key moments is extremely detrimental to your overall survivability and damage. Always make sure you're in the clear and in a position to unleash the full duration of Draw and Quarter before charging in.
In terms of defense, Draw and Quarter can also be used to cleanse movement impairing effects. This means slows and other soft CCs can be cleansed by your steed upon the skill's activation.
Coordinate With Your Team
Coordinate with your own team to ensure they capitalize on the space and chaos you create with your charges! Identify openings and work with them to isolate and eventually take out key targets during the match.
Use Your Ultimates Wisely
Sacred Fire's Burning Heart is a very strong ultimate that grants you enhanced primary attack damage and a decent shield at the same time. As with all ultimates, Sacred Fire's takes a long time to charge up. Only use this under these conditions to ensure maximum value:
- You are low HP and in dire need of shields in the middle of a fight.
- You need a damage boost in a drawn-out engagement, but Draw and Quarter is on cooldown.
Diablo Immortal Related Guides

Builds By Class
| Diablo Immortal Builds | ||
|---|---|---|
All Crusader Builds
| Diablo Immortal Builds | ||
|---|---|---|
 Crusader Leveling Guide Crusader Leveling Guide
(PvE) |
 Draw and Quarter Challenge Rift Draw and Quarter Challenge Rift
(PvE) |
 Draw and Quarter PvP Draw and Quarter PvP
(PvP) |
 Holy Banner Raid Holy Banner Raid
(PvE) |
||
Author
Crusader Draw and Quarter PvP Build Guide: Gems, Items, and How to Play
improvement survey
03/2026
improving Game8's site?

Your answers will help us to improve our website.
Note: Please be sure not to enter any kind of personal information into your response.

We hope you continue to make use of Game8.
Rankings
- We could not find the message board you were looking for.
Gaming News
Popular Games

Genshin Impact Walkthrough & Guides Wiki

Honkai: Star Rail Walkthrough & Guides Wiki

Umamusume: Pretty Derby Walkthrough & Guides Wiki

Pokemon Pokopia Walkthrough & Guides Wiki

Resident Evil Requiem (RE9) Walkthrough & Guides Wiki

Monster Hunter Wilds Walkthrough & Guides Wiki

Wuthering Waves Walkthrough & Guides Wiki

Arknights: Endfield Walkthrough & Guides Wiki

Pokemon FireRed and LeafGreen (FRLG) Walkthrough & Guides Wiki

Pokemon TCG Pocket (PTCGP) Strategies & Guides Wiki
Recommended Games

Diablo 4: Vessel of Hatred Walkthrough & Guides Wiki

Cyberpunk 2077: Ultimate Edition Walkthrough & Guides Wiki

Fire Emblem Heroes (FEH) Walkthrough & Guides Wiki

Yu-Gi-Oh! Master Duel Walkthrough & Guides Wiki

Super Smash Bros. Ultimate Walkthrough & Guides Wiki

Pokemon Brilliant Diamond and Shining Pearl (BDSP) Walkthrough & Guides Wiki

Elden Ring Shadow of the Erdtree Walkthrough & Guides Wiki

Monster Hunter World Walkthrough & Guides Wiki

The Legend of Zelda: Tears of the Kingdom Walkthrough & Guides Wiki

Persona 3 Reload Walkthrough & Guides Wiki
All rights reserved
©2022 BLIZZARD ENTERTAINMENT, INC. ALL RIGHTS RESERVED.
All trademarks referenced herein are the properties of their respective owners.
The copyrights of videos of games used in our content and other intellectual property rights belong to the provider of the game.
The contents we provide on this site were created personally by members of the Game8 editorial department.
We refuse the right to reuse or repost content taken without our permission such as data or images to other sites.


![Monster Hunter Stories 3 Review [First Impressions] | Simply Rejuvenating](https://img.game8.co/4438641/2a31b7702bd70e78ec8efd24661dacda.jpeg/thumb)


