This survey will take about 1 minute.
Your answers will help us to improve our website.
Diablo Immortal
Dungeons Guide | List of All Dungeons
Check out Game8's Diablo 4 Wiki for our latest guides!
☆Diablo 4 Best Builds
☆Diablo 4 Interactive Map
☆Diablo 4 Class Tier List
☆Diablo 4 Story Walkthrough
☆Diablo 4 Leveling Guide
In Diablo Immortal, Dungeons are story-connected locations that players can explore for loot and lore, and farm for Set items at end-game. Read on to learn more about what Dungeons are, tips for clearing them out, and the list of all Dungeons currently in-game!
List of All Dungeons
| Diablo Immortal Dungeons | |||
|---|---|---|---|
| Mad King's Breach | Forgotten Tower | Tomb of Fahir | Destruction's End |
| Kikuras Rapids | Temple of Namari | Cavern of Echoes | Pit of Anguish |
Click on any of the links above to quickly navigate to each dungeon's section below!
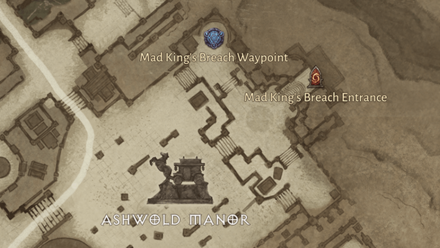
Mad King's Breach Dungeon
| Mad King's Breach Location | |||
|---|---|---|---|
 |
|||
| Zone | Bosses | ||
| Ashwold Cemetery |  Sir Gorash Sir Gorash |
 Manoruk Manoruk |
 King Leoric King Leoric |
| Difficulty | Set Item Drops | ||
| Hell I+ | ・Torn Sole (Feet) ・Mountebank's Bravado (Waist) |
||
| Hell II+ | ・Dozen Strikes of Shal'baas (Hands) ・Issatar at Rest (Neck) |
||
| Hell IV+ | ・Fairfleet (Ring) ・Shepherd and Mother (Ring) |
||
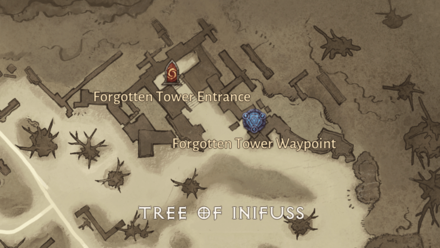
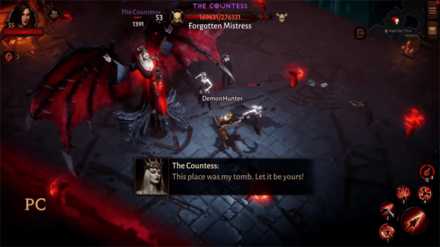
Forgotten Tower Dungeon
| Forgotten Tower Location | ||
|---|---|---|
 |
||
| Zone | Bosses | |
| Dark Wood |  Blood Priestess Innaloth Blood Priestess Innaloth |
 The Countess The Countess |
| Difficulty | Set Item Drops | |
| Hell I+ | ・Storm-Tack of Shal'baas (Feet) ・Mountebank's Slyness (Feet) |
|
| Hell II+ | ・Wisdom's Edge (Neck) ・Issatar's Open Hand (Hands) |
|
| Hell IV+ | ・The Prisoner (Ring) ・Shepherd and Father (Ring) |
|
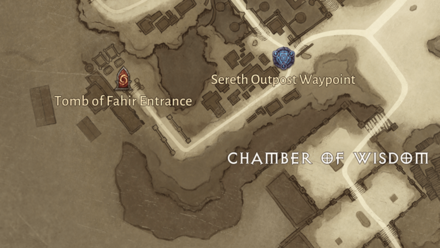
Tomb of Fahir Dungeon
| Tomb of Fahir Location | ||
|---|---|---|
 |
||
| Zone | Bosses | |
| Shassar Sea |  King Fahir King Fahir |
 Segithis Segithis |
| Difficulty | Set Item Drops | |
| Hell I+ | ・Wind-Trods of Shal'baas (Feet) ・Issatar Contained (Waist) |
|
| Hell II+ | ・Hurtling Steel (Hands) ・Shepherd and Architect (Neck) |
|
| Hell IV+ | ・The Turnkey (Ring) ・Shameless Urge (Ring) |
|
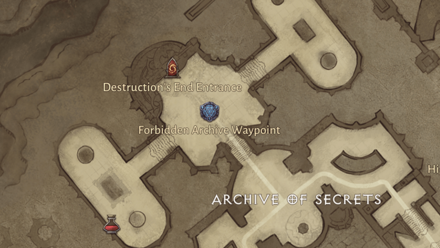
Destruction's End Dungeon
| Destruction's End Location | |||
|---|---|---|---|
 |
|||
| Zone | Bosses | ||
| Library of Zoltun Kulle |  Baal Baal |
||
| Difficulty | Set Item Drops | ||
| Hell I+ | ・Whipcrack (Waist) ・Issatar The Brute (Feet) |
||
| Hell II+ | ・The Subjugator (Neck) ・Shepherd and Beastmaster (Hands) ・Slit Throat (Neck) |
||
| Hell IV+ | ・Modest Urge (Ring) |
||
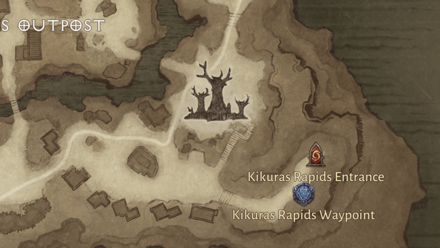
Kikuras Rapids Dungeon
| Kikuras Rapids Location | |||
|---|---|---|---|
 |
|||
| Zone | Bosses | ||
| Bilefen | 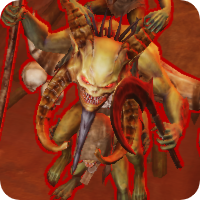 Ongori Ongori |
||
| Difficulty | Set Item Drops | ||
| Hell I+ | ・Stump-Stir (Feet) ・Shepherd and Begetter (Waist) |
||
| Hell II+ | ・The Mailed Fist (Hands) ・Awakener's Urge (Neck) |
||
| Hell IV+ | ・Broken Palm (Ring) ・Mountebank's Marvel (Ring) |
||
Temple of Namari Dungeon
| Temple of Namari Location | |||
|---|---|---|---|
 |
|||
| Zone | Bosses | ||
| Bilefen |  Sargoth Sargoth |
||
| Difficulty | Set Item Drops | ||
| Hell I+ | ・The Gaoler (Waist) ・Shepherd and Leader (Feet) |
||
| Hell II+ | ・Luminary's Urge (Hands) |
||
| Hell IV+ | ・Severed Thumb (Ring) ・Mountebank's Misdirection (Ring) ・Resting Fangs of Shal'baas (Ring) |
||
Temple of Namari Bosses
On top of fighting Sargoth, the Temple of Namari dungeon will have a unique boss gauntlet that has you fight 3 random bosses from the following pool of enemies:
- Torrid One
- Siegebreaker
- Fallen War Matron
- Marauders of the Ashen Wastes (3 Enemies)
- Coldsnap
- Voracity
Note: The selections will be random each time you attempt the dungeon, so make sure to study the movesets of each boss when tackling this dungeon at higher difficulties.
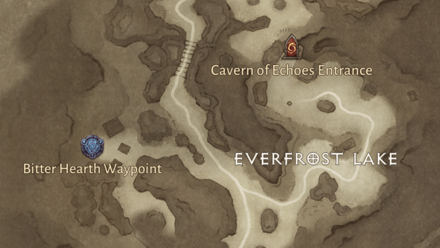
Cavern of Echoes Dungeon
| Cavern of Echoes Location | |||
|---|---|---|---|
 |
|||
| Zone | Bosses | ||
| Frozen Tundra | 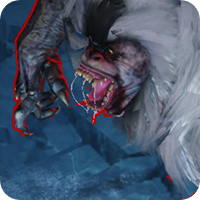 Bloodrime Bloodrime |
 Glacial Colossus Glacial Colossus |
|
| Difficulty | Set Item Drops | ||
| Hell I+ | ・Exemplar's Urge (Waist) | ||
| Hell II+ | ・Bloody Hand (Hands) ・Mountebank's Flourish (Neck) |
||
| Hell IV+ | ・Issatar Undone (Ring) ・Braided Serpent of Shal'baas (Ring) |
||
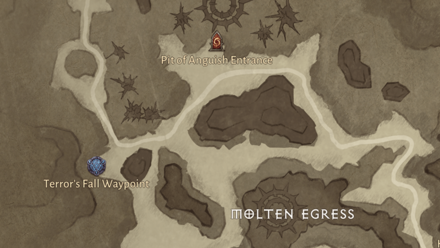
Pit of Anguish Dungeon
| Pit of Anguish Location | |||
|---|---|---|---|
 |
|||
| Zone | Bosses | ||
| Realm of Damnation | 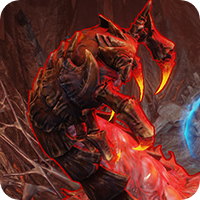 Abyssal Tiller Abyssal Tiller |
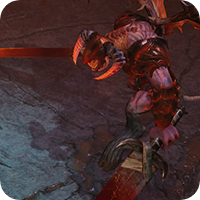 Zolthrax Zolthrax |
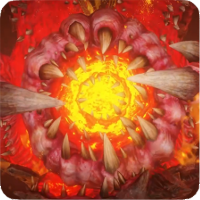 Zaka Zaka |
| Difficulty | Set Item Drops | ||
| Hell I+ | ・Open Gut (Waist) ・Beacon's Urge (Feet) |
||
| Hell II+ | ・Mountebank's Shirking (Hands) ・Burning Heart of Shal'baas (Neck) |
||
| Hell IV+ | ・Issatar Enraged (Ring) ・Foulfleet (Ring) |
||
What are Dungeons?
Story-Connected PvE Instances
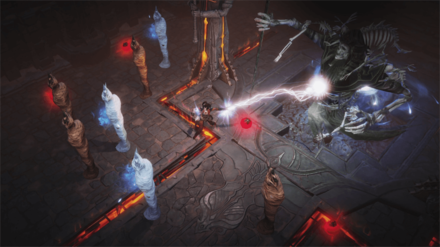
Dungeons are instanced combat locations in Diablo Immortal that act as story progression points and as grinding areas for experience, Gold, and different kinds of loot.
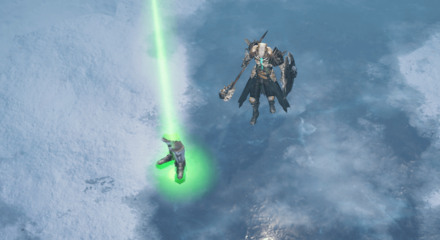
Every Dungeon offers different maps to explore, massive bosses to kill, and unique loot to discover, so they are the main areas to look forward to upon discovering a new Zone.
In addition, starting up a Dungeon provides players with a story cinematic to give it added context and atmosphere before they go about exploring the area and slaying the monsters within.
Can Be Completed Solo or Co-op on Normal
As you progress through the campaign in Normal difficulty, each Dungeon you come across can be completed solo or with a group of friends.
No matter how large your party is, you can go through and finish a Normal difficulty Dungeon within 10 to 15 minutes.
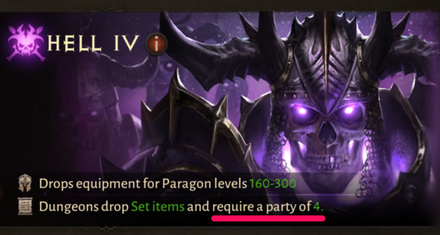
Multiplayer Mandatory for Higher Difficulties
| Difficulty | Required No. of Players |
|---|---|
| Normal | 1 Player |
| Hell I | Party of 2 Players |
| Hell II+ | Party of 4 Players |
However, once you enter Hell I Difficulty and higher, you will need to party up to enter Dungeons.
You will not be able to access Dungeons in these higher difficulties unless you have enough members in your party.
Source of Set Items in Hell Difficulties
| Difficulty | Set Item Drops |
|---|---|
| Hell I+ | Feet Waist |
| Hell II+ | Hands Neck |
| Hell IV+ | Rings |
Dungeons are also the primary way to get Set items, which are the strongest and highest quality secondary equipment you can find in Diablo Immortal.
Once you enter Hell I Difficulty and higher, the final bosses of each Dungeon gain a chance to drop different Set items.
Set Items Guide: Drop Locations & Bonuses | How to Get Set Items
Dungeon Clearing Tips
Keep Combat Rating High and Items Upgraded

Before you enter any Dungeon, ensure that you've done everything to keep your Combat Rating at its highest.
Combat Rating is a crucial stat for clearing Dungeons as it affects how much damage you deal and how much damage you take.
Make sure to check that you've upgraded your equipment and that you've socketed them to the best of your ability to maximize your Combat Rating.
Group Up Smaller Mobs
Grouping up smaller enemies is essential in Dungeons as it allows you to maximize the damage your area-of-effect abilities.
You can do this by leading enemies around in a circle, which makes them clump up into a group you can easily take down or have someone with a good Gather Skill in your party, like a Monk or Crusader.
Keep Movement Speed High
High Movement Speed allows you to clear out Dungeons faster by making it easier to group up mobs, dodge enemy abilities, and reach the next Dungeon objective.
While Combat Rating is still the more important stat to increase, don't neglect Movement Speed whenever you see it as an attribute on a good item.
Diablo Immortal Related Guides

Beginner Tips
Character Upgrade Guide
Game Mechanics
Achievement Guides
| Haunted Altars | The Guards' Story |
| Blood Resurrection | Blood Apparition |
| Revealing the Path | Lord Martanos |
| Hiding in Plain Sight | Blasphemous Texts |
| Shrubbery | Barbarian Spirits |
| Siegebreaker | - |
FAQs
Author

Dungeons Guide | List of All Dungeons
Please participate in our site
improvement survey
03/2026
improvement survey
03/2026
Would you assist in
improving Game8's site?
improving Game8's site?

×
We are listening to our users' valuable opinions and discussing how to act on them.
The information collected through this survey will be used for the purpose of improving our services. In addition, the information will only be disclosed a part of a statistic in a format that will not allow identification of personal information.
Begin Survey
Not Now
×
Please rate each item regarding Game8.co's Advertisements.
Amount of Ads
Very Dissatisfied
Somewhat Dissatisfied
Fine
Somewhat Satisfied
Highly Satisfied
Placement of Ads
Timing of Ad Display
Ad Loading Speed
Safeness of Ads
Content of Ads
×
Please rate each item regarding Game8.co's Quality of Articles.
Amount of information
Very Dissatisfied
Somewhat Dissatisfied
Fine
Somewhat Satisfied
Highly Satisfied
Frequency of updates
Speed of new information
Accuracy of articles
Understandibility of articles
Readability of sentences
×
Please rate each item regarding Game8.co's Usability of the Site.
Ease of finding information
Very Dissatisfied
Somewhat Dissatisfied
Fine
Somewhat Satisfied
Highly Satisfied
Loading Speed
Use of Color
Font Size
Visibility of Images
Easy to Understand Layout
×
Please rate each item regarding Game8.co's Message Boards, Comments.
Ease of Writing
Very Dissatisfied
Somewhat Dissatisfied
Fine
Somewhat Satisfied
Highly Satisfied
Readability
Ease in Finding Information
Comment Quality
Comment Quantity
Admin Response
×
Please rate each item regarding Game8.co's Site's new design.
Please rate our site's new design
Very Dissatisfied
Somewhat Dissatisfied
Fine
Somewhat Satisfied
Highly Satisfied
Do you think that the website's design change makes the site easier to use?
Has the new design made it easier for you to find information on the site?
Has the new design improved the overall visual appeal of the site?
How would you rate your overall satisfaction with the new design of the site?
×
How likely are you to recommend Game8 to someone you know?
Very Unlikely
0
1
2
3
4
5
6
7
8
9
10
Very Likely
If you have other opinions regarding potential improvement to the website, please share them with us. We would appreciate your honest opinion.
Note: This is a free response section, so you can proceed without entering anything.
Note: Please be sure not to enter any kind of personal information into your response.
Note: Please be sure not to enter any kind of personal information into your response.
×
Thank You
×
Thank you for participating in our survey! Your answers will help us to improve the quality of our website and services.
We hope you continue to make use of Game8.
We hope you continue to make use of Game8.
Close
Rankings
Gaming News


![Monster Hunter Stories 3 Review [First Impressions] | Simply Rejuvenating](https://img.game8.co/4438641/2a31b7702bd70e78ec8efd24661dacda.jpeg/thumb)
Popular Games

Genshin Impact Walkthrough & Guides Wiki
Honkai: Star Rail Walkthrough & Guides Wiki
Umamusume: Pretty Derby Walkthrough & Guides Wiki
Pokemon Pokopia Walkthrough & Guides Wiki
Resident Evil Requiem (RE9) Walkthrough & Guides Wiki
Monster Hunter Wilds Walkthrough & Guides Wiki
Wuthering Waves Walkthrough & Guides Wiki
Arknights: Endfield Walkthrough & Guides Wiki
Pokemon FireRed and LeafGreen (FRLG) Walkthrough & Guides Wiki
Pokemon TCG Pocket (PTCGP) Strategies & Guides Wiki


Recommended Games
Diablo 4: Vessel of Hatred Walkthrough & Guides Wiki
Cyberpunk 2077: Ultimate Edition Walkthrough & Guides Wiki
Fire Emblem Heroes (FEH) Walkthrough & Guides Wiki
Yu-Gi-Oh! Master Duel Walkthrough & Guides Wiki
Super Smash Bros. Ultimate Walkthrough & Guides Wiki
Pokemon Brilliant Diamond and Shining Pearl (BDSP) Walkthrough & Guides Wiki
Elden Ring Shadow of the Erdtree Walkthrough & Guides Wiki
Monster Hunter World Walkthrough & Guides Wiki
The Legend of Zelda: Tears of the Kingdom Walkthrough & Guides Wiki
Persona 3 Reload Walkthrough & Guides Wiki


All rights reserved
©2022 BLIZZARD ENTERTAINMENT, INC. ALL RIGHTS RESERVED.
All trademarks referenced herein are the properties of their respective owners.
The copyrights of videos of games used in our content and other intellectual property rights belong to the provider of the game.
The contents we provide on this site were created personally by members of the Game8 editorial department.
We refuse the right to reuse or repost content taken without our permission such as data or images to other sites.