This survey will take about 1 minute.
Your answers will help us to improve our website.
Shin Megami Tensei V: Vengeance (SMT V)
The Three Keys Main Quest Guide
The Three Keys is the 17th quest in Shin Megami Tensei V: Vengeance (SMT V). Read on for a full walkthrough of Taito including all objectives, all bosses, tips and strategies, decisions in this area, and all obtainable demons, essences, and items!
| Previous Quest | Next Quest |
|---|---|
| Demon King's Castle (CoC) Chase Through Shakan (CoV) |
To The Empyrean |
List of Contents
Overall Map - Taito Ward
Overall Map

The Three Keys Objectives
Objectives
| Objective | |
|---|---|
| 1 | Exit the castle and warp back to Tokyo |
| 2 | Enter the conference room and approach the marker |
| 3 | Exit the building and head to your dorm |
| 4 | Go back to the Research Lab and save your progress |
| 5 | Warp to Minato and enter the Diet Building for a cutscene |
| 6 | Talk to everyone, watch another cutscene, and defeat Abdiel ▶ Abdiel boss fight guide |
| 7 | Enter the conference room and approach the marker |
| 8 | Exit the room, watch the cutscene, and head back to your dorm A familiar face will join your party, the main quest The Three Keys will automatically be accepted, and Amanozako will rejoin you after the cutscene. |
| 9 | Register the leyline fount of Ueno and save your progress |
| 10 | Head north and destroy the Abscess of Ueno Park ▶ Abscess of Ueno Park tips and strategy |
| 11 | Head further north and register the leyline fount of Ueno Park Do not go to the marker yet as it will trigger the fight with Zeus. We'll deal with him later. |
| 12 | From the fount, make your way to the west, register the leyline fount of Shinobazu Pond, and destroy the Abscess of the area The leyline fount is just east of the Abscess. ▶ Abscess of Shinobazu Pond tips and strategy |
| 13 | Go south past Kuramae until you trigger a cutscene with Ichiro then register the leyline fount of Umayabashi |
| 14 | Head west and destroy the Abscess of Kuramae ▶ Abscess of Kuramae tips and strategy |
| 15 | Warp back to Umayabashi's fount then run eastward and register the leyline fount of Asakusa Main Street The fount is in a corner north of where Goko is. |
| 16 | Head northeast and destroy the Abscess of Asakusa Don't worry about Amanozako's warning. Nuwa just wants to talk. ▶ Abscess of Asakusa tips and strategy |
| 17 | Head southeast and register the leyline fount of Asakusa The fount is located south of the objective marker. |
| 18 | Warp back to Asakusa Main Street and head south to destroy the Abscess of Azumabashi ▶ Abscess of Azumabashi tips and strategy |
| 19 | Return to Asukasa Main Street fount, head west until you find an NPC Macabre, and climb the blocks to reach the leyline fount of Komagata You can find a Macabre at the entrance of the path leading to the Komagata's leyline fount, which is just west of the Sandman that will give you The Sleeping Sands subquest. |
| 20 | (CoC) Start the boss rush by engaging Odin at the top of the stairs Your team should be at least lv70 for this boss rush. Defeating Odin will give you the Key of Harmony and unlock Deity Odin for fusion as rewards. ▶ Odin boss fight guide (CoV) Engage both Odin and Zeus in a boss fight to obtain both the Key of Harmony and Key of Benevolence. ▶ Odin and Zeus boss fight guide |
| 21 | (CoC) Warp to Ueno Park and head north to engage Zeus You'll obtain the Key of Benevolence as reward ▶ Zeus boss fight guide (CoV) You will be able to accept the quest, "God of Old, Devourer of Kin", from Saturnus if you head past the Ueno Park leyline. |
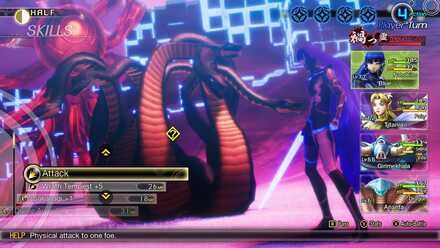
| 22 | (CoC) Warp to Asakusa and head north to engage Vasuki You'll obtain the Key of Austerity and unlock Drake Vasuki for fusion as rewards and complete The Three Keys main quest. Amanozako will also leave after the fight. ▶ Vasuki boss fight guide (CoV) Engage Beelzebub in a fight on the top of the mountain. You will obtain the Key of Austerity afterwards ▶ Beelzebub boss fight guide |
| 23 | Warp to Umayabashi and head south to Honjo until you reach the entrance to the Temple of Eternity |
The Three Keys Choices and Alignment
| Question | Answer and Alignment |
|---|---|
 Conversation with Tao Conversation with Tao |
You're alive! |
| I thought you were dead. | |
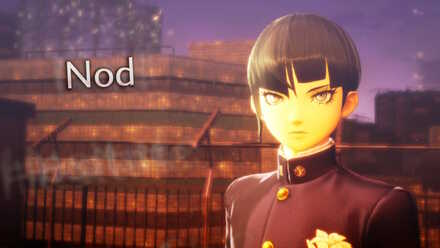 Second response to Tao Second response to Tao |
Nod |
| Hesitate | |
 Before fighting Odin Before fighting Odin |
What are your feelings on this world? |
| Give me the key. | |
 Before fighting Beelzebub Before fighting Beelzebub |
I want to re-create the world. |
| I want to stop Tiamat. |
The Three Keys General Tips
Komagata Leyline Fount Location
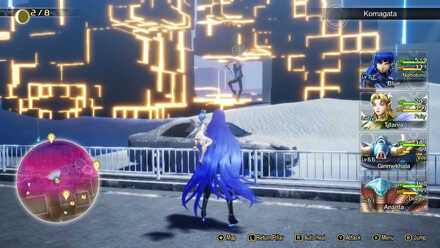
The path leading to Komagata's leyline fount and Odin is easy to miss but once you find the entrance, you won't have any more problems getting to the top.
From the Asukasa Main Street fount, head west until you find a Sandman with the subquest The Sleeping Sands. A little more to the west is an NPC Macabre, marking the entrance of the path you're looking for.
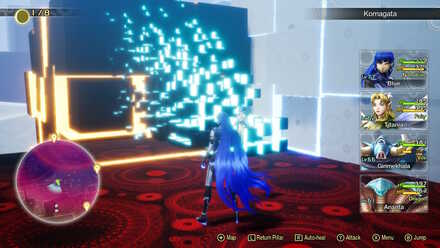
From there, use the blocks and the moving stairs to get to the top where you can find the leyline fount and Odin nearby.
Destroying the Abscess of Ueno Park
Cybele and Scathach are both weak to Electric but watch out for their Fire and Light attacks. Bring demons like Nue and Titania to match their weakness. Titania can also provide healing with Diarahan and inflict Sleep with Lullaby.
Unlocked Miracles
| Divine Garrison IX | Fire Mastery V | Ice Mastery V |
| Electric Mastery V | Force Mastery V | Majestic Aura |
Destroying the Abscess of Shinobazu Pond
Skadi, Atavaka, Barong, and Siegfried will face you in this Abscess, each having different affinities.
Tao can spam Megidola to ignore enemy resistances as well as use Hamaon to target Siegfried's weakness. Ananta is also a good choice for this battle as it can block/resist most of the enemies' attack and use Ice Dracostrike on Atavaka to gain extra turns.
Avoid using Physical attacks against Siegfried as he can absorb them.
Unlocked Miracles
| Prayer of Agility | Prayer of Luck | Light Mastery V |
| Dark Mastery V | Ailment Mastery V |
Destroying the Abscess of Kuramae
Yatagarasu, Throne, and Mitra are guarding this Abscess and unlike the previous team, they have some similatrities in weaknesses.
Mitra is weak to Ice, Yatagarasu is weak to Dark, while Throne is weak to both. This Abscess is also easier than the one in Shinobazu Pond since they have lower levels.
Just don't use Light attacks on any of them as they will simply block them.
Unlocked Miracles
| Deathly Aura IV | Healer's Hospitality II | Almighty Mastery IV |
| Physical Mastery IV | Art of Essences III |
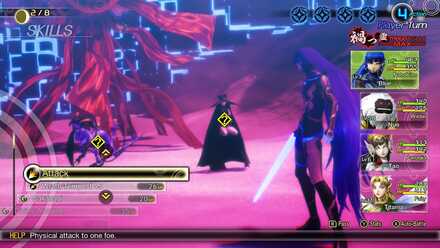
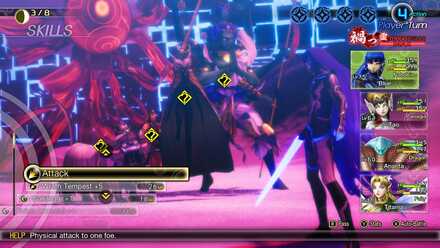
Destroying the Abscess of Asakusa
Rangda can be very annoying as it naturally reflects Physical attacks and can cast Makarakarn to reflect the next incoming Magical attack. Use Almighty attacks like Sakanagi or "Piercing" attacks like Hell Thrust to counter these.
Both Girimekhala and Garuda can learn Hell Thrust. Girimekhala can be found just east of the Abscess while Garuda can be obtained through Fafnir and Nue's fusion.
Unlocked Miracles
| Merchant's Hospitality II | Recover Mastery III | Support Mastery III |
| Prayer of Strength | Prayer of Magic |
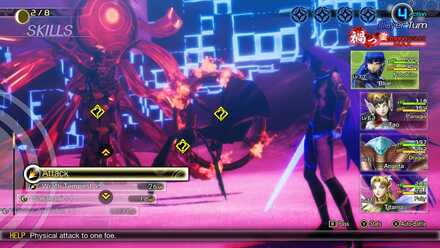
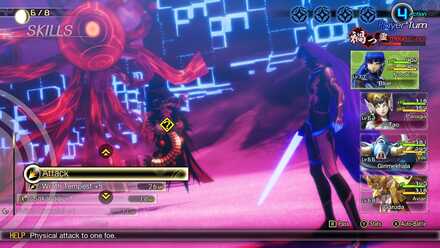
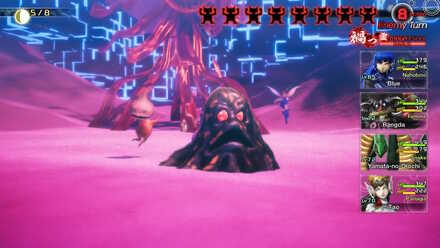
Destroying the Abscess of Azumabashi
Yamata-no-Orochi can block both Ice and Fire but is weak to Electric. Since it mostly uses Physical attacks, Girimekhala is a perfect demon for this fight as it can reflect Physical skills. Bring demons like Titania and Ananta to target his weakness and gain extra turns.
Unlocked Miracles
| Demon Proficency IV | Divine Proficency IV | Almight Mastery V |
| Physical Mastery V |
Destroying the Abscess of Motoasakusa
This is an odd but dangerous Abscess as it houses a Slime, a Pixie, an Onmoraki, and a Preta. These are early game demons, but in this fight, they are all lv99 and have a total of 8 turns. Skip this Abscess for now and go back when with a team that can take them on.
Unlocked Miracles
| Skillful Conversation | Dread | Summoner's Hospitality III |
The Three Keys Bosses and Strategies
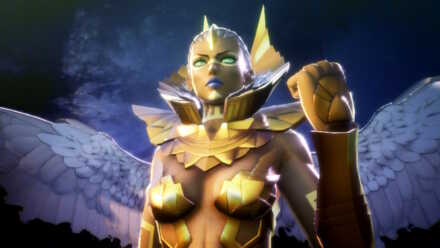
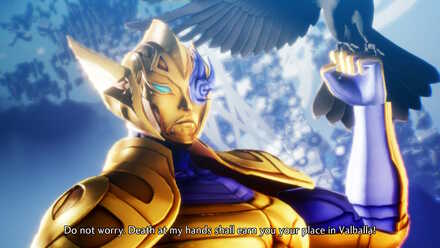
Abdiel
| Recommended Level: 58 |
|---|
 |
| Tips and Strategy |
|
|
Abdiel will focus her attacks on Nahobino and will only hit your allies when she uses Light's Descent and Maragidyne.
Fuse Nahobino an essence that can block Light attacks like Titania and Atavaka, especially if your current affinity is weak to Light. For your demon allies, bring those who have Dark skills and are not weak to Light like Atavaka, Lahmu, and Flauros.
Use a Fire Dampener when Abdiel starts gathering Magatsuhi to block the Maragidyne that follows.
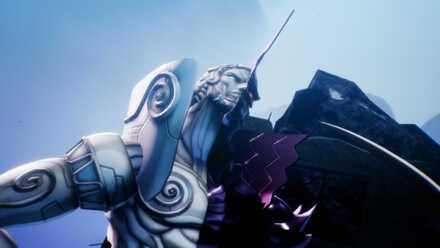
Odin
| Recommended Level: 72 |
|---|
 |
| Tips and Strategy |
|
|
A lv69 Lilith and a lv68 Skadi can learn Null Elec and Null Ice respectively. Fuse the two into Rangda, teach it Taunt through essence fusion, and make it your meatshield against Odin.
Mot is a good choice for the attacker role as long as you give it a Resist/Null Elec through essence fusion as well.
Use an Ice Dampener when Odin starts gathering Magatsuhi to block the Mabufudyne that follows.
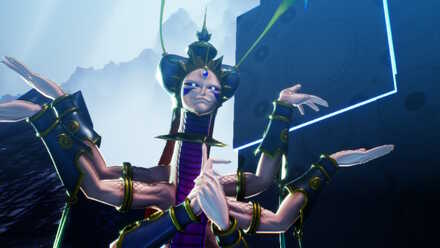
Zeus
| Recommended Level: 72 |
|---|
 |
| Tips and Strategy |
|
|
At this point, you can summon demons that can deal more damage with their Physical attacks than using Force attacks to target Zeus' weakness while also being resistant to Electric like Seth, Mara, and Thor. Though not resistant to Electric, Futsunushi is also an excellent choice for this role especially with his Phys Pleroma. You can obtain Futsunushi by completing In Defense of Tokyo.
Use an Elec Dampener when Zeus starts gathering Magatsuhi to block the Maziodyne that follows.
Vasuki
| Recommended Level: 72 |
|---|
 |
| Tips and Strategy |
|
|
We recommend bringing Surt or Adramelech to target Vasuki's weakness to Fire. Though slightly weaker than the two, you can opt for Yamata-no-Orochi instead since it can block Ice.
Similar to our strat against Odin, you can fuse a Skadi with Null Ice and another demon into Rangda, teach it Taunt through essence fusion, and make it your meatshield against Vasuki.
Use an Ice Dampener when Vasuki starts gathering Magatsuhi to block the Mabufudyne that follows.
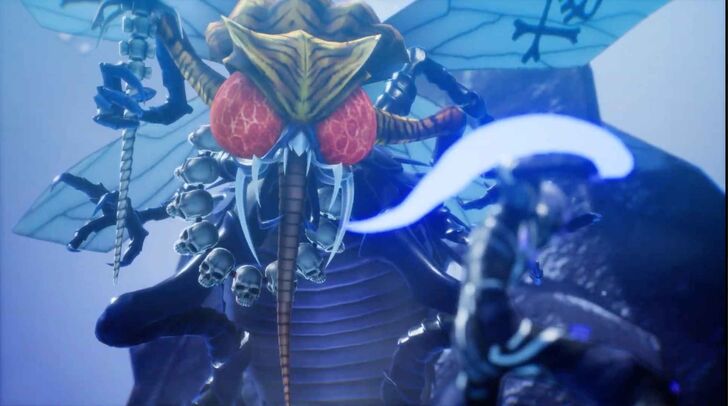
Beelzebub
| Recommended Level: 72 |
|---|
 |
| Tips and Strategy |
|
|
We recommend bringing Mot or Adramelech to target Beelzebub's weakness to Fire.
Similar to our strat against Odin, you can fuse a Skadi with Null Ice and another demon into Rangda, teach it Taunt through essence fusion, and make it your meatshield against Beelzebub.
Use a Wind Dampener when Beelzebub starts gathering Magatsuhi to block the Zanbarion that follows.
The Three Keys Miman Locations
5 Mimans Can Be Found Here
There are 50 Mimans that can be found in this section of the game.
There are 200 in total, 50 in each ward. Be careful not to miss them!
Ueno
Iriya
Motoasakusa
Ueno Park
Uguisudani
Okachimachi
Shinobazu
Okachimachi (Again)
Umayabashi
Kuramae
Komagata
Okachimachi (Once Again)
Asakusa
| Actual Location | Map Location | |
|---|---|---|
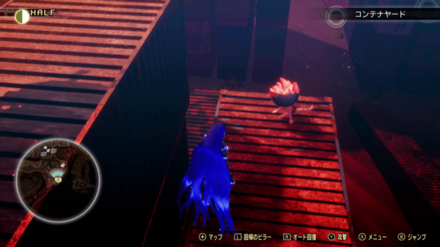
| 151 | 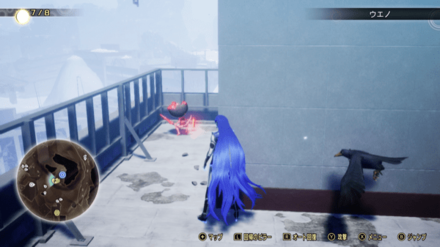 | 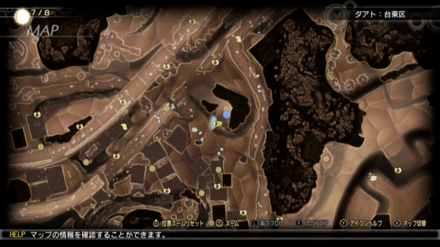 |
| At the back of the doorway in the building south of the Ueno Leyline. | ||
| 152 | 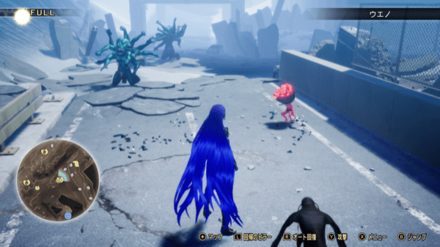 | 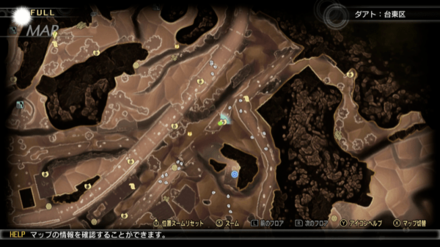 |
| North of the Ueno Leyline. | ||
| 153 | 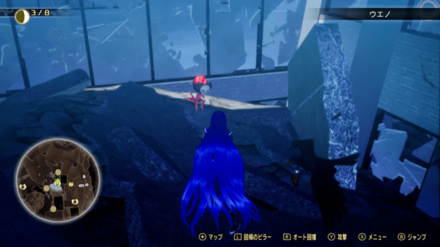 | 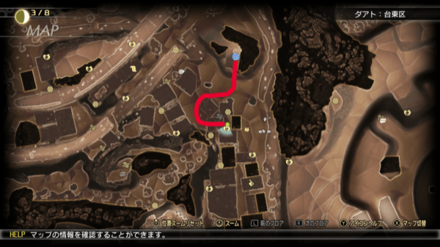 |
| In the corner of a building south of the Ueno Leyline. | ||
| 154 | 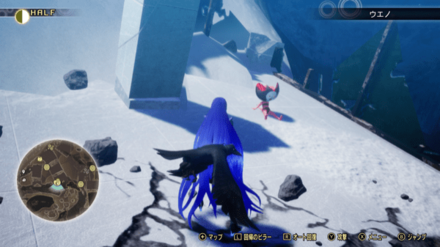 | 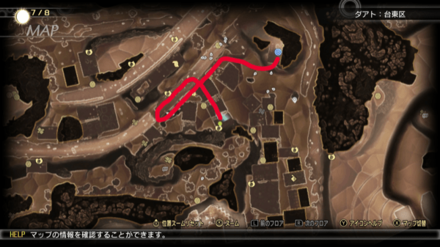 |
| On top of a collapsed building southwest of the Ueno Leyline. | ||
| 155 | 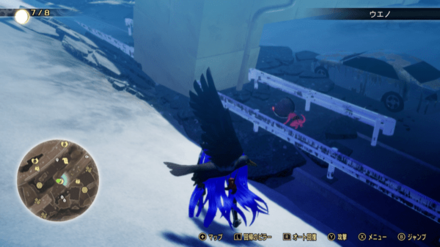 | 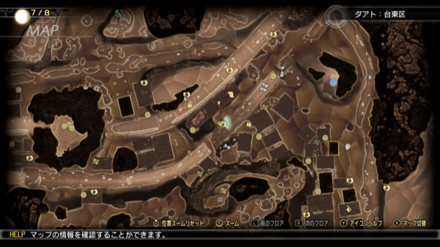 |
| Under the road far southwest of the Ueno Leyline. | ||
| 156 | 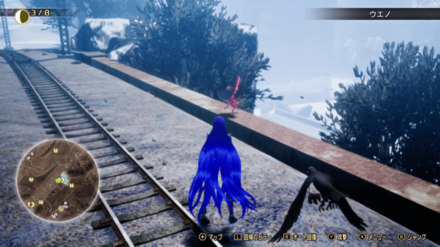 | 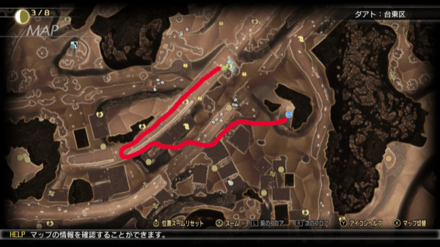 |
| Northwest of the Ueno Leyline after following the road west and heading towards the train tracks. | ||
| 157 | 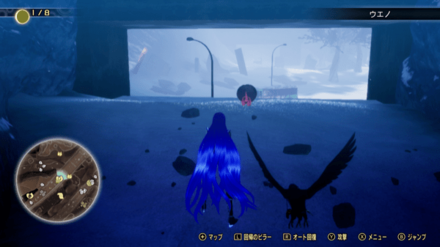 | 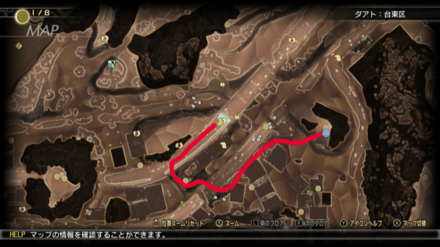 |
| West of the Ueno Leyline after passing through the underground tunnel under the train. | ||
| 158 | 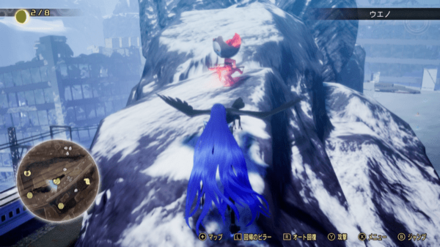 | 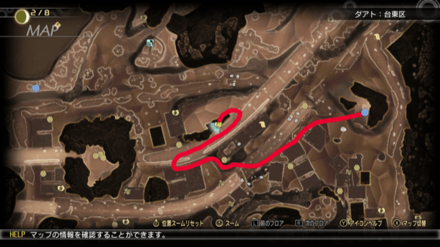 |
| On top of a large rock west of the Ueno Leyline. | ||
| 159 | 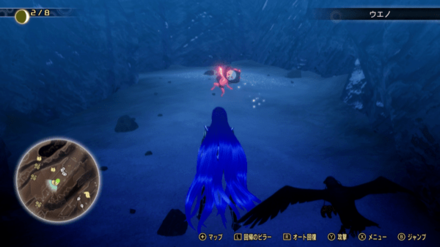 | 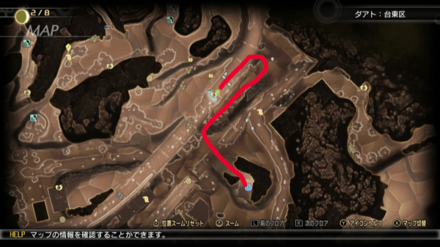 |
| North of the Ueno Leyline, after passing through the path under the train. | ||
| 160 |  | 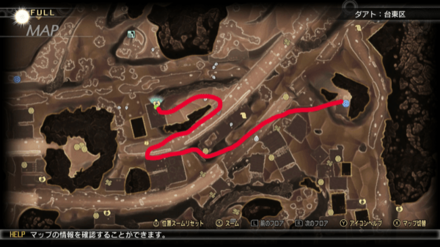 |
| In the corner of a building over the railroad tracks west of the Ueno Leyline. | ||
| Actual Location | Map Location | |
|---|---|---|
| 161 | 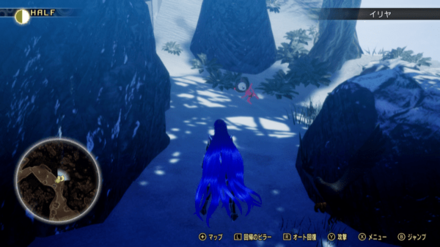 | 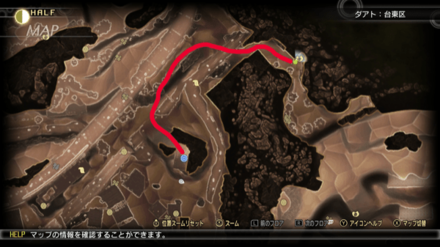 |
| Northeast of the Ueno Leyline. | ||
| Actual Location | Map Location | |
|---|---|---|
| 162 | 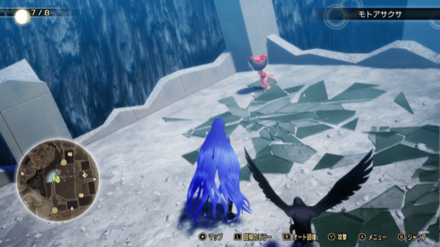 | 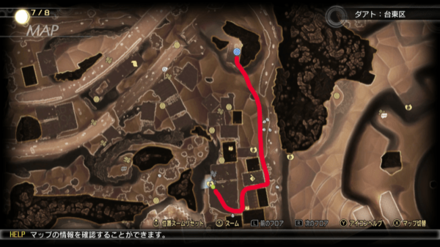 |
| On top of a collapsed building south of the Ueno Leyline. | ||
| Actual Location | Map Location | |
|---|---|---|
| 163 | 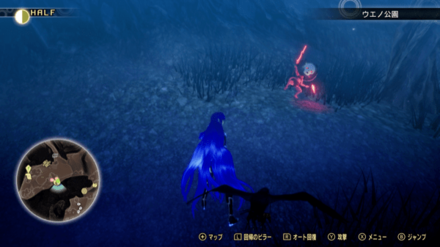 | 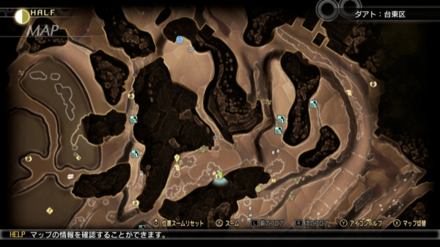 |
| South of the Ueno Park Leyline. | ||
| 164 | 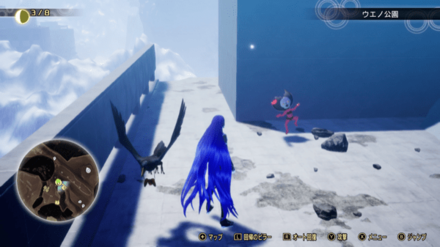 | 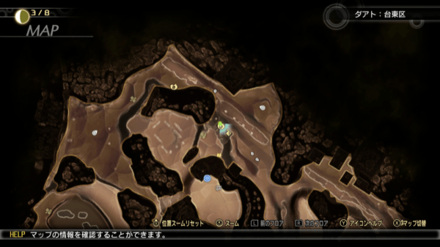 |
| On top of a building north of the Ueno Park Leyline. | ||
| Actual Location | Map Location | |
|---|---|---|
| 165 | 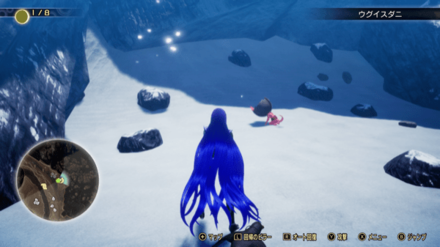 | 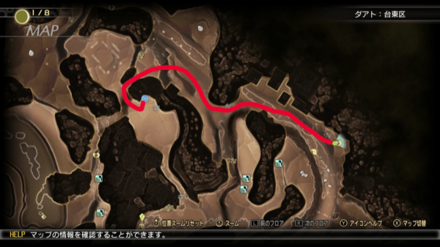 |
| Near the vending machine southeast of the Ueno Park Leyline. | ||
| 166 | 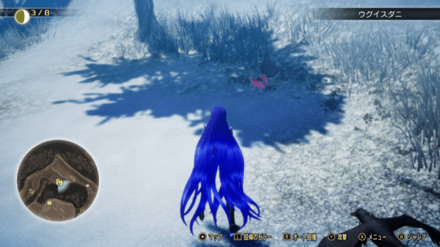 | 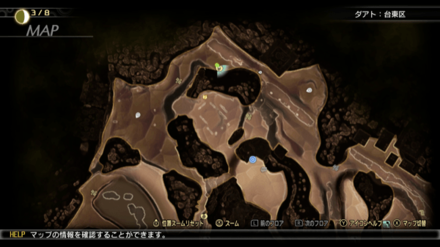 |
| Near a tree noth of the Ueno Park Leyline. | ||
| Actual Location | Map Location | |
|---|---|---|
| 167 | 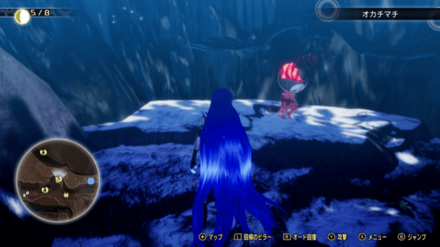 | 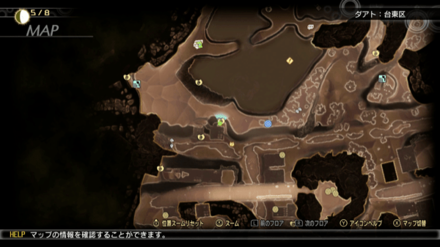 |
| On a rock down a cliff west of the Shinobazu Pond Leyline. | ||
| Actual Location | Map Location | |
|---|---|---|
| 168 | 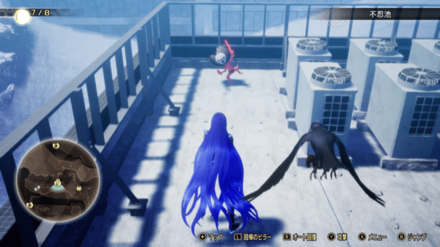 |  |
| On a building a little south of the 167th Miman's location and west of the Shinobazu Pond Leyline. | ||
| 169 | 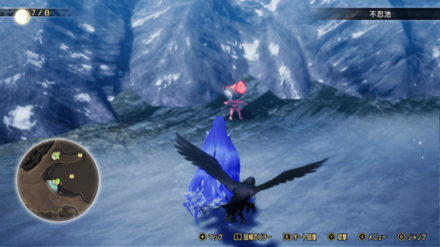 | 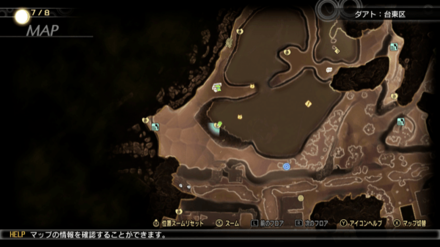 |
| Northwest of the Shinobazu Pond Leyline. | ||
| 170 | 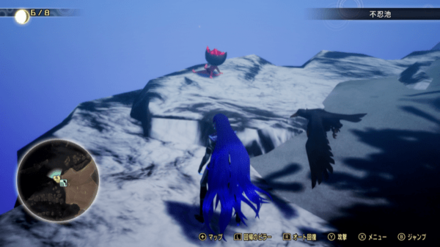 | 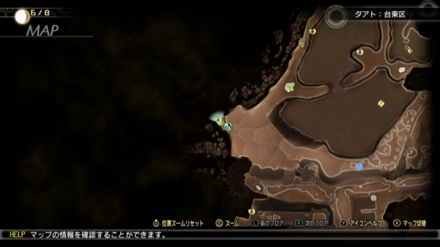 |
| West of the Shinobazu Pond Leyline after climbing the platforms. | ||
| 171 | 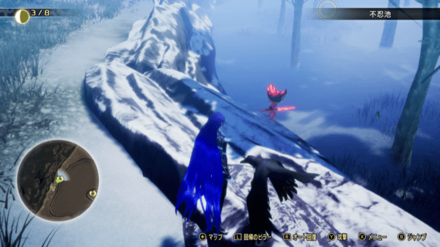 | 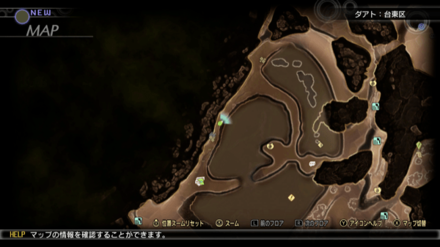 |
| On a rock north of the Shinobazu Pond Leyline. | ||
| 172 | 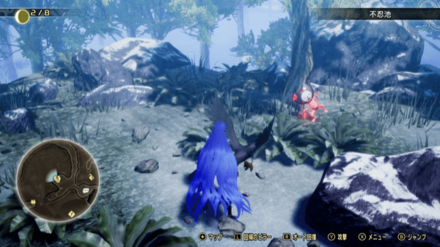 | 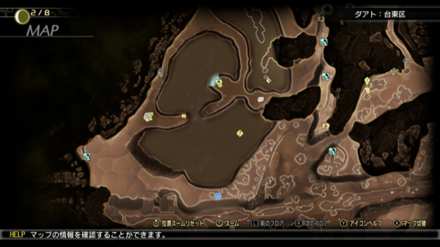 |
| Near a tree north of the Shinobazu Pond Leyline and a bit south of the 171st Miman's location. | ||
| 173 | 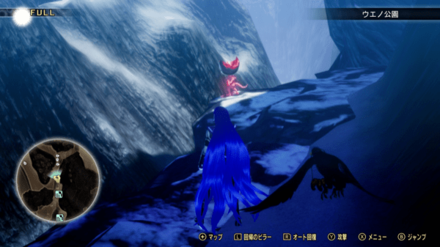 | 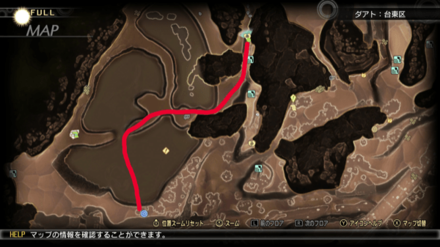 |
| At the end of the narrow path northwest of the Shinobazu Pond Leyline. | ||
| 174 | 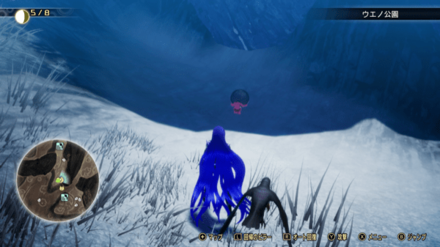 |  |
| South of the 173rd Miman's location. | ||
| Actual Location | Map Location | |
|---|---|---|
| 175 | 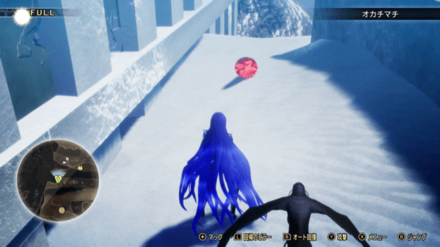 | 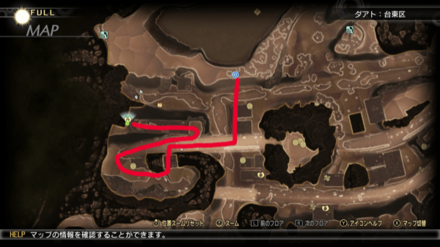 |
| ||
| 176 | 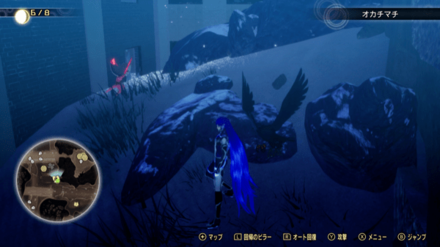 |  |
| In between two buildings south of the Shinobazu Pond Leyline. | ||
| Actual Location | Map Location | |
|---|---|---|
| 177 | 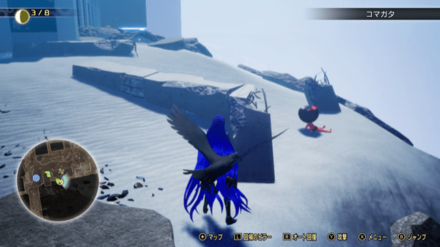 | 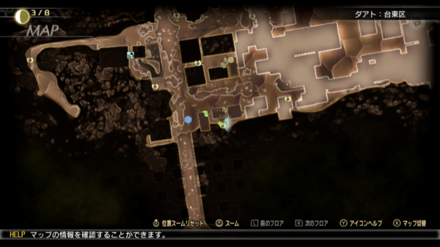 |
| West of the Umayabashi Leyline. | ||
| 178 | 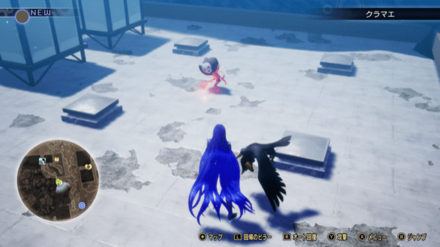 | 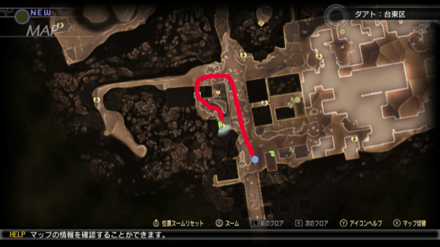 |
| Northwest of the Umayabashi Leyline. | ||
| 179 |  | 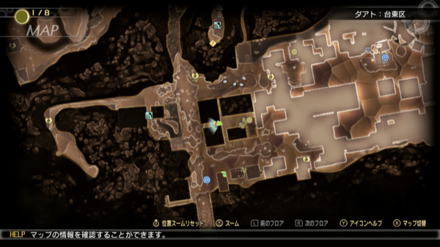 |
| Slightly north of the Umayabashi Leyline. | ||
| 180 | 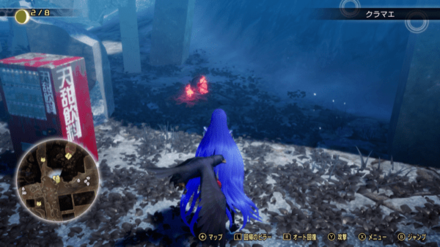 | 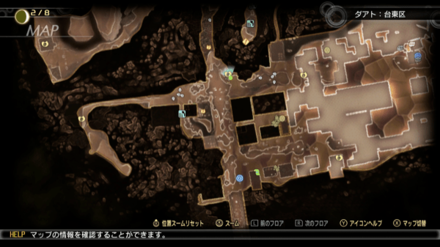 |
| Behind a vending machine north of the Umayabashi Leyline. | ||
| 181 | 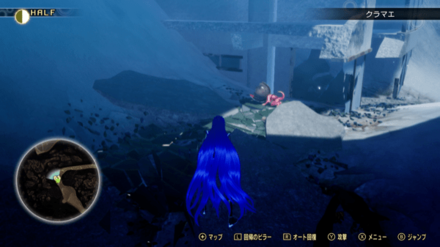 | 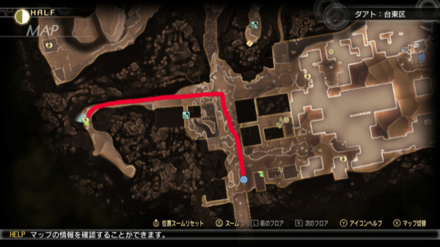 |
| In an alley northwest of the Umayabashi Leyline. | ||
| Actual Location | Map Location | |
|---|---|---|
| 182 |  | 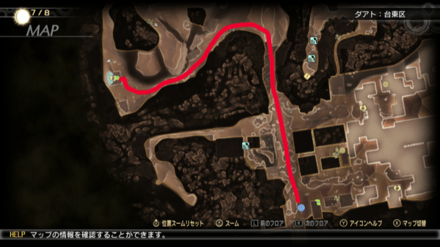 |
| At the top of a building far northwest of the Umayabashi Leyline and north of the 181st Miman's location. | ||
| Actual Location | Map Location | |
|---|---|---|
| 183 | 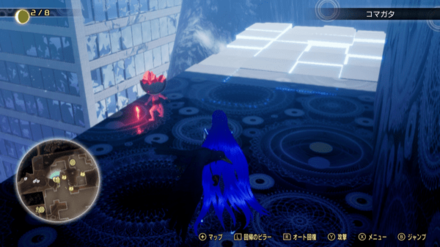 | 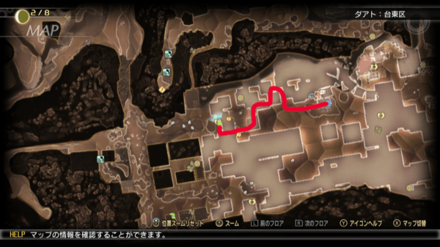 |
| West of the Komagata Leyline. | ||
| 184 | 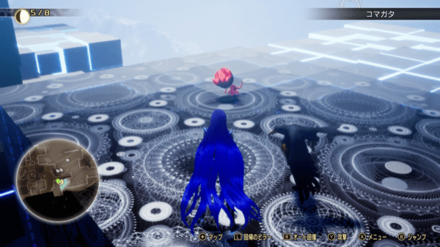 |  |
| Southwest of the Komagata Leyline. | ||
| 185 | | |
| Slightly northeast of the Komagata Leyline. | ||
| 186 | 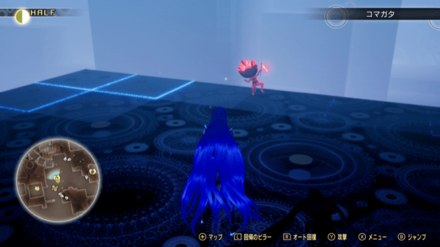 | 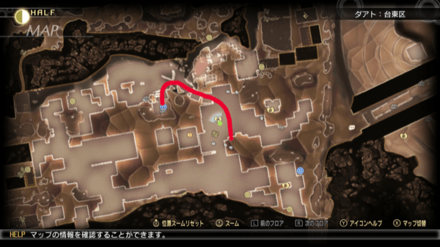 |
| Southeast of the Komagata Leyline. | ||
| 187 | 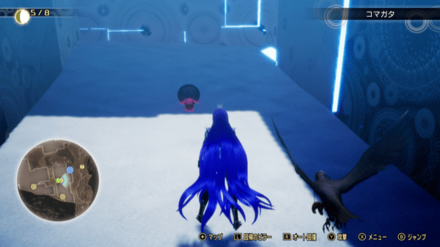 | 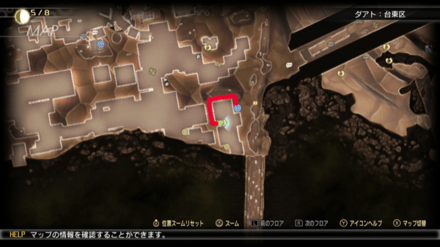 |
| Slightly southwest of the Hirokoji Leyline. | ||
| 188 | 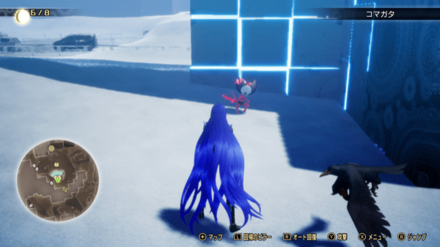 | 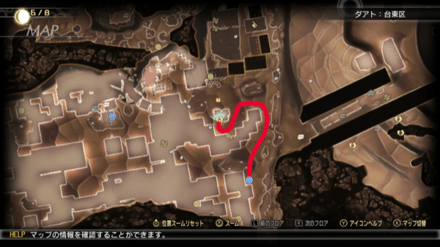 |
| On the ground slightly northwest of the Hirokoji Leyline. | ||
| Actual Location | Map Location | |
|---|---|---|
| 189 | 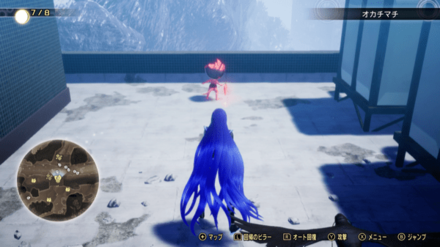 | 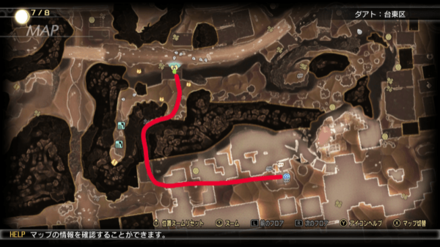 |
| On a building northwest of the Komagata Leyline. | ||
| Actual Location | Map Location | |
|---|---|---|
| 190 | 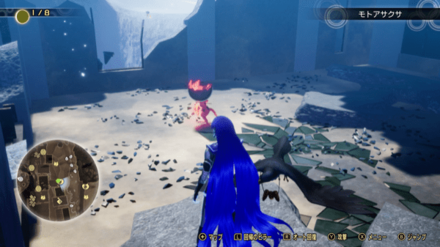 | 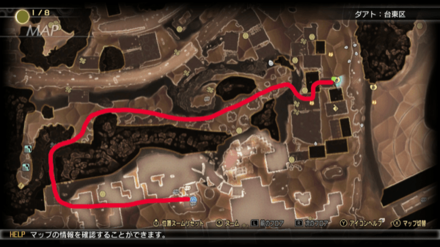 |
| ||
| 191 | 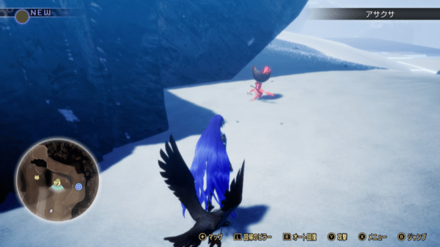 | 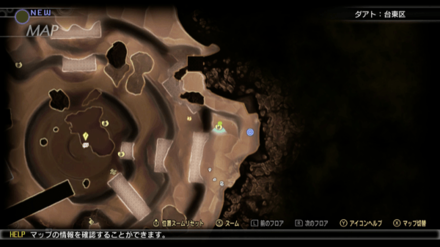 |
| West of the Asakusa Leyline. | ||
| 192 | 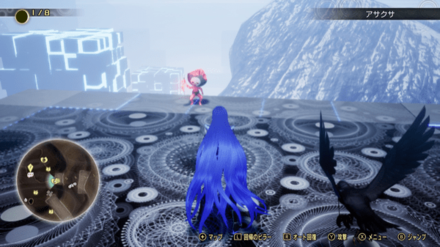 | 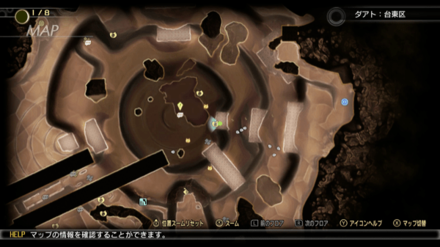 |
| Further west of the Asakusa Leyline. | ||
| 193 |  | 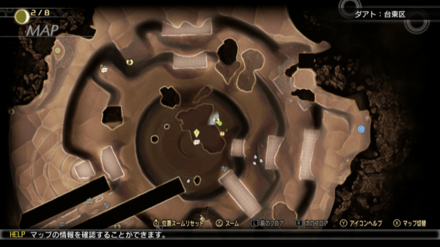 |
| Northwest of the 192nd Miman's location. | ||
| 194 | 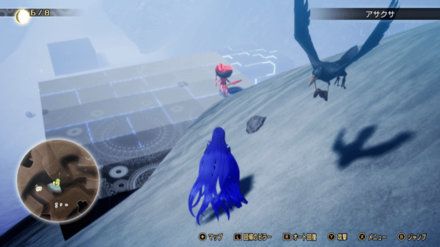 | 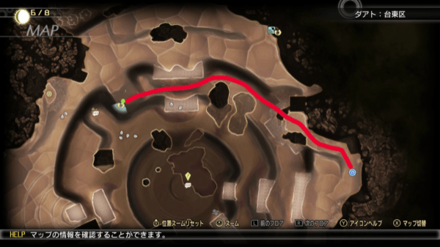 |
| On a block far west of the Asakusa Leyline. | ||
| 195 | 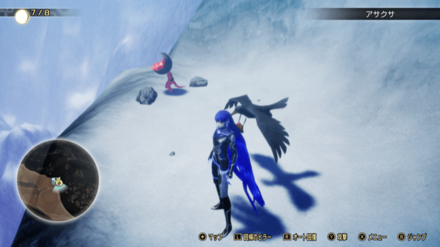 | 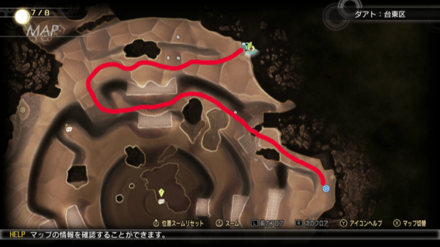 |
| Northeast of the 194th Miman's location. | ||
| 196 | 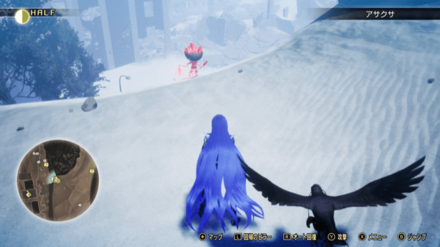 | 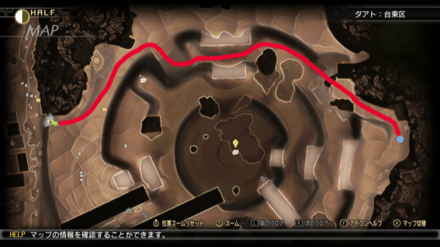 |
| On a cliff on the far, far west of the Asakusa Leyline. | ||
| 197 | 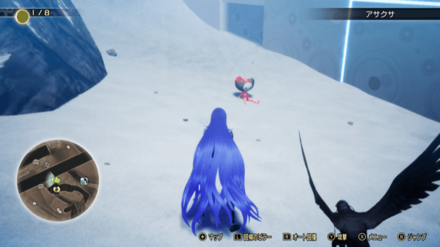 | 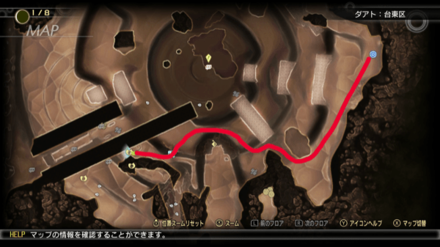 |
| Far southwest of the Asakusa Leyline after climbing some platforms. | ||
| 198 | 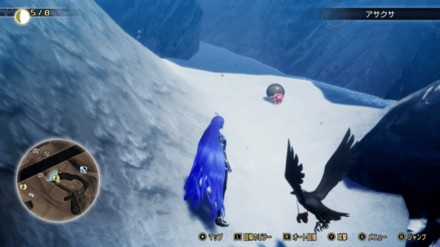 | 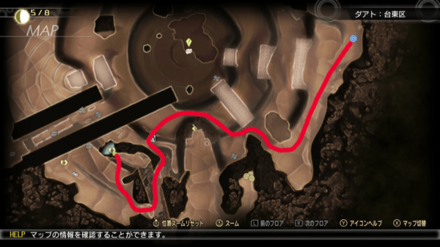 |
| ||
| 199 | 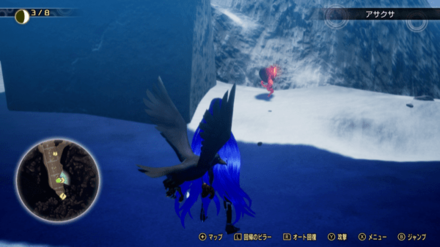 | 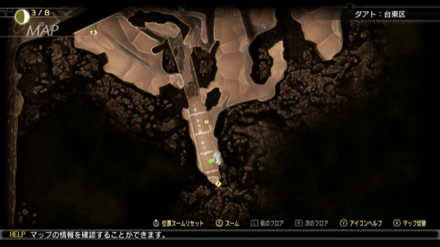 |
| Under the railroad track south of the 198th Miman's location. | ||
| 200 | 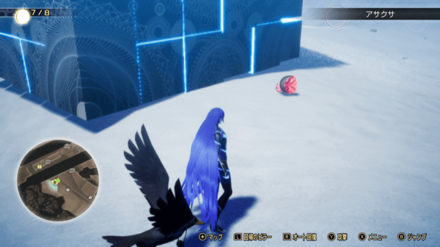 | 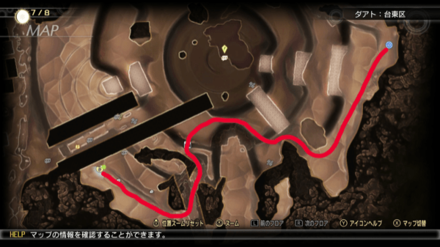 |
| ||
Taito Available Sidequests
The following sidequests will be available in the Taito region of Da'at.
The Three Keys Encounterable Demons
| Demons | Lv | Race |
|---|---|---|
 Loup-garou Loup-garou
|
54 | Beast |
 Decarabia Decarabia
|
55 | Fallen |
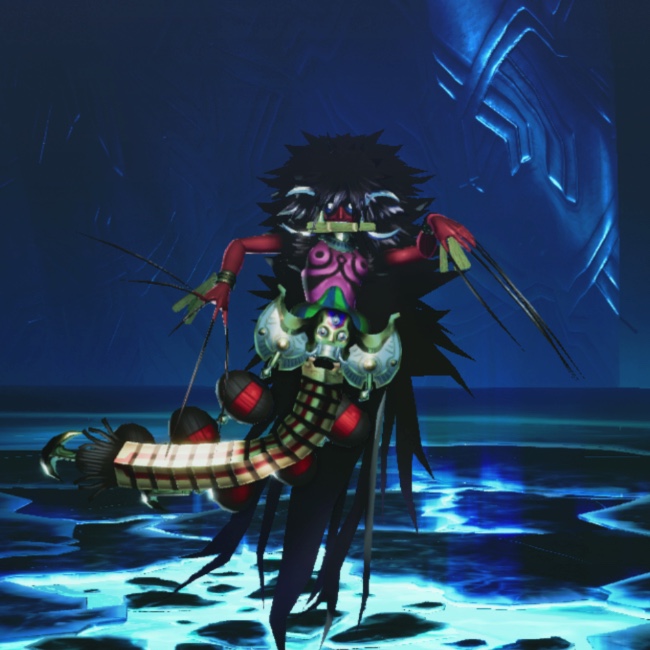
 Hecatoncheires Hecatoncheires
|
55 | Jaki |
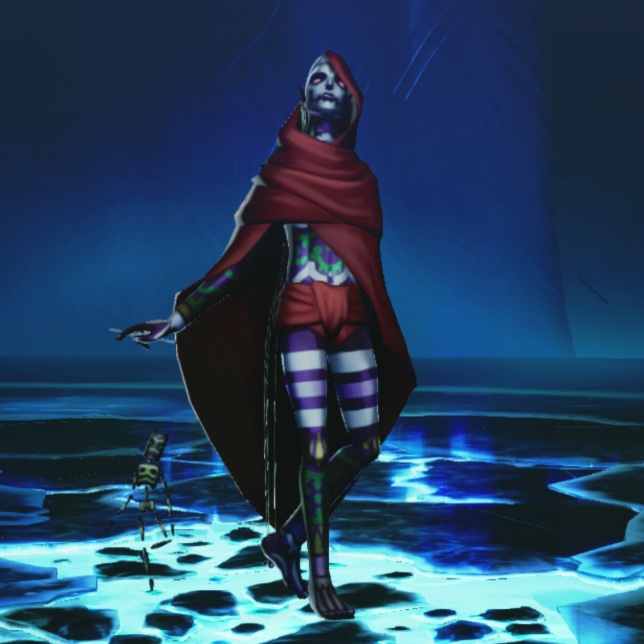
 Queen Medb Queen Medb
|
56 | Night |
 Sui-Ki Sui-Ki
|
56 | Brute |
 Titania Titania
|
57 | Fairy |
 Lachesis Lachesis
|
58 | Femme |
 Fafnir Fafnir
|
60 | Drake |
 Fuu-Ki Fuu-Ki
|
63 | Brute |
 Throne Throne
|
64 | Divine |
 Atropos Atropos
|
64 | Femme |
 Cerberus Cerberus
|
64 | Beast |
 Girimekhala Girimekhala
|
66 | Vile |
 Nebiros Nebiros
|
67 | Fallen |
 Rangda Rangda
|
70 | Femme |
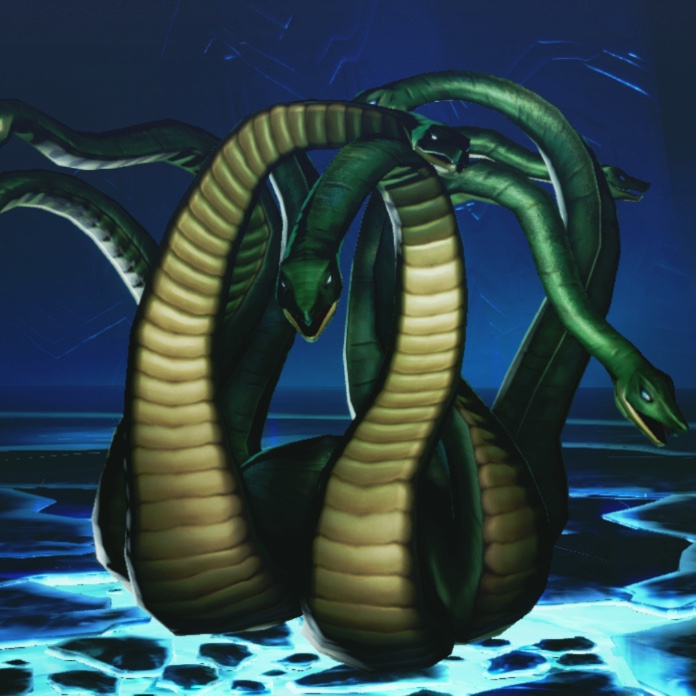 Yamata no Orochi Yamata no Orochi
|
72 | Snake |
Shin Megami Tensei V: Vengeance Related Guides
| Previous Quest | Next Quest |
|---|---|
| Demon King's Castle (CoC) Chase Through Shakan (CoV) |
To The Empyrean |

Story Walkthrough and Route Guides
SMT V: Vengeance Walkthrough Guides
| Both Story Routes | |
|---|---|
 The Lay of the Land The Lay of the Land |
 The Angel's Trail The Angel's Trail |
 The Angels' Request The Angels' Request |
 Head to Jozoji Temple Head to Jozoji Temple |
 Save the Students Save the Students |
 A Golden Opportunity A Golden Opportunity |
| ↓ Canon of Creation ↓ | ↓ Canon of Vengeance ↓ |
 Chiyoda Chiyoda |
 Investigate the Anomalies in Tokyo Investigate the Anomalies in Tokyo |
 Tokyo Station Tokyo Station |
 Rescue Miyazu Atsuta Rescue Miyazu Atsuta
|
 Demon King's Castle Demon King's Castle |
 Chase Through Shakan Chase Through Shakan
|
| Both Story Routes | |
| The Three Keys
|
 To The Empyrean To The Empyrean
|
 Towards a New World Towards a New World
|
 Endings Guide Endings Guide |
Comment
1  Anonymous about 4 years
What is required to go through the mysterious entrance in this area? I know my level needs to be higher but not sure how much grinding I need to do.
Author
Shin Megami Tensei V Vengeance (SMTVV) Walkthrough & Guides Wiki
The Three Keys Main Quest Guide
Please participate in our site
improvement survey
03/2026
improvement survey
03/2026
Would you assist in
improving Game8's site?
improving Game8's site?

×
We are listening to our users' valuable opinions and discussing how to act on them.
The information collected through this survey will be used for the purpose of improving our services. In addition, the information will only be disclosed a part of a statistic in a format that will not allow identification of personal information.
Begin Survey
Not Now
×
Please rate each item regarding Game8.co's Advertisements.
Amount of Ads
Very Dissatisfied
Somewhat Dissatisfied
Fine
Somewhat Satisfied
Highly Satisfied
Placement of Ads
Timing of Ad Display
Ad Loading Speed
Safeness of Ads
Content of Ads
×
Please rate each item regarding Game8.co's Quality of Articles.
Amount of information
Very Dissatisfied
Somewhat Dissatisfied
Fine
Somewhat Satisfied
Highly Satisfied
Frequency of updates
Speed of new information
Accuracy of articles
Understandibility of articles
Readability of sentences
×
Please rate each item regarding Game8.co's Usability of the Site.
Ease of finding information
Very Dissatisfied
Somewhat Dissatisfied
Fine
Somewhat Satisfied
Highly Satisfied
Loading Speed
Use of Color
Font Size
Visibility of Images
Easy to Understand Layout
×
Please rate each item regarding Game8.co's Message Boards, Comments.
Ease of Writing
Very Dissatisfied
Somewhat Dissatisfied
Fine
Somewhat Satisfied
Highly Satisfied
Readability
Ease in Finding Information
Comment Quality
Comment Quantity
Admin Response
×
Please rate each item regarding Game8.co's Site's new design.
Please rate our site's new design
Very Dissatisfied
Somewhat Dissatisfied
Fine
Somewhat Satisfied
Highly Satisfied
Do you think that the website's design change makes the site easier to use?
Has the new design made it easier for you to find information on the site?
Has the new design improved the overall visual appeal of the site?
How would you rate your overall satisfaction with the new design of the site?
×
How likely are you to recommend Game8 to someone you know?
Very Unlikely
0
1
2
3
4
5
6
7
8
9
10
Very Likely
If you have other opinions regarding potential improvement to the website, please share them with us. We would appreciate your honest opinion.
Note: This is a free response section, so you can proceed without entering anything.
Note: Please be sure not to enter any kind of personal information into your response.
Note: Please be sure not to enter any kind of personal information into your response.
×
Thank You
×
Thank you for participating in our survey! Your answers will help us to improve the quality of our website and services.
We hope you continue to make use of Game8.
We hope you continue to make use of Game8.
Close
Rankings
- We could not find the message board you were looking for.
Gaming News


![Monster Hunter Stories 3 Review [First Impressions] | Simply Rejuvenating](https://img.game8.co/4438641/2a31b7702bd70e78ec8efd24661dacda.jpeg/thumb)
Popular Games

Genshin Impact Walkthrough & Guides Wiki
Honkai: Star Rail Walkthrough & Guides Wiki
Umamusume: Pretty Derby Walkthrough & Guides Wiki
Pokemon Pokopia Walkthrough & Guides Wiki
Resident Evil Requiem (RE9) Walkthrough & Guides Wiki
Monster Hunter Wilds Walkthrough & Guides Wiki
Wuthering Waves Walkthrough & Guides Wiki
Arknights: Endfield Walkthrough & Guides Wiki
Pokemon FireRed and LeafGreen (FRLG) Walkthrough & Guides Wiki
Pokemon TCG Pocket (PTCGP) Strategies & Guides Wiki


Recommended Games
Diablo 4: Vessel of Hatred Walkthrough & Guides Wiki
Cyberpunk 2077: Ultimate Edition Walkthrough & Guides Wiki
Fire Emblem Heroes (FEH) Walkthrough & Guides Wiki
Yu-Gi-Oh! Master Duel Walkthrough & Guides Wiki
Super Smash Bros. Ultimate Walkthrough & Guides Wiki
Pokemon Brilliant Diamond and Shining Pearl (BDSP) Walkthrough & Guides Wiki
Elden Ring Shadow of the Erdtree Walkthrough & Guides Wiki
Monster Hunter World Walkthrough & Guides Wiki
The Legend of Zelda: Tears of the Kingdom Walkthrough & Guides Wiki
Persona 3 Reload Walkthrough & Guides Wiki


All rights reserved
©ATLUS. ©SEGA. All rights reserved. ATLUS and SEGA are registered in the U.S. Patent and Trademark Office. ATLUS, the ATLUS logo, SHIN MEGAMI TENSEI and SMT are either registered trademarks or trademarks of ATLUS Co., Ltd. or its affiliates.
The copyrights of videos of games used in our content and other intellectual property rights belong to the provider of the game.
The contents we provide on this site were created personally by members of the Game8 editorial department.
We refuse the right to reuse or repost content taken without our permission such as data or images to other sites.
You’re supposed to be above level 80 but I recommend bring at least 90 since the boss you will fight is probably the hardest in the game.