Necromancer Bone Spike PvP Build Guide: Gems, Items, and How to Play
Check out Game8's Diablo 4 Wiki for our latest guides!
☆Diablo 4 Best Builds
☆Diablo 4 Interactive Map
☆Diablo 4 Class Tier List
☆Diablo 4 Story Walkthrough
☆Diablo 4 Leveling Guide
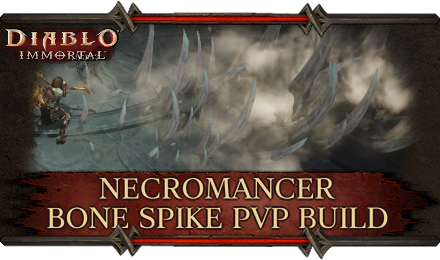
This is a guide to the Bone Spike PvP Build, a PvP Necromancer Build in Diablo Immortal! This is a Crowd Control support build that makes use of the Hideous Dawning headpiece synergy with Bone Spikes to have 3 charges of stuns to keep enemies in place for allies.
| All Necromancer Guides | ||
|---|---|---|
 Necromancer Class Overview Necromancer Class Overview |
 Best Necromancer Builds Best Necromancer Builds |
|
Bone Spike PvP Build Profile
Build Profile and Rating
| Bone Spike PvP | |
|---|---|
| Class |
 Necromancer Necromancer
|
| Build Rating |
|
| Preference | Party |
| Build Focus | PvP |
| Stat Priorities |
・Willpower ・Cooldown Reduction ・Vitality ・Fortitude ・Movement Speed |
Build Strengths and Weaknesses
| Strengths | Weaknesses |
|---|---|
| ・High HP and survivabilty
・Supportive Skills allows a safer playstyle ・Several tools to disrupt other players |
・Low damage output
・Can't perform its role alone |
Build Gear and Skill Summary
| Main Hand | Off Hand | ||
|---|---|---|---|
| Simulacrator | Pyre's Allure | ||
| Head | Shoulder | Chest | Legs |
| Hideous Dawning |
 Chasm-Crosser Chasm-Crosser
|
The Inviting Tomb |
 Sacral Chausses Sacral Chausses
|
| Feasting Baron’s Pack Set | |||
| Neck | Ring 1 | Ring 2 | Waist |
 The Subjugator The Subjugator
|
 The Turnkey The Turnkey
|
 The Prisoner The Prisoner
|
 The Gaoler The Gaoler
|
| Hands | Feet | ||
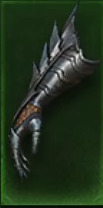 The Mailed Fist The Mailed Fist
|
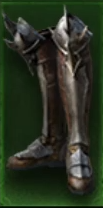 The Tyrant The Tyrant
|
||
| Paragon Trees | |||
| Survivor > Gladiator > Soldier | |||
| Skills | |||
|
|
|||
|
|
|
||
|
|
|
||
| Charm Priority | |||
Gem Setup
| Gem Name | Effect |
|---|---|
| + 8 Armor | |
| + 8 Potency | |
| + 80 Life |
| Gem Name | Effect |
|---|---|
 Battleguard Battleguard | Decreases all melee damage you take by 8.00% from enemies within 3 yards. You move unhindered through enemies while your Life is below 15%. Unlocks at Rank 3 |
 Blood-Soaked Jade Blood-Soaked Jade | Increases all damage you deal by up to 8% while at full Life, with a minimum bonus of 4% while at low Life. Increases your Movement Speed by 10%. Take 2% decreased damage while below 50% Life. Unlocks at Rank 3 |
 Bottled Hope Bottled Hope | Using a skill to grant a buff increases the target's damage done and movement speed by 8.00% for 6 seconds. Cannot occur more often than once every 20 seconds per target. Decreases the cooldown on all your skills by 1.5%. Unlocks at Rank 3 |
 Fervent Fang Fervent Fang | Each time you deal damage to an enemy, that enemy now takes 0.80% increased from your attacks, up to a maximum increase of 8% at 10 stacks. All damage you deal to Elite monsters increased by 1.5% Unlocks at Rank 3 |
 Pain of Subjugation Pain of Subjugation | You deal 5.50% increased damage to enemies suffering loss of control. Decreases all damage you take by 1% while suffering loss of control of your character. Unlocks at Rank 3 |
 Unity Crystal Unity Crystal | You and all party members take 0.50% reduced damage per additional party member within 6 yards of you. Each nearby party member increases damage done by all party members by 0.3% Unlocks at Rank 3 |
Indicated gem effects only display their base effect. Values will be higher depending on the gem's upgrade level.
A Crowd Control Support Build
We focus on providing support and utility to allies. We can bait enemies by providing allies shields from Bone Armor, blocking choke points in the arena with Bone Wall, or just imprisoning them with it while keeping them in place with Bone Spikes. The build is meant to be as annoying to enemies as possible while being unkillable at the same time.
Focus On Cooldown Reduction and Potency
With our setup, we will not be the one dealing damage in PvP. Instead, we want to focus on having as many skill rotations as possible and making them as effective as we can. Increase your Potency (either by investing in Willpower or Citrines) to make sure we maximize the value of Bone Spikes and invest in Cooldown Reduction to give us more engage and disengage tools.
Hideous Dawning and Bone Spike Synergy
Hideous Dawning removes the charging property of Bone Spikes in exchange for a bleed effect. This may sound to be in contrast with our build setup being focused on Crowd Control but the real reason we take this legendary is for its secondary effect which grants Bone Spikes 3 charges. With this, we can engage enemies from afar using Wraith Form (to overcome the shorter range limitation) and permanently stun enemies by using all charges consecutively.
Gem Setup and Choices
For Normal Gems we choose to invest in Potency and survivability. We don't want to do the damage ourselves, we simply want to be at the right place and at the right time to apply crowd control to setup kills for our allies.
For Legendary Gems, we slot in several defensive gems such as Battleguard, Bottled Hope, and Unity Crystal to make sure we stay alive for as long as we can for more skill rotations.
We slot in some DPS gems like Fervent Fang (for bonespike bleed and bonewall fire synergy), Blood-Soaked Jade, and Pain of Subjugation to give that damage boost to help speed up kills but these can be replaced by more supportive and defensive gems depending on preference.
Stats and Paragon Priorities
Attribute Priorities
| Willpower | Increases your stun duration if your potency is higher than the enemy's resistance. This is the most crucial stat in this Necro support build. |
|---|---|
| Cooldown Reduction | More times to use your abilities means more mayhem and disruption against the enemy. |
| Vitality | A dead player can't cast skills. |
| Fortitude | |
| Movement Speed | Easier kiting and movement around the battlefield. |
Paragon Priorities
| Survivor > Gladiator > Soldier |
|---|
Survivor
Survivor provides some extra survivability (hence the Survivor tree name) which allows us to stay on during the fight. We completely forego the Vanquisher Tree as this build does not need offensive stats and skills and is more focused on making sure enemies stay in place for your allies to kill.
Gladiator and Soldier
Both trees provide bonuses to PvP. As a PvP-centered build, we want to make sure we immediately put points into these trees as much as possible. For the two trees, we want to focus more on Gladiator than Soldier due to Gladiator's defensive perks.
How to Play
| |
Use Bone Spikes and Bone Wall to Setup Kills
The main playstyle of this build is to make sure we pin enemies down and keep them in place while allies follow up for kills. Focus on your positioning and use your Crowd Control skills to keep enemies in place and set up kills for your allies.
Ignite Bone Wall for DPS
Bone Wall can stop enemies from moving around but it can also be used as a small DPS tool in our build by igniting the wall with Soul Fire. It deals a small amount of DPS but it can still help in finishing off enemies with ally support.
Use Wraith Form to Engage and Disengage
Wraith Form is both an offensive tool and a defensive tool. Use it to get near enemies to set up your Crowd Control effects for allies to follow up. You are durable with this setup and we also have Bone Armor to support ourselves from enemy burst so don't be afraid to engage but do not engage too deep!
Watch Ally HP for Bone Armor Baits
Most enemies will overcommit to eliminating low HP allies. Bone Armor can provide a decent amount of Shield which can potentially save an ally from a short burst of damage. Use this to bait kills and stun them with our Bone Spike for a reversal.
Diablo Immortal Related Guides

Builds By Class
| Diablo Immortal Builds | ||
|---|---|---|
All Necromancer Builds
| Diablo Immortal Builds | ||
|---|---|---|
 Bone Spike PvP Bone Spike PvP
(PvP) |
 Corpse Explosion Challenge Rift Corpse Explosion Challenge Rift
(PvE) |
 Corpse Lance Elder Rift Corpse Lance Elder Rift
(PvE) |
 Dark Curse Summoner Raid Dark Curse Summoner Raid
(PvE) |
 Necromancer Leveling Build Necromancer Leveling Build
(PvE) |
 Summoner Corpse Explosion Rift Build Summoner Corpse Explosion Rift Build
(PvE) |
Comment
Author
Necromancer Bone Spike PvP Build Guide: Gems, Items, and How to Play
improvement survey
03/2026
improving Game8's site?

Your answers will help us to improve our website.
Note: Please be sure not to enter any kind of personal information into your response.

We hope you continue to make use of Game8.
Rankings
- We could not find the message board you were looking for.
Gaming News
Popular Games

Genshin Impact Walkthrough & Guides Wiki

Honkai: Star Rail Walkthrough & Guides Wiki

Umamusume: Pretty Derby Walkthrough & Guides Wiki

Pokemon Pokopia Walkthrough & Guides Wiki

Resident Evil Requiem (RE9) Walkthrough & Guides Wiki

Monster Hunter Wilds Walkthrough & Guides Wiki

Wuthering Waves Walkthrough & Guides Wiki

Arknights: Endfield Walkthrough & Guides Wiki

Pokemon FireRed and LeafGreen (FRLG) Walkthrough & Guides Wiki

Pokemon TCG Pocket (PTCGP) Strategies & Guides Wiki
Recommended Games

Diablo 4: Vessel of Hatred Walkthrough & Guides Wiki

Cyberpunk 2077: Ultimate Edition Walkthrough & Guides Wiki

Fire Emblem Heroes (FEH) Walkthrough & Guides Wiki

Yu-Gi-Oh! Master Duel Walkthrough & Guides Wiki

Super Smash Bros. Ultimate Walkthrough & Guides Wiki

Pokemon Brilliant Diamond and Shining Pearl (BDSP) Walkthrough & Guides Wiki

Elden Ring Shadow of the Erdtree Walkthrough & Guides Wiki

Monster Hunter World Walkthrough & Guides Wiki

The Legend of Zelda: Tears of the Kingdom Walkthrough & Guides Wiki

Persona 3 Reload Walkthrough & Guides Wiki
All rights reserved
©2022 BLIZZARD ENTERTAINMENT, INC. ALL RIGHTS RESERVED.
All trademarks referenced herein are the properties of their respective owners.
The copyrights of videos of games used in our content and other intellectual property rights belong to the provider of the game.
The contents we provide on this site were created personally by members of the Game8 editorial department.
We refuse the right to reuse or repost content taken without our permission such as data or images to other sites.


![Monster Hunter Stories 3 Review [First Impressions] | Simply Rejuvenating](https://img.game8.co/4438641/2a31b7702bd70e78ec8efd24661dacda.jpeg/thumb)


