Moss-Grown Adamantoise Hard Mode Guide

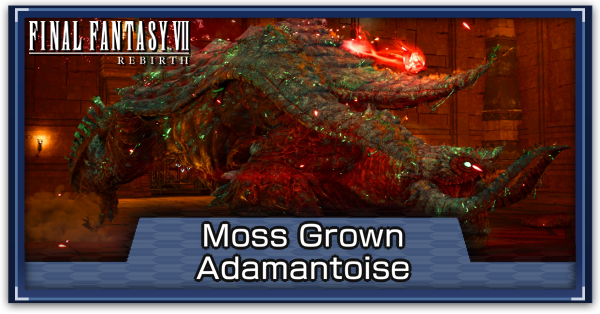
Moss-Grown Adamantoise is a Biological Enemy from Final Fantasy 7 Rebirth (FF7 Rebirth). Read on to learn how to beat Moss-Grown Adamantoise on Hard Mode, how to pressure and stagger it, as well as its weaknesses, resistances, immunities, drops, and possible locations.
Moss-Grown Adamantoise Overview
Moss-Grown Adamantoise Basic Information
| 168. Moss Grown Adamantoise | ||
|---|---|---|
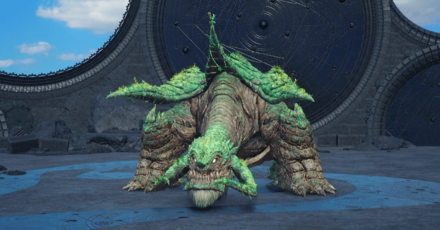
 Large herbivorous creatures with life spans so long they are said to have coexisted with the Cetra. Though docile in nature, they do not take kindly to any who would disturn the peace of the temple. |
||
| Areas | Species | Movement |
| Temple of the Ancients | Biological | Grounded |
Moss-Grown Adamantoise Weaknesses and Resistances
| Weaknesses | Normal:
Staggered:
|
|---|---|
| Resistances | Lesser: - Greater: - Staggered: - |
| Immunities | Normal:
Staggered: - |
| Absorbs | Normal: - |
Moss-Grown Adamantoise Droppable Items
| Drops | Common:
Exquisite Beast Spine
Rare: Astral Remnant |
|---|---|
| Ability Yield | Steal:
Beast Bone
Morph: Astral Remnant |
Moss-Grown Adamantoise Abilities
| Abilities |
・Barrier ・Manaward ・Protect ・Shell ・Counter ・Enraged Charged |
|---|
How to Pressure and Stagger Moss-Grown Adamantoise
| How to Pressure Moss Grown Adamantoise |
|---|
| Exploiting their elemental weakness of hitting their blind spot with powerful offensive abilities during Counter will pressure them. While pressured, they will be unable to unleash their long-range homing strikes. |
Exploit Its Fire Weakness
Exploiting the Moss-Grown Adamantoise's Fire weakness is the quickest and easiest way to pressure it. Make sure that you have a Fire Materia equipped or use a character that has Weapon Abilities that deal Fire damage, like Cloud's Firebolt Blade or Yuffie's Fiery Banishment, to quickly pressure and stagger it.
Attack Its Blind Spot When It Uses Counter
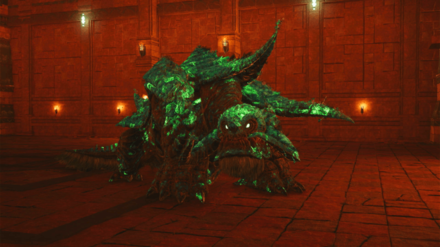
Whenever the Moss-Grown Adamantoise uses Counter, it will put up a shield that will negate your attack. Go around to its side or back to bypass its Counter, and it will automatically get pressured when you hit it with a spell or ability.
How to Beat Moss-Grown Adamantoise on Hard Mode
| Moss-Grown Adamantoise Hard Mode Tips |
|---|
| Best Hard Mode Builds for Moss-Grown Adamantoise |
|
|
Moss-Grown Adamantoise Hard Mode Builds
| These Hard Mode builds use equipment that are at least Weapon Level 8. If you don't have enough Materia slots or the right Weapon Skills to complete a character's setup, consider using a different weapon or collect all of their Manuscripts first. |
 Yuffie Yuffie Magic DPS | |||||
| Weapon | Armor | ||||
|---|---|---|---|---|---|
| Crescent Sickle | Cetran Bracer | ||||
| Accessory | Summon Materia | ||||
| Genji Gloves | Gilgamesh | ||||
| Weapon Materia | Armor Materia | ||||
| Weapon Skills | |||||
 Tifa Tifa Physical DPS | |||||
| Weapon | Armor | ||||
|---|---|---|---|---|---|
| Dragon Claws | Valkyrian Bangle | ||||
| Accessory | Summon Materia | ||||
| Enhanced Expeditionary Medal | Odin | ||||
| Weapon Materia | Armor Materia | ||||
| Weapon Skills | |||||
 Aerith Aerith Support | |||||
| Weapon | Armor | ||||
|---|---|---|---|---|---|
| Ceremonial Staff | Cetran Armlet | ||||
| Accessory | Summon Materia | ||||
| Enhanced Karmic Cowl | Phoenix | ||||
| Weapon Materia | Armor Materia | ||||
| Weapon Skills | |||||
You can replace Aerith's accessory with a Gotterdammerung if you have it.
Use Fiery Banishment to Conserve MP
Since you can't recover MP on Hard Mode, you'll want to use Abilities over Spells to preserve it for future fights. Quickly build up Yuffie's Banishment charges so that you can deal massive damage with her Fiery Banishment III instead of spending MP using Fire spells.
Link MP Absorption to a Fire Materia
Alternatively, you could also link a MP Absorption Materia to your Fire Materia so that you can recover MP every time you cast a Fire spells. Do note however that you won't recover MP when you kill it, so remember to prioritize using Banishment when you can.
Immobilize It With Stop or Sleep
Since the Moss-Grown Adamantoise isn't a normal boss, it's susceptible to a lot of negative status effects like Stop and Sleep. Cast these spells so that it stops acting and you can get some free hits in.
Remove Its Buffs by Casting Dispel
Throughout the fight, the Moss-Grown Adamantoise will cast multiple defensive buffs on itself. Remove these buffs by casting Dispel so that it doesn't become incredibly tanky and difficult to kill.
Cast Manawall to Reduce Damage Taken
If you don't pressure the Moss-Grown Adamantoise, it will automatically unleash a barrage of homing attacks that won't stop until it's pressured. Cast Manawall so that you can reduce the damage of both its regular and homing attacks.
Moss-Grown Adamantoise Location
| Primary Region | |
|---|---|
| Northwood | |
| Map Location | World Location |  |
 |
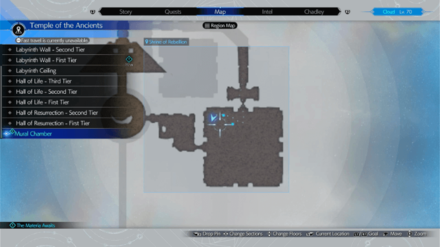
| The Moss-Grown Adamantoise can be encountered in Temple of the Ancients in Chapter 13. | |
FF7 Rebirth Related Guides

Boss Fight Guide and List of All Bosses
Story Bosses
| All Major Story Bosses | |
|---|---|
| Chapter 1 | Materia Guardian |
| Chapter 2 | Midgardsormr |
| Chapter 3 |
Rude and Elena Mythril Golem |
| Chapter 4 |
Terror of the Deep Roche |
| Chapter 5 | Jenova Emergent |
| Chapter 6 | Grasptropod |
| Chapter 7 |
Custom Valkyrie Gigatrice |
| Chapter 8 |
Dyne Anuran Suppressor |
| Chapter 9 |
Specimen H1024 Crimson Mare Mk. II |
| Chapter 10 | Gi Nattak |
| Chapter 11 |
Diabolic Variant Yin and Yang Forgotten Specimen Galian Beast Roche |
| Chapter 12 |
Abzu Rude and Elena Rufus |
| Chapter 13 |
Red Dragon Ironclad Reno and Rude Tseng and Elena Moss-Grown Adamantoise Demon Gate |
| Chapter 14 |
Jenova Lifeclinger Sephiroth Reborn |
Optional Bosses
| Grasslands | |
|---|---|
| Summon | Titan |
| Classified Intel | Quetzalcoatl |
| Side Quests |
White Terror |
| Junon | |
| Summon | Phoenix |
| Classified Intel | Mindflayer |
| Side Quests |
White Mousse Hell Rider II Sandstorm Drake |
| Corel | |
| Summon | Alexander |
| Classified Intel | Tonberry King |
| Side Quests |
Dark Claw Joker |
| Minigame | Test 0 |
| Gongaga | |
| Summon | Kujata |
| Classified Intel | Great Malboro |
| Side Quests |
Levridon Mastodon Gorgon Mane Gigantoad |
| Cosmo Canyon | |
| Summon | Bahamut Arisen |
| Classified Intel | Jabberwock |
| Side Quests | Irasceros Gigaworm |
| Nibel | |
| Summon | Odin |
| Classified Intel | King Zu |
| Side Quests |
Queen Bee Dranabarga |
| Meridian Ocean | |
| Gilgamesh's Island |
Gilgamesh Titan and Bahamut Arisen Phoenix and Kujata Alexander and Odin |
| Pirate King's Treasure |
Ogre Raider Brineborn Demon Hueyacoatl Sea Dragon |
Comment
Author
Moss-Grown Adamantoise Hard Mode Guide
improvement survey
03/2026
improving Game8's site?

Your answers will help us to improve our website.
Note: Please be sure not to enter any kind of personal information into your response.

We hope you continue to make use of Game8.
Rankings
- We could not find the message board you were looking for.
Gaming News
Popular Games

Genshin Impact Walkthrough & Guides Wiki

Honkai: Star Rail Walkthrough & Guides Wiki

Umamusume: Pretty Derby Walkthrough & Guides Wiki

Pokemon Pokopia Walkthrough & Guides Wiki

Resident Evil Requiem (RE9) Walkthrough & Guides Wiki

Monster Hunter Wilds Walkthrough & Guides Wiki

Wuthering Waves Walkthrough & Guides Wiki

Arknights: Endfield Walkthrough & Guides Wiki

Pokemon FireRed and LeafGreen (FRLG) Walkthrough & Guides Wiki

Pokemon TCG Pocket (PTCGP) Strategies & Guides Wiki
Recommended Games

Diablo 4: Vessel of Hatred Walkthrough & Guides Wiki

Fire Emblem Heroes (FEH) Walkthrough & Guides Wiki

Yu-Gi-Oh! Master Duel Walkthrough & Guides Wiki

Super Smash Bros. Ultimate Walkthrough & Guides Wiki

Pokemon Brilliant Diamond and Shining Pearl (BDSP) Walkthrough & Guides Wiki

Elden Ring Shadow of the Erdtree Walkthrough & Guides Wiki

Monster Hunter World Walkthrough & Guides Wiki

The Legend of Zelda: Tears of the Kingdom Walkthrough & Guides Wiki

Persona 3 Reload Walkthrough & Guides Wiki

Cyberpunk 2077: Ultimate Edition Walkthrough & Guides Wiki
All rights reserved
© SQUARE ENIX CO., LTD. All Rights Reserved.
CHARACTER DESIGN: TETSUYA NOMURA/ROBERTO FERRARI
LOGO ILLUSTRATION: © 1997 YOSHITAKA AMANO
The copyrights of videos of games used in our content and other intellectual property rights belong to the provider of the game.
The contents we provide on this site were created personally by members of the Game8 editorial department.
We refuse the right to reuse or repost content taken without our permission such as data or images to other sites.


![Monster Hunter Stories 3 Review [First Impressions] | Simply Rejuvenating](https://img.game8.co/4438641/2a31b7702bd70e78ec8efd24661dacda.jpeg/thumb)


