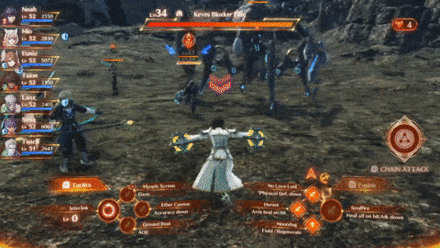
How to Revive Allies
Healers can revive fallen allies during combat in Xenoblade Chronicles 3. Read on to learn more about revival including how to revive allies, how revival works, and some helpful tips to improve ally revival.
List of Contents
How to Revive Allies
Set Your Character Class to a Healer
If you want your current party leader (controlled character) to revive allies, you will first need to change their class to a Healer since only Healers have the ability to revive downed allies.
To swap classes, make sure you've finished the Class Change tutorial during Chapter 2. Once the feature is unlocked, pick one of the many Healer classes available in the game.
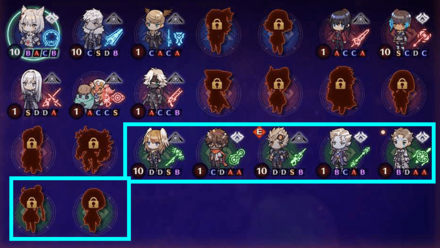
Do Not Go Adventuring Without at Least 2 Healers in the Party
Tempting as it may be to explore Aionios with the many classes available in the game, keep in mind that you will always need at least 2 Healers in your party. One Healer will revive downed allies, and the other is there to revive your first Healer if they get downed.
Even if you are simply farming for CP in order to master your classes, make sure you have at least 2 Healers who can revive your party if things go south during combat.
Swap to a Healer During Combat

If you don't want your party leader to be a Healer, you can opt to simply swap to any of the available Healers in your party. To cycle through your party members during combat, hold down ZL and press either L or R to switch between characters.
Note: Character Change is only available after you finish Chapter 1. Make sure you've completed the first section of the main game to unlock this feature.
Healers Automatically Revive Downed Allies
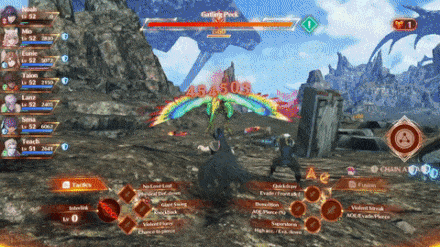
However, for those who do not want to switch in battle, do know that party members that have a Healer class will automatically revive downed allies by themselves. They will also revive your character if you happen to faint during battle.
Tips for Reviving Allies
Equip Characters with Revival-Related Gems
| Gem | Effect |
|---|---|
| Rank 1: Boosts speed of ally revival by 20% and raises Healing by 5. Rank 10: Boosts speed of ally revival by 45% and raises Healing by 15. |
|
| Rank 1: When helping an incapacitated ally, revives them with 20% more HP; also raises Healing by 5. Rank 10: When helping an incapacitated ally, revives them with 45% more HP; also raises Healing by 15. |
Once you unlock Gem Crafting during Chapter 2, equip your Healer with either of the gems above to modify the revival process. You can choose between faster revival speed or more HP for revived characters (or both if you want).
Equip Accessories that Improve Revival
| Accessory | Effect & How to Get |
|---|---|
| Boosts ally revival speed for each incapacitated ally. Can be purchased from the Nopon Coin X-Change using 40 Silver Nopon Coins. |
Some rare accessories will also modify your revival action. If you're repeatedly wiping when facing certain enemies, try equipping items like the Emergency Bandana which gives your Healers an advantage during combat.
Use Classes that Have Improved Revival
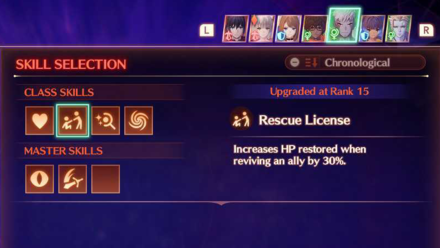
Classes like the War Medic will have skills that modify ally revival. Take a look at the skills of all Healer characters and select one that has better bonuses when reviving allies. This is particularly useful when playing the game on Hard difficulty or when challenging enemies that are way above your current party level.
Use Quick Move To Get to Downed Allies
Time is crucial when fighting a pitched battle where multiple allies are low on HP. Get to any of your downed allies quickly by using the R3 button to perform a Quick Move during combat.
Xenoblade Chronicles 3 Related Guides

Tips and Tricks
Author

How to Revive Allies
Rankings
- We could not find the message board you were looking for.
Gaming News

![Death Stranding 2: On The Beach [PC] Review | A Port That Delivers](https://img.game8.co/4447392/15310a0c9aa1b6843bb713b2ea216930.jpeg/show)


Popular Games

Genshin Impact Walkthrough & Guides Wiki
Umamusume: Pretty Derby Walkthrough & Guides Wiki
Crimson Desert Walkthrough & Guides Wiki
Monster Hunter Stories 3: Twisted Reflection Walkthrough & Guides Wiki
Honkai: Star Rail Walkthrough & Guides Wiki
Pokemon Pokopia Walkthrough & Guides Wiki
The Seven Deadly Sins: Origin Walkthrough & Guides Wiki
Wuthering Waves Walkthrough & Guides Wiki
Zenless Zone Zero Walkthrough & Guides Wiki
Arknights: Endfield Walkthrough & Guides Wiki


Recommended Games
Fire Emblem Heroes (FEH) Walkthrough & Guides Wiki
Diablo 4: Vessel of Hatred Walkthrough & Guides Wiki
Cyberpunk 2077: Ultimate Edition Walkthrough & Guides Wiki
Yu-Gi-Oh! Master Duel Walkthrough & Guides Wiki
Super Smash Bros. Ultimate Walkthrough & Guides Wiki
Pokemon Brilliant Diamond and Shining Pearl (BDSP) Walkthrough & Guides Wiki
Elden Ring Shadow of the Erdtree Walkthrough & Guides Wiki
Monster Hunter World Walkthrough & Guides Wiki
The Legend of Zelda: Tears of the Kingdom Walkthrough & Guides Wiki
Persona 3 Reload Walkthrough & Guides Wiki


All rights reserved
© Nintendo / MONOLITHSOFT
The copyrights of videos of games used in our content and other intellectual property rights belong to the provider of the game.
The contents we provide on this site were created personally by members of the Game8 editorial department.
We refuse the right to reuse or repost content taken without our permission such as data or images to other sites.