Isurd's Hero Quest: Unwavering Resolve Walkthrough

Completing Unwavering Resolve allows Isurd to join your party in Xenoblade Chronicles 3. Read on to learn how to unlock this Hero Quest, its detailed walkthrough, rewards, location, and which hero you can recruit in Unwavering Resolve.
List of Contents
Unwavering Resolve Location and Rewards
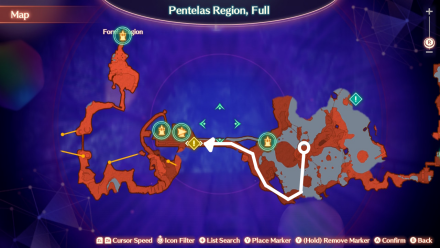
Pentelas Region - Clearwater Shelf
| Zoomed Out Map | Zoomed In Map |
|---|---|
 |
 |
How to Unlock and Recommended Level
| Chapter | Chapter 4 |
|---|---|
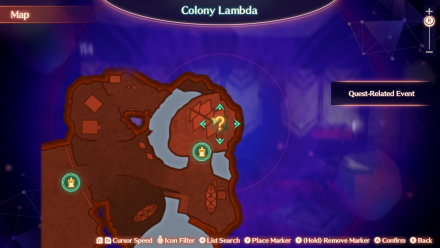
| How to Unlock | Complete Chapter 3 and unlock Colony Lambda. Once you do, speak to Isurd inside the command tent. |
| Recommended Level | 27 |
| Quest Giver | N/A |
Rewards
| Gold | EXP | SP |
|---|---|---|
| 1940 G | 1760 EXP | 10 SP |
| Item Rewards | ||
| None | ||
Unwavering Resolve Hero Unlocked
Unlocks the Hero Isurd
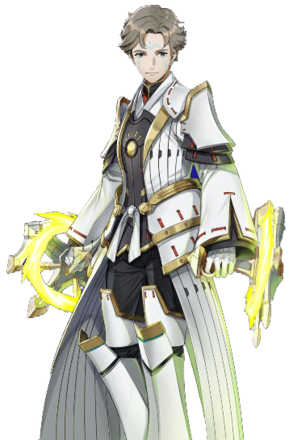 Isurd |
Starting Class |
|---|---|
| Starting Role | |
|
|
|
| Nation/Faction | |
| Agnus | |
| Voice Actors | |
| ENG: Iam Boullion | JP: Tomoaki Maeno |
| Description | |
| Isurd is a seasoned tactician and commander of the Agnus’ Colony Lambda in. Once a former mentor to Taion, taking him under his wing to train him up as a tactician, Isurd now greets his former ally as an enemy. | |
Unwavering Resolve Walkthrough
| ★ Unwavering Resolve Walkthrough ★ |
||
|---|---|---|
|
|
Go to Mine No. 3
After talking to Isurd at the Command Tent, head to Mine No. 3 at the Urayan Tunnels. You can reach it by going up a long slope south of Colony Lambda.
Rescue the People Trapped in the Mines
Because of the collapse in the mines, your squad has to go around to get to the people on the other side. Below is our step by step guide on how to get to the other side of the mines to rescue the people.
| Step by Step Walkthrough | |
|---|---|
| 1 | 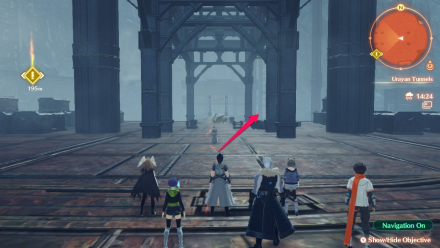 After the cutscene, go straight until you see two tall metal structures. Hop to the right side and follow the path until you see an elevator. Take the elevator up. |
| 2 | 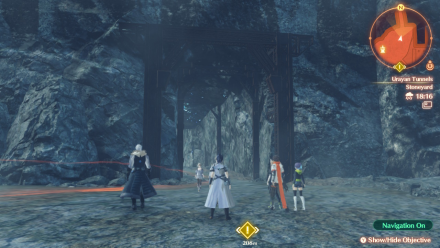 Get off the elevator and enter the tunnel up north. |
| 3 | 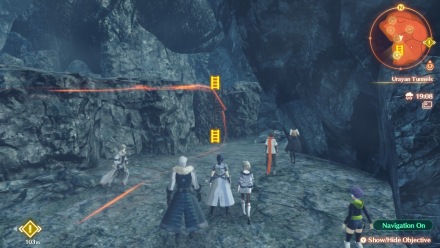 |
| 4 | 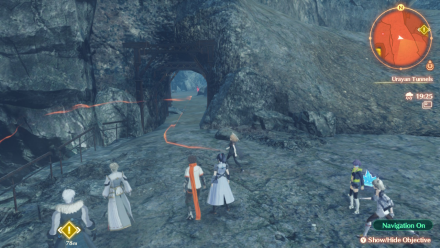 Follow the path until you see a tunnel to your left. Enter it and keep walking until you get to the other side. |
| 5 | 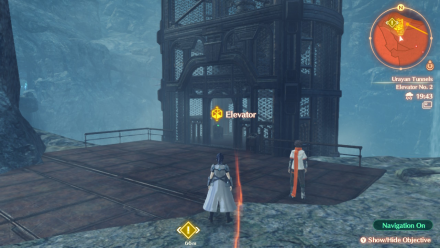 After exiting the tunnel, take the elevator on your left. |
| 6 | 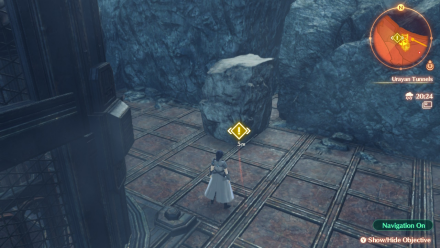 |
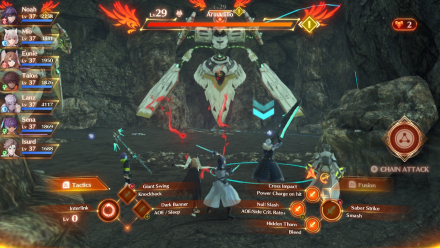
| 7 | Continue forward and defeat the enemies inside the cave-in. |
Return to Colony Lambda

After defeating the enemies in the cave-in, return to Colony Lambda and talk to Isurd again.
Go to the Cave at Pira Bluffs and Defeat the Auto-Levnises
Go south of Colony Lambda towards Pira Bluffs and defeat the Auto-Levnis there. Defeating completes the quest and recruits Isurd to your party. It will also unlock the Strategos Class for Taion.
Xenoblade Chronicles 3 Related Guides
All Hero Quests
Author

Isurd's Hero Quest: Unwavering Resolve Walkthrough
Rankings
- We could not find the message board you were looking for.
Gaming News


Popular Games

Genshin Impact Walkthrough & Guides Wiki
Umamusume: Pretty Derby Walkthrough & Guides Wiki
Crimson Desert Walkthrough & Guides Wiki
Monster Hunter Stories 3: Twisted Reflection Walkthrough & Guides Wiki
Honkai: Star Rail Walkthrough & Guides Wiki
Pokemon Pokopia Walkthrough & Guides Wiki
The Seven Deadly Sins: Origin Walkthrough & Guides Wiki
Wuthering Waves Walkthrough & Guides Wiki
Zenless Zone Zero Walkthrough & Guides Wiki
Arknights: Endfield Walkthrough & Guides Wiki


Recommended Games
Fire Emblem Heroes (FEH) Walkthrough & Guides Wiki
Diablo 4: Vessel of Hatred Walkthrough & Guides Wiki
Cyberpunk 2077: Ultimate Edition Walkthrough & Guides Wiki
Yu-Gi-Oh! Master Duel Walkthrough & Guides Wiki
Super Smash Bros. Ultimate Walkthrough & Guides Wiki
Pokemon Brilliant Diamond and Shining Pearl (BDSP) Walkthrough & Guides Wiki
Elden Ring Shadow of the Erdtree Walkthrough & Guides Wiki
Monster Hunter World Walkthrough & Guides Wiki
The Legend of Zelda: Tears of the Kingdom Walkthrough & Guides Wiki
Persona 3 Reload Walkthrough & Guides Wiki


All rights reserved
© Nintendo / MONOLITHSOFT
The copyrights of videos of games used in our content and other intellectual property rights belong to the provider of the game.
The contents we provide on this site were created personally by members of the Game8 editorial department.
We refuse the right to reuse or repost content taken without our permission such as data or images to other sites.