King Zu Hard Mode Guide | Nibel Classified Intel Boss
King Zu is a secret boss in Nibel Region of Final Fantasy 7 Rebirth (FF7 Rebirth). Learn how to beat King Zu in Hard Mode and normal difficulties, its weaknesses and resistances, and a list of its moves and attack patterns in this guide!
List of Contents
Nibel Classified Intel Boss Location
Location
| Full Map |  |
|---|---|
| Enlarged Map |  |
| In-Game Location | 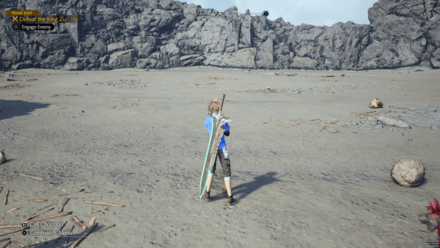 |
How to Unlock Quest
| Chapter | 11 - The Long Shadow of Shinra |
|---|---|
| How to Unlock | Complete all four Expedition Intels from the Nibel Region |
| Rec. Level | Lv. 43 |
The Classified Intel Report: Avian Tyrant can be unlocked by first going to all four Expedition Intel Reports in the Nibel Region and analyzing the Lifesprings there.
All Lifespring Locations (Expedition Intel)
King Zu Weaknesses and Stats
Stats
 |
|||
| Easy | Normal | Hard | |
|---|---|---|---|
| HP | 28787 | 41124 | 78532 |
Weakness and Resistances
| Weaknesses | Lesser Resistances | Greater Resistances |
|---|---|---|
| None | ||
| Absorbed Elements | Immunities | |
| None | ||
Changes When Staggered
| Weakness / Effective | Resistance |
|---|---|
| None | None |
How to Pressure King Zu
How to Pressure
|
|
When it finishes performing its Swan Song, a single attack against it will deal lethal damage. Destroying its wings in the middle of its Swan Song will interrupt the attack and pressure it.
How to Pressure and Stagger Enemies
How to Beat King Zu
| King Zu Boss Fight Tips |
|---|
|
|
Use Lightning Attacks

With King Zu being susceptible to Lightning Attacks, make sure that you have a Lightning Materia equipped on your Main DPS so that you can exploit its weakness.
Ideally you'd want Yuffie for this role so that she can weave in Lightning Ninjutsu basic attacks and Thunderous Banishments in between her spell casts.
Destroy Both of Its Wings
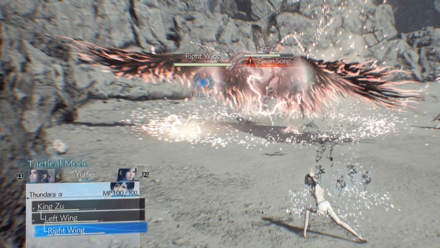
Whenever it uses the move Swan Song, it'll leave its wings exposed to get destroyed. Prioritize destroying the wings to put it under pressure and stop its Swan Song. If you don't, you'll end up taking 9999 damage and instantly lose the battle.
You can also apply Reraise to revive your party after the Swan Song finishes, but it's much easier to destroy the wings instead.
Starts the Fight With Swan Song on Hard
If you're facing this boss on Hard Mode, it will start the fight by using Swan Song. Make sure that you react accordingly and quickly build up your ATB bar so that you can spam Lightning attacks to destroy its wings.
Use Manaward, Shell, and Defaith

Considering that all but one of King Zu's attacks are Magic, it's advised to buff your party's Magic Defense and lower King Zu's Magic stat to make the fight easier.
The specific spells you're looking for are Manaward from the Barrier Materia to halve all magic damage taken, Shell from the Fortification Materia to increase your Magic Defense stat, and Defaith from the Disempowerment Materia to lower King Zu's Magic Attack stat.
Equip High Magic Defense Armors
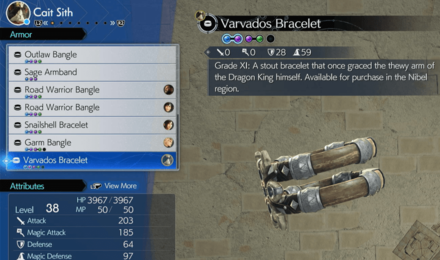
Lastly, to further increase your defense against King Zu's Magic attacks, equip high Magic Defense Armors, like a Snailshell Bracelet or Varvados Bracelet, to further mitigate the damage that it deals.
Best Armor and How to Get Them
King Zu Moves and Attack Patterns
Abilities and Attack Patterns
| This section is under construction! Stay tuned for updates! |
Battle Icons, Status Effects, and Ailments Explained
King Zu Best Party and Builds
| This party setup is built for Hard Mode. If you don't have certain members, equipment, or Materia available, you could replace them with the closest alternative that you have available. |
Recommended Party Setup
| Recommended Party Setup | |
|---|---|
 Yuffie Yuffie
|
【Main DPS】 ・Has multiple Lightning attacks. ・Can swiftly dodge King Zu's attacks. Recommended Level: 70 |
 Tifa Tifa
|
【Stagger DPS】 ・Heavily increases stagger damage. ・Uses Defaith to free up Aerith to buff. Recommended Level: 70 |
 Aerith Aerith
|
【Support】 ・Buffs the party's Magic Defenses. ・Save ATB charges for emergency heals. Recommended Level: 70 |
Yuffie Spams Lightning Attacks
Yuffie will be your Main DPS on this team due to Lightning Ninjutsu, Thunderous Banishment, and Thunder Spells being able to constantly exploit King Zu's weakness.
After it's been staggered, she can fire off a Thundaga or Thunderous Banishment III with her Doppelganger active to double cast it and deal massive damage to King Zu.
Tifa Increases Damage Dealt During Stagger
Once King Zu gets staggered, Tifa can use the combination of Rise and Fall, Omnistrike, and True Strike to massively increase the amount of damage it takes while staggered.
Combine this with Yuffie's powerful Lightning attacks and Aerith's Ray of Judgement also increasing stagger damage, King Zu will easily go down in no time.
Aerith Casts Buffs on the Party
Aerith's primary role in the party is to cast Manaward and Shell on the party to reduce the amount of Magic damage everyone takes. Just make sure that she has extra ATB Charges to heal the party in case someone's HP gets too low.
King Zu Best Materia to Use
Recommended Materia for Yuffie
| Weapon: Crescent Sickle |
Armor: Valkyrian Bangle |
|---|---|
|
|
|
| Summon: |
Magic Focus linked to Lightning will be your primary damage source outside of Thunderous Banishment III, so make sure that you have this equipped.
ATB Boost and Stagger are used to give Yuffie a boost to her ATB so that she can continue to spam commands while ATB Assist is great for charging up Tifa and Aerith's ATBs without you needing to swap to them.
For the flexibles slots, HP, MP, Magic and Luck Up are all generally good stat increases while Assess is useful to check for the boss' stats. Also, Chakra and Prayer are useful in case you need to quickly heal yourself or the party.
Finally, Gilgamesh is used to give Yuffie a balanced boost to her Attack and Magic while also giving a slight boost to her HP and MP.
Recommended Materia for Tifa
| Weapon: Kaiser Knuckles |
Armor: Enhanced Varvados Bracelet |
|---|---|
|
|
|
| Summon: |
ATB Stagger, Boost, and Skill Master are used so that Tifa can spam as many abilities as possible as soon as King Zu gets staggered.
Magnify linked to Healing is used in case no one else has ATB Chagres to heal the party, while Disempowerment and Enervation will debuff the boss and make the fight more manageable.
For the flexible slots, HP, Luck, and Strength Up are all generally good stat increases while Chakra will heal Tifa in a pinch without having to use MP.
Finally, Odin is used because it gives her the highest Attack boost out of all the available Summons.
Recommended Materia for Aerith
| Weapon: Ceremonial Staff |
Armor: Cetran Bracer |
|---|---|
|
|
|
| Summon: |
Barrier and Fortification are the main Materia for this build so that Aerith can cast Manaward and Shell, but she also has Time and Empowerment for Haste and to buff Yuffie and Tifa's damage respectively.
While not mandatory, HP and MP Up are recommended since Aerith has pretty low HP and she needs the MP with all the buffs that she's casting.
For the linked Materia, Magnify and Healing are used to heal the entire party in a pinch, Swiftcast and Revival to instantly revive a downed ally, and lastly Magic Efficiency and Reraise to cast Reraise on an ally at a lower MP cost.
Finally, Phoenix is used because it gives her the highest Magic boost out of all the available Summons.
King Zu Rewards and Details
Rewards
| Quetzalcoatl Rewards | |||||||||||
|---|---|---|---|---|---|---|---|---|---|---|---|
| Easy/Normal | Hard Mode | ||||||||||
|
・5238 EXP ・18 AP ・483 Gil |
・12870 EXP ・18 AP ・907 Gil |
||||||||||
| Items Dropped | Rare Items Dropped | ||||||||||
| ・King Zu Feather | None | ||||||||||
| Stealable Items | Morphable Items | ||||||||||
| None | ・King Zu Feather | ||||||||||
| Hard Mode Exclusive Drops | |||||||||||
|
・Secrets of the Ninja Vol. XII ・Argent King Zu Feather |
|||||||||||
Drops the Argent King Zu Feather on Hard
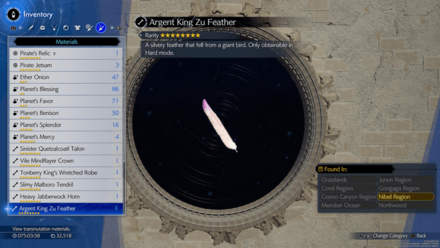
Beating King Zu on Hard Mode will award the player with a Argent King Zu Feather, which is required to craft the Genji Ring accessory.
Genji Ring Effects and How to Get
Basic Information and Details
| King Zu | |
|---|---|
 |
|
| Location | Chapter Unlocked |
| Nibel Region | Chapter 11 |
| Species | Movement |
| Biological | Flying |
| Details | |
|
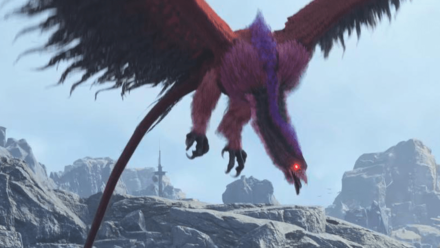
An avian creature with bloodred feathers that rules the skies above the Nibel region. Boasting excellent hunting skills, it descends on its prey with a mighty shriek. When it finishes performing its Swan Song, a single attack against it will deal lethal damage. Destroying its wings in the middle of its Swan Song will interrupt the attack and pressure it. |
|
FF7 Rebirth Related Guides

Boss Fight Guide and List of All Bosses
Story Bosses
| All Major Story Bosses | |
|---|---|
| Chapter 1 | Materia Guardian |
| Chapter 2 | Midgardsormr |
| Chapter 3 |
Rude and Elena Mythril Golem |
| Chapter 4 |
Terror of the Deep Roche |
| Chapter 5 | Jenova Emergent |
| Chapter 6 | Grasptropod |
| Chapter 7 |
Custom Valkyrie Gigatrice |
| Chapter 8 |
Dyne Anuran Suppressor |
| Chapter 9 |
Specimen H1024 Crimson Mare Mk. II |
| Chapter 10 | Gi Nattak |
| Chapter 11 |
Diabolic Variant Yin and Yang Forgotten Specimen Galian Beast Roche |
| Chapter 12 |
Abzu Rude and Elena Rufus |
| Chapter 13 |
Red Dragon Ironclad Reno and Rude Tseng and Elena Moss-Grown Adamantoise Demon Gate |
| Chapter 14 |
Jenova Lifeclinger Sephiroth Reborn |
Optional Bosses
| Grasslands | |
|---|---|
| Summon | Titan |
| Classified Intel | Quetzalcoatl |
| Side Quests |
White Terror |
| Junon | |
| Summon | Phoenix |
| Classified Intel | Mindflayer |
| Side Quests |
White Mousse Hell Rider II Sandstorm Drake |
| Corel | |
| Summon | Alexander |
| Classified Intel | Tonberry King |
| Side Quests |
Dark Claw Joker |
| Minigame | Test 0 |
| Gongaga | |
| Summon | Kujata |
| Classified Intel | Great Malboro |
| Side Quests |
Levridon Mastodon Gorgon Mane Gigantoad |
| Cosmo Canyon | |
| Summon | Bahamut Arisen |
| Classified Intel | Jabberwock |
| Side Quests | Irasceros Gigaworm |
| Nibel | |
| Summon | Odin |
| Classified Intel | King Zu |
| Side Quests |
Queen Bee Dranabarga |
| Meridian Ocean | |
| Gilgamesh's Island |
Gilgamesh Titan and Bahamut Arisen Phoenix and Kujata Alexander and Odin |
| Pirate King's Treasure |
Ogre Raider Brineborn Demon Hueyacoatl Sea Dragon |
Comment
Author
King Zu Hard Mode Guide | Nibel Classified Intel Boss
Rankings
- We could not find the message board you were looking for.
Gaming News
Popular Games

Genshin Impact Walkthrough & Guides Wiki

Honkai: Star Rail Walkthrough & Guides Wiki

Arknights: Endfield Walkthrough & Guides Wiki

Umamusume: Pretty Derby Walkthrough & Guides Wiki

Wuthering Waves Walkthrough & Guides Wiki

Pokemon TCG Pocket (PTCGP) Strategies & Guides Wiki

Abyss Walkthrough & Guides Wiki

Zenless Zone Zero Walkthrough & Guides Wiki

Digimon Story: Time Stranger Walkthrough & Guides Wiki

Clair Obscur: Expedition 33 Walkthrough & Guides Wiki
Recommended Games

Fire Emblem Heroes (FEH) Walkthrough & Guides Wiki

Pokemon Brilliant Diamond and Shining Pearl (BDSP) Walkthrough & Guides Wiki

Diablo 4: Vessel of Hatred Walkthrough & Guides Wiki

Super Smash Bros. Ultimate Walkthrough & Guides Wiki

Yu-Gi-Oh! Master Duel Walkthrough & Guides Wiki

Elden Ring Shadow of the Erdtree Walkthrough & Guides Wiki

Monster Hunter World Walkthrough & Guides Wiki

The Legend of Zelda: Tears of the Kingdom Walkthrough & Guides Wiki

Persona 3 Reload Walkthrough & Guides Wiki

Cyberpunk 2077: Ultimate Edition Walkthrough & Guides Wiki
All rights reserved
© SQUARE ENIX CO., LTD. All Rights Reserved.
CHARACTER DESIGN: TETSUYA NOMURA/ROBERTO FERRARI
LOGO ILLUSTRATION: © 1997 YOSHITAKA AMANO
The copyrights of videos of games used in our content and other intellectual property rights belong to the provider of the game.
The contents we provide on this site were created personally by members of the Game8 editorial department.
We refuse the right to reuse or repost content taken without our permission such as data or images to other sites.


![Animal Crossing: New Horizons Review [Switch 2] | Needlessly Crossing Over to a New Generation](https://img.game8.co/4391759/47d0408b0b8a892e453a0b90f54beb8a.png/show)


