Best Weapons For Each Character and Locations
Here's a list of the best weapons for each character in Final Fantasy 7 Rebirth (FF7 Rebirth). Read on to learn more about the best weapons for each character, how to obtain them, and their best uses!
| Weapon Guides | |
|---|---|
| All Weapons | Best Weapons |
List of Contents
Best Weapons For Cloud
Highest Physical Damage: Igneous Saber
| Weapon | Level: 7 |
|---|---|
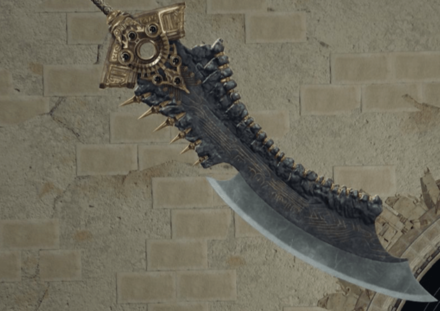 Igneous Saber Igneous Saber
|
Physical: 158 Magical: 53 ◯-◯ ◯-◯ ◯ ◯ ◯ |
| Strongest Points | |
| ・ Has lots of materia slots ・ Extremely high Physical Attack stat ・Weapon Skills reward Punisher Mode blocking |
|
| Recommended Weapon Skills | |
| How to Get | |
| ・Found in a treasure chest near the peak of Mount Nibel in Chapter 11. | |
Rewards Blocking with Punisher Mode
The Igneous Saber is extremely good when blocking while in Punisher mode as it increases the counter damage. To make this weapon's blocking ability more potent, it's best to master the proficiency of the Umbral Blade to gain access to Prime Mode, a more powerful variant of Punisher Mode.
Best for Spamming Abilities: Sleek Saber
| Weapon | Level: 7 |
|---|---|
 Sleek Saber Sleek Saber
|
Physical: 121 Magical: 89 ◯-◯ ◯-◯ ◯ ◯ |
| Strongest Points | |
| ・ Average Physical Attack stat ・Weapon Skills focus on ATB gauge fill rate |
|
| Recommended Weapon Skills | |
| How to Get | |
| ・Found in a chest near the Abandoned Dock in the Grasslands in Chapter 2. | |
Can Be used Until Late Game
The Sleek Saber is a very comfortable weapon to use from Chapter 2 until the end of the game. This is due to the weapon's ability to fill the ATB gauge for Cloud fast, allowing you to spam abilities constantly, which can help with pressuring and staggering enemies.
Highest Magic Damage: Rune Blade
| Weapon | Level: 7 |
|---|---|
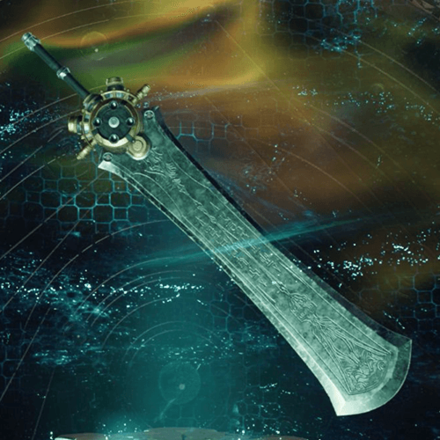 Rune Blade Rune Blade
|
Physical: 73 Magical: 158 ◯-◯ ◯-◯ ◯ ◯ |
| Strongest Points | |
| ・Specializes in Magic Attacks ・ Greatly benefits magical abilities. |
|
| Recommended Weapon Skills | |
| How to Get | |
| ・Found inside the Starboard Connecting Passage in Chapter 4. | |
Has the Highest Magic Damage of All Cloud's Weapons
The Rune Blade is a great weapon against enemies that are weak to magic. Furthermore, the damage of weapon abilities like Firebolt Blade and Infinity's End are greatly increased and are more effective against enemies with the corresponding weaknesses.
Best Weapons for Tifa
Highest Physical Damage: Kaiser Knuckles
| Weapon | Level: 7 |
|---|---|
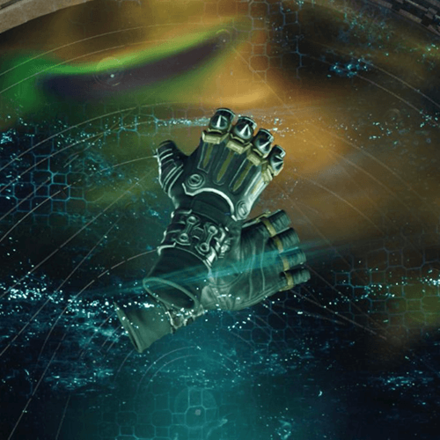 Kaiser Knuckles Kaiser Knuckles
|
Physical: 158 Magical: 35 ◯-◯ ◯-◯ ◯ |
| Strongest Points | |
| ・Has overwhelming Physical damage ・Allows Tifa to start with Level 1 Chi ・Has average materia Slots |
|
| Recommended Weapon Skills | |
| How to Get | |
| ・Obtained in a treasure chest found on the topmost level of the ship in Chapter 5. | |
Has the Highest Physical Attack Stat
Despite the lack of materia slots for the Kaiser Knuckles, it makes up for its extremely high Physical Attack power. This is extremely useful for Tifa as she can increase her damage further by raising her Chi levels with Unbridled Strength.
Best For General Use: Jarngreiper
| Weapon | Level: 7 |
|---|---|
| Jarngreiper | Physical: 86 Magical: 58 ◯-◯ ◯-◯ ◯-◯ |
| Strongest Points | |
| ・ Great number of materia slots ・ Balanced Physical and Magical stats ・Weapon Skills can increase criticals |
|
| Recommended Weapon Skills | |
| How to Get | |
| ・Found in the Corridor of Currents in Chapter 13. | |
Easy to Use and Has Many materia Slots
Jarngreiper is a versatile and easy-to-use weapon with balanced Physical and Magical attack stats. It also has many materia slots that can further give Tifa more options.
Many of the weapon's skills increase damage and critical, making it an excellent choice for a combined Unfettered Fury, and Unbridled Strength build that can stagger and increase the damage multiplier on enemies.
Best Weapons for Barret
Best for Spamming Abilities: Battle Cry
| Weapon | Level: 7 |
|---|---|
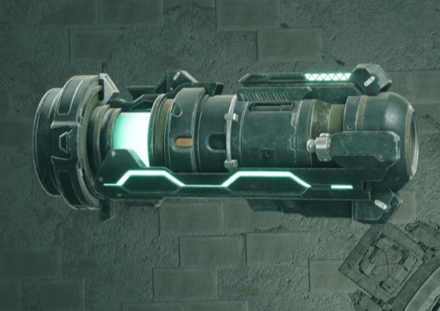 Battle Cry Battle Cry
|
Physical: 88 Magical: 65 ◯-◯ ◯-◯ ◯ ◯ ◯ |
| Strongest Points | |
| ・Great Weapon Skills ・Has many materia slots ・Average attack power |
|
| Recommended Weapon Skills | |
| How to Get | |
| ・Found in the Corridor of Catastrophe in Chapter 13. | |
Easy to Use and Fill ATB Gauge
The weapon skills for this weapon, combined with Barret's speed to fill his ATB gauge create a perfect support weapon for Barret, allowing him to cast multiple abilities that will support his party. This includes spellcasting and abilities that specialize in staggering enemies.
Best for Tank Builds: Barrage Blaster
| Weapon | Level: 7 |
|---|---|
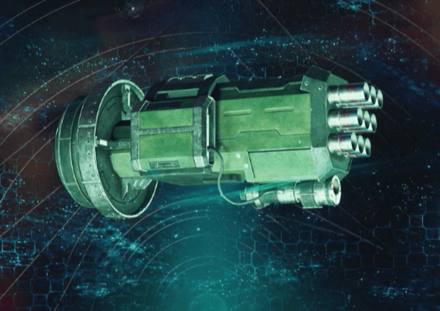 Barrage Blaster Barrage Blaster
|
Physical: 88 Magical: 65 ◯-◯ ◯-◯ ◯ |
| Strongest Points | |
| ・ Has the Weapon Ability Lifesaver ・ Further increases Barret's tank capabilities ・ |
|
| Recommended Weapon Skills | |
| How to Get | |
| ・Found in a chest while climbing Mount Corell in Chapter 7. | |
Synergizes with Barret's Tank Capabilities
The weapon skills on the Barrage Blaster bring out Barret's tank capabilities for the party, allowing him to remain unflinching while casting abilities and making his block more reliable.
Best Weapons for Aerith
Strongest Magic Damage: Plumose Rod
| Weapon | Level: 7 |
|---|---|
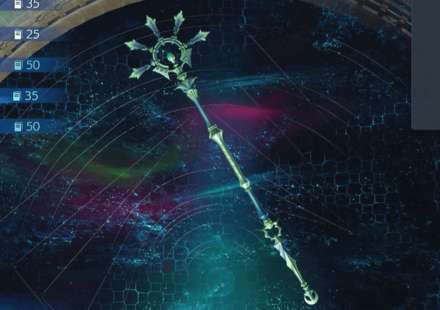 Plumose Rod Plumose Rod
|
Physical: 49 Magical: 143 ◯-◯ ◯ ◯ ◯ ◯ |
| Strongest Points | |
| ・Has the highest Magic damage output ・Provides Utility for Wards ・Has a lot of materia Slots |
|
| Recommended Weapon Skills | |
| How to Get | |
| ・Complete all of Hojo's Exams in Shinra Manor once you've completed Chapter 11. | |
Best Weapon for Aerith as All Her Attacks Count as Magic
This is the undisputed best weapon for Aerith, as not only does it have the highest Magic damage from all her weapons, but its weapon skills allow it to prolong the duration of Aerith's Wards, ultimately allowing you to save ATB. Furthermore, the HP increase decreased cooldown on Ward Shift grants more survivability for tougher fights.
Best Weapon for Healing and Debuffing: Timeless Rod
| Weapon | Level: 7 |
|---|---|
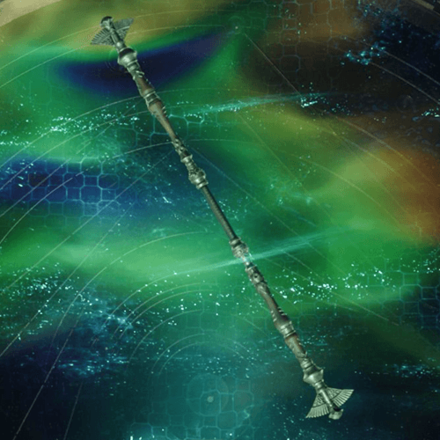 Timeless Rod Timeless Rod
|
Physical: 63 Magical: 116 ◯-◯ ◯-◯ ◯ |
| Strongest Points | |
| ・Has the option to increase the amount of HP recovered ・Weapon Skills buff Wards ・Allows Faster Ward Shift |
|
| Recommended Weapon Skills | |
| How to Get | |
| ・Found inside Bill's Ranch in the Grasslands, Chapter 2. | |
Helps with Ward Durations and Dodging
This is a great weapon for Aerith's utility, as it shortens the cooldown time of Ward Shift, and prolongs the duration of her Wards, allowing you to save your ATB for spells.
Best Weapons for Red XIII
Best for Tanking and Vengeance Mode: Renegade's Collar
| Weapon | Level: 7 |
|---|---|
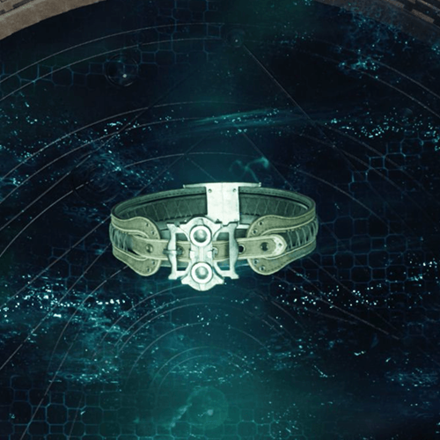 Renegade's Collar Renegade's Collar
|
Physical: 116 Magical: 63 ◯-◯ ◯-◯ ◯ |
| Strongest Points | |
| ・ Can tank damage while recovering health with Vengeance Mode ・High Physical attack stat ・Can synergize with defensive materia and Accessories |
|
| Recommended Weapon Skills | |
| How to Get | |
| ・Found in a chest in the Mithril Mine in Chapter 3. | |
Tank For the Party with Vengeance Mode
Given the weapon's skills, this allows Red XIII to tank damage while recovering it when in Vengeance Mode as it allows him to block without taking much damage, and the health regained for Siphoned Fang is increased.
Best Weapons for Yuffie
Best for ATB Gauge Fill: Fuma Shuriken
| Weapon | Level: 7 |
|---|---|
| Fuma Shuriken | Physical: 77 Magical: 97 ◯-◯ ◯-◯ ◯-◯ |
| Strongest Points | |
| ・Strong Magic attack that can be further boosted in the weapon skills ・Fast ATB gauge fill, allowing for constant ability use ・Decent physical attack stat, making the weapon versatile |
|
| Recommended Weapon Skills | |
| How to Get | |
| ・Found in the Shrine of Ambition in Chapter 13. | |
Fast ATB Charges Benefit Yuffie's Playstyle
The weapon helps with Yuffie's ATB gauge fill rate, which benefits her playstyle as this allows her to use her abilities for any given situation. Art of War for damaging enemies, Brumal Form for evading attacks, and Elemental Ninjustsu for exploiting enemy weaknesses; with this weapon, Yuffie can use any ability at any time.
Best for Physical Damage: Crystalline Cross
| Weapon | Level: 7 |
|---|---|
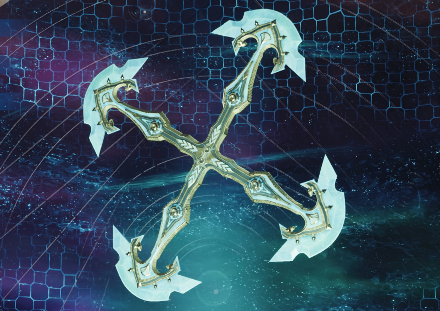 Crystalline Cross Crystalline Cross
|
Physical: 119 Magical: 40 ◯-◯ ◯-◯ ◯ ◯ ◯ |
| Strongest Points | |
| ・High Physical attack that synergizes with Yuffie's basic attacks ・ Has a weapon skill that activates Brave when using Steal ・Has many materia slots |
|
| Recommended Weapon Skills | |
| How to Get | |
| ・Found in a chest during the chase for Cait Sith in Chapter 12. | |
Physical Attack Stat Synergizes with Banishment
Banishment allows ATB charges used on other abilities to deal increased damage, synergizing with the high Physical attack stat of the weapon.
Best Weapons for Cait Sith
Best for Spamming Abilities: Golden Megaphone
| Weapon | Level: 6 |
|---|---|
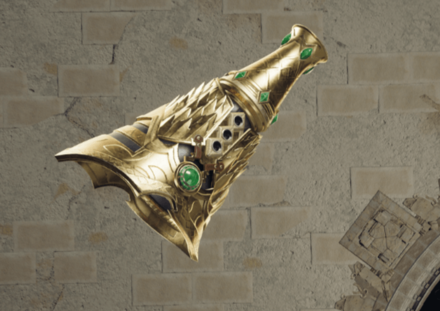 Golden Megaphone Golden Megaphone
|
Physical: 80 Magical: 86 ◯-◯ ◯ ◯ ◯ ◯ |
| Strongest Points | |
| ・Balanced Stat for Physical and Magic damage ・Easy to cast abilities due to ATB charge rate ・Has many materia slots |
|
| Recommended Weapon Skills | |
| How to Get | |
| ・Located in the Specimen Testing Room of Shinra Manor in Chapter 11. | |
Best for Spamming Roll o' the Dice or Fortune Teller
Since the weapon allows Cait Sith to fill his ATB gauge faster, you can spam Roll o' the Dice when supporting your party, or Fortune Teller when you're dealing damage.
Strongest Physical Damage: Gjallarhorn
| Weapon | Level: 6 |
|---|---|
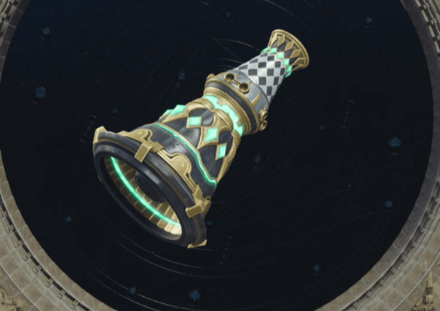 Gjallarhorn Gjallarhorn
|
Physical: 136 Magical: 34 ◯-◯ ◯-◯ ◯-◯ |
| Strongest Points | |
| ・Highest Physical Damage stat for Cait Sith ・Can increase Luck stat and Critical ・Great number of materia slots |
|
| Recommended Weapon Skills | |
| How to Get | |
| ・Give 45 Chocobo Grass to the Chocobotique in Nibelheim (Chapter 11) | |
Highest Physical Damage and Can Help with Critical Damage
The Gjallarhorn has the highest physical attack damage for Cait Sith. Its Lady Luck ability temporarily increases the critical rate of your party, partner it with Lucky Jockey and you may or may not see high damage numbers from your abilities or limit break.
Criteria for Best Weapons
Weapon Stats, Skills, and materia Slots
The criteria for the best weapon are based on weapon Stats, Skills, and materia Slots. Weapon Abilities are not included in the criteria since all abilities can be used in any weapon.
Weapons with Few materia Slots are Ranked Low
Weapons with few materia that can be equipped are rated low since materia is extremely helpful in tougher fights. With materia slots, you’ll have more options in a battle that can synergize from any of your abilities.
FF7 Rebirth Related Guides

| All Weapon Guides | |
|---|---|
| List of All Weapons | Best Weapons |
All Character Weapons
Comment
Author
Best Weapons For Each Character and Locations
improvement survey
02/2026
improving Game8's site?

Your answers will help us to improve our website.
Note: Please be sure not to enter any kind of personal information into your response.

We hope you continue to make use of Game8.
Rankings
- We could not find the message board you were looking for.
Gaming News
Popular Games

Genshin Impact Walkthrough & Guides Wiki

Arknights: Endfield Walkthrough & Guides Wiki

Honkai: Star Rail Walkthrough & Guides Wiki

Wuthering Waves Walkthrough & Guides Wiki

Umamusume: Pretty Derby Walkthrough & Guides Wiki

Zenless Zone Zero Walkthrough & Guides Wiki

Pokemon TCG Pocket (PTCGP) Strategies & Guides Wiki

Clair Obscur: Expedition 33 Walkthrough & Guides Wiki

Digimon Story: Time Stranger Walkthrough & Guides Wiki

Where Winds Meet Walkthrough & Guides Wiki
Recommended Games

Fire Emblem Heroes (FEH) Walkthrough & Guides Wiki

Diablo 4: Vessel of Hatred Walkthrough & Guides Wiki

Super Smash Bros. Ultimate Walkthrough & Guides Wiki

Yu-Gi-Oh! Master Duel Walkthrough & Guides Wiki

Pokemon Brilliant Diamond and Shining Pearl (BDSP) Walkthrough & Guides Wiki

Elden Ring Shadow of the Erdtree Walkthrough & Guides Wiki

Monster Hunter World Walkthrough & Guides Wiki

The Legend of Zelda: Tears of the Kingdom Walkthrough & Guides Wiki

Persona 3 Reload Walkthrough & Guides Wiki

Cyberpunk 2077: Ultimate Edition Walkthrough & Guides Wiki
All rights reserved
© SQUARE ENIX CO., LTD. All Rights Reserved.
CHARACTER DESIGN: TETSUYA NOMURA/ROBERTO FERRARI
LOGO ILLUSTRATION: © 1997 YOSHITAKA AMANO
The copyrights of videos of games used in our content and other intellectual property rights belong to the provider of the game.
The contents we provide on this site were created personally by members of the Game8 editorial department.
We refuse the right to reuse or repost content taken without our permission such as data or images to other sites.


![MENACE Review [Early Access] | Menacing, But Only at the Start](https://img.game8.co/4406385/400fc86faf7e41a4a05455d432d4d303.png/show)

