All Gold Saucer Queen’s Blood Challenges and Solutions
A guide on the Gold Saucer Queen's Blood Challenges in Final Fantasy 7 Rebirth (FF7 Rebirth). Read on to see all the puzzle solutions for Gold Saucer Queen's Blood Challenges and the rewards that can be obtained by completing them!
| Queen's Blood Challenges | |
|---|---|
| Gold Saucer Queen’s Blood Challenges | Costa del Sol Queen’s Blood Challenges |
List of Contents
Gold Saucer Queen's Blood Challenges Easy Solutions
Support Card: Luxury Real Estate Solution
| Easy Queen's Blood Challenges | |||||
|---|---|---|---|---|---|
| Luxury Real Estate | Succulent Succor | Behind Enemy Lines | |||
| Chadley the Callous | Ifrit's 32-Bit Flames | ||||
Recommended Deck
| Dio Buff Deck Variation | |||||
|---|---|---|---|---|---|
 Crystalline Crab Crystalline Crab
2x |
 Ignilisk Ignilisk
2x |
 Loveless Loveless
1x |
|||
 Chocobo & Moogle Chocobo & Moogle
1x |
 Haunted Hotel Haunted Hotel
1x |
 Zemzelett Zemzelett
1x |
|||
 Shoalopod Shoalopod
2x |
 Titan Titan
1x |
 Ifrit Ifrit
1x |
|||
 Dio Dio
1x |
 Grandhorn Grandhorn
2x |
||||
Playstyle
For this challenge, you will have many opportunities to play high-cost cards due to Gigantaur's effect. Double down on this by playing Titan and slamming down Dio for a guaranteed lane.
Support Card: Succulent Succor Solution
| Easy Queen's Blood Challenges | |||||
|---|---|---|---|---|---|
| Luxury Real Estate | Succulent Succor | Behind Enemy Lines | |||
| Chadley the Callous | Ifrit's 32-Bit Flames | ||||
Recommended Deck
| Space Ranger Buff Deck Variation | |||||
|---|---|---|---|---|---|
|
Crystalline Crab
2x |
Ignilisk
2x |
 Space Ranger Space Ranger
1x |
|||
|
Loveless
1x |
Chocobo & Moogle
1x |
Haunted Hotel
1x |
|||
|
Zemzelett
1x |
Shoalopod
1x |
Titan
1x |
|||
|
Ifrit
1x |
Dio
1x |
 Griffon Griffon
2x |
|||
Playstyle
If you have been playing a Buff Deck, this challenge should be a breeze to finish. Focus on getting your Chocobo & Moogle down along with Space Ranger to counter the opponent's buffs. Push your lanes to set up Cactrot's buffs as well!
Gimmick Battlefield: Behind Enemy Lines Solution
| Easy Queen's Blood Challenges | |||||
|---|---|---|---|---|---|
| Luxury Real Estate | Succulent Succor | Behind Enemy Lines | |||
| Chadley the Callous | Ifrit's 32-Bit Flames | ||||
Recommended Deck
| Behind Enemy Lines Deck | |||||
|---|---|---|---|---|---|
 Flan Flan
2x |
 Crawler Crawler
2x |
 Fleetwing Fleetwing
2x |
|||
 Flametrooper Flametrooper
2x |
 Elphadunk Elphadunk
2x |
 Zu Zu
2x |
|||
 Devil Rider Devil Rider
2x |
 Fat Chocobo Fat Chocobo
1x |
||||
Playstyle
This challenge should not be approached with a conventionally structured deck. Cards such as Crawler that puts pawns behind it completely trivialize this challenge due to their ability to push backward.
Support Card: Chadley the Callous Solution
| Easy Queen's Blood Challenges | |||||
|---|---|---|---|---|---|
| Luxury Real Estate | Succulent Succor | Behind Enemy Lines | |||
| Chadley the Callous | Ifrit's 32-Bit Flames | ||||
Recommended Deck
| Chocobo Jockey Decklist | ||
|---|---|---|
 Mandragora Mandragora
2x |
Crystalline Crab
2x |
 Spearhawk Spearhawk
2x |
 J-Unit Sweeper J-Unit Sweeper
2x |
 Quetzalcoatl Quetzalcoatl
2x |
Titan
1x |
 Chocobo Jockey Chocobo Jockey
1x |
 Mythril Golem Mythril Golem
1x |
Griffon
2x |
Playstyle
This challenge rewards players who like to stack points in a single lane. You will be able to quadruple a high-powered card like Mythril Golem by using Chadley. Simply put, focus on setting up a powerful unit and then diversify its power.
Gimmick Battlefield: Ifrit's 32-Bit Flames
| Easy Queen's Blood Challenges | |||||
|---|---|---|---|---|---|
| Luxury Real Estate | Succulent Succor | Behind Enemy Lines | |||
| Chadley the Callous | Ifrit's 32-Bit Flames | ||||
Recommended Deck
| Dio Buff Deck Variation | |||||
|---|---|---|---|---|---|
|
Crystalline Crab
2x |
Ignilisk
2x |
Loveless
1x |
|||
|
Chocobo & Moogle
1x |
Haunted Hotel
1x |
Zemzelett
1x |
|||
|
Shoalopod
2x |
Titan
1x |
Ifrit
1x |
|||
|
Dio
1x |
Grandhorn
2x |
||||
Playstyle
This challenge is made trivial if you have Dio since Ifrit buffs the center part of the board regardless of affiliation. Focus on setting up either Chocobo & Moogle or Dio to scale them up with Ifrit's effect.
Gold Saucer Queen's Blood Challenges Advanced Solutions
Gimmick Battlefield: High Ground
| Advanced Queen's Blood Challenges | |||||
|---|---|---|---|---|---|
| High Ground | Don't Fear; MAI's Here | Outflanked | |||
| Vertical Integration | Back to the Wall | ||||
Recommended Deck
| High-Cost Deck | |||||
|---|---|---|---|---|---|
 Twin Brain Twin Brain
2x |
 Tifa Tifa
1x |
 Cid Cid
1x |
|||
 Disgorgon Disgorgon
2x |
 2-C SOLDIER Operator 2-C SOLDIER Operator
2x |
Titan
1x |
|||
 Screamer Screamer
2x |
 Maloceros Maloceros
2x |
Fat Chocobo
1x |
|||
 Skywheel Skywheel
1x |
|||||
Playstyle
Your goal here is to clog the board with your pawns so the enemy will not be able to play their cards. Since the middle lane will have three pawns, look to mulligan for a Screamer, Fat Chocobo or Skywheel to secure positions for yourself.
Support Card: Don't Fear; MAI's Here
| Advanced Queen's Blood Challenges | |||||
|---|---|---|---|---|---|
| High Ground | Don't Fear; MAI's Here | Outflanked | |||
| Vertical Integration | Back to the Wall | ||||
Recommended Deck
| Tifa Jockey Mythril Variant Deck | |||||
|---|---|---|---|---|---|
|
Cid
1x |
Crystalline Crab
2x |
Spearhawk
2x |
|||
|
Twin Brain
2x |
Tifa
1x |
Disgorgon
2x |
|||
|
Titan
1x |
Chocobo Jockey
1x |
Maloceros
1x |
|||
|
Mythril Golem
1x |
 Gi Nattak Gi Nattak
1x |
||||
Playstyle
This challenge rewards decks that emphasize high-powered units or buffs. The goal here is to establish 2-3 pawns farther into the board to make use of MAI's replace effect to remove opponents from the board. Utilize Titan and Disgorgon for early 2-pawn pushes.
Gimmick Battlefield: Outflanked
| Advanced Queen's Blood Challenges | |||||
|---|---|---|---|---|---|
| High Ground | Don't Fear; MAI's Here | Outflanked | |||
| Vertical Integration | Back to the Wall | ||||
Recommended Deck
| Outflanked Deck | |||||
|---|---|---|---|---|---|
|
Flan
1x |
Crawler
2x |
 Archdragon Archdragon
2x |
|||
|
Flametrooper
2x |
Zu
2x |
 Sea Devil Sea Devil
1x |
|||
 Grangalan Grangalan
1x |
 Insectoid Chimera Insectoid Chimera
2x |
 Yin & Yang Yin & Yang
2x |
|||
Playstyle
The challenge starts you off by having your pawns in the middle while the opponent has both the left and right positions. Look to play cards such as Crawler or Flan to establish early positions and play to avoid getting smothered out by the opponent.
The opponent will look to play Black Bat and Insectoid Chimera to steal pawns from you, so counter these with replace cards of your own!
Gimmick Battlefield: Vertical Integration
| Advanced Queen's Blood Challenges | |||||
|---|---|---|---|---|---|
| High Ground | Don't Fear; MAI's Here | Outflanked | |||
| Vertical Integration | Back to the Wall | ||||
Recommended Deck
| Vertical Push Deck | |||||
|---|---|---|---|---|---|
|
Crystalline Crab
1x |
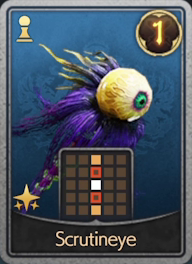 Scrutineye Scrutineye
2x |
Cid
1x |
|||
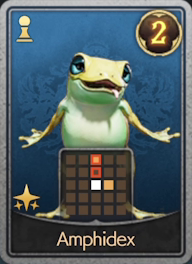 Amphidex Amphidex
2x |
Chocobo & Moogle
1x |
 Ogre Ogre
1x |
|||
|
Shoalopod
2x |
Insectoid Chimera
2x |
Griffon
2x |
|||
|
Gi Nattak
1x |
|||||
Playstyle
This challenge lays out the positions with you starting from the bottom and your opponent starting from the top with Alexanders on both the left and right. To win the challenge, look to steal the opponent's pawns by playing Amphidex or Scrutineye early in the game and build your board from there.
The opponent is using an enfeeble deck to bolster their Alexander, so it is often recommended to focus on the top and bottom lane due to its scaling power.
Gimmick Battlefield: Back to the Wall
| Advanced Queen's Blood Challenges | |||||
|---|---|---|---|---|---|
| High Ground | Don't Fear; MAI's Here | Outflanked | |||
| Vertical Integration | Back to the Wall | ||||
Recommended Deck
| Replace Deck | ||
|---|---|---|
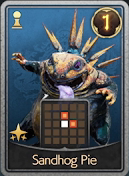 Sandhog Pie Sandhog Pie
2x |
 Heatseeker Heatseeker
2x |
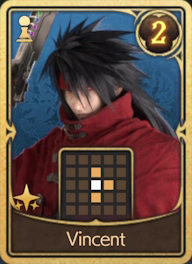 Vincent Vincent
1x |
 Bomb Bomb
1x |
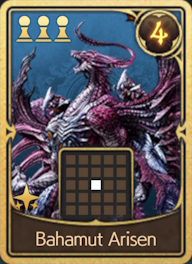 Bahamut Arisen Bahamut Arisen
1x |
Insectoid Chimera
2x |
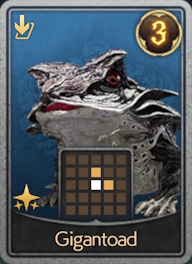 Gigantoad Gigantoad
2x |
Grandhorn
2x |
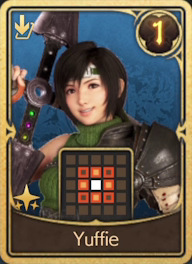 Yuffie Yuffie
1x |
|
Gi Nattak
1x |
||
Playstyle
This challenge is one of the easier challenges since it starts you off with 2 pawns on the bottom lane. To win the challenge, push the bottom lane with any of your replace fodder cards such as Heatseeker to contest pawns. Look to lock out the opponent from pushing the top lane as well!
Contest pawns with Insectoid Chimera and other replace cards to ensure your push. The opponent is using a variation of a buff deck that uses Space Ranger, so look to give up the lane where it is placed.
Gold Saucer Queen's Blood Challenges Survival Guide
Boot Camp Survival
| Queen's Blood Survival Challenges | ||
|---|---|---|
| Boot Camp | Extreme | Nightmare |
Recommended Deck
| Chapter 8 Chocobo Jockey Deck | ||
|---|---|---|
|
Mandragora
2x |
Crystalline Crab
2x |
Spearhawk
2x |
|
J-Unit Sweeper
1x |
Quetzalcoatl
2x |
Titan
1x |
|
Chocobo Jockey
1x |
Ogre
1x |
Mythril Golem
1x |
|
Griffon
2x |
||
Round-by-Round
For each round, you will draw 5 cards. The cards that you do not use will be carried over to the next round. Assess whether or not it is worth inputting resources to a lane to win this challenge.
| Round | Playstyle |
|---|---|
| 1 | Make sure to win the mid-lane to get the Cactuar Card. If possible, play Chocobo Jockey here for early points. |
| 2 | Use Mandragoras to lock out the top and bottom lanes. Build up 2-3 pawn placements but do not fill them in for Shiva. |
| 3 | Most likely, you will have 6-7 cards here. Look to win at least one lane to ensure that you finish the challenge and get Sephiroth. |
Extreme Survival
| Queen's Blood Survival Challenges | ||
|---|---|---|
| Boot Camp | Extreme | Nightmare |
Recommended Deck
| Self-Enfeeble Deck | |||||
|---|---|---|---|---|---|
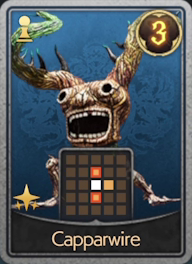 Capparwire Capparwire
1x |
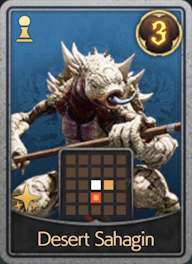 Desert Sahagin Desert Sahagin
2x |
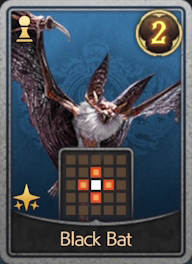 Black Bat Black Bat
2x |
|||
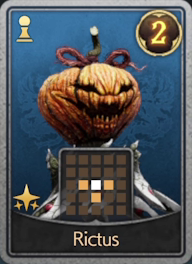 Rictus Rictus
2x |
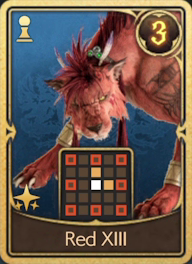 Red XIII Red XIII
1x |
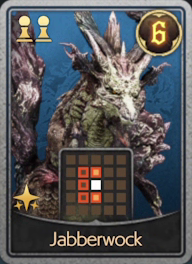 Jabberwock Jabberwock
2x |
|||
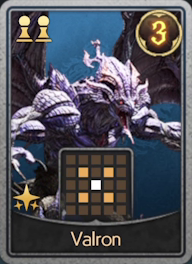 Valron Valron
1x |
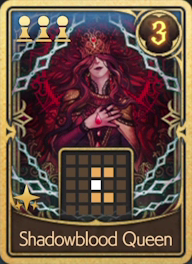 Shadowblood Queen Shadowblood Queen
1x |
Yin & Yang
1x |
|||
|
Yuffie
1x |
Gi Nattak
1x |
||||
Round-by-Round
Extreme Survival follows the same rules as Boot Camp Survival but now leans towards the enemy's advantage with starting cards on their side of the field.
| Round | Playstyle |
|---|---|
| 1 | For this round, it is recommended to win the mid and one side lane to get Cactuar and Chadley cards. Do so by setting up and playing Jabberwock there. Mulligan hard for Jabberwock and Desert Sahagin. |
| 2 | Again, try to win the mid-lane to get a random 3-cost Legendary card. Put your scaling cards such as Rictus and Valron in the middle to challenge Space Ranger. |
| 3 | Given your cards, you will have enough cards for the last round. Look to avoid the mid-lane since Dio will be scaling his power by a specific margin. Only play in the mid-lane to set up pawns or if you can challenge the lane with a scaling card like Shadowblood Queen! |
Nightmare Survival
| Queen's Blood Survival Challenges | ||
|---|---|---|
| Boot Camp | Extreme | Nightmare |
Recommended Deck
| Nightmare Challenge Deck | ||
|---|---|---|
|
Mandragora
1x |
 Cait Sith Cait Sith
1x |
Cid
1x |
|
Chocobo & Moogle
1x |
Space Ranger
1x |
Titan
1x |
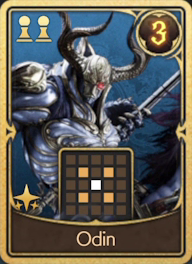 Odin Odin
1x |
 Moogle Trio Moogle Trio
1x |
Chocobo Jockey
1x |
 Emerald Witch Emerald Witch
1x |
Maloceros
1x |
 Dyne Dyne
1x |
|
Dio
1x |
Shadowblood Queen
1x |
Gi Nattak
1x |
Round-by-Round
Nightmare Survival is easily one of the most difficult challenges for Queen's Blood, rivaling or surpassing even the Shadowblood Queen. This survival challenge follows the rules of the previous ones, but you will not be able to draw 5 cards from the round start in 4 and 5!
It is okay to lose lanes during this challenge if it means holding a card advantage from your opponent! The goal here is to amass over 80+ points until Round 5!
| Round | Playstyle |
|---|---|
| 1 | Look to hard mulligan for Dio and Space Ranger here to guarantee mid and a side lane for +2 card advantage. Mid-lane should be contested with Dio along with a Chocobo Jockey for an early lead. |
| 2 | Focus on building up the mid-lane first to develop 2-pawn positions near the chest. Use cards that put diagonal pawns such as Odin or MAI to invade the opponent's space! |
| 3 | Mostly a give-away round to set up for rounds 4 and 5 since the chests are helpless at this point and a Mythril Golem in the mid-lane is hard to contest. Optimally, invest in either of the side lanes, but keep 7 or more cards for rounds 4 and 5! |
| 4 | During this round, save key cards in Shadowblood Queen and Gi Nattak. Mitigate the amount of points that you will lose by at least winning one lane to set up for round 5. |
| 5 | As early as possible, set up the mid-lane for your Shadowblood Queen and put units in both the top and mid-lane. Let Shadowblood Queen stack up to 16+ Power and distribute that using Gi Nittak. This should easily guarantee you the final round. |
Gold Saucer Queen's Blood Challenges Rewards
Completing the Gold Saucer Queen's Blood Challenges rewards you with new Queen's Blood Cards along with GSP (Gold Saucer Points). You can spend GSP at exchange stalls for collectibles and even more Queen's Blood cards!
The rewards mentioned here are first-time rewards, subsequent tries give half of the original reward.
Easy Card Challenge Rewards
| Challenge | Reward |
|---|---|
| Luxury Real Estate | GSP: 50 Card: Mythril Golem |
| Succulent Succor | GSP: 60 Card: Grasptropod |
| Behind Enemy Lines | GSP: 70 Card: Custom Valkyrie |
| Chadley the Callous | GSP: 90 Card: Gigatrice |
| Ifrit's 32-Bit Flames | GSP: 120 Card: Materia Guardian |
Advanced Card Challenge Reward
| Challenge | Reward |
|---|---|
| High Ground | GSP: 140 Card: Specimen H1024 |
| Don't Fear; MAI's Here | GSP: 160 Card: Anuran Suppressor |
| Outflanked | GSP: 180 Card: Crimson Mare Mk. II |
| Vertical Integration | GSP: 210 Card: Forgotten Specimen |
| Back to the Wall | GSP: 240 Card: Rufus |
Survival Challenge Reward
| Challenge | Reward |
|---|---|
| Boot Camp | Gold: 120 GSP Silver: 90 GSP Bronze: Sephiroth, 35 GSP |
| Extreme | Gold: 240 GSP Silver: 210 GSP Bronze: Leviathan, 90 GSP |
| Nightmare | Gold: 270 GSP Silver: 240 GSP Bronze: Bahamut, 105 GSP, Card Slayer Item for Johnny's Treasure Trove |
All Queen's Blood Card Locations and Guide
Gold Saucer Queen's Blood Challenges Location
In Wonderment Square
| Wonderment Square (Gold Saucer) |
|---|
 |
The Gold Saucer Queen's Blood Challenges is inside the Wonderment Square in the Gold Saucer. These challenges are unlocked as early as Chapter 8 after resting in the Haunted Hotel.
Go towards the left after entering Wonderment Square and approach the NPC at the reception table to see the challenges. More challenges will be unlocked when you reach Chapter 12.
Corel Region: Map and All Locations
FF7 Rebirth Related Guides
List of All Available Minigames
All Minigame Guides
 Piano Minigame
 Hustle de Chocobo
 Moogle MIschief
 Dolphin Show Minigame
 Junon Parade and All 7th Infantry Locations
 Fort Condor
 Cactuar Caper and All Cactuar Locations
 Run Wild
 Card Carnival (Costa del Sol Queen's Blood Challenges)
 Pirate's Rampage
 Wheelie Rendezvous
 Minecart Adventure
 G-Bike Minigame
 Desert Rush
 Galactic Saviors
 3D Brawler
 Chocobo Races
 Musclehead Colosseum
 Jumpfrog
 Crunch-Off
 Glide de Chocobo
 Cactuar Crush
 Gears and Gambits
Comment
a lot of these decks are useless for the challenge they're supposed to be for. It isn't you, person I know who's going to go 'wtf' at these decks not working.
Author

All Gold Saucer Queen’s Blood Challenges and Solutions
Rankings
- We could not find the message board you were looking for.
Gaming News
![Neverness to Everness (NTE) Review [Beta Co-Ex Test] | Rolling the Dice on Something Special](https://img.game8.co/4414628/dd3192c8f1f074ea788451a11eb862a7.jpeg/show)


Popular Games

Genshin Impact Walkthrough & Guides Wiki
Honkai: Star Rail Walkthrough & Guides Wiki
Arknights: Endfield Walkthrough & Guides Wiki
Umamusume: Pretty Derby Walkthrough & Guides Wiki
Wuthering Waves Walkthrough & Guides Wiki
Pokemon TCG Pocket (PTCGP) Strategies & Guides Wiki
Abyss Walkthrough & Guides Wiki
Zenless Zone Zero Walkthrough & Guides Wiki
Digimon Story: Time Stranger Walkthrough & Guides Wiki
Clair Obscur: Expedition 33 Walkthrough & Guides Wiki


Recommended Games
Fire Emblem Heroes (FEH) Walkthrough & Guides Wiki
Pokemon Brilliant Diamond and Shining Pearl (BDSP) Walkthrough & Guides Wiki
Diablo 4: Vessel of Hatred Walkthrough & Guides Wiki
Super Smash Bros. Ultimate Walkthrough & Guides Wiki
Yu-Gi-Oh! Master Duel Walkthrough & Guides Wiki
Elden Ring Shadow of the Erdtree Walkthrough & Guides Wiki
Monster Hunter World Walkthrough & Guides Wiki
The Legend of Zelda: Tears of the Kingdom Walkthrough & Guides Wiki
Persona 3 Reload Walkthrough & Guides Wiki
Cyberpunk 2077: Ultimate Edition Walkthrough & Guides Wiki


All rights reserved
© SQUARE ENIX CO., LTD. All Rights Reserved.
CHARACTER DESIGN: TETSUYA NOMURA/ROBERTO FERRARI
LOGO ILLUSTRATION: © 1997 YOSHITAKA AMANO
The copyrights of videos of games used in our content and other intellectual property rights belong to the provider of the game.
The contents we provide on this site were created personally by members of the Game8 editorial department.
We refuse the right to reuse or repost content taken without our permission such as data or images to other sites.
Man tell me why you think I would come here looking for a chapter specific queens blood guide and in the deck you include cards that are from a later chapter. Why do you think I would go out of my way to progress the story just to get one or two cards and come back to play the stupid card game. That's just so stupid in my mind am I the only one thinking so?