The Splinter Within Side Quest Walkthrough
┣ Complete Quests → Quest Walkthroughs
┣ Learn the Best Skills → Best Skills
┣ Collect Gear → List of Weapons / Outfits
┣ Collect All Legendaries → All Legendary Weapons/Outfits
┗ Take Down Machines → List of Enemy Machines
★The Ver. 1.08 Patch is now Available!
This guide will show you how to complete the The Splinter Within, a Side Quest in Horizon Forbidden West: Burning Shores (HFW). Read on to learn the quest objectives, location, how to kill the machines, how to recover the focus, and the rewards for completing the The Splinter Within Side Quest.
List of Contents
The Splinter Within Quest Information
General Info
| The Splinter Within | |
|---|---|
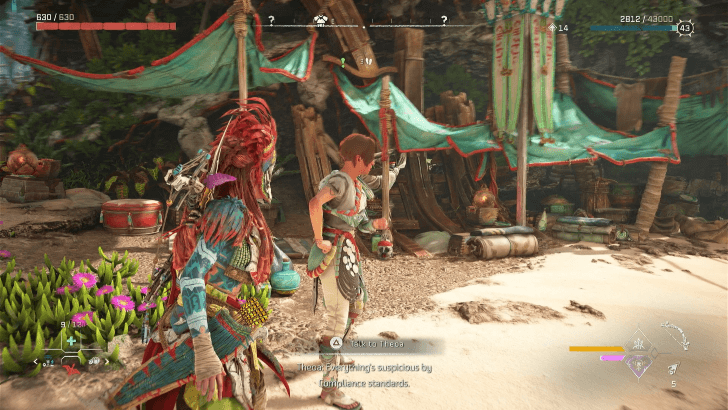
| Quest Giver | Theoa |
| Description | A secret resistance needs Aloy to track down their missing Diviner and a valuable shipping manifest that could turn the tide against the Quen Empire. |
| Rewards |
・31200 XP ・2 Skill Points ・Imperial Gold Dye ・Quen Deadeye |
| Recommended Level | 39 |
How to Unlock The Splinter Within and Location
Unlocked after Arriving at Fleet's End
Players can unlock The Splinter Within during the Main Quest, To the Burning Shores, after arriving at Fleet's End. Players also need to speak to Theoa near the center of the settlement to activate the questline. Note that for majority of the quest, Aloy needs to steer the skiff, a new form of transportation introduced by Seyka.
The Splinter Within Location
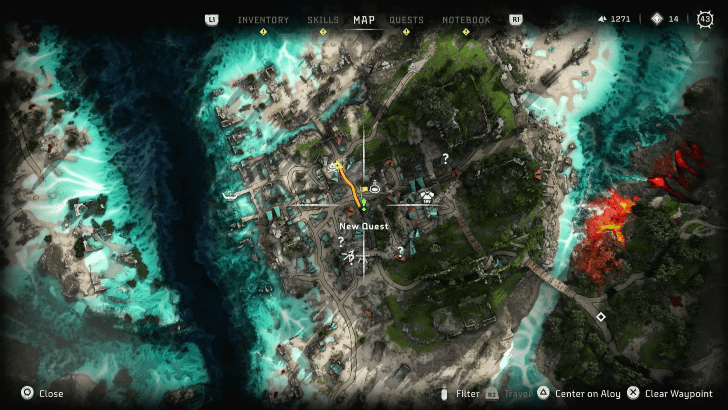 Map Location |
 World Location |
The Splinter Within Walkthrough
How to Complete
| Objectives | |
|---|---|
| 1 | 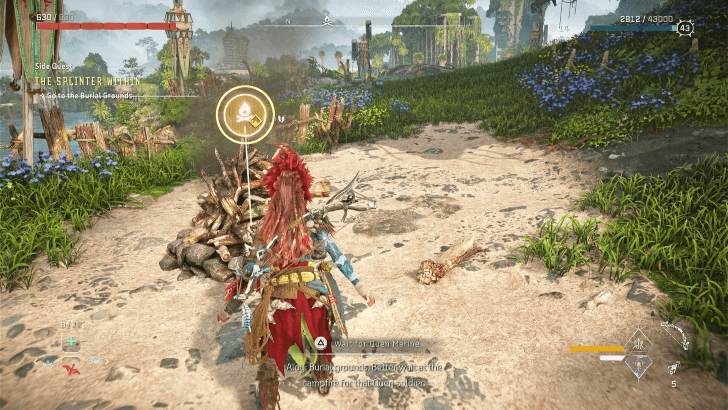 Go to the Burial Grounds Head to the north of the town and select the prompt to wait at the campfire for Theoa. |
| 2 | 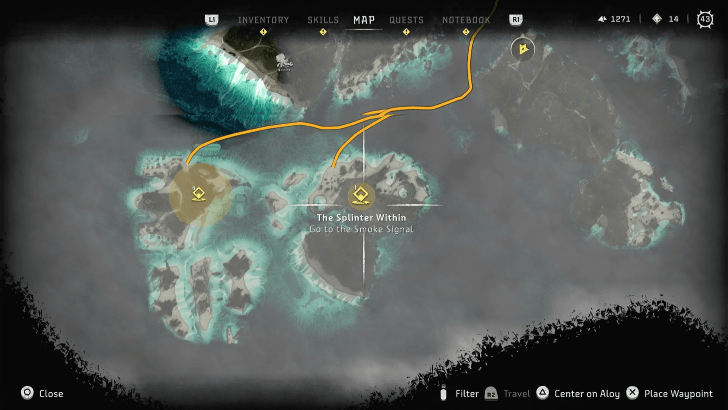 Go to the Smoke Signal Steer the skiff to head to the island where the smoke signal is, to the south of Fleet's End. Always take note of where you dock the skiff to avoid having to search for its icon on the map. On the other hand, if you decide to complete this quest after completing To the Burning Shores Main Quest, players can use their Sunwing to fly to the island. |
| 3 | 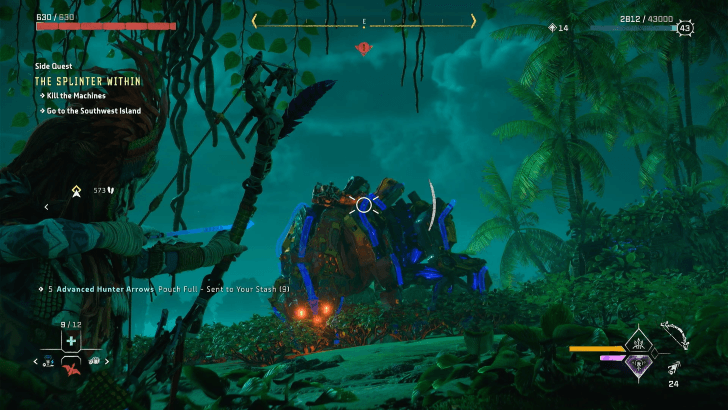 Kill the machines After arriving on the island, a new objective to eliminate the machines will appear. These include leaplashers, ravagers and stalkers. If you cannot find them on the ground, try to find them on top of the overgrown bridges on the island. To defeat the stalker, apply elemental damage to them or target their stealth generator. |
| 4 |  Talk to the Quen Soldier After defeating the machines, talk to the Quen Soldier. He will be on top of a bridge that you can get to by climbing a ladder. |
| 5 |  Search for Survivors and Kill the Machines Use the skiff (or fly with the Sunwing if you completed the To the Burning Shores main quest) to get to the island to the west. After arriving, players need to kill the Waterwings on top of the high platform that Aloy can grapple to. Use a ropecaster to restrict their movement. |
| 6 | 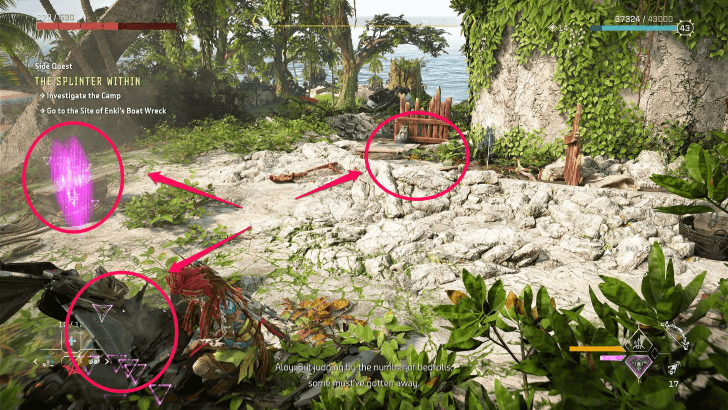 Examine the Corpses and Investigate the Camp After killing the Waterwings, examine the corpses on the same platform. Then use the focus to reveal the three points of investigation. These include the bedrolls, the Frost Glinthawk, and the gathered salvage. |
| 7 | 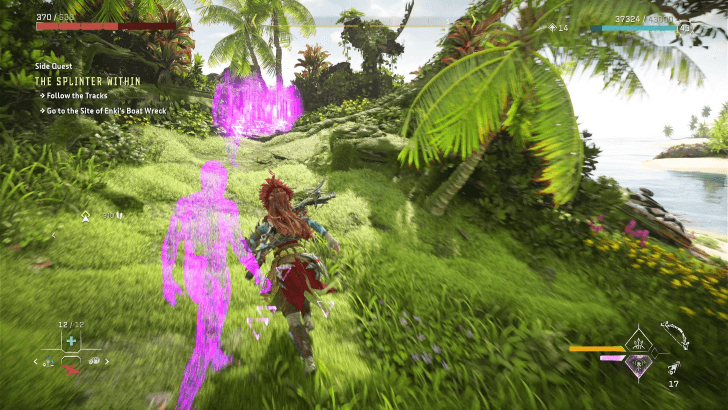 Search for Tracks and Follow Them Use the focus in the same area to reveal the tracks and follow them. They will lead you to a grassy area with a corpse that needs to be examined. |
| 8 | 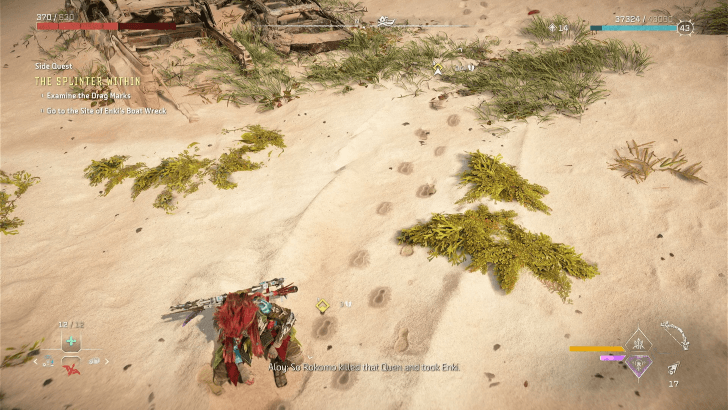 Follow the Tracks and Examine the Drag Marks Follow the tracks again but this time they will lead onto the beach. This beach will also have drag marks that Aloy needs to examine. |
| 9 | 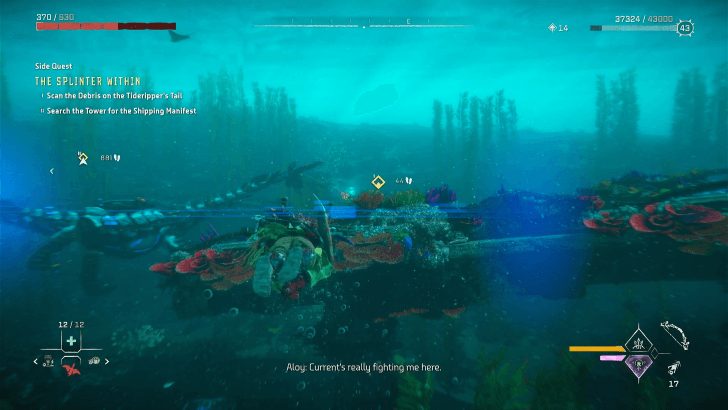 • Go to the Site of Enki's Boatwreck • Scan the Debris • Recover the Focus Use the skiff to travel to the site of the Boatwreck. It is recommended to dock the boat at the nearby island the swim the rest of the way. Players will need to scan then interact with the Tideripper's tail to complete the objective. the Tideripper will be swimming in a definite circular path. Cut it off by swiming in a straight line to the tail. Note that this will initially be the objective called Go to the Southwest Island but will change after the objective of Examine the Drag Marks. |
| 10 | 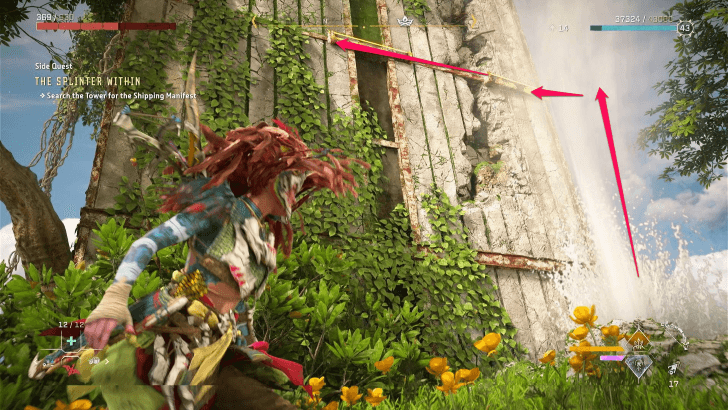 Search the Tower for the Shipping Manifest Use the skiff to travel to the island with the tower. Once there, Aloy needs to glide with the shieldwing to ride the thermal updraft. Make sure to target the climbable bar on the outside of the tower. |
| 11 | 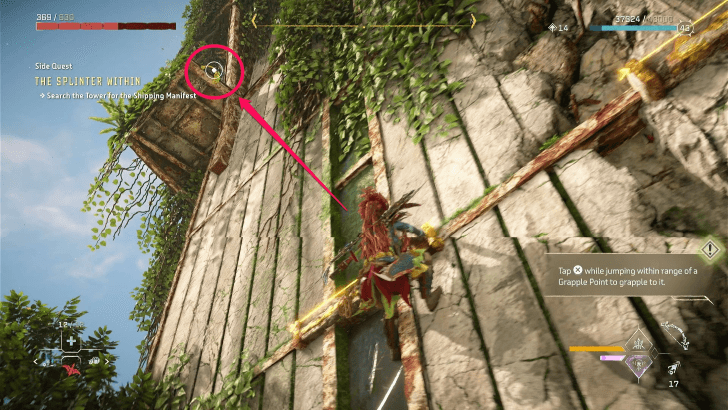 Search the Tower for the Shipping Manifest After climbing, there will be a grappling point on the upper left side and then another thermal updraft to glide through to the next platform. |
| 12 |  Examine the Console After grappling and climbing all the way to the top, there will be a console and an Ancient Valuables Chest nearby. Activate the Holo projector at the console. |
| 13 | 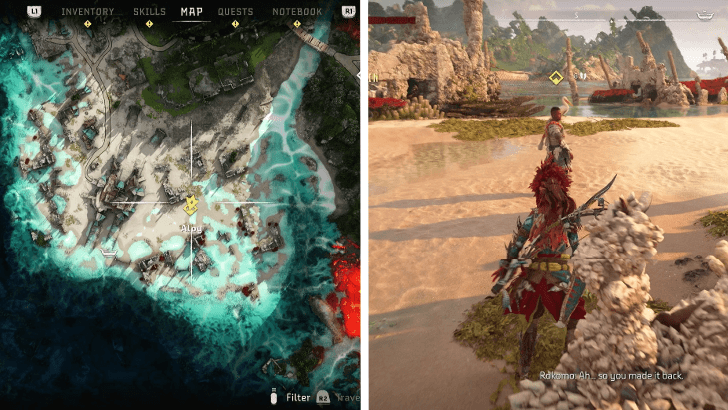 Confront Rokomo and Return to Theoa Head back near Fleet's End to confront Rokomo. He will be on the beach in between some half sunken and dilapidated building frames. Speak with him then return to Theoa, who is nearer to the center of the settlement to end the quest.. |
Tips and Strategies for The Splinter Within
Be Mindful of Falling Off Platforms
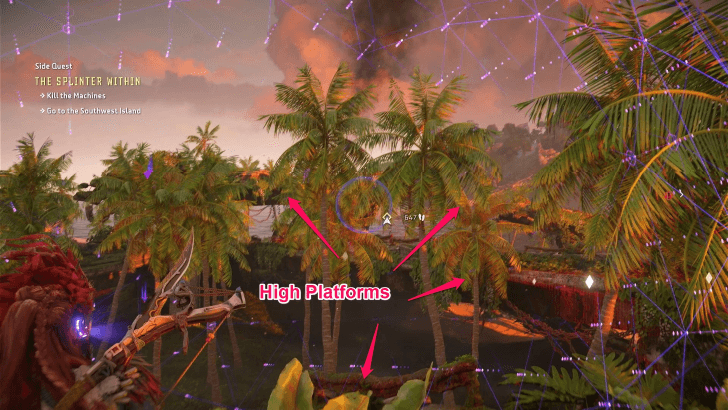
The machines on both islands will usually be on elevated bridges or platforms. It is important to be mindful of their attacks so that Aloy does not fall off of them and lose their positioning advantage. One way to do this is to get their attention and lure them off of these elevated platforms to fight on the ground.
Equip Outfits with Shock Resistances
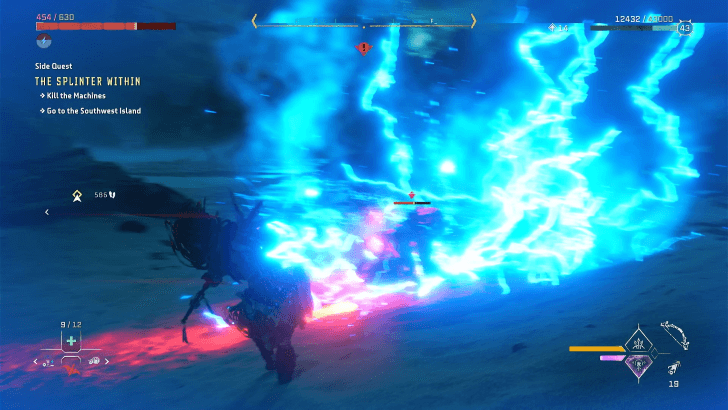
A lot of the enemies you will need to kill will have shock based attacks so it is best to equip shock resistant outfits.
Use a Ropecaster for Waterwings

Like all flying enemies, the Waterwings will try to fly off so it will be more difficult to target their weak spots and predict their attack patterns. Equip and use a Ropecaster to restrict their movement.
Cut Off the Tideripper by Swimming Across Its Path
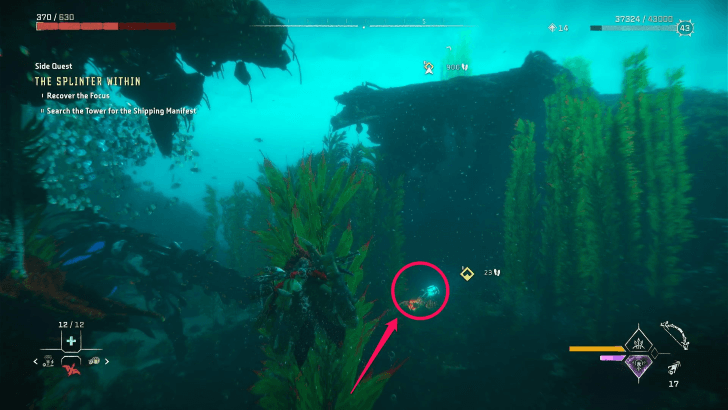
During the objective of recovering the focus, the Tideripper will swim around in a definite circular path. Do not try to follow behind it but instead, swim across its circular path and predict when its tail will be right in front of you on the other side.
Horizon Forbidden West Related Guides

List of All Quest Types
List of All Side Quests
| Side Quest | Level |
|---|---|
| Deep Trouble | Lv. 5 |
| The Bristlebacks | Lv. 7 |
| The Twilight Path | Lv. 7 |
| Shadow from the Past | Lv. 7 |
| Shadow in the West | Lv. 10 |
| Drowned Hopes | Lv. 22 |
| The Burning Blooms | Lv. 15 |
| Need to Know | Lv. 25 |
| The Roots that Bind | Lv. 15 |
| A Tribe Apart | Lv. 15 |
| The Promontory | Lv. 17 |
| Thirst for the Hunt | Lv. 17 |
| The Wound in the Sand | Lv. 19 |
| The Gate of the Vanquished | Lv. 15 |
| The Deluge | Lv. 15 |
| Signal Spike | Lv. 16 |
| Breaking Even | Lv. 18 |
| A Soldier's March | Lv. 18 |
| Blood for Blood | Lv. 19 |
| The Second Verse | Lv. 25 |
| The Valley of the Fallen | Lv. 28 |
| The Way Home | Lv. 32 |
| The Blood Choke | Lv. 27 |
| Forbidden Legacy | Lv. 30 |
| What Was Lost | Lv. 30 |
| In the Fog | Lv. 20 |
| Lofty Ambitions | Lv. 24 |
| Boom or Bust | Lv. 24 |
| The Splinter Within | Lv. 39 |
| In His Wake | Lv. 40 |
| A Friend in the Dark | Lv. 42 |
Comment
Author

The Splinter Within Side Quest Walkthrough
Rankings
- We could not find the message board you were looking for.
Gaming News

![Pokémon FireRed Review [Switch First Impressions] | As Beautiful As the Day We Left Them](https://img.game8.co/4427482/3d5f77da7bd7c1ed4fa09591077cd864.jpeg/thumb)


Popular Games

Genshin Impact Walkthrough & Guides Wiki
Honkai: Star Rail Walkthrough & Guides Wiki
Monster Hunter Wilds Walkthrough & Guides Wiki
Arknights: Endfield Walkthrough & Guides Wiki
Umamusume: Pretty Derby Walkthrough & Guides Wiki
Wuthering Waves Walkthrough & Guides Wiki
Pokemon TCG Pocket (PTCGP) Strategies & Guides Wiki
Digimon Story: Time Stranger Walkthrough & Guides Wiki
Palworld Walkthrough & Guides Wiki
Zenless Zone Zero Walkthrough & Guides Wiki


Recommended Games
Fire Emblem Heroes (FEH) Walkthrough & Guides Wiki
Diablo 4: Vessel of Hatred Walkthrough & Guides Wiki
Pokemon Brilliant Diamond and Shining Pearl (BDSP) Walkthrough & Guides Wiki
Super Smash Bros. Ultimate Walkthrough & Guides Wiki
Yu-Gi-Oh! Master Duel Walkthrough & Guides Wiki
Elden Ring Shadow of the Erdtree Walkthrough & Guides Wiki
Monster Hunter World Walkthrough & Guides Wiki
The Legend of Zelda: Tears of the Kingdom Walkthrough & Guides Wiki
Persona 3 Reload Walkthrough & Guides Wiki
Cyberpunk 2077: Ultimate Edition Walkthrough & Guides Wiki


All rights reserved
©2021 Sony Interactive Entertainment Europe. Developed by Guerrilla. Horizon Forbidden West is a trademark of Sony Interactive Entertainment LLC.
Sony Interactive Entertainment Privacy Policy & EULA
The copyrights of videos of games used in our content and other intellectual property rights belong to the provider of the game.
The contents we provide on this site were created personally by members of the Game8 editorial department.
We refuse the right to reuse or repost content taken without our permission such as data or images to other sites.