Best Builds Guide
┣ Complete Quests → Quest Walkthroughs
┣ Learn the Best Skills → Best Skills
┣ Collect Gear → List of Weapons / Outfits
┣ Collect All Legendaries → All Legendary Weapons/Outfits
┗ Take Down Machines → List of Enemy Machines
★The Ver. 1.08 Patch is now Available!
Looking for the best build in Horizon Forbidden West? Game8's got you covered! Read this guide to find out which builds are the best on early up to the late part of the game.
List of Contents
Best Build for Early Game
| Jump to a Section! | ||
|---|---|---|
| Hunter Build | Warrior Build | Survivor Build |
| Machine Master Build | Infiltrator Build | Trapper Build |
Best Hunter Build for Early Game
| Best Weapon and Armor | ||
|---|---|---|
| Name | Rarity | How to Get |
 Nora Sentinel Nora Sentinel
|
Rare | Stitchers or Hunters in Barren Light, near the base, and near LATOPOLIS |
 Fire Hunter Bow Fire Hunter Bow
|
Uncommon | Hunters in Chainscrape and Hunting Grounds: The Daunt |
 Knockdown Sharpshot Bow Knockdown Sharpshot Bow
|
Uncommon | Hunters in Barren Light |
| Best Weapon Modifications | ||
| Fire Damage | Impact Damage | Draw Speed |
| Best Outfit Modifications | ||
| Acid Defense | Melee Defense | Ranged Defense |
| Best Skills | ||
 Concentration+ Concentration+
|
 Deep Concentration Deep Concentration
|
 Concentration Regen Concentration Regen
|
 Weapon Stamina+ Weapon Stamina+
|
 High Volley High Volley
|
 Stamina Regen Stamina Regen
|
| Valor Surge: Ranged Master | ||
This build focuses on balanced gameplay while making good use of weapons that can easily exploit the machines' weaknesses at the early stages of the game.
Best Warrior Build for Early Game
| Best Weapon and Armor | ||
|---|---|---|
| Name | Rarity | How to Get |
 Oseram Explorer Oseram Explorer
|
Uncommon | Stitchers or Hunters in Chainscrape |
 Swift Warrior Bow Swift Warrior Bow
|
Uncommon | Hunters in Barren Light |
 Explosive Blastsling Explosive Blastsling
|
Uncommon | Hunters in Barren Light |
| Best Weapon Modifications | ||
| Critical Hit Chance | Impact Damage | Draw Speed |
| Best Outfit Modifications | ||
| Fire Defense | Melee Defense | Ranged Defense |
| Best Skills | ||
 Nora Warrior Nora Warrior
|
 Block Breaker Block Breaker
|
 Melee Damage Melee Damage
|
 Critical Strike+ Critical Strike+
|
 Energized Duration Energized Duration
|
 Resonator Blast+ Resonator Blast+
|
| Valor Surge: Critical Boost | ||
This build revolves around close-range fights that maximize the use of your spear. The Warrior Bow and Blastsling will allow you to fight in range if the situation needs to be.
Best Survivor Build for Early Game
| Best Weapon and Armor | ||
|---|---|---|
| Name | Rarity | How to Get |
 Carja Shadow Carja Shadow
|
Rare | Stitchers or Hunters in Plainsong, The Maw of the Arena, and Scalding Spear |
 Explosive Blastsling Explosive Blastsling
|
Uncommon | Hunters in Barren Light |
 Slicing Shredder Gauntlet Slicing Shredder Gauntlet
|
Rare | Hunters in Barren Light, Plainsong, Hunting Grounds: Sheerside Mountains, and near LATOPOLIS |
| Best Weapon Modifications | ||
| Tear Damage | Impact Damage | Draw Speed |
| Best Outfit Modifications | ||
| Acid Defense | Melee Defense | Ranged Defense |
| Best Skills | ||
 Bouncing Bomb Bouncing Bomb
|
 Triple Shredder Triple Shredder
|
 Low Health Regen Low Health Regen
|
 Potion Proficiency Potion Proficiency
|
 Low Health Defense Low Health Defense
|
 Potent Medicine Potent Medicine
|
| Valor Surge: Toughened | ||
This build allows you to become more suitable for a longer battle. It will also let you fight enemies from afar or at close range, depending on what the situation needs.
Best Machine Master Build for Early Game
| Best Weapon and Armor | ||
|---|---|---|
| Name | Rarity | How to Get |
 Nora Huntress Nora Huntress
|
Uncommon | Stitchers or Hunters in Chainscrape |
 Utaru Whisperer Utaru Whisperer
|
Rare | Reward from The Dying Lands quest |
 Impact Spike Thrower Impact Spike Thrower
|
Uncommon | Complete all Barren Light Salvage Contracts |
 Ropecaster Ropecaster
|
Uncommon | Hunters in Barren Light and Hunting Grounds: The Daunt |
| Best Weapon Modifications | ||
| Knockdown Power | Impact Damage | Draw Speed |
| Best Outfit Modifications | ||
| Acid Defense | Melee Defense | Ranged Defense |
| Best Skills | ||
 Spike Trap Spike Trap
|
 Machine Damage Machine Damage
|
 Propelled Spike Propelled Spike
|
 Heavy Lifter Heavy Lifter
|
 Efficient Repair Efficient Repair
|
 Override Subroutines Override Subroutines
|
| Valor Surge: Part Breaker | ||
This build will help you override machines much easier and make them more suitable for combat. Use the Spike Thrower to assist and defeat enemies from a distance.
Best Infiltrator Build for Early Game
| Best Weapon and Armor | ||
|---|---|---|
| Name | Rarity | How to Get |
 Nora Huntress Nora Huntress
|
Uncommon | Stitchers or Hunters in Chainscrape |
 Utaru Whisperer Utaru Whisperer
|
Rare | Reward from The Dying Lands quest |
 Knockdown Sharpshot Bow Knockdown Sharpshot Bow
|
Uncommon | Hunters in Barren Light |
 Explosive Tripcaster Explosive Tripcaster
|
Uncommon | Hunters in Barren Light and Hunting Grounds: The Daunt |
| Best Weapon Modifications | ||
| Tear Damage | Impact Damage | Critical Hit Chance |
| Best Outfit Modifications | ||
| Acid Defense | Melee Defense | Ranged Defense |
| Best Skills | ||
 Stealth Tear+ Stealth Tear+
|
 Stealth Ranged+ Stealth Ranged+
|
 Silent Strike Heal Silent Strike Heal
|
 Low Profile Low Profile
|
 Quiet Spear Quiet Spear
|
 Quiet Movement Quiet Movement
|
| Valor Surge: Stealth Stalker | ||
This build helps you play more stealthily and take enemies out from long range. You can also set up some traps using the Tripcaster in case of enemies notice you and now coming close to get you.
Best Trapper Build for Early Game
| Best Weapon and Armor | ||
|---|---|---|
| Name | Rarity | How to Get |
 Carja Wanderer Carja Wanderer
|
Rare | Stitchers or Hunters in The Maw of the Arena, The Bulwark, and Scalding Spear |
 Forgefire Tripcaster Forgefire Tripcaster
|
Rare | Hunters in Plainsong and near LATOPOLIS |
 Explosive Tripcaster Explosive Tripcaster
|
Uncommon | Hunters in Barren Light and Hunting Grounds: The Daunt |
 Fire Hunter Bow Fire Hunter Bow
|
Uncommon | Hunters in Chainscrape and Hunting Grounds: The Daunt |
| Best Weapon Modifications | ||
| Knockdown Power | Fire Damage | Shock Damage |
| Best Outfit Modifications | ||
| Acid Defense | Melee Defense | Ranged Defense |
| Best Skills | ||
 Quick Trapper Quick Trapper
|
 Nimble Crafter Nimble Crafter
|
 Skilled Salvager Skilled Salvager
|
 Trap Limit Trap Limit
|
 Resilient Trapper Resilient Trapper
|
 Food Duration Food Duration
|
| Valor Surge: Elemental Fury | ||
This build will let you maximize the use of your traps and their effectiveness in battle, buff from food, and elemental build-up and damage. You will need to run away and lure enemies into your traps to use this build effectively.
Best Build for Mid Game
| Jump to a Section! | ||
|---|---|---|
| Hunter Build | Warrior Build | Survivor Build |
| Machine Master Build | Infiltrator Build | Trapper Build |
Best Hunter Build for Mid Game
| Best Weapon and Armor | ||
|---|---|---|
| Name | Rarity | How to Get |
 Nora Sentinel Nora Sentinel
|
Rare | Stitchers or Hunters in Barren Light, near the base, and near LATOPOLIS |
 Pyre Hunter Bow Pyre Hunter Bow
|
Rare | Hunters in The Maw of the Arena and The Bulwark |
 Cleaving Sharpshot Bow Cleaving Sharpshot Bow
|
Rare | Given by Dekka during The Broken Sky quest |
 Hammerburst Boltblaster Hammerburst Boltblaster
|
Rare | Hunters in Stone Crest and The Bulwark |
| Best Weapon Modifications | ||
| Fire Damage | Concentration Damage | Draw Speed |
| Acid Damage | Explosive Damage | Overdraw Damage |
| Best Outfit Modifications | ||
| Acid Defense | Melee Defense | Ranged Defense |
| Best Skills | ||
 Deep Concentration Deep Concentration
|
 Concentration Regen Concentration Regen
|
 Ammo Expert Ammo Expert
|
 Spread Blast Spread Blast
|
 Triple Notch Triple Notch
|
 Sustained Burst Sustained Burst
|
 Heavy Weapon+ Heavy Weapon+
|
 Weapon Stamina+ Weapon Stamina+
|
 Valor Surge Master Valor Surge Master
|
| Valor Surge: Ranged Master | ||
This build is more effective at mid-range encounters. You can start off by using the Cleaving Sharpshot Bow or Pyre Hunter Bow in a fight and then rain them down with bolts using the Hammerburst Boltblaster.
Best Warrior Build for Mid Game
| Best Weapon and Armor | ||
|---|---|---|
| Name | Rarity | How to Get |
 Oseram Wayfarer Oseram Wayfarer
|
Rare | Stitchers or Hunters in Plainsong and The Maw of the Arena |
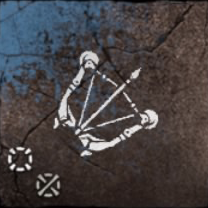 Melee Warrior Bow Melee Warrior Bow
|
Rare | Hunters in Thornmarsh and Scalding Spear |
 Acid Warrior Bow Acid Warrior Bow
|
Rare | Hunters in Plainsong and Carja Camp |
 Frostbite Warrior Bow Frostbite Warrior Bow
|
Rare | Hunters in The Bulwark, near the base, and Scalding Spear |
| Best Weapon Modifications | ||
| Critical Hit Chance | Close Range Damage | Draw Speed |
| Melee Follow Up | Multiple Enemy Damage | Agility Damage |
| Best Outfit Modifications | ||
| Shock Defense | Melee Defense | Ranged Defense |
| Best Skills | ||
 Nora Warrior Nora Warrior
|
 Block Breaker Block Breaker
|
 Melee Damage Melee Damage
|
 Halfmoon Slash Halfmoon Slash
|
 Melee Detonator Melee Detonator
|
 Resonator Damage Resonator Damage
|
 Power Attack+ Power Attack+
|
 Resonator Blast+ Resonator Blast+
|
 Critical Strike+ Critical Strike+
|
| Valor Surge: Critical Boost | ||
This build increases your spear damage even further and gives you more choices and combos to take out from a melee range. The Warrior Bows from this build will help you exploit enemies' weaknesses if it's hard to take them out using your spear only.
Best Survivor Build for Mid Game
| Best Weapon and Armor | ||
|---|---|---|
| Name | Rarity | How to Get |
 Carja Shadow Carja Shadow
|
Rare | Stitchers or Hunters in Plainsong, The Maw of the Arena, and Scalding Spear |
 Icefire Blastsling Icefire Blastsling
|
Rare | Hunters in The Maw of the Arena and The Bulwark |
 Ironeater Shredder Gauntlet Ironeater Shredder Gauntlet
|
Rare | Hunters in Salt Bite, The Bulwark, and Scalding Spear |
 Siege Blastsling Siege Blastsling
|
Rare | Hunters in Thornmarsh and Scalding Spear |
| Best Weapon Modifications | ||
| Tear Damage | Impact Damage | Draw Speed |
| Close Range Damage | Explosive Damage | Overdraw Damage |
| Best Outfit Modifications | ||
| Acid Defense | Melee Defense | Ranged Defense |
| Best Skills | ||
 Bouncing Bomb Bouncing Bomb
|
 Triple Shredder Triple Shredder
|
 Low Health Regen Low Health Regen
|
 Low Health Defense Low Health Defense
|
 Shredder Mine Shredder Mine
|
 Potent Medicine Potent Medicine
|
 Low Health Ranged Low Health Ranged
|
 Valor on Impact Valor on Impact
|
|
| Valor Surge: Toughened | ||
This build offers close-range and long-range options for players and allows them to have high survivability in battle. The damage will come from the Siege Blastsling explosives and elemental build-up from the Ironeater Shredder and Icefire Blastsling.
Best Machine Master Build for Mid Game
| Best Weapon and Armor | ||
|---|---|---|
| Name | Rarity | How to Get |
 Tenakth Dragoon Tenakth Dragoon
|
Very Rare | Stitchers or Hunters in Fall's Edge and Legacy's Landfall |
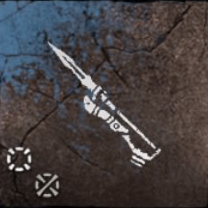 Bellowblast Spike Thrower Bellowblast Spike Thrower
|
Rare | Hunters in Stone Crest and The Bulwark |
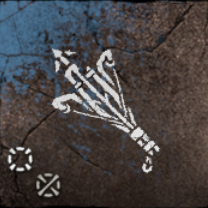 Eventide Ropecaster Eventide Ropecaster
|
Rare | Hunters in Salt Bite |
| Best Weapon Modifications | ||
| Knockdown Power | Impact Damage | Draw Speed |
| Explosive Damage | Shock Damage | |
| Best Outfit Modifications | ||
| Frost Defense | Melee Defense | Ranged Defense |
| Best Skills | ||
 Spike Trap Spike Trap
|
 Machine Damage Machine Damage
|
 Propelled Spike Propelled Spike
|
 Machine Damage Machine Damage
|
 Mounted Defense Mounted Defense
|
 Override Subroutines Override Subroutines
|
 Machine Elemental+ Machine Elemental+
|
 Efficient Repair Efficient Repair
|
 Machine Health Machine Health
|
| Valor Surge: Chain Burst | ||
This build will power up your machine in combat even further. The Spike Thrower and Ropecaster on this build will help you and your machine get the upper hand in battle.
Best Infiltrator Build for Mid Game
| Best Weapon and Armor | ||
|---|---|---|
| Name | Rarity | How to Get |
 Utaru Whisperer Utaru Whisperer
|
Rare | Reward from The Dying Lands quest |
 Cleaving Sharpshot Bow Cleaving Sharpshot Bow
|
Rare | Given by Dekka during The Broken Sky quest |
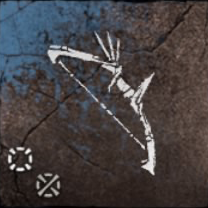 Exacting Sharpshot Bow Exacting Sharpshot Bow
|
Rare | Hunters in The Bulwark and Cliffwatch |
 Beamwire Tripcaster Beamwire Tripcaster
|
Rare | Hunters in The Maw of the Arena and Scalding Spear |
| Best Weapon Modifications | ||
| Concentration Damage | Impact Damage | Critical Hit Chance |
| Knockdown Damage | Sharpshot Tear Damage | Draw Speed |
| Best Outfit Modifications | ||
| Acid Defense | Melee Defense | Ranged Defense |
| Best Skills | ||
 Stealth Tear+ Stealth Tear+
|
 Stealth Ranged+ Stealth Ranged+
|
 Silent Strike Heal Silent Strike Heal
|
 Braced Shot Braced Shot
|
 Silent Strike Gain Silent Strike Gain
|
 Stealth Tear+ Stealth Tear+
|
 Quiet Spear Quiet Spear
|
 Low Profile Low Profile
|
|
| Valor Surge: Radial Blast | ||
This build is an upgraded version of the Early Game Infiltrator Build, but this build focuses more on long-range shooting rather than getting close and doing a Silent Strike. The Radial Blast and Beamwire Tripcaster will help you defend yourself if you get surrounded by enemies.
Best Trapper Build for Mid Game
| Best Weapon and Armor | ||
|---|---|---|
| Name | Rarity | How to Get |
 Carja Trader Carja Trader
|
Very Rare | Stitchers or Hunters in Tide's Reach and Legacy's Landfall |
 Canister Ropecaster Canister Ropecaster
|
Rare | Hunters in Hunting Grounds: Plainsong, The Bulwark, and Cliffwatch |
 Perimeter Tripcaster Perimeter Tripcaster
|
Very Rare | Reward from Blood for Blood quest |
 Pyre Hunter Bow Pyre Hunter Bow
|
Rare | Hunters in The Maw of the Arena and The Bulwark |
 Frost Hunter Bow Frost Hunter Bow
|
Rare | Hunters in Plainsong, Hunting Grounds: Sheerside Mountains, and near LATOPOLIS |
 Shock Warrior Bow Shock Warrior Bow
|
Uncommon | Talk to the Grounds Keeper at Hunting Grounds: The Daunt |
| Best Weapon Modifications | ||
| Knockdown Power | Fire Damage | Shock Damage |
| Frost Damage | Draw Speed | Overdraw Damage |
| Best Outfit Modifications | ||
| Acid Defense | Melee Defense | Ranged Defense |
| Best Skills | ||
 Quick Trapper Quick Trapper
|
 Nimble Crafter Nimble Crafter
|
 Skilled Salvager Skilled Salvager
|
 Trap Limit Trap Limit
|
 Resilient Trapper Resilient Trapper
|
 Food Duration Food Duration
|
 Penetrating Rope Penetrating Rope
|
 Quick Wire Quick Wire
|
|
| Valor Surge: Trap Specialist | ||
This build is pretty much the same as the best Early Game Trapper Build, but it will give you more variations of traps and options to fight back head-on. You will become more deadly if you can maximize the use of the Canister Ropecaster, together with the Hunter Bows and Warrior Bow.
Best Build for Late Game
| Jump to a Section! | ||
|---|---|---|
| Hunter Build | Warrior Build | Survivor Build |
| Machine Master Build | Infiltrator Build | Trapper Build |
Best Hunter Build for Late Game
| Best Weapon and Armor | ||
|---|---|---|
| Name | Rarity | How to Get |
 Tenakth Skirmisher Tenakth Skirmisher
|
Very Rare | Stitchers or Hunters at Scalding Spear and near the base during the late game. |
 Nora Thunder Warrior Nora Thunder Warrior
|
Legendary | Prize Master at the Arena |
 Marshal Hunter Bow Marshal Hunter Bow
|
Very Rare | Prize Master at the Arena |
 Death-Seeker's Shadow Death-Seeker's Shadow
|
Legendary | Prize Master at the Arena |
 Icestorm Boltblaster Icestorm Boltblaster
|
Very Rare | Abadund in Hidden Ember; Hunters in Thornmarsh and near the base during the late game |
 The Blast Forge The Blast Forge
|
Legendary | Prize Master at the Arena |
| Best Weapon Modifications | ||
| Instant Burning Chance | Draw Speed | Reload Speed |
| Instant Brittle Chance | Explosive Damage | Overdraw Damage |
| Long-Range Damage | Corroding Enemy Damage | Instant Confused Chance |
| Best Outfit Modifications | ||
| All Defense | Fire and Frost Defense | Purgewater and Plasma Defense |
| Best Skills | ||
| All Hunter Skills | ||
| Valor Surge: Powershots | ||
This build is the most flexible build of all of them. It also covers most of the elemental effects, which will allow you to take on every machine there is. They are also worth upgrading, especially the legendary ones, as you can use them when you start clearing all side contents on the post-game part of the game.
Best Warrior Build for Late Game
| Best Weapon and Armor | ||
|---|---|---|
| Name | Rarity | How to Get |
 Tenakth Marauder Tenakth Marauder
|
Very Rare | Stitchers or Hunters in Thornmarsh and near the base during the late game |
 Oseram Striker Oseram Striker
|
Very Rare | Abadund in Hidden Ember; Stitchers or Hunters in Fall's Edge and near the base during the late game |
 Barrage Blastsling Barrage Blastsling
|
Very Rare | Hunters in Lowland's Path |
 Adhesive Warrior Bow Adhesive Warrior Bow
|
Very Rare | Abadund in Hidden Ember; Hunters in Lowland's Path |
 Firestorm Warrior Bow Firestorm Warrior Bow
|
Very Rare | Reward from The Gate of the Vanquished quest |
| Best Weapon Modifications | ||
| Critical Hit Chance | Close Range Damage | Instant Confused Chance |
| Melee Follow Up | Multiple Enemy Damage | Agility Damage |
| Instant Slowed Chance | Multiple Enemy Damage | High Ground Damage |
| Best Outfit Modifications | ||
| All Defense | Ranged Defense | Melee Defense |
| Best Skills | ||
| All Warrior Skill | ||
| Valor Surge: Critical Boost | ||
You can attain the most damage your spear can do, as well as all the melee and range combo you can do on this build. You will also have enough elemental damage and effects to take on other enemies that are difficult to battle with using just your spear.
Best Survivor Build for Late Game
| Best Weapon and Armor | ||
|---|---|---|
| Name | Rarity | How to Get |
 Tenakth Sky Climber Tenakth Sky Climber
|
Very Rare | Reward from First to Fly quest |
 Tenakth Vanquisher Tenakth Vanquisher
|
Legendary | Prize Master at the Arena |
 Ripsteel Shredder Gauntlet Ripsteel Shredder Gauntlet
|
Very Rare | Hunters in Tide's Reach |
 Thunderbolt Shredder Gauntlet Thunderbolt Shredder Gauntlet
|
Very Rare | Abadund in Hidden Ember; Hunters in The Raintrace and Thornmarsh |
 Rampart Blastsling Rampart Blastsling
|
Very Rare | Prize Master at the Arena |
 Corrosive Blastsling Corrosive Blastsling
|
Very Rare | Hunters in Thornmarsh, Scalding Spear, and near the base during the late game |
| Best Weapon Modifications | ||
| Long-Range Damage | Corrosive Damage | Instant Corroding Chance |
| Instant Brittle Chance | Explosive Damage | Corroding Enemy Damage |
| Instant Slowed Chance | Reload Speed | Draw Speed |
| Best Outfit Modifications | ||
| All Defense | Purgewater and Plasma Defense | Acid Defense |
| Best Skills | ||
| All Survivor Skill | ||
| Valor Surge: Toughened, Elemental Fury, or Overshield | ||
There are two paths you can take on this build. It will depend on the Valor Surge you will get on this build. You can be more offensive with your playstyle if you equip the Elemental Fury, as it increases your elemental build-up while also giving you high elemental resistance. Players who like defensive playstyle should get the Toughened or Overshield to get the most defense they can possibly get.
Best Machine Master Build for Late Game
| Best Weapon and Armor | ||
|---|---|---|
| Name | Rarity | How to Get |
 Tenakth Recon Tenakth Recon
|
Very Rare | Stitchers or Hunters in Thornmarsh and near the base during the late game |
 Tenakth Tactician Tenakth Tactician
|
Legendary | Stitchers or Hunters in Thornmarsh |
 Glowblast Spike Thrower Glowblast Spike Thrower
|
Very Rare | Prize Master at the Arena |
 Vindicator Spike Thrower Vindicator Spike Thrower
|
Very Rare | Complete the Reinforced Components Salvage Contract in The Raintrace |
 Elite Ropecaster Elite Ropecaster
|
Very Rare | Hunters in Thornmarsh and near the base during the late game |
| Best Weapon Modifications | ||
| Knockdown Power | Impact Damage | Corroding Enemy Damage |
| Instant Corroding Chance | Explosive Damage | Instant Slowed Chance |
| Instant Confused Chance | Reload Speed | Draw Speed |
| Best Outfit Modifications | ||
| All Defense | Melee Defense | Ranged Defense |
| Best Skills | ||
| All Survivor Skill | ||
| Valor Surge: Chain Burst | ||
This build maximizes the use of your machine and your Spike Throwers. The most important item on this build is the weapon modifications, as they will help you increase your damage and put status effects on enemies that will give you the upper hand in battle. Focus on upgrading the Tenakth Tactician and Glowblast Spike Thrower, as you will still use them when clearing all the side contents in the game.
Best Infiltrator Build for Late Game
| Best Weapon and Armor | ||
|---|---|---|
| Name | Rarity | How to Get |
 Nora Tracker Nora Tracker
|
Very Rare | Stitchers or Hunters in Thornmarsh and near the base during the late game |
 Utaru Winterweave Utaru Winterweave
|
Legendary | Stitchers or Hunters in Thornmarsh |
 Glowblast Sharpshot Bow Glowblast Sharpshot Bow
|
Very Rare | Hunters in The Raintrace, Thornmarsh, and near the base during the late game |
 Marshal Hunter Bow Marshal Hunter Bow
|
Very Rare | Prize Master at the Arena |
 Forgefall Forgefall
|
Legendary | Prize Master at the Arena |
| Best Weapon Modifications | ||
| Concentration Damage | Stealth Damage | Berserk |
| Knockdown Damage | Sharpshot Tear Damage | Draw Speed |
| Long-Range Damage | Plasma Damage | Instant Confused Chance |
| Best Outfit Modifications | ||
| All Defense | Melee Defense | Ranged Defense |
| Best Skills | ||
| All Infiltrator Skill | ||
| Valor Surge: Radial Blast or Stealth Stalker | ||
This build offers the best stealth stats when entering the later part of this game. However, this build focuses more on long-range stealth rather than getting close for a Silent Strike. Both of them will help you defend yourself. Just choose the Valor Surge depending on which one have the higher level than the other.
Best Trapper Build for Late Game
| Best Weapon and Armor | ||
|---|---|---|
| Name | Rarity | How to Get |
 Carja Trader Carja Trader
|
Very Rare | Stitchers or Hunters in Tide's Reach and Legacy's Landfall |
 Carja Stalker Elite Carja Stalker Elite
|
Legendary | Prize Master at the Arena |
 Perimeter Tripcaster Perimeter Tripcaster
|
Very Rare | Reward from Blood for Blood quest |
 Delver Tripcaster Delver Tripcaster
|
Very Rare | Hunters in Fall's Edge |
 Death-Seeker's Shadow Death-Seeker's Shadow
|
Legendary | Prize Master at the Arena |
 Marshal Hunter Bow Marshal Hunter Bow
|
Very Rare | Prize Master at the Arena |
 Glowblast Sharpshot Bow Glowblast Sharpshot Bow
|
Very Rare | Hunters in The Raintrace, Thornmarsh, and near the base during the late game |
| Best Weapon Modifications | ||
| Knockdown Power | Corroding Enemy Damage | Explosive Damage |
| Instant Corroding Chance | Instant Confused Chance | Instant Slowed Chance |
| Reload Speed | Draw Speed | |
| Best Outfit Modifications | ||
| All Defense | Melee Defense | Ranged Defense |
| Best Skills | ||
| All Trapper Skill | ||
| Valor Surge: Trap Specialist | ||
This build favors patient players as they will have to set up a couple of traps before taking on enemies. When fighting a single enemy, place your traps on the field, hit it using a Sharpshot Bow, and lure it to damage and possibly kill it. Repeat the process until you kill the target.
When fighting a group of enemies, you can make 1 or 2 targets go berserk and help you fight their allies while you're setting up traps or hitting them from behind.
Best Build for Post Game
| Jump to a Section! | ||
|---|---|---|
| Hunter Build | Warrior Build | Survivor Build |
| Machine Master Build | Infiltrator Build | Trapper Build |
Best Hunter Build for Post Game
| Best Weapon and Armor | ||
|---|---|---|
| Name | Rarity | How to Get |
 Nora Thunder Warrior Nora Thunder Warrior
|
Legendary | Prize Master at the Arena |
 Marshal Hunter Bow Marshal Hunter Bow
|
Very Rare | Prize Master at the Arena |
 The Sun Scourge The Sun Scourge
|
Legendary | Complete All Rebel Camp missions in the game |
 Death-Seeker's Shadow Death-Seeker's Shadow
|
Legendary | Prize Master at the Arena |
 Icestorm Boltblaster Icestorm Boltblaster
|
Very Rare | Abadund in Hidden Ember; Hunters in Thornmarsh and near the base during the late game |
 The Blast Forge The Blast Forge
|
Legendary | Prize Master at the Arena |
| Best Weapon Modifications | ||
| Shock Damage | Draw Speed | Reload Speed |
| Acid and Fire | Explosive Damage | Overdraw Damage |
| Long-Range Damage | Corroding Enemy Damage | Instant Confused Chance |
| Best Skills | ||
| All Hunter Skills | ||
 Stealth Tear+ Stealth Tear+
|
 Stealth Ranged+ Stealth Ranged+
|
 Silent Strike Heal Silent Strike Heal
|
 Low Profile Low Profile
|
 Quiet Spear Quiet Spear
|
 Quiet Movement Quiet Movement
|
| Valor Surge: Powershots or Stealth Stalker | ||
This is the best hunter build you can get in the endgame. It will give you more options to approach enemies in battle and how you can kill them. Focus on getting and upgrading them and make all enemies bow down to you. Also, prioritize upgrading the Infiltrator Skill Tree after obtaining all the Hunter Skills to help you become more stealthy and do stealth kills.
Best Warrior Build for Post Game
| Best Weapon and Armor | ||
|---|---|---|
| Name | Rarity | How to Get |
 Oseram Artificier Oseram Artificier
|
Legendary | Complete all salvage contracts in the game |
 Barrage Blastsling Barrage Blastsling
|
Very Rare | Hunters in Lowland's Path |
 Carja's Bane Carja's Bane
|
Legendary | Complete all 4 Gauntlet Runs |
 Firestorm Warrior Bow Firestorm Warrior Bow
|
Very Rare | Reward from The Gate of the Vanquished quest |
 Wings of the Ten Wings of the Ten
|
Legendary | Collect all 12 Black Boxes in the game |
| Best Weapon Modifications | ||
| Critical Hit Chance | Close Range Damage | Instant Confused Chance |
| Melee Follow Up | Multiple Enemy Damage | Agility Damage |
| Instant Slowed Chance | Impact Damage | High Ground Damage |
| Best Skills | ||
| All Warrior Skill | ||
 Bouncing Bomb Bouncing Bomb
|
 Valor on Impact Valor on Impact
|
 Low Health Regen Low Health Regen
|
 Potion Proficiency Potion Proficiency
|
 Low Health Defense Low Health Defense
|
 Potent Medicine Potent Medicine
|
 Medicine Capacity Medicine Capacity
|
||
| Valor Surge: Critical Boost or Toughened | ||
Punish your enemies in the endgame at close range with this warrior build. Attack them successively using melee combos and Warrior Bow arrows. You can be more reckless by getting the Survivor Skills after unlocking all the Warrior Skills.
Best Survivor Build for Post Game
| Best Weapon and Armor | ||
|---|---|---|
| Name | Rarity | How to Get |
 Tenakth Vanquisher Tenakth Vanquisher
|
Legendary | Prize Master at the Arena |
 Ancestor's Return Ancestor's Return
|
Legendary | Collect all 9 Ornamnets gathered from Relic Ruins and give them to Stemmur in Dunehollow |
 Thunderbolt Shredder Gauntlet Thunderbolt Shredder Gauntlet
|
Very Rare | Abadund in Hidden Ember; Hunters in The Raintrace and Thornmarsh |
 Wings of the Ten Wings of the Ten
|
Legendary | Collect all 12 Black Boxes in the game |
 Corrosive Blastsling Corrosive Blastsling
|
Very Rare | Hunters in Thornmarsh, Scalding Spear, and near the base during the late game |
| Best Weapon Modifications | ||
| Long-Range Damage | Corrosive Damage | Instant Corroding Chance |
| Acid Damage | Explosive Damage | Corroding Enemy Damage |
| Instant Slowed Chance | Reload Speed | Draw Speed |
| Best Skills | ||
| All Survivor Skill | ||
 Concentration+ Concentration+
|
 Deep Concentration Deep Concentration
|
 Concentration Regen Concentration Regen
|
 Weapon Stamina+ Weapon Stamina+
|
 Valor Surge Master Valor Surge Master
|
 Stamina Regen Stamina Regen
|
| Valor Surge: Toughened or Ranged Master | ||
This Survivor Build for post-game focuses more on your Shredder Gauntlets and elemental damaging weapons. Try to get in a distance to charge up your shredder while inflicting elemental damage on enemies. Getting the Hunter Skills will help you battle enemies at long range, so be sure to prioritize them after completing the Survivor Skill Tree.
Best Machine Master Build for Post Game
| Best Weapon and Armor | ||
|---|---|---|
| Name | Rarity | How to Get |
 Tenakth Tactician Tenakth Tactician
|
Legendary | Stitchers or Hunters in Thornmarsh |
 Glowblast Spike Thrower Glowblast Spike Thrower
|
Very Rare | Prize Master at the Arena |
 The Skykiller The Skykiller
|
Legendary | Reward from The Way Home quest |
 Elite Ropecaster Elite Ropecaster
|
Very Rare | Hunters in Thornmarsh and near the base during the late game |
 Forgefall Forgefall
|
Legendary | Prize Master at the Arena |
 Marshal Hunter Bow Marshal Hunter Bow
|
Very Rare | Prize Master at the Arena |
| Best Weapon Modifications | ||
| Knockdown Power | Impact Damage | Plasma and Shock |
| Instant Corroding Chance | Explosive Damage | Instant Slowed Chance |
| Instant Confused Chance | Reload Speed | Draw Speed |
| Best Skills | ||
| All Machine Master Skill | ||
 Stealth Tear+ Stealth Tear+
|
 Stealth Ranged+ Stealth Ranged+
|
 Silent Strike Heal Silent Strike Heal
|
 Low Profile Low Profile
|
 Quiet Spear Quiet Spear
|
 Quiet Movement Quiet Movement
|
| Valor Surge: Chain Burst or Stealth Stalker | ||
Get the best war machine and the best Spike Thrower on this build. It will allow you to beat your enemies together with your overridden machine in the open world. You can get the Infiltrator Skills to help you sneak up to any machines to override them after getting all Machine Master Skills.
Best Infiltrator Build for Post Game
| Best Weapon and Armor | ||
|---|---|---|
| Name | Rarity | How to Get |
 Utaru Winterweave Utaru Winterweave
|
Legendary | Stitchers or Hunters in Thornmarsh |
 Death-Seeker's Shadow Death-Seeker's Shadow
|
Legendary | Prize Master at the Arena |
 Marshal Hunter Bow Marshal Hunter Bow
|
Very Rare | Prize Master at the Arena |
 Forgefall Forgefall
|
Legendary | Prize Master at the Arena |
 The Sun Scourge The Sun Scourge
|
Legendary | Complete All Rebel Camp missions in the game |
| Best Weapon Modifications | ||
| Concentration Damage | Stealth Damage | Berserk |
| Knockdown Damage | Sharpshot Tear Damage | Draw Speed |
| Long-Range Damage | Plasma and Shock | Instant Confused Chance |
| Best Skills | ||
| All Infiltrator Skill | ||
 Concentration+ Concentration+
|
 Deep Concentration Deep Concentration
|
 Concentration Regen Concentration Regen
|
 Weapon Stamina+ Weapon Stamina+
|
 Valor Surge Master Valor Surge Master
|
 Stamina Regen Stamina Regen
|
| Valor Surge: Radial Blast or Stealth Stalker | ||
If stealth is your thing in Horizon Forbidden West, this build is perfect for you. However, this build focuses more on long-range stealth than close-range because of the weapons. Get the Hunter Skills also to make this build suitable at mid-range fights after completing all the Infiltrator Skills.
Best Trapper Build for Post Game
| Best Weapon and Armor | ||
|---|---|---|
| Name | Rarity | How to Get |
 Carja Stalker Elite Carja Stalker Elite
|
Legendary | Prize Master at the Arena |
 Perimeter Tripcaster Perimeter Tripcaster
|
Very Rare | Reward from Blood for Blood quest |
 Tinker's Pride Tinker's Pride
|
Legendary | Getting Full Stripes in all 12 Hunting Grounds Trials |
 The Sun Scourge The Sun Scourge
|
Legendary | Complete All Rebel Camp missions in the game |
 Marshal Hunter Bow Marshal Hunter Bow
|
Very Rare | Prize Master at the Arena |
 Forgefall Forgefall
|
Legendary | Prize Master at the Arena |
| Best Weapon Modifications | ||
| Knockdown Power | Corroding Enemy Damage | Explosive Damage |
| Instant Corroding Chance | Instant Confused Chance | Instant Slowed Chance |
| Reload Speed | Draw Speed | Acid and Fire |
| Best Skills | ||
| All Trapper Skill | ||
 Stealth Tear+ Stealth Tear+
|
 Stealth Ranged+ Stealth Ranged+
|
 Silent Strike+ Silent Strike+
|
 Low Profile Low Profile
|
 Quiet Spear Quiet Spear
|
 Quiet Movement Quiet Movement
|
| Valor Surge: Trap Specialist or Stealth Stalker | ||
This build can help you instantly kill any enemy machine, even the largest ones. Set up all the traps you can near each other and lure them there to kill them. Finish them with your bows if the traps weren't enough to kill them. The Infiltrator Skills on this build can help you set up traps without being seen, even if you're a bit too close to them.
Horizon Forbidden West Guides
Tips and Tricks
Game Info and Settings
Gameplay Features
How-To Guides
Recommended Builds Guides
| Recommended Builds | ||
|---|---|---|
| Best Builds Guide | Best Weapons | Best Skills |
| Best Outfits and Armor | Valor Surge Tier List: What is the Best Valor Surge? | - |
Collectibles and Completion Guides
Author
improvement survey
03/2026
improving Game8's site?

Your answers will help us to improve our website.
Note: Please be sure not to enter any kind of personal information into your response.

We hope you continue to make use of Game8.
Rankings
- We could not find the message board you were looking for.
Gaming News
Popular Games

Genshin Impact Walkthrough & Guides Wiki

Honkai: Star Rail Walkthrough & Guides Wiki

Umamusume: Pretty Derby Walkthrough & Guides Wiki

Pokemon Pokopia Walkthrough & Guides Wiki

Resident Evil Requiem (RE9) Walkthrough & Guides Wiki

Monster Hunter Wilds Walkthrough & Guides Wiki

Wuthering Waves Walkthrough & Guides Wiki

Arknights: Endfield Walkthrough & Guides Wiki

Pokemon FireRed and LeafGreen (FRLG) Walkthrough & Guides Wiki

Pokemon TCG Pocket (PTCGP) Strategies & Guides Wiki
Recommended Games

Diablo 4: Vessel of Hatred Walkthrough & Guides Wiki

Fire Emblem Heroes (FEH) Walkthrough & Guides Wiki

Yu-Gi-Oh! Master Duel Walkthrough & Guides Wiki

Super Smash Bros. Ultimate Walkthrough & Guides Wiki

Pokemon Brilliant Diamond and Shining Pearl (BDSP) Walkthrough & Guides Wiki

Elden Ring Shadow of the Erdtree Walkthrough & Guides Wiki

Monster Hunter World Walkthrough & Guides Wiki

The Legend of Zelda: Tears of the Kingdom Walkthrough & Guides Wiki

Persona 3 Reload Walkthrough & Guides Wiki

Cyberpunk 2077: Ultimate Edition Walkthrough & Guides Wiki
All rights reserved
©2021 Sony Interactive Entertainment Europe. Developed by Guerrilla. Horizon Forbidden West is a trademark of Sony Interactive Entertainment LLC.
Sony Interactive Entertainment Privacy Policy & EULA
The copyrights of videos of games used in our content and other intellectual property rights belong to the provider of the game.
The contents we provide on this site were created personally by members of the Game8 editorial department.
We refuse the right to reuse or repost content taken without our permission such as data or images to other sites.


![Everwind Review [Early Access] | The Shaky First Step to A Very Long Journey](https://img.game8.co/4440226/ab079b1153298a042633dd1ef51e878e.png/thumb)

![Monster Hunter Stories 3 Review [First Impressions] | Simply Rejuvenating](https://img.game8.co/4438641/2a31b7702bd70e78ec8efd24661dacda.jpeg/thumb)


