Relic Ruins: No Man's Land Walkthrough
┣ Complete Quests → Quest Walkthroughs
┣ Learn the Best Skills → Best Skills
┣ Collect Gear → List of Weapons / Outfits
┣ Collect All Legendaries → All Legendary Weapons/Outfits
┗ Take Down Machines → List of Enemy Machines
★The Ver. 1.08 Patch is now Available!
Relic Ruins: No Man's Land is the second Relic Ruins quest you can access in Horizon Forbidden West (HFW). Read on to learn the best approach to completing this quest, as well as other hints and advice.
To complete this Quest, you will need the Igniter ability for your Spear. You can obtain this by completing the Main Quest Death's Door.
Death's Door Walkthrough and Door Code
List of Contents
Relic Ruins: No Man's Land Information
General Info
| Relic Ruins: No Man's Land | |
|---|---|
| Description | Treasures await those who dare explore the ruins of the Old World. |
| Rewards | ・5000 XP ・2 Skill Points |
| Level | 10 |
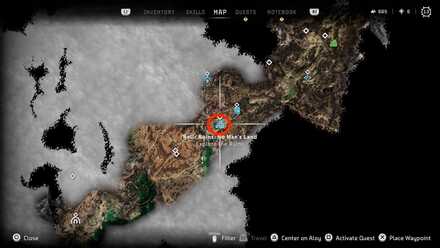
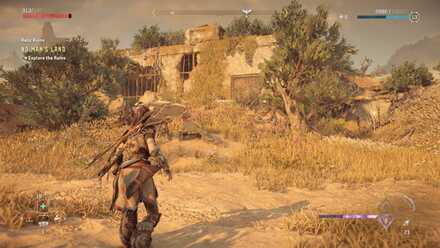
Rebel Ruins: No Man's Land Location
| World Map Location | In-Game Location |
|---|---|
 |
 |
Rebel Ruins: No Man's Land Walkthrough
How to Complete
| Objectives | |
|---|---|
| 1 | 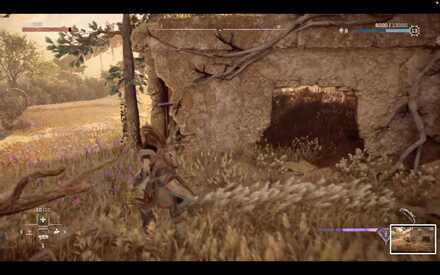 Head to the Open Area
Scanning the door with your Focus will confirm that it's locked. If you turn left and go throught the opening you will eventually come to an open area with a grate and a crate. |
| 2 | 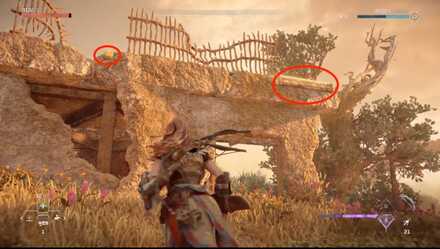 Climb to the Next Level
Open the grate with your Pullcaster to create an exit for later. After that move the crate to ledge where you can use it to climb up. |
| 3 | 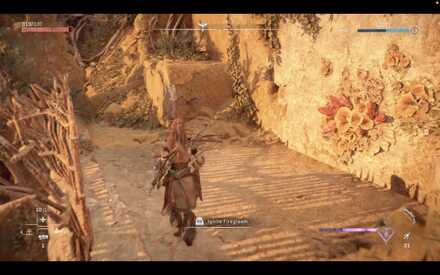 After climbing up, turn left and you should see a patch of Firegleam that you can ignite. Doing so will expose a new room where you should see an old door across an opening. Jump and use your Shieldwing to reach it. |
| 4 | 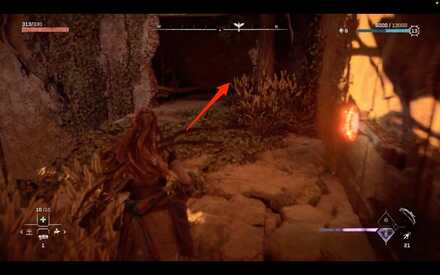 Scan the Area
Scanning the door and the nearby console will inform you that you need a Key Code. To the left of the door you will find a crate that you need to push to the lower level. After pushing the crate over the edge, drop down to the next level. |
| 5 | 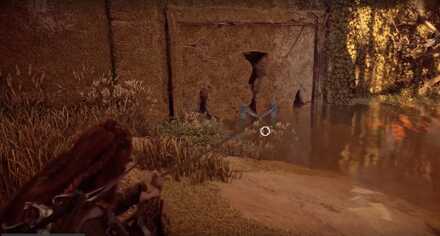 Create an Opening
If you look around around, you will notice two terminals: One for charging power, and one for emitting power. You will need a fuel cell to make use of these terminals. For now, use your Pullcaster to break open a hole in the wall. |
| 6 | 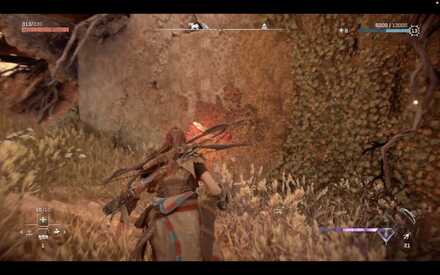 Find the Fuel Cell
Heading right through the new opening will lead you to more Firegleam. The room exposed by igniting the Firegleam contains a fuel cell. Return it to the main room and charge it. |
| 7 | 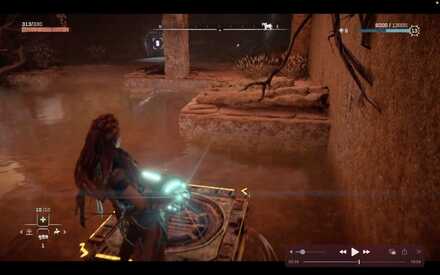 Transport the Fuel Cell
Your newly-charged fuel cell will discharge if you attempt to carry it through the water, so leave it near the charging station for the time being. Use your Pullcaster to bring the crate across the water near the edge where the charging station is located. After placing the Fuel Cell on top of the crate, head to the opposite side and use your Pullcaster one the crate once more to transport the fuel cell across the water. |
| 8 |  Restore Power and Get the Code
Placing the charged Fuel Cell in the docking area will restore power to the room, allowing you to access the door. If you haven't already, scan the Datapoint Entry to reveal the necessary code to open the door, 2204. |
| 9 | 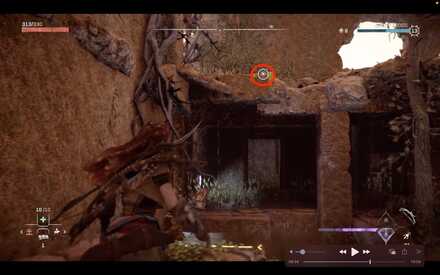 Head Back to the Old Door
After getting the door code, climb back to the top level Using your Pullcaster and glide to the door one more time. |
| 10 | 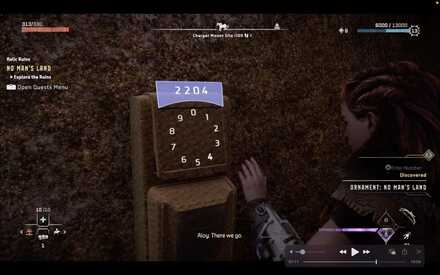 Open the Door and Collect The Ornament
Once you glide over and enter the code 2204, the door will open, allowing you to collect the ornament and end the quest. |
Tips and Strategies
Make Sure to Get the Greenshine Sliver
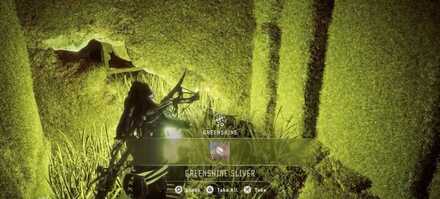
If you head left after opening a hole in the wall with your Pullcaster, you can find a Greenshine Sliver, as well as a grate that can act as a convenient exit.
How to Get Greenshine: Uses and Information
Horizon Forbidden West Quests
List of All Quest Types
List of Relic Ruin Guides
| All Relic Ruins Guides | |
|---|---|
| The Stillsands Relic Ruins | Isle of Spires Relic Ruins |
| Runner's Wild Relic Ruins | Dry Yearn Relic Ruins |
| No Man's Land Relic Ruins | The Daunt Relic Ruins |
| The Restless Weald | The Long Coast Relic Ruins |
Author
Relic Ruins: No Man's Land Walkthrough
improvement survey
03/2026
improving Game8's site?

Your answers will help us to improve our website.
Note: Please be sure not to enter any kind of personal information into your response.

We hope you continue to make use of Game8.
Rankings
- We could not find the message board you were looking for.
Gaming News
Popular Games

Genshin Impact Walkthrough & Guides Wiki

Honkai: Star Rail Walkthrough & Guides Wiki

Umamusume: Pretty Derby Walkthrough & Guides Wiki

Pokemon Pokopia Walkthrough & Guides Wiki

Resident Evil Requiem (RE9) Walkthrough & Guides Wiki

Monster Hunter Wilds Walkthrough & Guides Wiki

Wuthering Waves Walkthrough & Guides Wiki

Arknights: Endfield Walkthrough & Guides Wiki

Pokemon FireRed and LeafGreen (FRLG) Walkthrough & Guides Wiki

Pokemon TCG Pocket (PTCGP) Strategies & Guides Wiki
Recommended Games

Diablo 4: Vessel of Hatred Walkthrough & Guides Wiki

Fire Emblem Heroes (FEH) Walkthrough & Guides Wiki

Yu-Gi-Oh! Master Duel Walkthrough & Guides Wiki

Super Smash Bros. Ultimate Walkthrough & Guides Wiki

Pokemon Brilliant Diamond and Shining Pearl (BDSP) Walkthrough & Guides Wiki

Elden Ring Shadow of the Erdtree Walkthrough & Guides Wiki

Monster Hunter World Walkthrough & Guides Wiki

The Legend of Zelda: Tears of the Kingdom Walkthrough & Guides Wiki

Persona 3 Reload Walkthrough & Guides Wiki

Cyberpunk 2077: Ultimate Edition Walkthrough & Guides Wiki
All rights reserved
©2021 Sony Interactive Entertainment Europe. Developed by Guerrilla. Horizon Forbidden West is a trademark of Sony Interactive Entertainment LLC.
Sony Interactive Entertainment Privacy Policy & EULA
The copyrights of videos of games used in our content and other intellectual property rights belong to the provider of the game.
The contents we provide on this site were created personally by members of the Game8 editorial department.
We refuse the right to reuse or repost content taken without our permission such as data or images to other sites.


![Everwind Review [Early Access] | The Shaky First Step to A Very Long Journey](https://img.game8.co/4440226/ab079b1153298a042633dd1ef51e878e.png/thumb)

![Monster Hunter Stories 3 Review [First Impressions] | Simply Rejuvenating](https://img.game8.co/4438641/2a31b7702bd70e78ec8efd24661dacda.jpeg/thumb)


