
This survey will take about 1 minute.
Your answers will help us to improve our website.
Horizon Forbidden West (HFW)
Seeds of the Past Walkthrough
┣ Complete Quests → Quest Walkthroughs
┣ Learn the Best Skills → Best Skills
┣ Collect Gear → List of Weapons / Outfits
┣ Collect All Legendaries → All Legendary Weapons/Outfits
┗ Take Down Machines → List of Enemy Machines
★The Ver. 1.08 Patch is now Available!
Seeds of the Past is one of the main quests in Horizon Forbidden West (HFW). Read on to see the detailed walkthrough, rewards, location, and tips for the Seeds of the Past quest!
| Previous Quest | Current Quest | Next Quest |
|---|---|---|
| The Sea of Sands | Seeds of the Past | Faro's Tomb |
List of Contents
Seeds of the Past Overview
Basic Information
| Seeds of the Past | |
|---|---|
| Description | To recover DEMETER, one of GAIA's lost subordinate functions, Aloy must traverse a vast expanse of wilderness to reach the far western coast. |
| Rewards |
・19200 XP ・2 Skill Points |
| Recommended Level | 24 |
Seeds of the Past Walkthrough
| Objectives | |
|---|---|
| 1 | 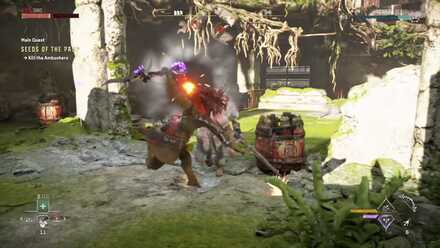 ・Go to DEMETER's Coordinates ・Kill the Ambushers Upon reaching the objective, climb the tower while killing the ambushers. Ride the zipline back down and go into the building from the bottom floor. |
| 2 |  ・Search the Facility ・Examine the Console ・Find Test Station Ivy After you reach the Metal Flower, turn left and go through the door. Use the Pullcaster on the metal clamp to pull the rubble out of the wall, then use the Pullcaster again on the vent. Climb up and use the terminal. |
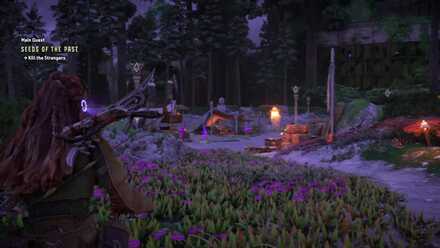
| 3 | 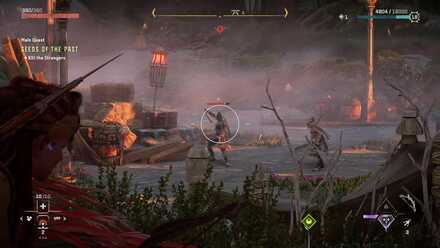 ・Kill the Strangers ・Enter the Facility After the cutscene, continue outside by rappelling down the leftmost window and kill the Strangers at the camp. Enter the facility after that and meet Alva. There's a chance to encounter a bug here. |
| 4 | 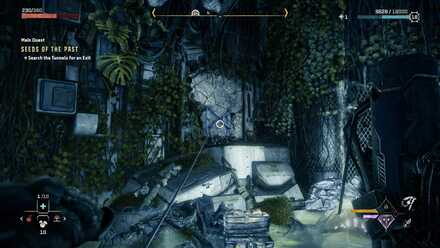 ・Examine the Paired Console ・Enter the Facility Tunnels Interact with the terminal after your conversation with Alva, then go down the ladder. Facing away from the ladder, turn left and duck under the low ceiling in the next hall. Ignite the Firegleam to go through. On the left wall will be a blue X-shaped grate you can use the Pullcaster on. |
| 5 | 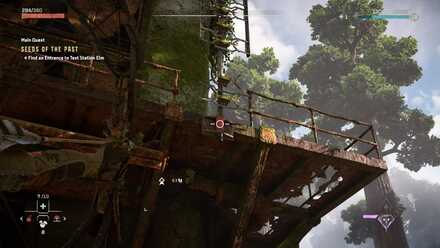 ・Search the Tunnels for an Exit ・Find an Entrance to Test Station Elm Through the vent, turn right at the fork in the path. Continue through the door and ahead until you find the way back up. Outside, go through the door in the building to pass through an area with machines. If you're seen, you'll have to fight a large group, so avoid the fight. Use the Pullcaster on the vent in front of Test Station Elm, and release the ladder on the left side of the structure by shooting at the red spot with an arrow. Climb up onto the platform to get into the vent. |
| 6 | 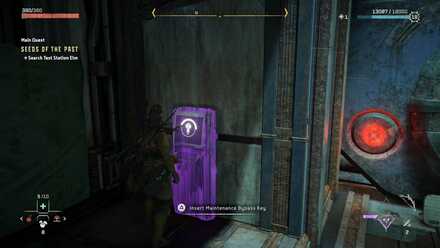 ・Search Test Station Elm Inside, continue to the large room. On the opposite end, pull the far Battery Rack out of the right wall and go behind it to find the Maintenance Bypass Key. Use the key on the terminal to the right, near the ladder. Grab the Storage Unit and pull it until Alva jumps on it, then pull it to the end. |
| 7 | 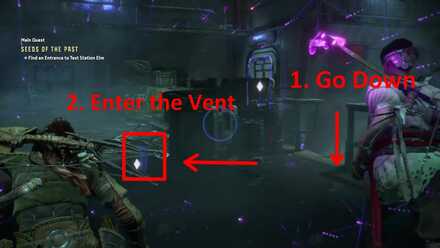 ・Restore Power to the Control Room Door Look on the left corner near the other Battery Racks are to see a vent you can use the Pullcaster on. Go through, and ignite the Firegleam to make a path. Pull the Battery Rack out of the left wall and take the Energy Cell out. Carry it through the new path and put it in the Energy Cell to restore the power. |
| 8 | 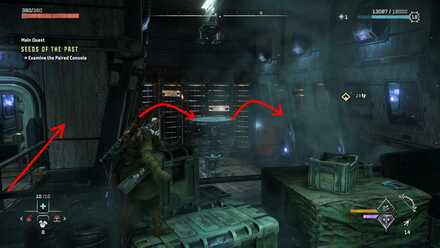 ・Return to Alva ・Examine the Paired Console ・Enter the Tunnels ・Search the Tunnels for an Exit ・Find an Entrance to Test Station Ivy Go back up the ladder and through the door. To get to the room on the opposite wall to examine the Paired Console, you'll need to go through the door to the left and jump across the top of the Storage Unit. Activate the terminal, then go down in the new tunnel. Go straight, then right at the fork. Continue ahead until you get outside. |
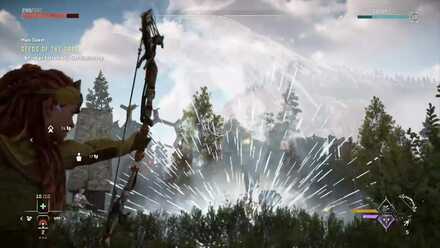
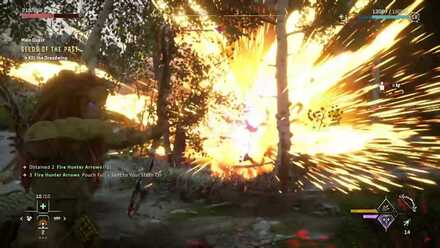
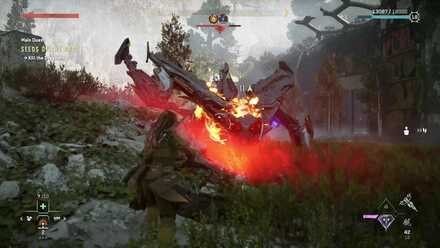
| 9 | 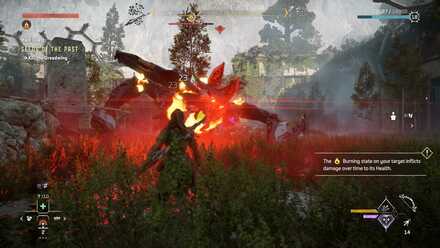 ・Kill the Dreadwing Defeat the Dreadwing and go into Test Center Ivy. The Dreadwing is able to turn invisible, and can inflict status effects on you. Examine its weak spots in the notebook carefully – precise shots on these can disable its dangerous abilities. |
| 10 | 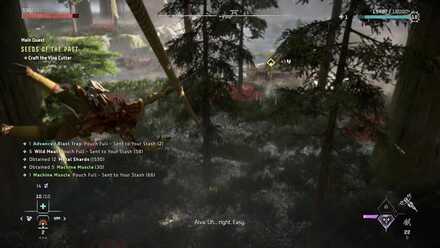 ・Search Test Station Ivy ・Craft the Vine Cutter After the cutscene, pry open the door and continue ahead the maze-like tunnel again and go up the ladder. At the end, zipline down and craft the Vine Cutter at the Workbench at the bottom. You will see more valuable resources by exploring around these parts. |
| 11 | 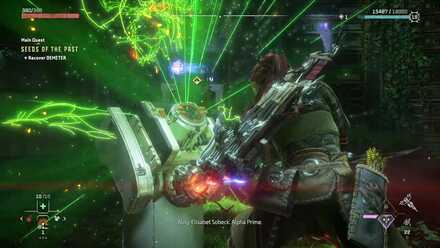 ・Return to the Data Core ・Destroy the Metal Flower's Vines ・Enter the Data Core ・Recover DEMETER ・Return to the Base ・Deliver DEMETER to GAIA Go back to the Metal Flower and hit it with melee attacks, then press R1 to open the way ahead. Take DEMETER back to GAIA at the Base to end the Quest. |
Tips and Strategies
How to Fix Kill the Strangers Bug
You may encounter a bug where you have to fight the 2nd human enemy group in the quest area. They will vanish from the map, rendering your progress to the quest. The fastest way to fix this is to reload from your last save.
Armored Human Enemies

All human enemies you'll encounter on this quest have armors and helmets. You can remove them easily by hitting them with charged heavy attacks and Precision Arrows. You can then hit their bodies without reducing your damage against them.
Shoot the Dreadwing While Invisible
The Dreadwing has the ability to become invisible. However, it is still vulnerable to attacks while in this state. Watch for the subtle outline of the Dreadwing's transparent shape against the background to detect its location.
In addition, the Dreadwing is generally less aggressive while invisible, so take this opportunity to lob a few arrows at it, particularly if you're not worried about targeting specific components.
Destroy the Blaze Sacs on Fire Bellowback Corpses
You can bring down the Dreadwing by burning it. You can do it quickly by baiting the Dreadwing to the Fire Bellowback corpses and then destroying the Blaze Sac to inflict burning damage.
Boss Strategy Guide
Dreadwing
How to Beat Dreadwing - Key Points
- Remove its ability to go invisible.
- Inflict Burning effect to ground it.
- Place Vertical Traps.
- Detach and use the Bomb Launcher.
- Destroy Metalbite Sac to cause an explosion.
How to Beat Dreadwing: Boss Fight Guide
Horizon Forbidden West Quests
List of All Quest Types
List of All Main Quests
| No. | Quest |
|---|---|
| 1 | Reach for the Stars |
| 2 | The Point of the Lance |
| 3 | To the Brink |
| 4 | The Embassy |
| 5 | Death's Door |
| 6 | The Dying Lands |
| 7 | The Eye of the Earth |
| 8 | The Broken Sky |
| 9 | The Kulrut |
| 10 | Cradle of Echoes |
| 11 | The Sea of Sands |
| 12 | Seeds of the Past |
| 13 | Faro's Tomb |
| 14 | Gemini |
| 15 | All That Remains |
| 16 | The Wings of the Ten |
| 17 | Singularity |
Author

Seeds of the Past Walkthrough
Please participate in our site
improvement survey
03/2026
improvement survey
03/2026
Would you assist in
improving Game8's site?
improving Game8's site?

×
We are listening to our users' valuable opinions and discussing how to act on them.
The information collected through this survey will be used for the purpose of improving our services. In addition, the information will only be disclosed a part of a statistic in a format that will not allow identification of personal information.
Begin Survey
Not Now
×
Please rate each item regarding Game8.co's Advertisements.
Amount of Ads
Very Dissatisfied
Somewhat Dissatisfied
Fine
Somewhat Satisfied
Highly Satisfied
Placement of Ads
Timing of Ad Display
Ad Loading Speed
Safeness of Ads
Content of Ads
×
Please rate each item regarding Game8.co's Quality of Articles.
Amount of information
Very Dissatisfied
Somewhat Dissatisfied
Fine
Somewhat Satisfied
Highly Satisfied
Frequency of updates
Speed of new information
Accuracy of articles
Understandibility of articles
Readability of sentences
×
Please rate each item regarding Game8.co's Usability of the Site.
Ease of finding information
Very Dissatisfied
Somewhat Dissatisfied
Fine
Somewhat Satisfied
Highly Satisfied
Loading Speed
Use of Color
Font Size
Visibility of Images
Easy to Understand Layout
×
Please rate each item regarding Game8.co's Message Boards, Comments.
Ease of Writing
Very Dissatisfied
Somewhat Dissatisfied
Fine
Somewhat Satisfied
Highly Satisfied
Readability
Ease in Finding Information
Comment Quality
Comment Quantity
Admin Response
×
Please rate each item regarding Game8.co's Site's new design.
Please rate our site's new design
Very Dissatisfied
Somewhat Dissatisfied
Fine
Somewhat Satisfied
Highly Satisfied
Do you think that the website's design change makes the site easier to use?
Has the new design made it easier for you to find information on the site?
Has the new design improved the overall visual appeal of the site?
How would you rate your overall satisfaction with the new design of the site?
×
How likely are you to recommend Game8 to someone you know?
Very Unlikely
0
1
2
3
4
5
6
7
8
9
10
Very Likely
If you have other opinions regarding potential improvement to the website, please share them with us. We would appreciate your honest opinion.
Note: This is a free response section, so you can proceed without entering anything.
Note: Please be sure not to enter any kind of personal information into your response.
Note: Please be sure not to enter any kind of personal information into your response.
×
Thank You
×
Thank you for participating in our survey! Your answers will help us to improve the quality of our website and services.
We hope you continue to make use of Game8.
We hope you continue to make use of Game8.
Close
Rankings
- We could not find the message board you were looking for.
Gaming News


![Everwind Review [Early Access] | The Shaky First Step to A Very Long Journey](https://img.game8.co/4440226/ab079b1153298a042633dd1ef51e878e.png/thumb)

![Monster Hunter Stories 3 Review [First Impressions] | Simply Rejuvenating](https://img.game8.co/4438641/2a31b7702bd70e78ec8efd24661dacda.jpeg/thumb)
Popular Games

Genshin Impact Walkthrough & Guides Wiki
Honkai: Star Rail Walkthrough & Guides Wiki
Umamusume: Pretty Derby Walkthrough & Guides Wiki
Pokemon Pokopia Walkthrough & Guides Wiki
Resident Evil Requiem (RE9) Walkthrough & Guides Wiki
Monster Hunter Wilds Walkthrough & Guides Wiki
Wuthering Waves Walkthrough & Guides Wiki
Arknights: Endfield Walkthrough & Guides Wiki
Pokemon FireRed and LeafGreen (FRLG) Walkthrough & Guides Wiki
Pokemon TCG Pocket (PTCGP) Strategies & Guides Wiki


Recommended Games
Diablo 4: Vessel of Hatred Walkthrough & Guides Wiki
Fire Emblem Heroes (FEH) Walkthrough & Guides Wiki
Yu-Gi-Oh! Master Duel Walkthrough & Guides Wiki
Super Smash Bros. Ultimate Walkthrough & Guides Wiki
Pokemon Brilliant Diamond and Shining Pearl (BDSP) Walkthrough & Guides Wiki
Elden Ring Shadow of the Erdtree Walkthrough & Guides Wiki
Monster Hunter World Walkthrough & Guides Wiki
The Legend of Zelda: Tears of the Kingdom Walkthrough & Guides Wiki
Persona 3 Reload Walkthrough & Guides Wiki
Cyberpunk 2077: Ultimate Edition Walkthrough & Guides Wiki


All rights reserved
©2021 Sony Interactive Entertainment Europe. Developed by Guerrilla. Horizon Forbidden West is a trademark of Sony Interactive Entertainment LLC.
Sony Interactive Entertainment Privacy Policy & EULA
The copyrights of videos of games used in our content and other intellectual property rights belong to the provider of the game.
The contents we provide on this site were created personally by members of the Game8 editorial department.
We refuse the right to reuse or repost content taken without our permission such as data or images to other sites.