The Dying Lands Walkthrough
┣ Complete Quests → Quest Walkthroughs
┣ Learn the Best Skills → Best Skills
┣ Collect Gear → List of Weapons / Outfits
┣ Collect All Legendaries → All Legendary Weapons/Outfits
┗ Take Down Machines → List of Enemy Machines
★The Ver. 1.08 Patch is now Available!
The Dying Lands is one of the main quests in Horizon Forbidden West (HFW). Read on to see the detailed walkthrough, rewards, location, and tips for the The Dying Lands quest!
| Previous Quest | Current Quest | Next Quest |
|---|---|---|
| Death's Door | The Dying Lands | The Eye of the Earth |
List of Contents
The Dying Lands Overview
Basic Information
| The Dying Lands | |
|---|---|
| Description | In order to find MINERVA and reboot GAIA, Aloy and her friends must explore a sacred Utaru cave. Inside, they find much more than they bargained for. |
| Rewards |
・9000 XP ・2 Skill Points ・1 Utaru Whisperer |
| Recommended Level | 15 |
The Dying Lands Walkthrough
| Objectives | |
|---|---|
| 1 |  ・Go to Plainsong ・Talk to Varl and Zo ・Meet Varl and Zo Outside the Chorus ・Follow Zo to the Cordon After riding to Plainsong and going through the dialogue sequences, you can simply follow Zo in the first action segment. Don't worry about fighting any of the machines yet. |
| 2 | 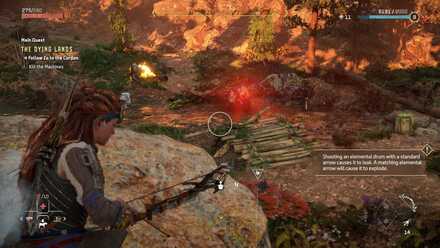 ・Kill the Machines You'll fight several Apex Scrappers and a Clawstrider. You can find a Ravager Cannon, a Heavy Weapon, on the ground here which will help in the battle. |
| 3 |  ・Explore the Sacred Cave Go into the cave and jump across to the ledge ahead. Enter the Cauldron and step on the triangular panel on the floor. When the spinning disc in front of you lights up, shoot it. Then, climb up the ladder above it. Do this for each of the two spinning discs above. |
| 4 | ・Find a Way Up At the top, go to the opposite side, smash the window and climb in. Push the crate back through the window you came through. Push the crate onto the triangular panel, and then the shoot the two spinning discs ahead. Platform across, then stand on the triangular panel and shoot three more discs. Go across, and press R2 to override the network uplink. |
| 5 |  ・Override the Network Uplink Turn back and find another ledge you can jump to in order to climb up. At the top, you'll find another spot where you can override the network uplink. If you fall down here, you can use the three rising pillars next to the entrance to get back to the start of the room. |
| 6 |  In the next room, glide to the triangular floor ahead. Climb up the ladder ahead and platform up until you find a ledge on the right close to the machines moving by. Hop onto one that comes by and grab onto it. You'll drop automatically at the end. Jump off the nearby ledge and Shieldwing down. Then, override the network uplink. Go into the door behind you and follow the path to the end, then override the network uplink on the door at the end. |
| 7 |  ・Kill the Grimhorn ・Override the Repair Bay Core Rappel down, then override the network uplink. You'll fight a Grimhorn and some other minor machines. Before overriding the network uplink, scan the Grimhorn inside the dome of light. You'll be able to check its weaknesses and tag it before the battle starts. |
▸Next Quest: The Eye of the Earth
Tips and Strategies
Keep Your Distance from the Grimhorn
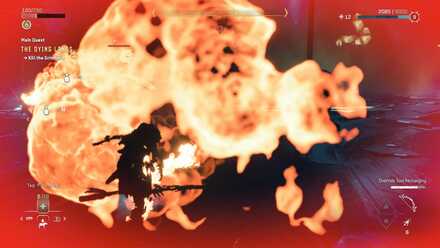
The Grimhorn can spit fire which blasts for a surprisingly long distance. Even if you try to dodge or run away from it from a close range, you're going to get burned. Keep your distance from it and lob arrows to knock out its weak points.
Grimhorn Cluster Launchers
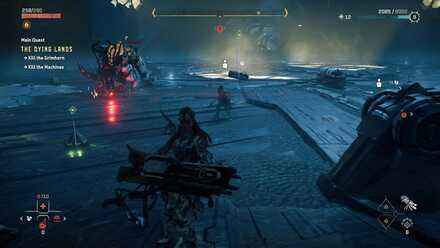
You can try to detach Grimhorn's Cluster Launchers and use them to help you out with battle. They will deal explosive damage that will allow you to remove Grimhorn's other components, lessening its way of attacking. You can also use them on the other enemy machines that will join in the battle.
Ravager Cannon
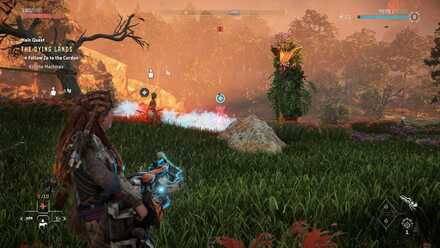
You can pick up the Ravager Cannon on the ground and use it to take out several Apex Scrappers and Clawstriders. However, make sure to get some distance first, as it needs a short time to charge to barrage your enemies with shocking bolts.
Boss Strategy Guide
Grimhorn
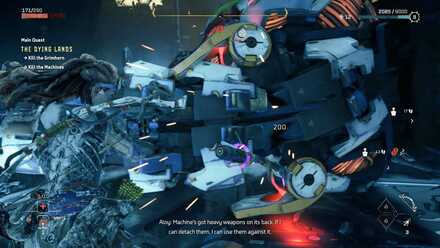
How to Beat Grimhorn - Key Points
- Detach Grimhorn Cluster Launchers and use them against it.
- Attack Components to stun Grimhorn.
- Place Blast Traps to destroy Grimhorn's horn.
- Keep some distance.
Horizon Forbidden West Quests
List of All Quest Types
List of All Main Quests
| No. | Quest |
|---|---|
| 1 | Reach for the Stars |
| 2 | The Point of the Lance |
| 3 | To the Brink |
| 4 | The Embassy |
| 5 | Death's Door |
| 6 | The Dying Lands |
| 7 | The Eye of the Earth |
| 8 | The Broken Sky |
| 9 | The Kulrut |
| 10 | Cradle of Echoes |
| 11 | The Sea of Sands |
| 12 | Seeds of the Past |
| 13 | Faro's Tomb |
| 14 | Gemini |
| 15 | All That Remains |
| 16 | The Wings of the Ten |
| 17 | Singularity |
Author
The Dying Lands Walkthrough
improvement survey
03/2026
improving Game8's site?

Your answers will help us to improve our website.
Note: Please be sure not to enter any kind of personal information into your response.

We hope you continue to make use of Game8.
Rankings
- We could not find the message board you were looking for.
Gaming News
Popular Games

Genshin Impact Walkthrough & Guides Wiki

Honkai: Star Rail Walkthrough & Guides Wiki

Umamusume: Pretty Derby Walkthrough & Guides Wiki

Pokemon Pokopia Walkthrough & Guides Wiki

Resident Evil Requiem (RE9) Walkthrough & Guides Wiki

Monster Hunter Wilds Walkthrough & Guides Wiki

Wuthering Waves Walkthrough & Guides Wiki

Arknights: Endfield Walkthrough & Guides Wiki

Pokemon FireRed and LeafGreen (FRLG) Walkthrough & Guides Wiki

Pokemon TCG Pocket (PTCGP) Strategies & Guides Wiki
Recommended Games

Diablo 4: Vessel of Hatred Walkthrough & Guides Wiki

Fire Emblem Heroes (FEH) Walkthrough & Guides Wiki

Yu-Gi-Oh! Master Duel Walkthrough & Guides Wiki

Super Smash Bros. Ultimate Walkthrough & Guides Wiki

Pokemon Brilliant Diamond and Shining Pearl (BDSP) Walkthrough & Guides Wiki

Elden Ring Shadow of the Erdtree Walkthrough & Guides Wiki

Monster Hunter World Walkthrough & Guides Wiki

The Legend of Zelda: Tears of the Kingdom Walkthrough & Guides Wiki

Persona 3 Reload Walkthrough & Guides Wiki

Cyberpunk 2077: Ultimate Edition Walkthrough & Guides Wiki
All rights reserved
©2021 Sony Interactive Entertainment Europe. Developed by Guerrilla. Horizon Forbidden West is a trademark of Sony Interactive Entertainment LLC.
Sony Interactive Entertainment Privacy Policy & EULA
The copyrights of videos of games used in our content and other intellectual property rights belong to the provider of the game.
The contents we provide on this site were created personally by members of the Game8 editorial department.
We refuse the right to reuse or repost content taken without our permission such as data or images to other sites.


![Everwind Review [Early Access] | The Shaky First Step to A Very Long Journey](https://img.game8.co/4440226/ab079b1153298a042633dd1ef51e878e.png/thumb)

![Monster Hunter Stories 3 Review [First Impressions] | Simply Rejuvenating](https://img.game8.co/4438641/2a31b7702bd70e78ec8efd24661dacda.jpeg/thumb)


