How to Beat Cauldron KAPPA Walkthrough and Guide
┣ Complete Quests → Quest Walkthroughs
┣ Learn the Best Skills → Best Skills
┣ Collect Gear → List of Weapons / Outfits
┣ Collect All Legendaries → All Legendary Weapons/Outfits
┗ Take Down Machines → List of Enemy Machines
★The Ver. 1.08 Patch is now Available!
This guide details how to beat Cauldron KAPPA in Horizon Forbidden West. To learn about Cauldron KAPPA's location, how to beat Cauldron KAPPA, and which machines the KAPPA overrides unlock, read on!
List of Contents
How to Beat Cauldron KAPPA
Cauldron KAPPA Walkthrough
Cauldron KAPPA List of Objectives
| Objectives | |
|---|---|
| 1 |  Enter the Cauldron Enter the CauldronDive under the water and enter the Cauldron. At this point you likely have access to a Sunwing, so drop down into the water to avoid the Shellsnapper. |
| 2 | 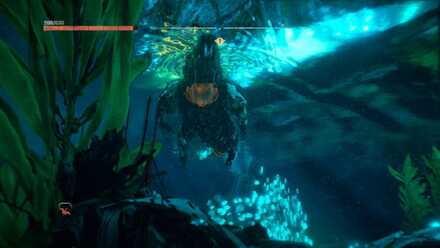 Avoid the Snapmaw Avoid the SnapmawIn the first room, avoid being spotted by the Snapmaw and dive down through the opening in the center of the room. Override the door and continue. |
| 3 | 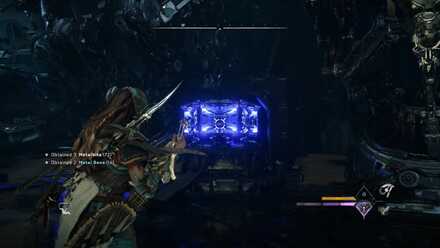 Pull the Crate and Kill the Spikesnout Pull the Crate and Kill the SpikesnoutSwim through the corridor into the next room. Swim to the surface before the current slows you down. Use the Pullcaster on the crate and pull it into the water. Defeat the Spikesnout. |
| 4 | 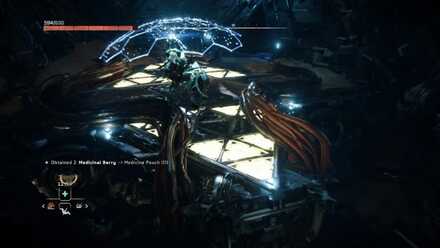 Climb Up and Shieldwing Across Climb Up and Shieldwing AcrossFrom the crate, jump to the handhold and climb up. Glide across the gap using the Shieldwing and continue to the next room. |
| 5 |  Override a Cauldron Door and Drop Into the Water Override a Cauldron Door and Drop Into the WaterClimb the moving pillar as it rises out of the ground. Jump to the ledge and override the node. Attempt to glide over to the handholds and they will break, dropping you down into the water. |
| 6 | 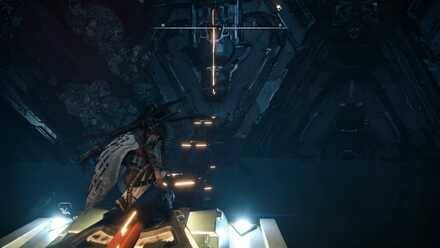 Jump Across the Pillars and Climb the Walls Jump Across the Pillars and Climb the WallsIgnore the enemies, using the water for stealth. In the back left part of this large room is a set of moving pillars you can jump across and a wall you can climb. Climb across and reach the next platform. |
| 7 | 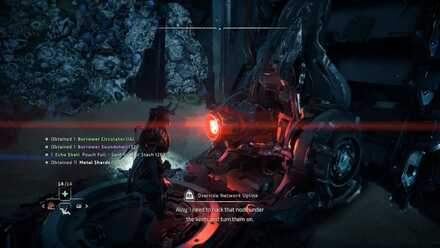 Kill the two Apex Burrowers and Override the Node Kill the two Apex Burrowers and Override the NodeContinue through the triangular doorway and drop down and to the left. Take down two Apex Burrowers and activate the nearby node. |
| 8 |  Ride the Pillar and Defeat More Apex Burrowers Ride the Pillar and Defeat More Apex BurrowersOverriding the node will make a pillar rise from the ground. Ride it to the top and defeat two more Apex Burrowers. |
| 9 |  Raise the Water Level and Swim to the Crate Raise the Water Level and Swim to the CrateOverride the node to raise the water level. Drop into the water and swim straight forward from the node's position. You'll see pillars you can use to climb out of the water. Ignore the Burrowers and reach the Crate. |
| 10 |  Raise the Water Level Again and Move the Crate Raise the Water Level Again and Move the CrateMove the crate to reach the vent. Climb up to the upper platform and override the next node to raise the water level again. After the water level is raised, use the Pullcaster to move the crate you used to climb up with to fit in the semi-hexagon shaped divot. |
| 11 |  Lower the Water Level and Move the Crate Lower the Water Level and Move the CrateSwim down to the node directly below the one you just overrode. Lower the water level and swim over to the pillars from step 9 again. Use the Pullcaster to bring the crate over. Pull it all the way back to the next semi-hexagon shaped divot. |
| 12 |  Raise the Water Level Again and Use the Crate Raise the Water Level Again and Use the CratePlatform across the pillars and climb back up to the upper node. Note that you can reach the first rung of the handholds now as it broke earlier. Raise the water level again, swim over to the crate and use it to jump to the climbable rail. |
| 13 |  Defeat the Room Full of Enemies Defeat the Room Full of EnemiesIn the next room you'll encounter two Shellwalkers, a Spikesnout, a Burrower, and two Scroungers. Clear the enemies to continue. |
| 14 |  Move the Crate and Climb Up Move the Crate and Climb UpUse the Pullcaster to grab the crate. Move it close to the climbable wall and proceed up it. Jump from the perch onto a flying cargo machine. Silent strike the Burrower when it's time to drop down. |
| 15 |  Override the Node and Fight the Tideripper Override the Node and Fight the TideripperOverride the cauldron door and drop into the water with a Tideripper. Swim to the next node indicated by the objective marker and override it. Swim through the opening. |
| 16 |  Lower the Water Level and Defeat the Tideripper Lower the Water Level and Defeat the TideripperSwim to the node to lower the water level. Return to the room you entered from to initiate a boss fight with the Tideripper. Defeat it to proceed. |
| 17 |  Override the Core Override the CoreAfter defeating the Tideripper, override the Core to unlock the KAPPA Overrides and clear the cauldron. |
Cauldron KAPPA Basic Info
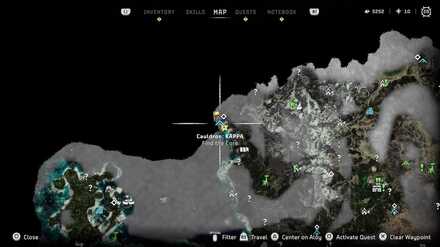
Location and Rewards
| Location: | |
|---|---|
 |
|
| Recommended Lv.: | 40 |
| Rewards: | +12500 XP +3 Skill Points KAPPA Overrides |
Override KAPPA Machines
All Machines With KAPPA Overrides
By clearing Cauldron CHI, you can override the following machines:
Note: Apex variants of Machines cannot be overriden.
Horizon Forbidden West Related Guides
List of All Quest Types
List of Cauldrons
| Cauldron Guides | |
|---|---|
| Cauldron TAU | Cauldron MU |
| Cauldron IOTA | Cauldron GEMINI |
| Cauldron CHI | Cauldron KAPPA |
Author
How to Beat Cauldron KAPPA Walkthrough and Guide
improvement survey
03/2026
improving Game8's site?

Your answers will help us to improve our website.
Note: Please be sure not to enter any kind of personal information into your response.

We hope you continue to make use of Game8.
Rankings
- We could not find the message board you were looking for.
Gaming News
Popular Games

Genshin Impact Walkthrough & Guides Wiki

Honkai: Star Rail Walkthrough & Guides Wiki

Umamusume: Pretty Derby Walkthrough & Guides Wiki

Pokemon Pokopia Walkthrough & Guides Wiki

Resident Evil Requiem (RE9) Walkthrough & Guides Wiki

Monster Hunter Wilds Walkthrough & Guides Wiki

Wuthering Waves Walkthrough & Guides Wiki

Arknights: Endfield Walkthrough & Guides Wiki

Pokemon FireRed and LeafGreen (FRLG) Walkthrough & Guides Wiki

Pokemon TCG Pocket (PTCGP) Strategies & Guides Wiki
Recommended Games

Diablo 4: Vessel of Hatred Walkthrough & Guides Wiki

Fire Emblem Heroes (FEH) Walkthrough & Guides Wiki

Yu-Gi-Oh! Master Duel Walkthrough & Guides Wiki

Super Smash Bros. Ultimate Walkthrough & Guides Wiki

Pokemon Brilliant Diamond and Shining Pearl (BDSP) Walkthrough & Guides Wiki

Elden Ring Shadow of the Erdtree Walkthrough & Guides Wiki

Monster Hunter World Walkthrough & Guides Wiki

The Legend of Zelda: Tears of the Kingdom Walkthrough & Guides Wiki

Persona 3 Reload Walkthrough & Guides Wiki

Cyberpunk 2077: Ultimate Edition Walkthrough & Guides Wiki
All rights reserved
©2021 Sony Interactive Entertainment Europe. Developed by Guerrilla. Horizon Forbidden West is a trademark of Sony Interactive Entertainment LLC.
Sony Interactive Entertainment Privacy Policy & EULA
The copyrights of videos of games used in our content and other intellectual property rights belong to the provider of the game.
The contents we provide on this site were created personally by members of the Game8 editorial department.
We refuse the right to reuse or repost content taken without our permission such as data or images to other sites.


![Everwind Review [Early Access] | The Shaky First Step to A Very Long Journey](https://img.game8.co/4440226/ab079b1153298a042633dd1ef51e878e.png/thumb)

![Monster Hunter Stories 3 Review [First Impressions] | Simply Rejuvenating](https://img.game8.co/4438641/2a31b7702bd70e78ec8efd24661dacda.jpeg/thumb)


