
This survey will take about 1 minute.
Your answers will help us to improve our website.
Horizon Forbidden West (HFW)
The Valley of the Fallen Side Quest Walkthrough
┣ Complete Quests → Quest Walkthroughs
┣ Learn the Best Skills → Best Skills
┣ Collect Gear → List of Weapons / Outfits
┣ Collect All Legendaries → All Legendary Weapons/Outfits
┗ Take Down Machines → List of Enemy Machines
★The Ver. 1.08 Patch is now Available!
This guide will show you how to complete the The Valley of the Fallen, a Side Quest in Horizon Forbidden West (HFW). Read on to learn the quest objectives, strategies, location, and rewards for completing the The Valley of the Fallen Side Quest.
List of Contents
The Valley of the Fallen Quest Information
General Info
| The Valley of the Fallen | |
|---|---|
| Quest Giver | Nakko |
| Description | Many dangerous machines have gathered in the Valley of the Fallen, forcing the Lowland Tenakth to abandon their territory. Aloy must investigate. |
| Rewards |
・9100 XP ・2 Skill Points ・1 Skystrike Boltcaster |
| Recommended Level | 28 |
How to Unlock The Valley of the Fallen and Location
Complete The Kulrut and Talk to Nakko
The Valley of the Fallen unlocks after completing The Kulrut main quest.
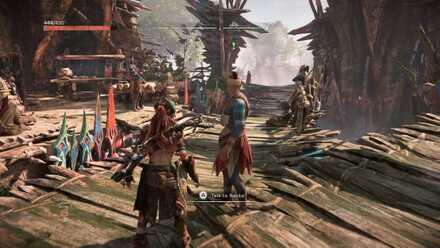
Begin the quest by talking to Nakko at Fall's Edge.
The Valley of the Fallen Location
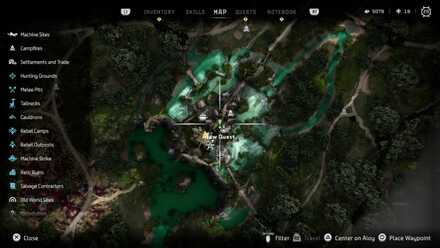 Map Location |
World Location |
The Valley of the Fallen Walkthrough
How to Complete
| Objectives | |
|---|---|
| 1 | 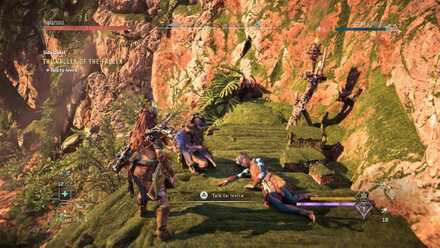 Go to the Entrance of the Valley of the Fallen Go to the Entrance of the Valley of the FallenFollow the map marker and reach the Valley of the Fallen. Talk to Ivvira once you arrive. |
| 2 | 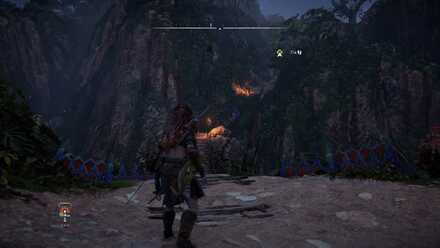 Enter the Valley of the Fallen Enter the Valley of the FallenClimb up the cliff to reach the valley. Use your Focus to find climbing areas quickly. |
| 3 | Go to the Waterfall Follow the path leading up to a waterfall. |
| 4 | 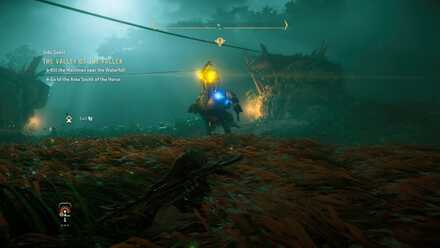 Kill the Machines and Find the Lure Kill the Machines and Find the LureAfter arriving to the waterfall, kill the nearby machines and find the lure. The lure is on top of the waterfall, and you have to override it to complete the objective. |
| 5 | 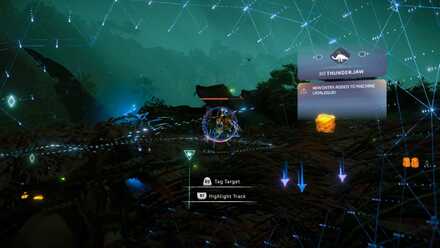 Go to the Horus Go to the HorusProceed to the next area and follow the path until you reach a narrow passage. You will reach the Horus, where you have to kill the Thunderjaw and Tremortusk to proceed. |
| 6 |  Override the Second Lure Override the Second LureUse your spear to override and second lure. |
| 7 | 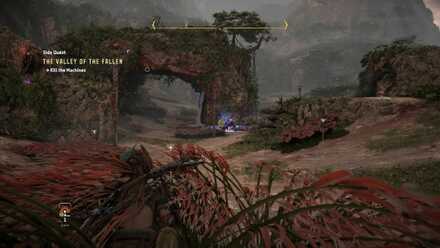 Find the Third Lure Find the Third LureClimb up another path to find the third machine lure. |
| 8 | 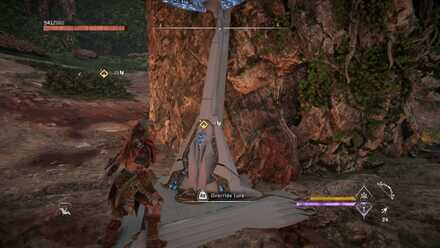 Kill the Machines and Override the Lure Kill the Machines and Override the LureKill the nearby machines to reach the third Lure. |
| 9 | 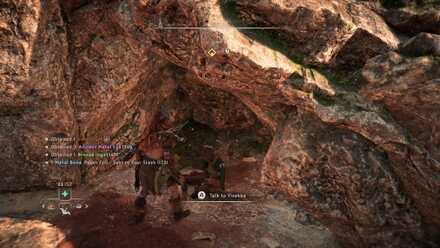 Talk to Yivekka Talk to YivekkaTalk to Yivekka after reaching the third lure. |
| 10 | 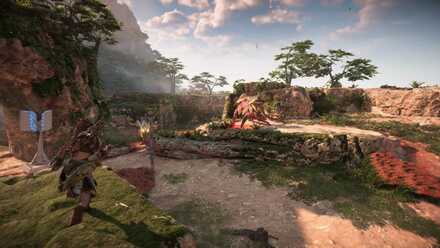 Kill the Specters Kill the SpectersKill the arriving Specters and talk to Ivvira after to complete the side quest |
Tips and Strategies
Use Spike Throwers Against Thunderjaws and Tremortusks
Spike throwers are very effective against larger enemies like the Thunderjaws and Tremortusks. This allows you to break off their components and weapons, allowing you to weaken them using elemental arrows.
Horizon Forbidden West Quests
List of All Quest Types
List of All Side Quests
| Side Quest | Level |
|---|---|
| Deep Trouble | Lv. 5 |
| The Bristlebacks | Lv. 7 |
| The Twilight Path | Lv. 7 |
| Shadow of the Past | Lv. 7 |
| Shadow in the West | Lv. 10 |
| Drowned Hopes | Lv. 22 |
| The Burning Blooms | Lv. 15 |
| Need to Know | Lv. 25 |
| The Roots that Bind | Lv. 15 |
| A Tribe Apart | Lv. 15 |
| The Promontory | Lv. 17 |
| Thirst for the Hunt | Lv. 17 |
| The Wound in the Sand | Lv. 19 |
| The Gate of the Vanquished | Lv. 15 |
| The Deluge | Lv. 15 |
| Signal Spike | Lv. 16 |
| Breaking Even | Lv. 18 |
| A Soldier's March | Lv. 18 |
| Blood for Blood | Lv. 19 |
| The Second Verse | Lv. 25 |
| The Valley of the Fallen | Lv. 28 |
| The Way Home | Lv. 32 |
| The Blood Choke | Lv. 27 |
| Forbidden Legacy | Lv. 30 |
| What Was Lost | Lv. 30 |
| In the Fog | Lv. 20 |
| Lofty Ambitions | Lv. 24 |
| Boom or Bust | Lv. 24 |
Author

The Valley of the Fallen Side Quest Walkthrough
Please participate in our site
improvement survey
03/2026
improvement survey
03/2026
Would you assist in
improving Game8's site?
improving Game8's site?

×
We are listening to our users' valuable opinions and discussing how to act on them.
The information collected through this survey will be used for the purpose of improving our services. In addition, the information will only be disclosed a part of a statistic in a format that will not allow identification of personal information.
Begin Survey
Not Now
×
Please rate each item regarding Game8.co's Advertisements.
Amount of Ads
Very Dissatisfied
Somewhat Dissatisfied
Fine
Somewhat Satisfied
Highly Satisfied
Placement of Ads
Timing of Ad Display
Ad Loading Speed
Safeness of Ads
Content of Ads
×
Please rate each item regarding Game8.co's Quality of Articles.
Amount of information
Very Dissatisfied
Somewhat Dissatisfied
Fine
Somewhat Satisfied
Highly Satisfied
Frequency of updates
Speed of new information
Accuracy of articles
Understandibility of articles
Readability of sentences
×
Please rate each item regarding Game8.co's Usability of the Site.
Ease of finding information
Very Dissatisfied
Somewhat Dissatisfied
Fine
Somewhat Satisfied
Highly Satisfied
Loading Speed
Use of Color
Font Size
Visibility of Images
Easy to Understand Layout
×
Please rate each item regarding Game8.co's Message Boards, Comments.
Ease of Writing
Very Dissatisfied
Somewhat Dissatisfied
Fine
Somewhat Satisfied
Highly Satisfied
Readability
Ease in Finding Information
Comment Quality
Comment Quantity
Admin Response
×
Please rate each item regarding Game8.co's Site's new design.
Please rate our site's new design
Very Dissatisfied
Somewhat Dissatisfied
Fine
Somewhat Satisfied
Highly Satisfied
Do you think that the website's design change makes the site easier to use?
Has the new design made it easier for you to find information on the site?
Has the new design improved the overall visual appeal of the site?
How would you rate your overall satisfaction with the new design of the site?
×
How likely are you to recommend Game8 to someone you know?
Very Unlikely
0
1
2
3
4
5
6
7
8
9
10
Very Likely
If you have other opinions regarding potential improvement to the website, please share them with us. We would appreciate your honest opinion.
Note: This is a free response section, so you can proceed without entering anything.
Note: Please be sure not to enter any kind of personal information into your response.
Note: Please be sure not to enter any kind of personal information into your response.
×
Thank You
×
Thank you for participating in our survey! Your answers will help us to improve the quality of our website and services.
We hope you continue to make use of Game8.
We hope you continue to make use of Game8.
Close
Rankings
- We could not find the message board you were looking for.
Gaming News


![Everwind Review [Early Access] | The Shaky First Step to A Very Long Journey](https://img.game8.co/4440226/ab079b1153298a042633dd1ef51e878e.png/thumb)

![Monster Hunter Stories 3 Review [First Impressions] | Simply Rejuvenating](https://img.game8.co/4438641/2a31b7702bd70e78ec8efd24661dacda.jpeg/thumb)
Popular Games

Genshin Impact Walkthrough & Guides Wiki
Honkai: Star Rail Walkthrough & Guides Wiki
Umamusume: Pretty Derby Walkthrough & Guides Wiki
Pokemon Pokopia Walkthrough & Guides Wiki
Resident Evil Requiem (RE9) Walkthrough & Guides Wiki
Monster Hunter Wilds Walkthrough & Guides Wiki
Wuthering Waves Walkthrough & Guides Wiki
Arknights: Endfield Walkthrough & Guides Wiki
Pokemon FireRed and LeafGreen (FRLG) Walkthrough & Guides Wiki
Pokemon TCG Pocket (PTCGP) Strategies & Guides Wiki


Recommended Games
Diablo 4: Vessel of Hatred Walkthrough & Guides Wiki
Fire Emblem Heroes (FEH) Walkthrough & Guides Wiki
Yu-Gi-Oh! Master Duel Walkthrough & Guides Wiki
Super Smash Bros. Ultimate Walkthrough & Guides Wiki
Pokemon Brilliant Diamond and Shining Pearl (BDSP) Walkthrough & Guides Wiki
Elden Ring Shadow of the Erdtree Walkthrough & Guides Wiki
Monster Hunter World Walkthrough & Guides Wiki
The Legend of Zelda: Tears of the Kingdom Walkthrough & Guides Wiki
Persona 3 Reload Walkthrough & Guides Wiki
Cyberpunk 2077: Ultimate Edition Walkthrough & Guides Wiki


All rights reserved
©2021 Sony Interactive Entertainment Europe. Developed by Guerrilla. Horizon Forbidden West is a trademark of Sony Interactive Entertainment LLC.
Sony Interactive Entertainment Privacy Policy & EULA
The copyrights of videos of games used in our content and other intellectual property rights belong to the provider of the game.
The contents we provide on this site were created personally by members of the Game8 editorial department.
We refuse the right to reuse or repost content taken without our permission such as data or images to other sites.