Relic Ruins: Isle of Spires Walkthrough
┣ Complete Quests → Quest Walkthroughs
┣ Learn the Best Skills → Best Skills
┣ Collect Gear → List of Weapons / Outfits
┣ Collect All Legendaries → All Legendary Weapons/Outfits
┗ Take Down Machines → List of Enemy Machines
★The Ver. 1.08 Patch is now Available!
Relic Ruins: Isle of Spires is the eighth Relic Ruins quest you can access in Horizon Forbidden West (HFW). Read on to learn the best approach to completing this quest, as well as other hints and advice.
List of Contents
This Quest is only accessible after retrieving GAIA's three subprograms, which is done by completing the Main Missions The Broken Sky, Seeds of the Past, and the Sea of Sands to access this quest.
| Required Main Quests | |
|---|---|
| 1. | Complete The Broken Sky |
| 2. | Complete The Sea of Sands |
| 3. | Complete Seeds of the Past |
Relic Ruins: Isle of Spires Information
General Info
| Relic Ruins: Isle of Spires | |
|---|---|
| Description | Treasures await those who dare explore the ruins of the Old World. |
| Rewards | ・5000 XP ・2 Skill Points |
| Level | 30 |
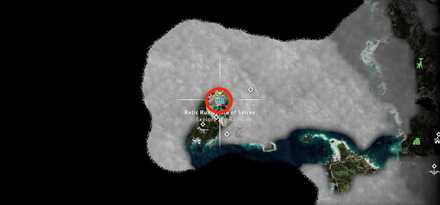
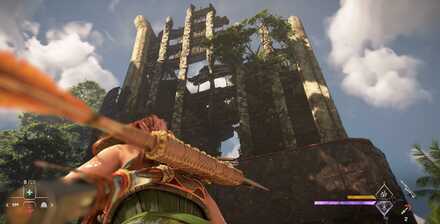
Rebel Ruins: Isle of Spires Location
| World Map Location | In-Game Location |
|---|---|
 |
 |
Rebel Ruins: Isle of Spires Walkthrough
How to Complete
| Objectives | |
|---|---|
| 1 | 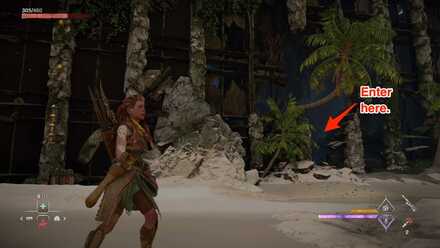 Find an Entrance
Starting from the campfire, head along the right side of the ruins until you see a low-hanging palm tree. Enter here and turn right when you reach the water. There will be a patch of Firegleam you need to ignite. |
| 2 | 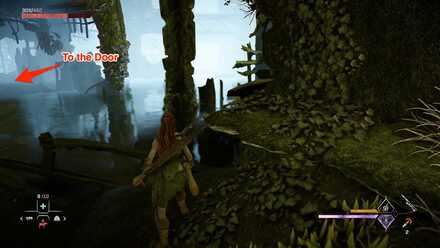 Scan the Door
Jump into the water and head to your left. You will discover this ruin's Ornament, which is locked behind a door. Scanning the Datapoint will reveal that you need a key and a code to open the door. |
| 3 | 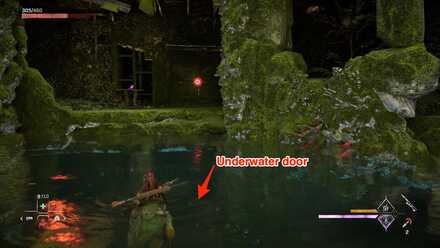 Find Another Crate
Jump back into the water and face the door. When you swim down there will be a door at the bottom. After opening it continue through the narrow pathway (you will receive a prompt to squeeze through the cracks) and rise to the surface when you can. You will be in a room with a patch of Firegleam. |
| 4 | 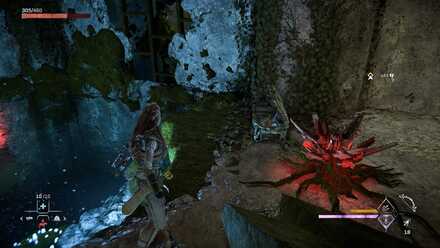 Open new Paths
Directly behind the hole that you just opened, is a crate in the water. Pull it out with your Pullcaster and push in the other bed of water that has a Metal Flower on the other side. Next, swim to the Metal Flower and pull the crate towards you. After that, jump on the crate and look right to see a ladder you need to lower with your bow. Destroy the Metal flower with your VIne Cutter to continue. |
| 5 | 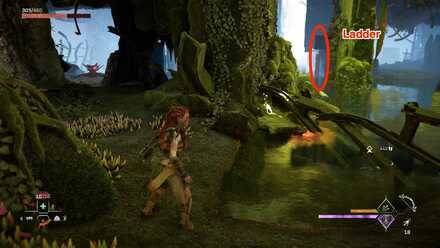 Get the Key
Head left after destroying the Metal Flower and swim left towards the ladder. After you climb up the wall as high as you can jump to the opposite ledge to get the key for these ruins. |
| 6 | 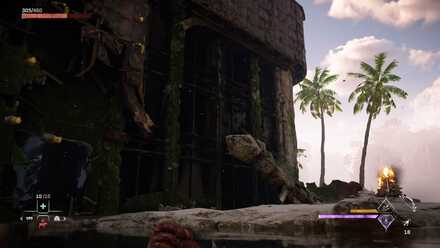 Reach the Top of the Ruins
Jump off the ledge after getting the key and head left, leaving the ruins. As you head towards the campfire, you will see footholds on the wall. Use these to climb to the top of the ruins. |
| 7 | 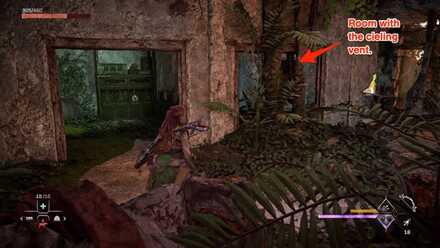 Charge the Energy Cell
Going along the path, you will eventually come across a room with an Energy Cell that needs charging. To do so, leave and continue past the Charging Terminal to a room with a ceiling vent. Pull open the vent and climb inside. You will end up in a room with the Charging Terminal. Ignite the Firegleam and bring the Energy Cell back through the newly-opened path to charge it. |
| 8 | 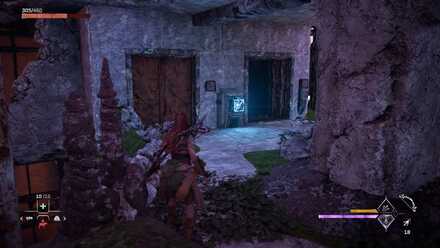 Bring Up the Crate
Take the Energy Cell to the elevator and ride it down. It will take you back to the area with the Metal Flower and crate. Pull the crate out of the water and place it in the elevator. |
| 9 | 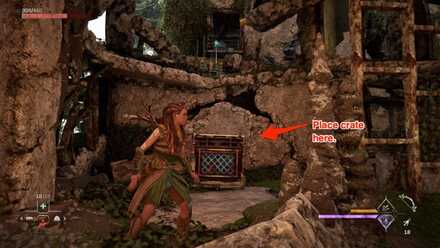 Use the Crate to Reach the Door
When you reach the top, push the crate near the wall and climb up using the footholds. You will see an opening to a room you can jump in when you reach the top. Inside is a Datapoint with the code used to open the door. Enter the code 109 to open it. |
| 10 | 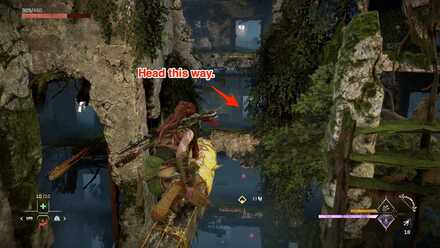 Reach the next Door
Drop down at the ledge and climb up the pillar in front of you. Use your Pullcaster to reach the top and walk out on the beam. Jump forward and use your Pullcaster to grapple to the opposite side of the ruins where the door is located. |
| 11 | 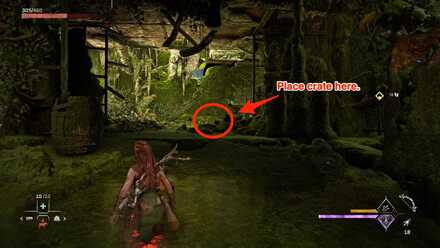 Pull Down the Crate
Head left of the door to find another beam with a crate on the opposite side. Pull it down with your Pullcaster and jump down afterward.Face the direction of where you jumped off and you will see a room with a ceiling vent. After pulling it open, pull the crate out of the water. |
| 12 | 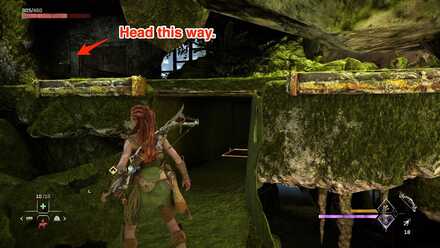 Get the Codes and the Ornament
Use the Crate to climb up the vent. After reaching the new room, explore the area to find items and the Datapoint containing the code for the door. Enter the code 2109 to exit the door and return to the first one. Entering the final code 2109109 will open the last door, allowing you to get the Ornament. |
Tips and Strategies
Turning on climbing Annotations With Exploration
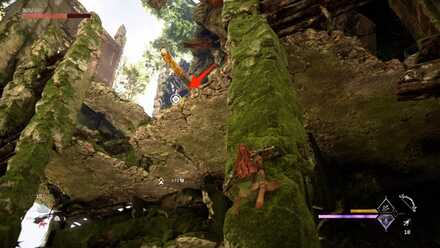
If you turn Climbing Annotations to On in your settings, ledges, and platforms you can climb on will be highlighted, making it easier to climb around the various pillars and platforms of these ruins.
Horizon Forbidden West Quests
List of All Quest Types
List of Relic Ruin Guides
| All Relic Ruins Guides | |
|---|---|
| The Stillsands Relic Ruins | Isle of Spires Relic Ruins |
| Runner's Wild Relic Ruins | Dry Yearn Relic Ruins |
| No Man's Land Relic Ruins | The Daunt Relic Ruins |
| The Restless Weald | The Long Coast Relic Ruins |
Author
Relic Ruins: Isle of Spires Walkthrough
improvement survey
03/2026
improving Game8's site?

Your answers will help us to improve our website.
Note: Please be sure not to enter any kind of personal information into your response.

We hope you continue to make use of Game8.
Rankings
- We could not find the message board you were looking for.
Gaming News
Popular Games

Genshin Impact Walkthrough & Guides Wiki

Honkai: Star Rail Walkthrough & Guides Wiki

Umamusume: Pretty Derby Walkthrough & Guides Wiki

Pokemon Pokopia Walkthrough & Guides Wiki

Resident Evil Requiem (RE9) Walkthrough & Guides Wiki

Monster Hunter Wilds Walkthrough & Guides Wiki

Wuthering Waves Walkthrough & Guides Wiki

Arknights: Endfield Walkthrough & Guides Wiki

Pokemon FireRed and LeafGreen (FRLG) Walkthrough & Guides Wiki

Pokemon TCG Pocket (PTCGP) Strategies & Guides Wiki
Recommended Games

Diablo 4: Vessel of Hatred Walkthrough & Guides Wiki

Fire Emblem Heroes (FEH) Walkthrough & Guides Wiki

Yu-Gi-Oh! Master Duel Walkthrough & Guides Wiki

Super Smash Bros. Ultimate Walkthrough & Guides Wiki

Pokemon Brilliant Diamond and Shining Pearl (BDSP) Walkthrough & Guides Wiki

Elden Ring Shadow of the Erdtree Walkthrough & Guides Wiki

Monster Hunter World Walkthrough & Guides Wiki

The Legend of Zelda: Tears of the Kingdom Walkthrough & Guides Wiki

Persona 3 Reload Walkthrough & Guides Wiki

Cyberpunk 2077: Ultimate Edition Walkthrough & Guides Wiki
All rights reserved
©2021 Sony Interactive Entertainment Europe. Developed by Guerrilla. Horizon Forbidden West is a trademark of Sony Interactive Entertainment LLC.
Sony Interactive Entertainment Privacy Policy & EULA
The copyrights of videos of games used in our content and other intellectual property rights belong to the provider of the game.
The contents we provide on this site were created personally by members of the Game8 editorial department.
We refuse the right to reuse or repost content taken without our permission such as data or images to other sites.


![Everwind Review [Early Access] | The Shaky First Step to A Very Long Journey](https://img.game8.co/4440226/ab079b1153298a042633dd1ef51e878e.png/thumb)

![Monster Hunter Stories 3 Review [First Impressions] | Simply Rejuvenating](https://img.game8.co/4438641/2a31b7702bd70e78ec8efd24661dacda.jpeg/thumb)


