To the Burning Shores Walkthrough
┣ Complete Quests → Quest Walkthroughs
┣ Learn the Best Skills → Best Skills
┣ Collect Gear → List of Weapons / Outfits
┣ Collect All Legendaries → All Legendary Weapons/Outfits
┗ Take Down Machines → List of Enemy Machines
★The Ver. 1.08 Patch is now Available!
To the Burning Shores is one of the main quests in Horizon Forbidden West: Burning Shores (HFW). Read on to see a detailed walkthrough of the quest, its rewards, location, how to deactivate the Zenith weapon and how to mount Aloy's Sunwing again!
| Previous Quest | Current Quest | Next Quest |
|---|---|---|
| Singularity | To the Burning Shores | Heaven and Earth |
To the Burning Shores Overview
Basic Information
| To the Burning Shores | |
|---|---|
| Quest Giver | Sylens |
| Description | To track down a dangerous enemy, Aloy must journey to the uncharted wilds of the Burning Shores. |
| Rewards |
・30400 XP ・3 Skill Points |
| Recommended Level | 38 |
To the Burning Shores Walkthrough
| Objectives | |
|---|---|
| 1 |  Meet Sylens at Tilda's Mansion After receiving the prompt that the DLC was successfully applied to the base game, Aloy will receive a call from Sylens. Head to Tilda's Mansion and speak with him there. When players select the option To the Burning Shores a long cutscene will play. Note that from here until this main quest is completed, Aloy cannot fly her Sunwing to return to the Forbidden West, so be prepared to be locked within the Burning Shores area. |
| 2 | 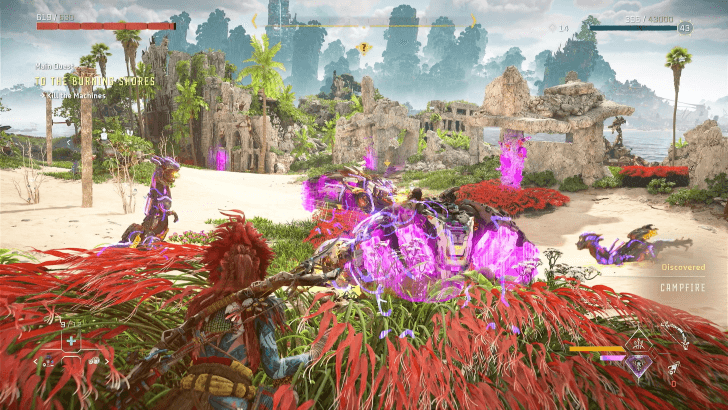 Kill the Machines After crashing on the beach and meeting Seyka, Aloy and her will have to defeat the Widemaws (only weak to Purgewater and resistant to everything else) and Burrowers (resistant to Fire). |
| 3 |  Follow Seyka After the cutscene that follows, where Seyka explains what is happening at the Burning Shores, follow her to her skiff then to Fleet's End. |
| 4 | 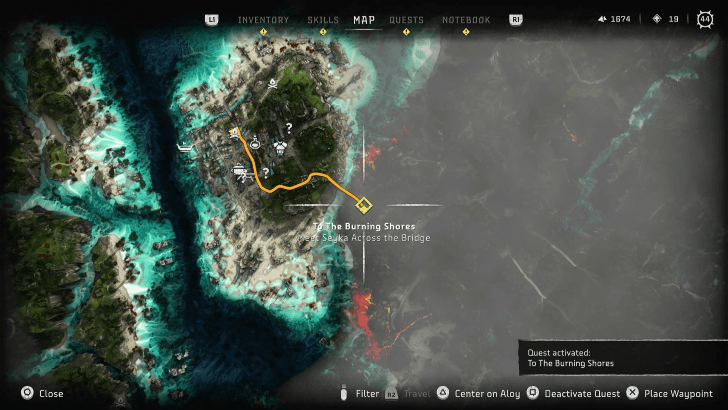 Meet Seyka Across the Bridge Players can choose to explore the islands using Seyka's Skiff and complete the nearby side quest add link The Splinter Within. Note however, that Aloy still cannot call the Sunwing, so free exploration will be primarily on foot, using the skiff or through swimming (which is much slower than the skiff). Otherwise, to progress the quest, meet Seyka at the designated spot to the south east of Fleet's End. |
| 5 | 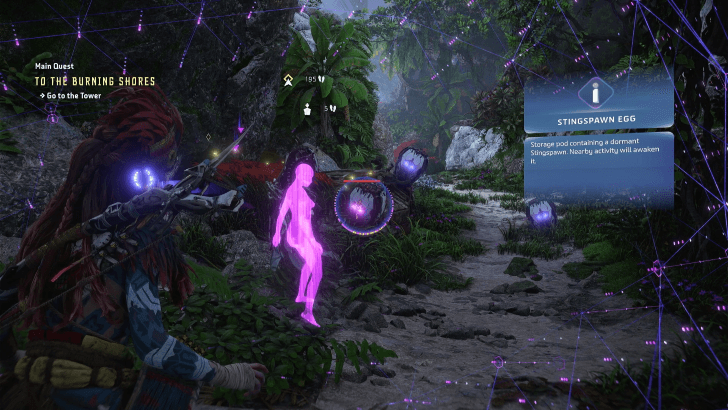 Go to the Tower Follow the trail ahead to head to the tower. Players may want to check the map every now and then to activate nearby campfires. Along the path, Aloy will also encounter an enemy in a new form, a Stingspawn Egg. Make sure to not get too close to avoid activating too many flying enemies. Instead, scan the area then hit them from afar. |
| 6 | 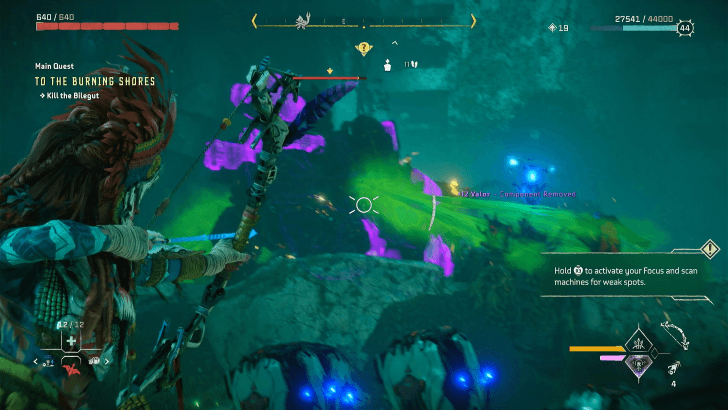 Kill the Bilegut and Follow Seyka into the Tower In an area with a lot of Stingspawn Eggs, players will need to fight a Bilegut. Be careful when it jumps and shoots out powerful poison attacks. After defeating it, Seyka will walk ahead to show where to go next. |
| 7 | 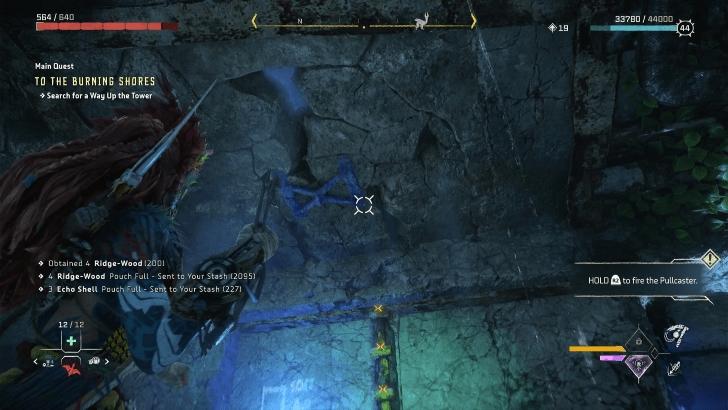 Search for a Way Up the Tower and Climb Eventually Aloy and Seyka will come to a dead end in front of two climbable spots. Use the Pullcaster on the blue parts on the ceiling to clear the path then proceed to climb up. |
| 8 | 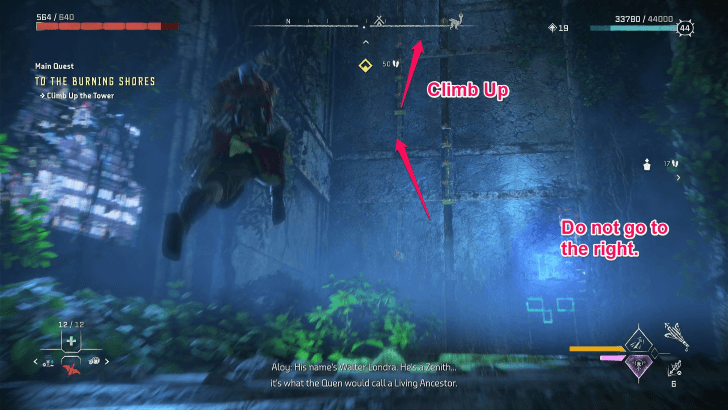 Climb Up the Tower As you proceed forward, do not go down the path to the right that leads to four doors with red lights. Instead right before this path to the right, use the climbable points on the wall and cross the concrete beam to keep heading up. |
| 9 | 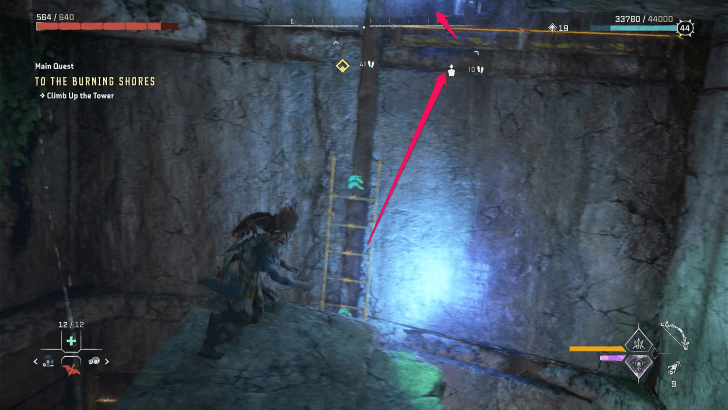 Climb Up the Tower As you keep climbing Aloy will eventually have to jump behind her (press the o button on the controller) to reach the next ladder or climbable point. Once you reach a floor with brimshine, climb up the ladder you came from then jump onto the climbable point directly above. |
| 10 | 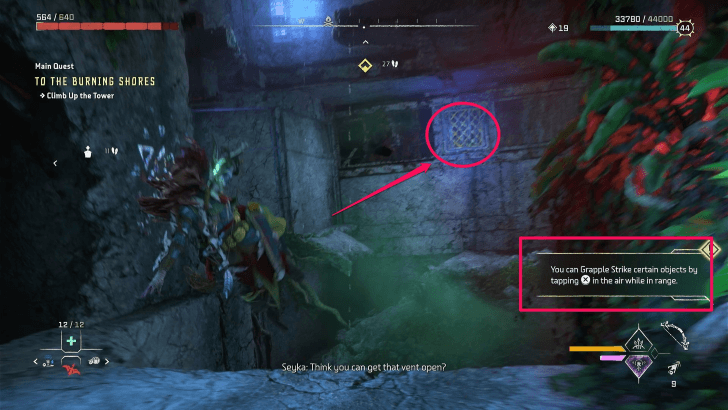 Climb Up the Tower After Aloy keeps climbing and jumping across the gaps, she will reach a gap with a grate on the other end of the wall. Use the grapple strike (press x on the controller while jumping) to open it and proceed through the vent. |
| 11 | 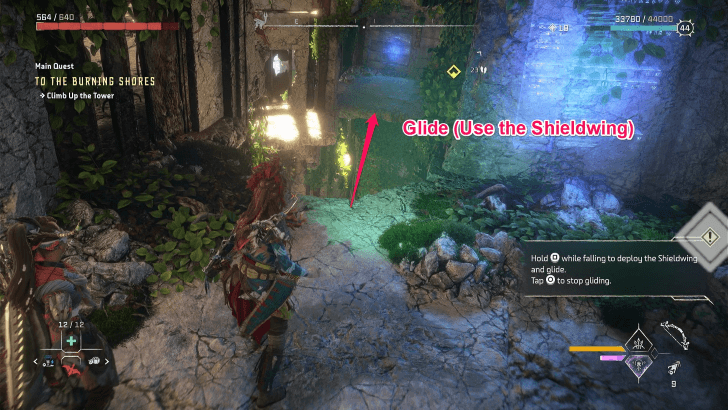 Climb Up the Tower Aloy will reach a point with a long gap before her as shown in the picture above. Glide to the next platform using the Shieldwing. Be mindful of when you release the shieldwing as players can fall all the way back down if they dont reach the other platform. |
| 12 | 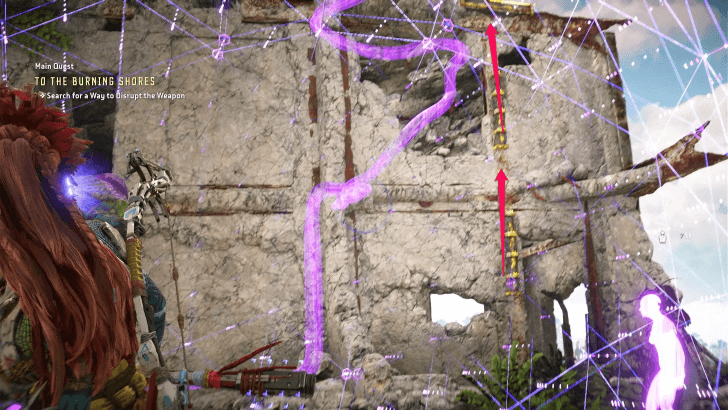 Search for a Way to Disrupt the Weapon Once Aloy reaches the campfire outside the building, face the outer wall of the building again to use the climbable spots. The device they are trying to deactivate will be right on the floor above. To disrupt the weapon, scan the machine to show a large cable that leads up the wall on the right. Follow it to override the control node at the top. |
| 13 | 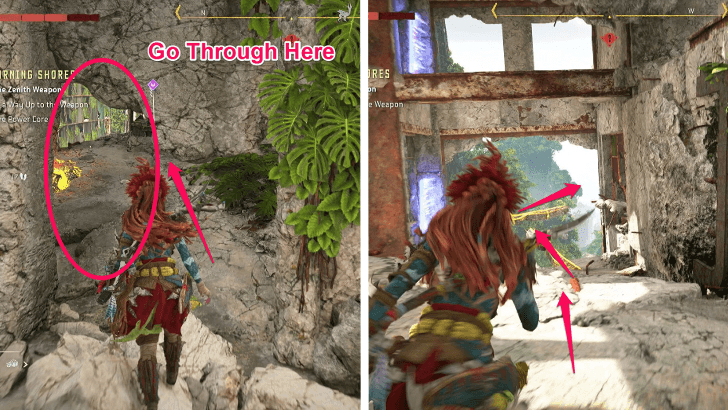 Destroy the Zenith Weapon The weapon will start attacking Aloy and Seyka. To destroy it, scan the weapon, then go through the crack on the wall to left. Head down the path, around the building, then shoot the unstable Firegleam to keep going. This will lead you to some beams on the outside of the building. |
| 14 | 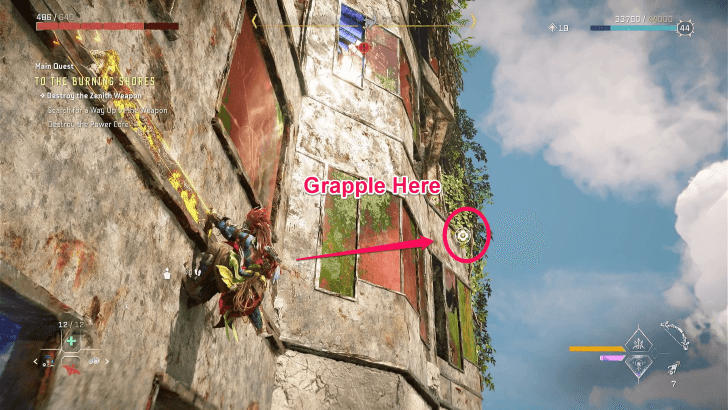 Destroy the Zenith Weapon Use the climbable points and grapple to the right to reach a spot where you can shoot the device's core. The device will enter its second phase of attacking. |
| 15 |  Destroy the Zenith Weapon Grapple to the spots on the next level of the buiilding (they will be on the back wall surrounding the device). Then head around the building until you have a clear shot of the top of the device's upper core. Shoot it down. Once the device falls do not forget to loot it to obtain Elite Critical Hits. |
| 16 | 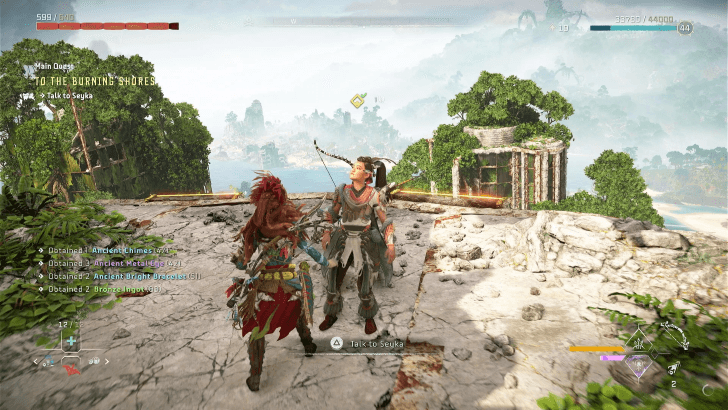 Talk to Seyka Talk to Seyka to end the main quest. Players will now have access to mount their Sunwings again. |
To the Burning Shores Tips and Strategies
| Main Quest Tips |
|---|
Prepare Weapons with Purgewater Ammo

Before selecting the option to Head to The Burning Shores, when Aloy talks to Sylens, make sure to equip at least one weapon that uses Purgewater Ammo sincethe cutscenes will directly lead to an enemy fight at the Burning Shores. These include Widemaws who are weak to Purgewater and resistant to everything else.
Use the Nearby Collapsible Platforms
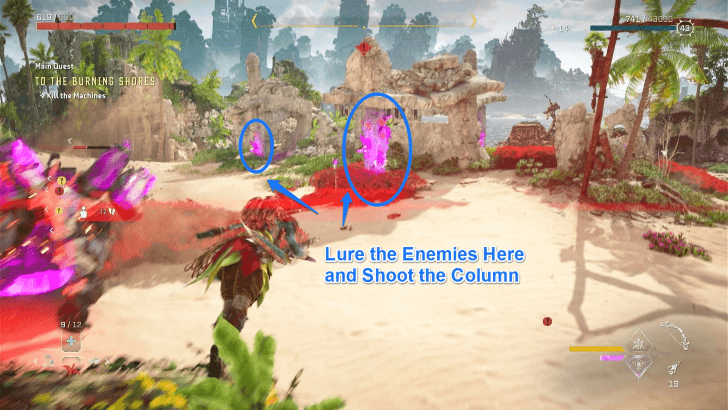
During the fight, directly after landing on the Burning Shores, there will be columns within the area that Aloy can shoot down to damage the enemies. Use these to damage the enemy whilemoving across the battlefield.
Scan the Area for Stingspawn Eggs
One of the new enemies, Stingpawns, will take the shape of a dormant egg before being approached and activate. Although they are not strong, they can be quite annoying to deal with especially during the Bilegut fight. Scan your surroundings, then shoot the Stingspawn eggs before approaching.
Bilegut Attack Patterns

The Bilegut will release an acid attack that has a wide area of reach. Make sure to keep your distance as much as you can. The Bilegut also has a strong slam attack where it jumps up in the air before charging at Aloy. Make sure to keep moving around and be aware of where it is in the air in order to avoid getting damaged.
Prepare Outifts with Fire Resistance

For the final boss fight in the quest, the enemy will inflict Fire type damage to Aloy with a laser. Make sure to equip an outfit with good Fire resistance and during this laser attack, keep rolling and dodging to avoid continuous elemental build up.
How to Start the Burning Shores DLC
Complete Singularity Main Quest
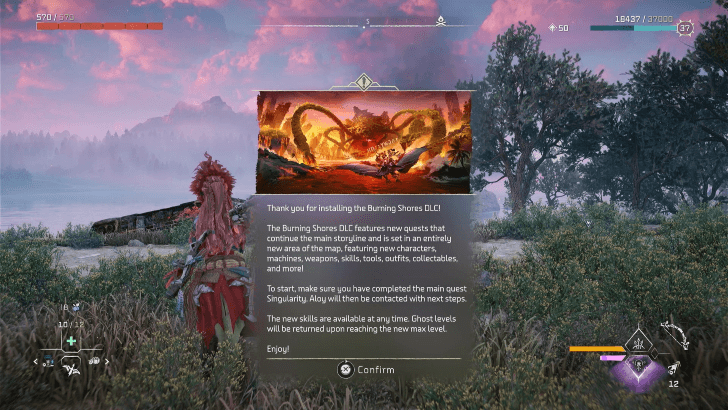
The Burning Shores Quest will start only after finishing the Singularity Main Quest, the last main quest of the base game. After which, if the player has successfully installed the DLC onto their account, either through purchasing the complete edition or buying it separately, there will be a prompt onscreen after reopening the game as shown above. Aloy will then automatically receive the first objective for the main quest.
Horizon Forbidden West Related Guides

List of All Quest Types
List of All Main Quests
| No. | Quest |
|---|---|
| 1 | Reach for the Stars |
| 2 | The Point of the Lance |
| 3 | To the Brink |
| 4 | The Embassy |
| 5 | Death's Door |
| 6 | The Dying Lands |
| 7 | The Eye of the Earth |
| 8 | The Broken Sky |
| 9 | The Kulrut |
| 10 | Cradle of Echoes |
| 11 | The Sea of Sands |
| 12 | Seeds of the Past |
| 13 | Faro's Tomb |
| 14 | Gemini |
| 15 | All That Remains |
| 16 | The Wings of the Ten |
| 17 | Singularity |
| 18 | To the Burning Shores |
| 19 | Heaven and Earth |
| 20 | The Stars in Their Eyes |
| 21 | For His Amusement |
| 22 | His Final Act |
| 23 | Epilogue |
Comment
Author

To the Burning Shores Walkthrough
Rankings
- We could not find the message board you were looking for.
Gaming News

![Pokémon FireRed Review [Switch First Impressions] | As Beautiful As the Day We Left Them](https://img.game8.co/4427482/3d5f77da7bd7c1ed4fa09591077cd864.jpeg/thumb)


Popular Games

Genshin Impact Walkthrough & Guides Wiki
Honkai: Star Rail Walkthrough & Guides Wiki
Monster Hunter Wilds Walkthrough & Guides Wiki
Arknights: Endfield Walkthrough & Guides Wiki
Umamusume: Pretty Derby Walkthrough & Guides Wiki
Wuthering Waves Walkthrough & Guides Wiki
Pokemon TCG Pocket (PTCGP) Strategies & Guides Wiki
Digimon Story: Time Stranger Walkthrough & Guides Wiki
Palworld Walkthrough & Guides Wiki
Zenless Zone Zero Walkthrough & Guides Wiki


Recommended Games
Fire Emblem Heroes (FEH) Walkthrough & Guides Wiki
Diablo 4: Vessel of Hatred Walkthrough & Guides Wiki
Pokemon Brilliant Diamond and Shining Pearl (BDSP) Walkthrough & Guides Wiki
Super Smash Bros. Ultimate Walkthrough & Guides Wiki
Yu-Gi-Oh! Master Duel Walkthrough & Guides Wiki
Elden Ring Shadow of the Erdtree Walkthrough & Guides Wiki
Monster Hunter World Walkthrough & Guides Wiki
The Legend of Zelda: Tears of the Kingdom Walkthrough & Guides Wiki
Persona 3 Reload Walkthrough & Guides Wiki
Cyberpunk 2077: Ultimate Edition Walkthrough & Guides Wiki


All rights reserved
©2021 Sony Interactive Entertainment Europe. Developed by Guerrilla. Horizon Forbidden West is a trademark of Sony Interactive Entertainment LLC.
Sony Interactive Entertainment Privacy Policy & EULA
The copyrights of videos of games used in our content and other intellectual property rights belong to the provider of the game.
The contents we provide on this site were created personally by members of the Game8 editorial department.
We refuse the right to reuse or repost content taken without our permission such as data or images to other sites.