 Grazer
 Burrower
 Scrounger
 Leaplasher
 Scrapper
 Spikesnout
 Skydrifter
 Plowhorn
 Charger
 Lancehorn
 Longleg
 Bristleback
 Fanghorn
 Redeye Watcher
 Widemaw
 Clawstrider
 Corruptor
 Bellowback
 Glinthawk
 Shell-walker
 Stalker
 Grimhorn
 Ravager
 Snapmaw
 Sunwing
 Clamberjaw
 Rollerback
 Rockbreaker
 Behemoth
 Dreadwing
 Tideripper
 Shellsnapper
 Stormbird
 Thunderjaw
 Frostclaw
 Scorcher
 Slitherfang
 Tremortusk
 Fireclaw
 Slaughterspine
 Tallneck
 Specter
 Specter Prime
This survey will take about 1 minute.
Your answers will help us to improve our website.
Horizon Forbidden West (HFW)
How to Beat Tideripper: Boss Fight Guide and Map Locations
┣ Complete Quests → Quest Walkthroughs
┣ Learn the Best Skills → Best Skills
┣ Collect Gear → List of Weapons / Outfits
┣ Collect All Legendaries → All Legendary Weapons/Outfits
┗ Take Down Machines → List of Enemy Machines
★The Ver. 1.08 Patch is now Available!
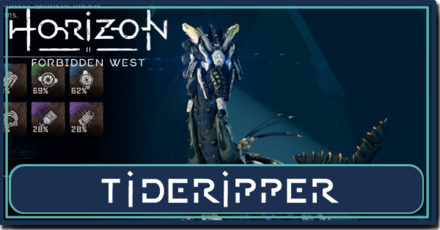
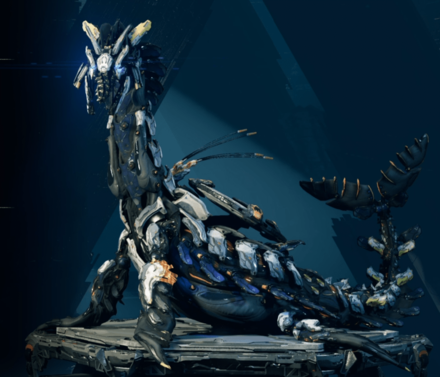
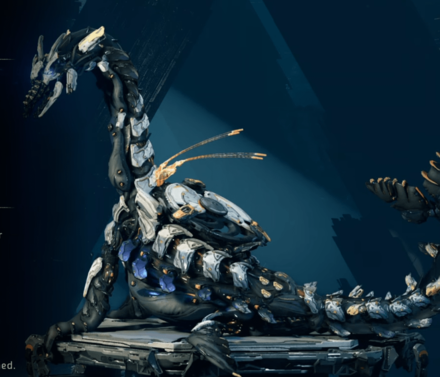
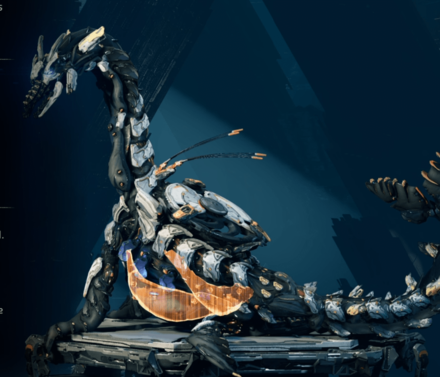
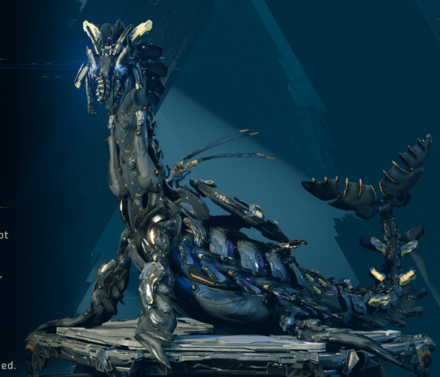
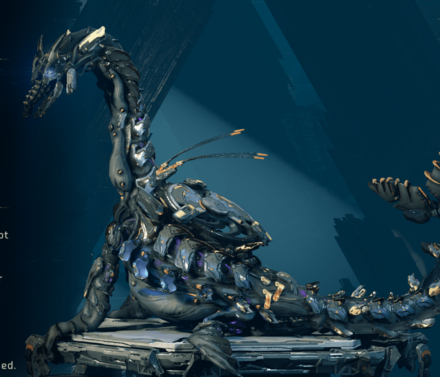
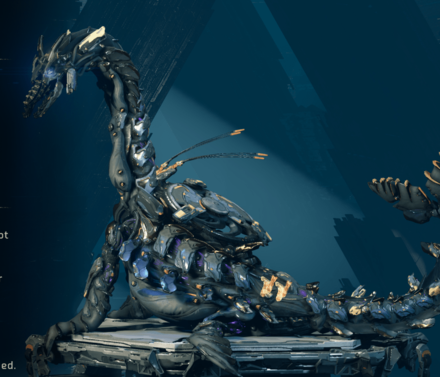
The Tideripper, a type of boss machine, is an enemy in The Sea of Sands quest in Horizon Forbidden West. Read on to learn Tideripper's weaknesses and how you can exploit them as well as a full map of Tideripper Sites in the overworld.
List of Contents
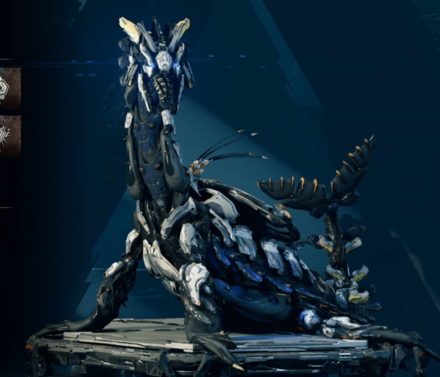
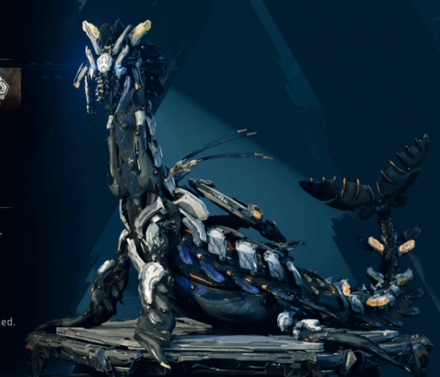
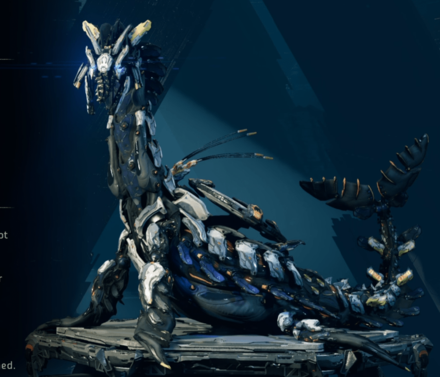
Tideripper Basic Information
| Tideripper | |
|---|---|
|
|
| Description | A large and powerful acquisition machine that filters sediments for resources. Whether on land or in water, it weaponizes Purgewater for devastating attacks. |
| Cauldron Override | KAPPA Overrides |
| Type | Acquisition |
| Class | Heavyweight |
| Weak Against | |
| Strong Against | |
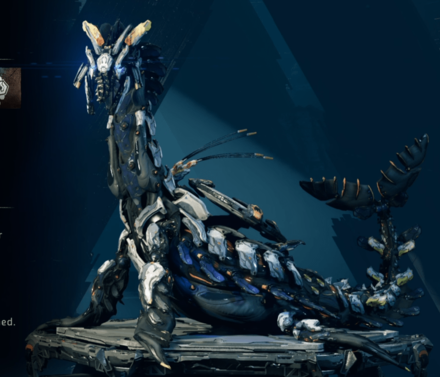
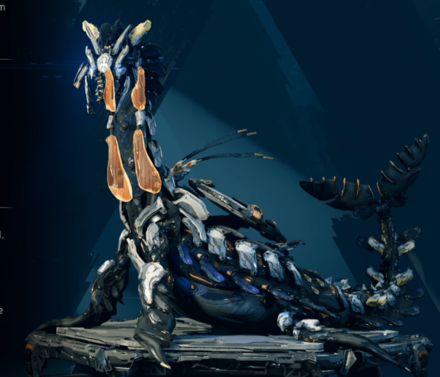
Tideripper Components
Main Components
| Component | Attributes |
|---|---|
|
|
None |
 |
Detachable - Component can be detached with Tear damage. Contains Valuable Resources - Tear off components to loot valuable resources. Destroyed when Killed - Component is destroyed if not detached. |
 |
Detachable - Component can be detached with Tear Damage. Attack Removal -Disables an attack if detached or destroyed. Contains Valuable Resource - Tear off component to loot valuable resoources Destroyed When Killed - Component is destroyed if not detached. |
 |
Explosive - Component explodes when destroyed Ability Removal - Disables an ability if detached or destroyed. Persists When Killed - Component is not destroyed when the machine is killed. Contains Resources if Intact - Leave components on the machine to gain valuable resources. |
 |
Indestructible - Component cannot be destroyed. Weak Spot - Component is vulnerable to damage. |
 |
Detachable - Component can be detached with Tear damage. Contains Valuable Resources - Tear off components to loot valuable resources. Destroyed when Killed - Component is destroyed if not detached. |
 |
Chain Reaction - Triggers an elemental explosion if shot with Frost Damage. Detachable - Component can be detached with Tear damage. Contains Valuable Resources - Tear off component to loot valuable resources Destroyed when Killed - Component is destroyed if not detached. |
 |
Detachable - Component can be detached with Tear Damage. Attack Removal -Disables an attack if detached or destroyed. Destroyed When Killed - Component is destroyed if not detached. Key Upgrade Resource - Component is valuable for upgrading weapons or outfits. |
 |
Detachable - Component can be detached with Tear damage. Reinforcement Call Removal - Disables machine reinforcements if detached or destroyed. Contains Valuable Resources - Tear off components to loot valuable resources Destroyed when Killed - Component is destroyed if not detached. |
 |
Detachable - Component can be detached with Tear Damage. Attack Removal - Disables an attack if detached or destroyed. Contains Valuable Resource - Tear off component to loot valuable resoources Destroyed When Killed - Component is destroyed if not detached. |
 |
Indestructible - Component cannot be destroyed. Weak Spot - Component is vulnerable to damage. |
 |
Chain Reaction - Triggers an elemental explosion if shot with Shock Damage. Detachable - Component can be detached with Tear damage. Contains Valuable Resources - Tear off component to loot valuable resources Destroyed when Killed - Component is destroyed if not detached. |
 |
Chain Reaction - Triggers an elemental explosion if shot with Plasma Damage. Detachable - Component can be detached with Tear damage. Contains Valuable Resources - Tear off component to loot valuable resources Destroyed when Killed - Component is destroyed if not detached. |
 |
Explosive - Component explodes when destroyed Ability Removal - Disables an ability if detached or destroyed. Persists When Killed - Component is not destroyed when the machine is killed. Contains Resources if Intact - Leave components on the machine to gain valuable resources. |
Virtual Components
| Component | Attributes |
|---|---|
 |
Chain Reaction - Triggers an elemental explosion if shot with Plasma Damage. Detachable - Component can be detached with Tear damage. Contains Valuable Resources - Tear off component to loot valuable resources Destroyed when Killed - Component is destroyed if not detached. |
 |
Chain Reaction - Triggers an elemental explosion if shot with Fire Damage. Detachable - Component can be detached with Tear damage. Contains Valuable Resources - Tear off component to loot valuable resources Destroyed when Killed - Component is destroyed if not detached. |
 |
Chain Reaction - Triggers an elemental explosion if shot with Acid Damage. Detachable - Component can be detached with Tear damage. Contains Valuable Resources - Tear off component to loot valuable resources Destroyed when Killed - Component is destroyed if not detached. |
Tideripper Item Drops
Body Loot
| Item Drop Chances | ||
|---|---|---|
 Metal Shards Metal Shards
(100%) |
 Purgewater Purgewater
(100%) |
 Apex Tideripper Heart Apex Tideripper Heart
(100% - Apex Variant Only) |
 Large Machine Core Large Machine Core
(69-70%) |
 Tideripper Circulator Tideripper Circulator
(69-70%) |
 Tideripper Primary Nerve Tideripper Primary Nerve
(62-63%) |
 Volatile Sludge Volatile Sludge
(50-51%) |
 Machine Muscle Machine Muscle
(45-46%) |
 Braided Wire Braided Wire
(30%) |
 Crystal Braiding Crystal Braiding
(28%) |
 Luminous Brainstem Luminous Brainstem
(28% - Normal Variant / 100% - Apex Variant) |
 Metal Bone Metal Bone
(28%) |
 Sturdy Hardplate Sturdy Hardplate
(15-16%) |
||
Processing Capsule Loot
| Item Drop Chances | ||
|---|---|---|
|
Braided Wire
(90%) |
Sturdy Hardplate
(56%) |
Large Machine Core
(26%) |
 Blastpaste Blastpaste
(26%) |
Tideripper Primary Nerve
(15%) |
Luminous Brainstem
(11%) |
Purgewater Cannon Loot
| Item Drop Chances | ||
|---|---|---|
|
Braided Wire
(67%) |
Crystal Braiding
(50-51%) |
Sturdy Hardplate
(34%) |
Purgewater Pouch Loot
| Item Drop Chances | ||
|---|---|---|
|
Purgewater
(100%) |
||
Tail Canister Loot
| Item Drop Chances | ||
|---|---|---|
|
Braided Wire
(89%) |
Sturdy Hardplate
(56-57%) |
Large Machine Core
(26-27%) |
|
Blastpaste
(25-26%) |
Tideripper Primary Nerve
(23-24%) |
|
Chillwater Canister Loot
| Item Drop Chances | ||
|---|---|---|
 Chillwater Chillwater
(100%) |
||
Tail Loot
| Item Drop Chances | ||
|---|---|---|
 Tideripper Tail Fin Tideripper Tail Fin
(100%) |
||
Antenna Loot
| Item Drop Chances | ||
|---|---|---|
|
Sturdy Hardplate
(50-51%) |
Braided Wire
(50-51%) |
Tideripper Primary Nerve
(10-11%) |
Tidal Disc Loot
| Item Drop Chances | ||
|---|---|---|
|
Braided Wire
(68%) |
Sturdy Hardplate
(33-35%) |
Luminous Brainstem
(10%) |
Sparker Loot
| Item Drop Chances | ||
|---|---|---|
 Sparker Sparker
(100%) |
||
Glowblast Canister Loot
| Item Drop Chances | ||
|---|---|---|
 Glowblast Glowblast
(100%) |
||
Purgewater Sac Loot
| Item Drop Chances | ||
|---|---|---|
|
Purgewater
(100%) |
||
Glowblast Canister Loot - Apex Tideripper Exclusive
| Item Drop Chances | ||
|---|---|---|
|
Glowblast
(100%) |
||
Blaze Canister Loot - Apex Tideripper Exclusive
| Item Drop Chances | ||
|---|---|---|
 Blaze Blaze
(100%) |
||
Acid Canister Loot - Apex Tideripper Exclusive
| Item Drop Chances | ||
|---|---|---|
 Metalbite Metalbite
(100%) |
||
How to Beat Tideripper
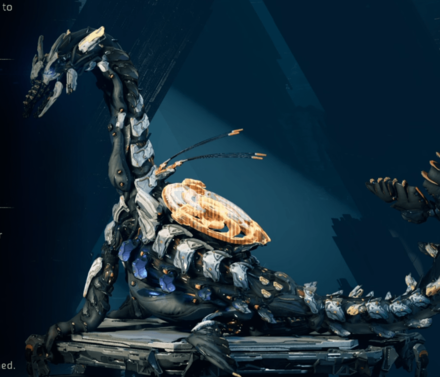
Rupture the Purgewater Sacs
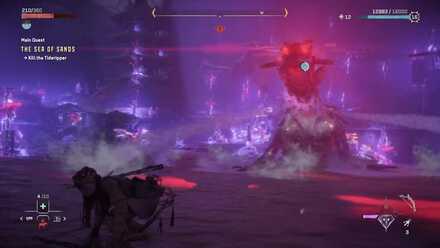
You can instantly put the Tideripper in a Drenched State once you destroy one of its Purgewater Sacs on the side. Drenched State causes Shock and Frost projectiles to deal increased damage and boosts elemental build-up against the target, which will help you deplete its HP more quickly.
There are a total of 2 Purgewater Sacs, so be sure to wait for the current debuff to wear off before destroying the other one to maximize the duration and damage.
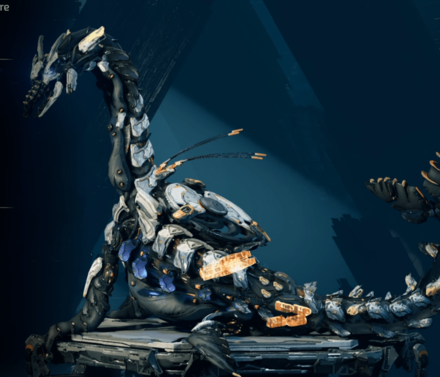
Perform Critical Strike
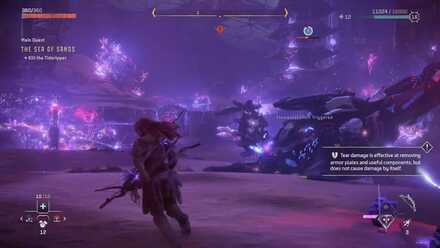
You can put the Tideripper to the ground by using weapons that can inflict Shock damage. You can also hit the Sparker on its back using those weapons to immobilize it for a brief duration. Do at least 1 Critical Strike once it's down and deal huge damage on it in a short time.
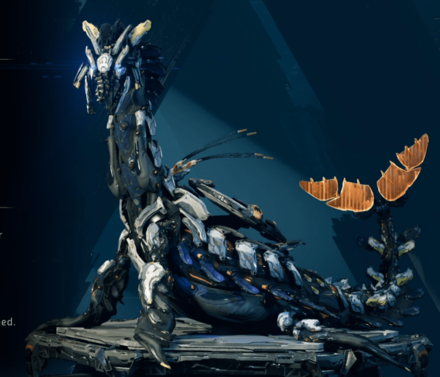
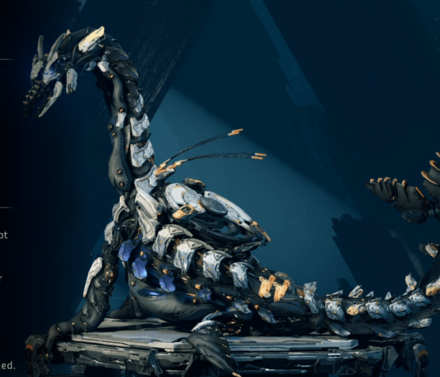
Destroy Components
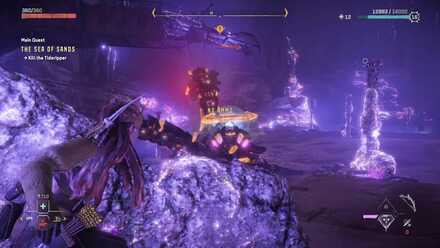
You can have more space to move in and out if you take out most Tiderippers components, especially the Tidal Disc on its back. You can remove the body parts faster using Tear Precision Arrows with high Tear stats. You can also get rare loots, like the Luminous Brainstem which you can use to upgrade powerful weapons and outfits, through this method.
Tideripper Map Locations
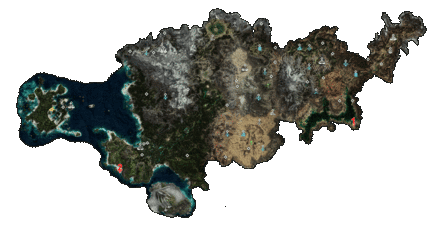 |
Horizon Forbidden West Guides

Machine Types
| Acquisition | Combat | Recon | Transport |
List of All Machines
Author

How to Beat Tideripper: Boss Fight Guide and Map Locations
Please participate in our site
improvement survey
03/2026
improvement survey
03/2026
Would you assist in
improving Game8's site?
improving Game8's site?

×
We are listening to our users' valuable opinions and discussing how to act on them.
The information collected through this survey will be used for the purpose of improving our services. In addition, the information will only be disclosed a part of a statistic in a format that will not allow identification of personal information.
Begin Survey
Not Now
×
Please rate each item regarding Game8.co's Advertisements.
Amount of Ads
Very Dissatisfied
Somewhat Dissatisfied
Fine
Somewhat Satisfied
Highly Satisfied
Placement of Ads
Timing of Ad Display
Ad Loading Speed
Safeness of Ads
Content of Ads
×
Please rate each item regarding Game8.co's Quality of Articles.
Amount of information
Very Dissatisfied
Somewhat Dissatisfied
Fine
Somewhat Satisfied
Highly Satisfied
Frequency of updates
Speed of new information
Accuracy of articles
Understandibility of articles
Readability of sentences
×
Please rate each item regarding Game8.co's Usability of the Site.
Ease of finding information
Very Dissatisfied
Somewhat Dissatisfied
Fine
Somewhat Satisfied
Highly Satisfied
Loading Speed
Use of Color
Font Size
Visibility of Images
Easy to Understand Layout
×
Please rate each item regarding Game8.co's Message Boards, Comments.
Ease of Writing
Very Dissatisfied
Somewhat Dissatisfied
Fine
Somewhat Satisfied
Highly Satisfied
Readability
Ease in Finding Information
Comment Quality
Comment Quantity
Admin Response
×
Please rate each item regarding Game8.co's Site's new design.
Please rate our site's new design
Very Dissatisfied
Somewhat Dissatisfied
Fine
Somewhat Satisfied
Highly Satisfied
Do you think that the website's design change makes the site easier to use?
Has the new design made it easier for you to find information on the site?
Has the new design improved the overall visual appeal of the site?
How would you rate your overall satisfaction with the new design of the site?
×
How likely are you to recommend Game8 to someone you know?
Very Unlikely
0
1
2
3
4
5
6
7
8
9
10
Very Likely
If you have other opinions regarding potential improvement to the website, please share them with us. We would appreciate your honest opinion.
Note: This is a free response section, so you can proceed without entering anything.
Note: Please be sure not to enter any kind of personal information into your response.
Note: Please be sure not to enter any kind of personal information into your response.
×
Thank You
×
Thank you for participating in our survey! Your answers will help us to improve the quality of our website and services.
We hope you continue to make use of Game8.
We hope you continue to make use of Game8.
Close
Rankings
- We could not find the message board you were looking for.
Gaming News


![Everwind Review [Early Access] | The Shaky First Step to A Very Long Journey](https://img.game8.co/4440226/ab079b1153298a042633dd1ef51e878e.png/thumb)

![Monster Hunter Stories 3 Review [First Impressions] | Simply Rejuvenating](https://img.game8.co/4438641/2a31b7702bd70e78ec8efd24661dacda.jpeg/thumb)
Popular Games

Genshin Impact Walkthrough & Guides Wiki
Honkai: Star Rail Walkthrough & Guides Wiki
Umamusume: Pretty Derby Walkthrough & Guides Wiki
Pokemon Pokopia Walkthrough & Guides Wiki
Resident Evil Requiem (RE9) Walkthrough & Guides Wiki
Monster Hunter Wilds Walkthrough & Guides Wiki
Wuthering Waves Walkthrough & Guides Wiki
Arknights: Endfield Walkthrough & Guides Wiki
Pokemon FireRed and LeafGreen (FRLG) Walkthrough & Guides Wiki
Pokemon TCG Pocket (PTCGP) Strategies & Guides Wiki


Recommended Games
Diablo 4: Vessel of Hatred Walkthrough & Guides Wiki
Cyberpunk 2077: Ultimate Edition Walkthrough & Guides Wiki
Fire Emblem Heroes (FEH) Walkthrough & Guides Wiki
Yu-Gi-Oh! Master Duel Walkthrough & Guides Wiki
Super Smash Bros. Ultimate Walkthrough & Guides Wiki
Pokemon Brilliant Diamond and Shining Pearl (BDSP) Walkthrough & Guides Wiki
Elden Ring Shadow of the Erdtree Walkthrough & Guides Wiki
Monster Hunter World Walkthrough & Guides Wiki
The Legend of Zelda: Tears of the Kingdom Walkthrough & Guides Wiki
Persona 3 Reload Walkthrough & Guides Wiki


All rights reserved
©2021 Sony Interactive Entertainment Europe. Developed by Guerrilla. Horizon Forbidden West is a trademark of Sony Interactive Entertainment LLC.
Sony Interactive Entertainment Privacy Policy & EULA
The copyrights of videos of games used in our content and other intellectual property rights belong to the provider of the game.
The contents we provide on this site were created personally by members of the Game8 editorial department.
We refuse the right to reuse or repost content taken without our permission such as data or images to other sites.