Death from Below Fiend Intel: How to Avoid Getting Swallowed
Death from Below is a Fiend Intel Combat Assignment in the Corel Region of Final Fantasy 7 Rebirth (FF7 Rebirth). Learn the strategies on how to beat this Fiend Intel, how to avoid getting swallowed, how to unlock, and where to find this Fiend Intel on the map.
List of Contents
Death from Below Information
Death from Below Objectives
| Battle Conditions |
|---|
Death from Below Enemy Intel
| Duneworm Enemy Intel | ||
|---|---|---|
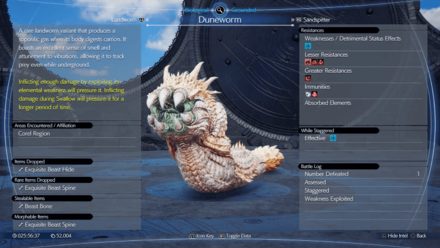 |
||
| Weaknesses | Normal:
Staggered:
|
|
| Resistances | Lesser:
Greater:
Staggered: - |
|
| Immunities | Normal:
Staggered: - |
|
| Absorbs | Normal: - |
|
How to Unlock Death from Below
| How to Unlock | Complete Activation Intel 4: Riverside Tower |
|---|---|
| Recommended Level | 31 |
| Chapter Available | Chapter 9 |
How to Avoid Being Swallowed
Maintain Distance and Dodge When Duneworm Launches Upwards

Whenever the Duneworm dives underground, this means that they will follow your controlled character and will use Swallow. Always move far from the Duneworm and once they launch upwards, this is the moment when you need to dodge.
Dodge towards a direction where they will not land. This can be difficult to do at first but you can always retry the battle to practice until you get the timing right.
Death from Below Map Location
Southeast of Riverside Tower
| Map View | 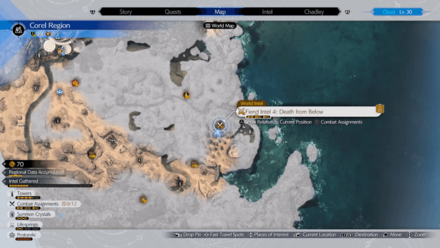 |
|---|---|
| In-Game |  |
After activating Riverside Tower, this Fiend Intel will appear. Pin this on your map and follow the waypoint.
Ride your buggy that you will get on Chapter 9 and go through the huge tube passage to get to the side where the Fiend Intel is. Just follow the waypoint until you reach the Fiend Intel.
Chapter 9: The Planet Stirs Walkthrough
How to Beat Duneworm
Use Ice Magic to Pressure
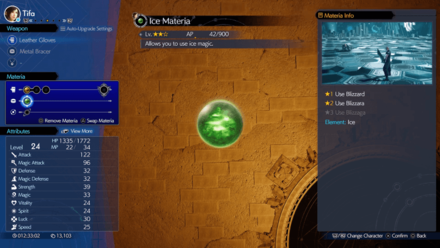
| How to Pressure Duneworm |
|---|
| Inflicting enough damage by exploiting its elemental weakness will pressure it. Inflicting damage during Swallow will pressure it for a longer period of time. |
The Duneworm is weak and can be pressured from Ice spells, so it is recommended to equip an Ice Materia to one of your party members.
Choose Dynamic Difficulty if Your Level is Way Higher than the Fiend Intel
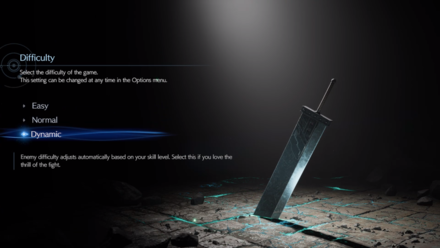
If you are trying to pressure the enemy and your level is way too high, there is a chance that you'll defeat the enemy even before pressuring them. To solve this, switch to Dynamic difficulty as the enemies' level will scale with you, providing a challenge and an opportunity to complete the Fiend Intel's mission
Dynamic Difficulty and Difficulty Settings
Retry if You Fail an Objective
If you fail an objective such as pressuring the enemy, you can always retry the Fiend Intel by holding the Triangle button.
Use Strong Abilities While Staggered
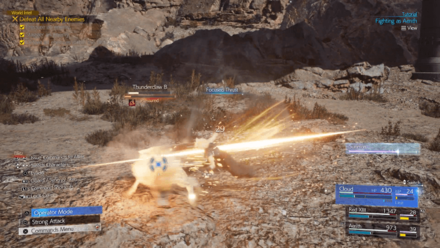
Once the Duneworm is staggered, unleash your party's strongest abilities against the Duneworm to deal massive damage against it.
Maintain Distance and Use Range Attacks
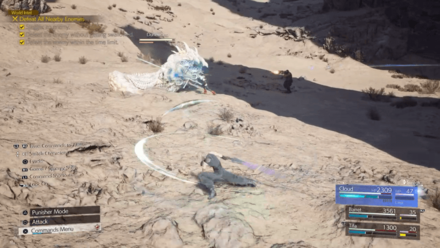
The safest way to deal with the Duneworm is to use Cloud's ranged attacks or Barret as you can be distant from the Duneworm and it will allow you to watch it's movements from afar.
Equip Assess Materia to Scan Enemy Information
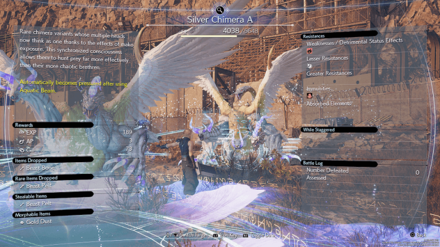
It is highly recommended to equip the Assess Materia and Assess the Fiend to figure out their pressure conditions and also what their weaknesses or resistances are.
Scan Enemies to Unlock Chadley's Biological Intel Combat Simulator Missions
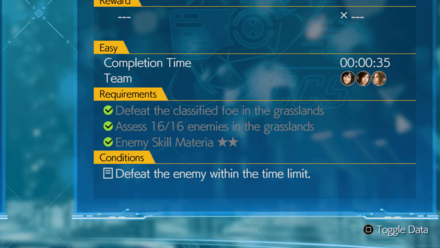
Scanning Fiends will also contribute to unlocking some Biological Intel missions as Chadley will require you to assess a certain amount of enemies within a region in order to unlock a Biological Intel combat simulator missions.
Combat Simulator Guide: How to Unlock and Win All Battles
FF7 Rebirth Related Guides

All Fiend Intel Guides
| Grasslands Fiend Intel | |
|---|---|
| Voracious and Venomous | Bearer of Grudges |
| Keepers of the Burrow | Wailing Weed |
| Picky Eater | Voltaic Canine |
| Junon Fiend Intel | |
| Cacophonic Corvid | Zemze Breaks |
| Scorched Earth | Weather the Storm |
| Corel Fiend Intel | |
| Hit the Squids | Seahorsing Around |
| Top of the Pecking Order | Death from Below |
| Fish out of Water | Unholy Union |
| Gongaga Fiend Intel | |
| A Croaking Chorus | Mean Green Mother |
| Shake the Earth | Maddened by Mako |
| A Two-Pronged Assault | Reactor Royalty |
| Cosmo Canyon Fiend Intel | |
| Wizards of the Waste | Fury Takes Flight |
| Guardian of Gold | Too Hot to Handle |
| The Shapeless Assassin | Forgotten Toys |
| Nibel Fiend Intel | |
| Roaring Flames | Gluttonous Devourer |
| Mako-Cursed Abomination | Stone-Cold Spitter |
Comment
Author
Death from Below Fiend Intel: How to Avoid Getting Swallowed
improvement survey
04/2026
improving Game8's site?

Your answers will help us to improve our website.
Note: Please be sure not to enter any kind of personal information into your response.

We hope you continue to make use of Game8.
Rankings
- We could not find the message board you were looking for.
Gaming News
Popular Games

Genshin Impact Walkthrough & Guides Wiki

Crimson Desert Walkthrough & Guides Wiki

Umamusume: Pretty Derby Walkthrough & Guides Wiki

Honkai: Star Rail Walkthrough & Guides Wiki

Monster Hunter Stories 3: Twisted Reflection Walkthrough & Guides Wiki

Wuthering Waves Walkthrough & Guides Wiki

The Seven Deadly Sins: Origin Walkthrough & Guides Wiki

Pokemon TCG Pocket (PTCGP) Strategies & Guides Wiki

Pokemon Pokopia Walkthrough & Guides Wiki

Zenless Zone Zero Walkthrough & Guides Wiki
Recommended Games

Monster Hunter World Walkthrough & Guides Wiki

Fire Emblem Heroes (FEH) Walkthrough & Guides Wiki

Pokemon Brilliant Diamond and Shining Pearl (BDSP) Walkthrough & Guides Wiki

Super Smash Bros. Ultimate Walkthrough & Guides Wiki

Diablo 4: Vessel of Hatred Walkthrough & Guides Wiki

Cyberpunk 2077: Ultimate Edition Walkthrough & Guides Wiki

Yu-Gi-Oh! Master Duel Walkthrough & Guides Wiki

Elden Ring Shadow of the Erdtree Walkthrough & Guides Wiki

The Legend of Zelda: Tears of the Kingdom Walkthrough & Guides Wiki

Persona 3 Reload Walkthrough & Guides Wiki
All rights reserved
© SQUARE ENIX CO., LTD. All Rights Reserved.
CHARACTER DESIGN: TETSUYA NOMURA/ROBERTO FERRARI
LOGO ILLUSTRATION: © 1997 YOSHITAKA AMANO
The copyrights of videos of games used in our content and other intellectual property rights belong to the provider of the game.
The contents we provide on this site were created personally by members of the Game8 editorial department.
We refuse the right to reuse or repost content taken without our permission such as data or images to other sites.


![Forza Horizon 6 Review [Preview] | Beautiful Roads With a Whole Lot of Oversteer](https://img.game8.co/4460981/a7254c24945c43fbdf6ad9bea52b5ce9.png/thumb)
![Borderlands Mobile Review [Playtest] | The Same Borderlands Made Easy](https://img.game8.co/4465500/aac0c880a39ec5cd46073e49d18f3ed5.png/thumb)


