

This survey will take about 1 minute.
Your answers will help us to improve our website.
Arknights: Endfield
Finally, in Full Color Mission Guide
✪ Check Game8 Endfield Twitter for daily tips!
★ Exclusive: Endfield's Connection to Arknights
★ Version 1.2: Release Date | Livestream
★ Tangtang (Build | Banner) | Rossi (Build | Banner)
★ 1.1 Events: Survival Training | Cleanse and Rinse
★ Hot: Essence Tool | Blueprint | Best Dijiang Setup
Finally, in Full Color is a two-part subquest of one of Yvonne's Operator Mission found in Valley IV in Arknights: Endfield 1.0 See how to check the surroundings, how to figure out a way to navigate the obstacles, how to deploy the Tweety-Bomb, how to unlock this quest, a full walkthrough, and all mission rewards in this guide!
| Previous Mission | Next Mission |
|---|---|
| - | Together as We Are |
How to Unlock Finally, in Full Color
Complete Conference of the Four
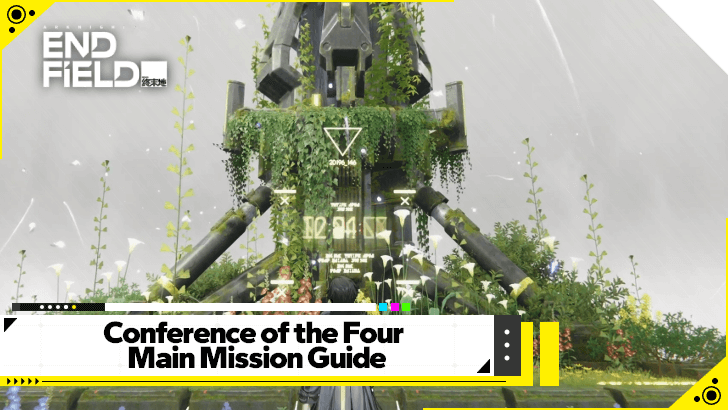
Part 1 of Finally, in Full Color is unlocked after completing Conference of the Four and has no level restrictions.
Conference of the Four Main Mission Guide
Start Algorithm of Joy Side Quest
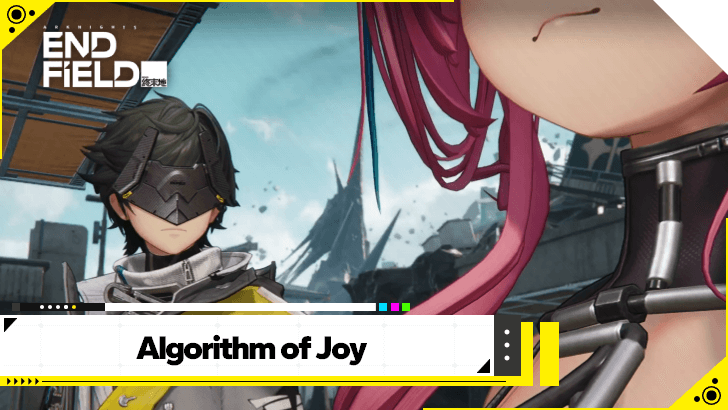
Part 2 of Finally, in Full Color is immediately available once you start the Algorithm of Joy mission, which is the 3rd subquest of the Yvonne Operator Mission.
Finally, in Full Color Part 1 Walkthrough
Finally, in Full Color Part 1 Quest Guide
- Read the Message from Andre
- Ask the Worker About the Package's Location
- Find Yvonne's Package
- Follow Yvonne
Read the Message from Andre
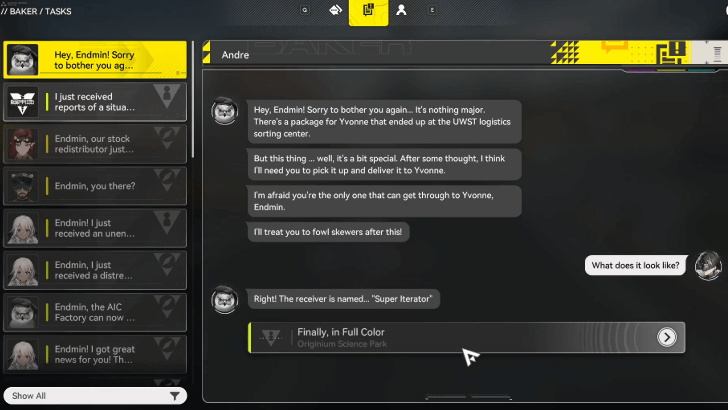
To start Yvonne's Operator Mission, open Baker and read Andre's message. He asks you to deliver Yvonne's package from the UWST logistics to her.
Ask the Worker About the Package's Location
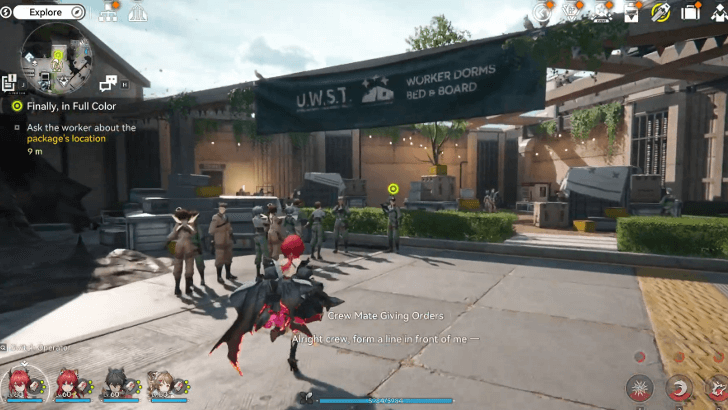
Head to the Originium Science Park and find the crew mate giving orders. Ask him about Yvonne's package location, which should be behind him.
Find Yvonne's Package
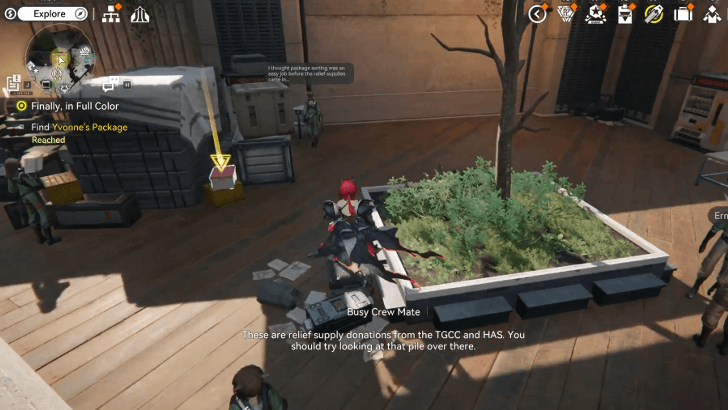
Behind the crew mate is an area filled with packages. Yvonne's package should be the pink package at the left side of the area. You will automatically be in Yvonne's lab with the package.
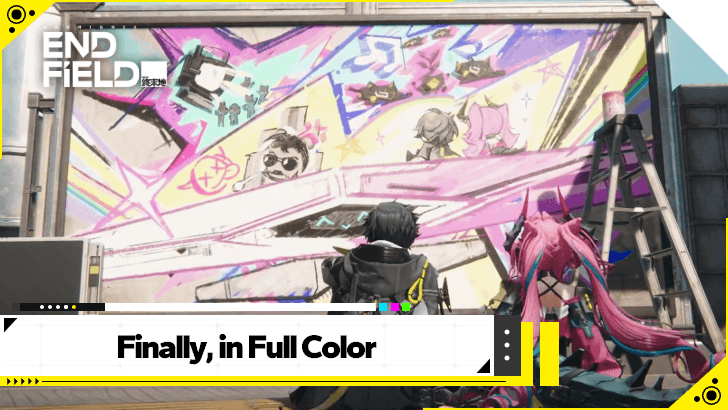
Follow Yvonne
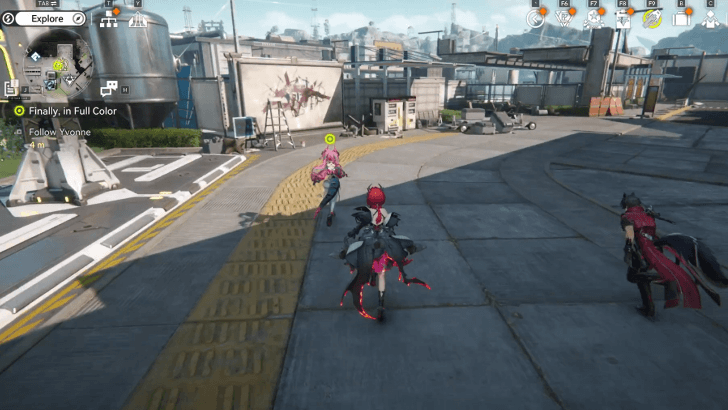
After a conversation at her lab, follow Yvonne outside to see her graffiti. She tells you to grab a brush to help her finish the art. To find inspiration, Yvonne asks you to take her to some inspiring spots.
Finally, in Full Color Part 2 Walkthrough
Finally, in Full Color Part 2 Quest Guide
- Check the Surroundings and Explore Ahead
- Defeat the Aggeloi
- Find a Passable Road
- Explore Ahead
- Figure Out a Way to Navigate the Obstacle
- Follow Frost-e-Bytee to Find the Voice Command
- Tell Yvonne the New Activation Command
- Keep Exploring Ahead
- Deploy the Tweety-Bomb at the Specified Position
- Keep Exploring Ahead
- Defeat the Aggeloi Inside
- Check the Gate Lock
- Explore Ahead
- Figure Out a Way to Navigate the Obstacle
- Keep Advancing
- Defeat the Attacking Aggeloi
- Follow the Path Created by the Drones
- Keep Advancing
- Head Below the Giant Machine
- Defeat the Aggeloi
- Go to the Familiar Table
- Talk to Yvonne
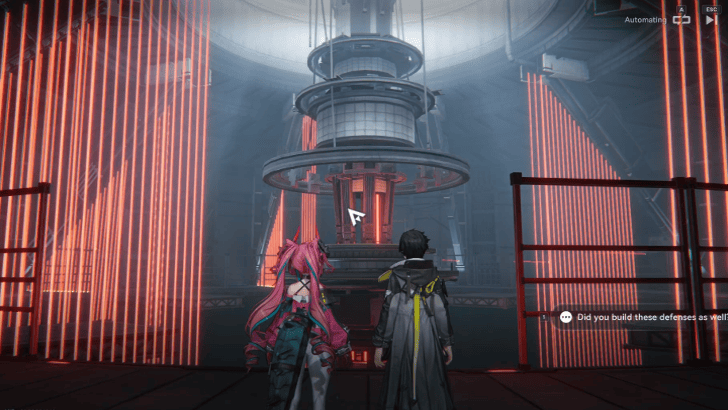
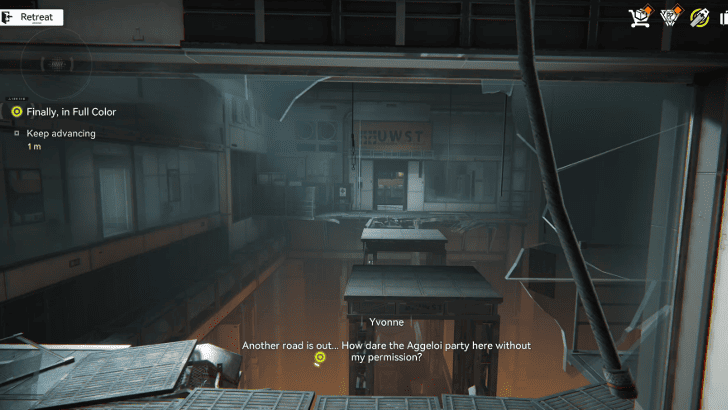
Check the Surroundings and Explore Ahead
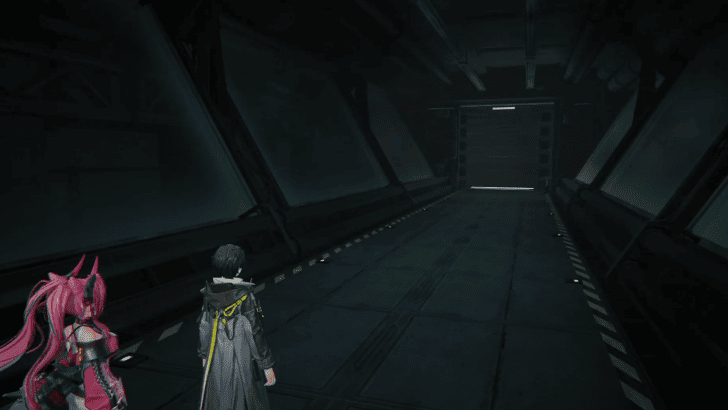
After entering the the area, keep following the path and explore ahead. Open the door and look over the laboratory. The alarm light has been activated and see that the Aggeloi inside.
How to Check the Surroundings
| How to Check the Surroundings | |
|---|---|
| 1 | 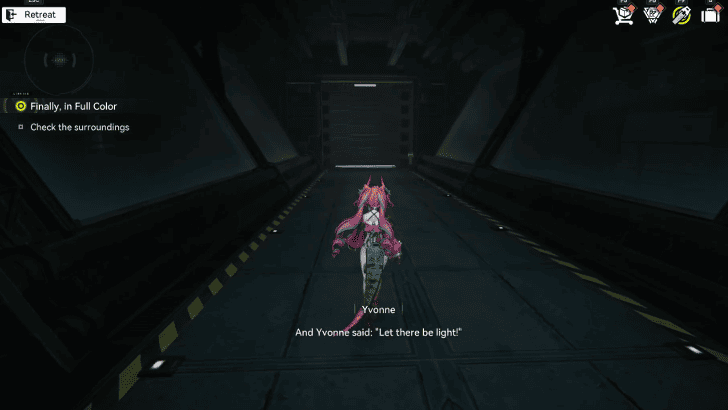 Explore ahead and open the door. Observe the laboratory that Yvonne previously worked on. |
| 2 | 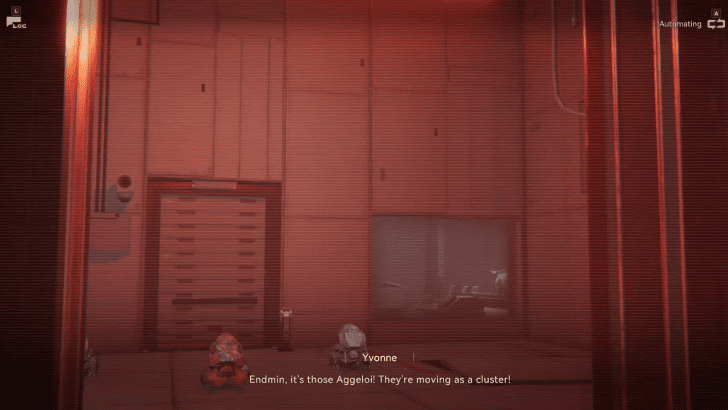 Both of you spot the activated alarm lights. Yvonne sees that there are Aggeloi inside moving as a cluster. Go to the room with the Aggeloi. |
Defeat the Aggeloi
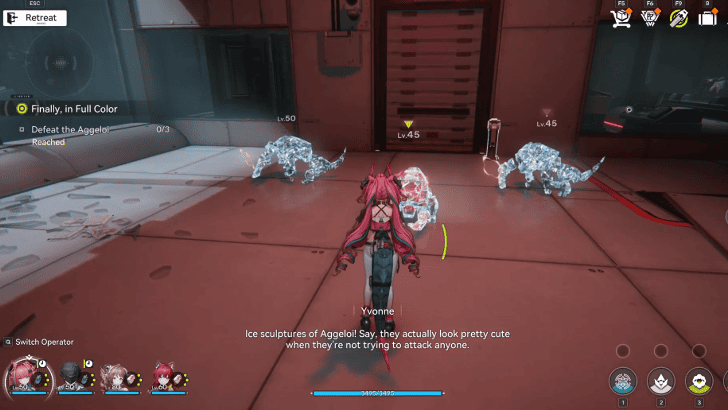
Defeat the Aggeloi that triggered the alarm. Open the door and head outside.
Find a Passable Road
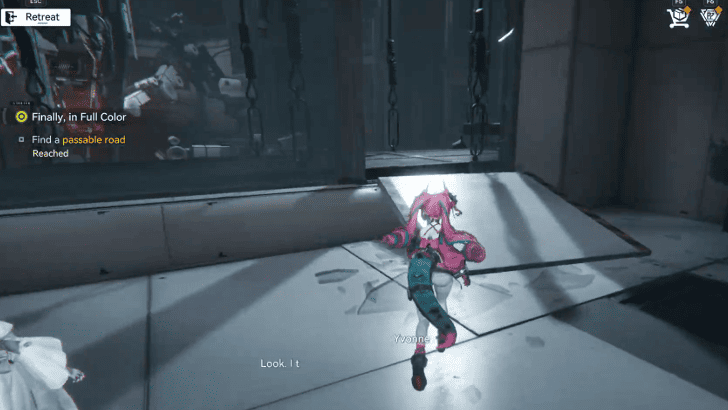
Head out the door and try to find a passable road. Head to the other side of the room to find an exit by the windows.
Explore Ahead
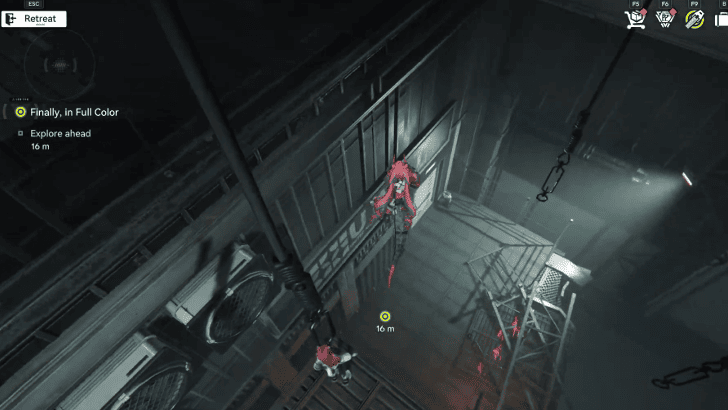
Follow the hanging platforms by running and jumping to the next one. Jump down and use the switch to open the door to enter a room with lasers on the conveyor belts.
Figure Out a Way to Navigate the Obstacle
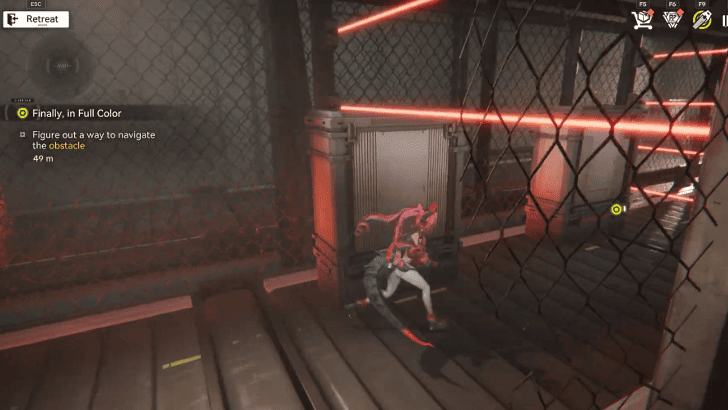
There are conveyor belts that will lead you to the next location. However, some paths are blocked by lasers. To pass through the lasers, stand beside the moving boxes blocking the lasers.
How to Figure Out to Navigate the Obstacle
| How to Figure Out a Way to Navigate the Obstacle | |
|---|---|
| 1 | 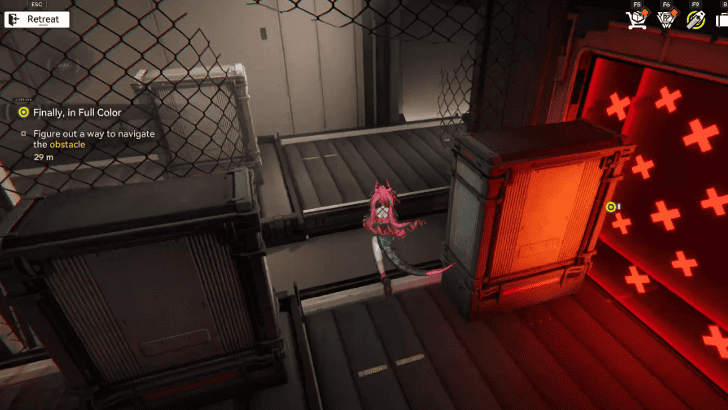 Stand beside the boxes to the left and reach the end of the conveyor belt and hop to the next one to the left. |
| 2 | 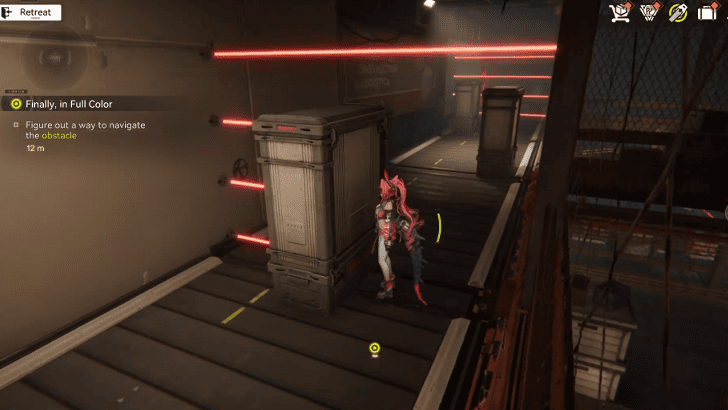 Wait to stand beside a box that will block the left side of the lasers to pass through. Step off to the right platform to see the elevator. |
| 3 | 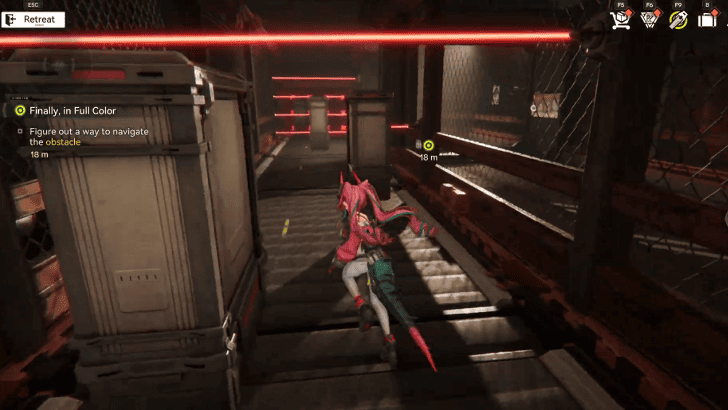 Jump down the platform to the third conveyor belt. The lasers will move vertically, so wait for the lasers to be higher than you. Go to the right to find another path. |
| 4 | 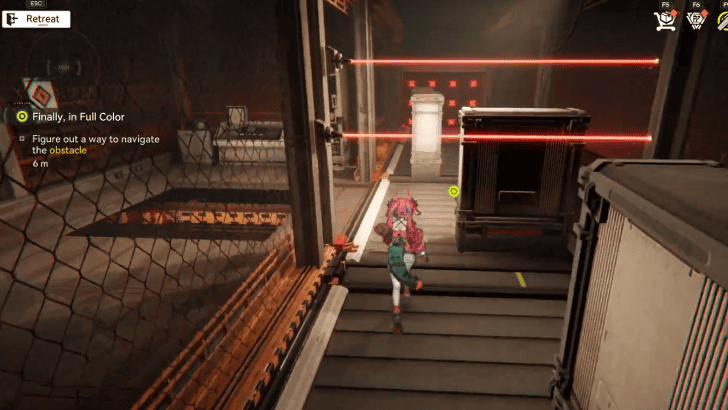 Follow the path to the fourth conveyor belt. Fight the direction of the conveyor belt and pass through the vertically moving laser. Hop down to the left. |
| 5 | 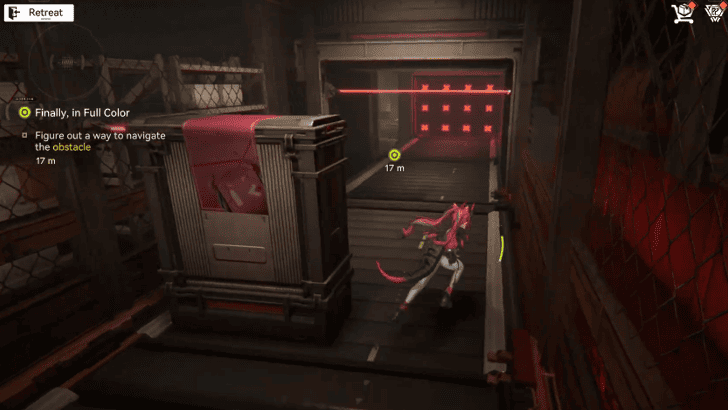 On the fifth conveyor belt, move forward against the belt's movement. Use the boxes to block the laser, or pass the lasers when it is higher than you. Step off the conveyor belt to the elevator. |
Follow Frost-e-Bytee to Find the Voice Command
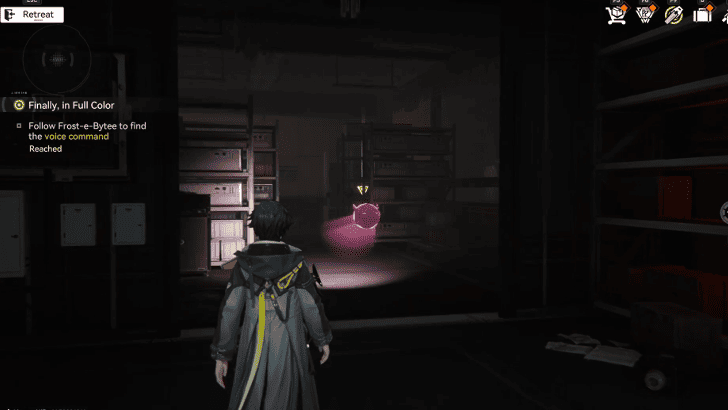
Access to the elevator is locked. Follow the Frost-e-Bytee and find audio logs for the elevator's activation command, which is on the shelf at the back of the room.
Tell Yvonne the New Activation Command
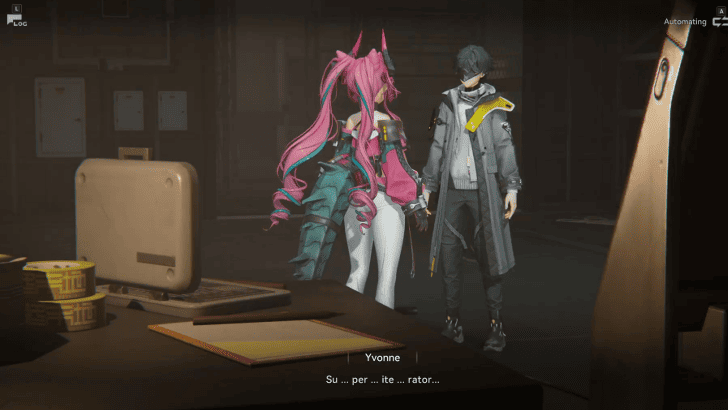
Return to Yvonne and tell her the activation command. The new command is **Super Iterator and you can take the elevator.
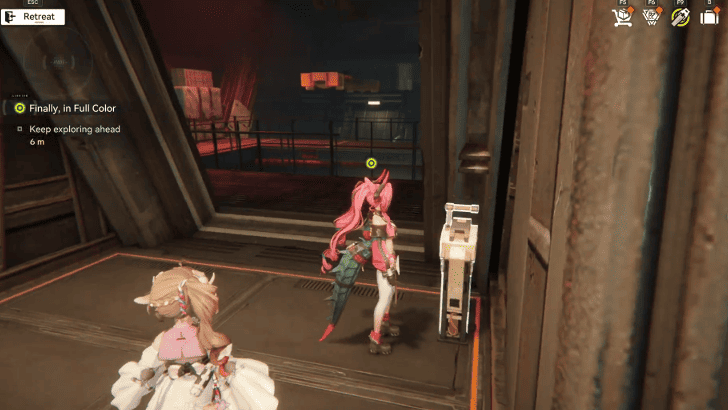
Keep Exploring Ahead
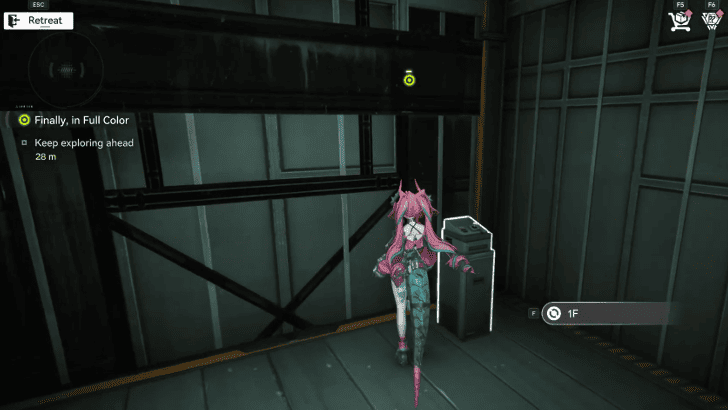
Call the elevator down and take it to the first floor. Keep walking until you find another room. The exit is being block by the Aggeloi.
Deploy the Tweety-Bomb at the Specified Position
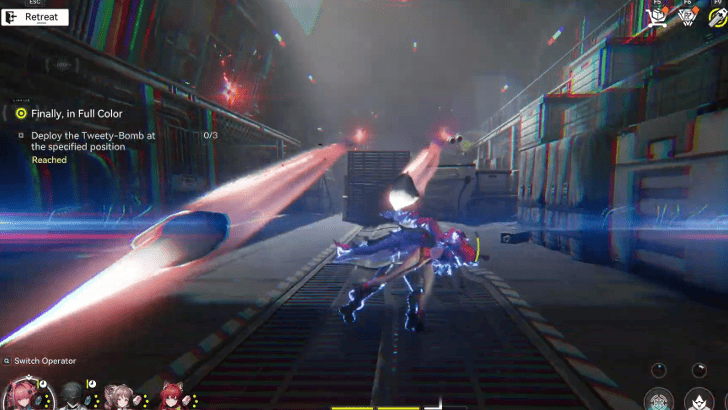
Dodge the Aggeloi missiles while you make your way to deploy the Tweety-Bombs. Find all three floating Tweety-Bombs
How to Deploy the Tweety-Bomb
| How to Deploy the Tweety-Bomb | |
|---|---|
| 1 | 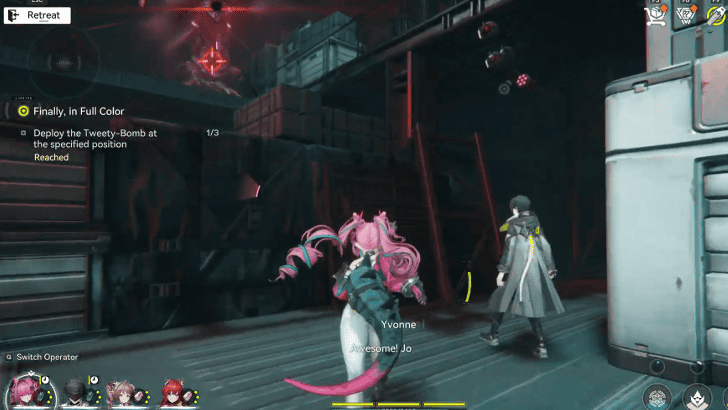 The first position is just straight ahead by the packages. Use them to block the missiles while waiting for the deployment. |
| 2 | 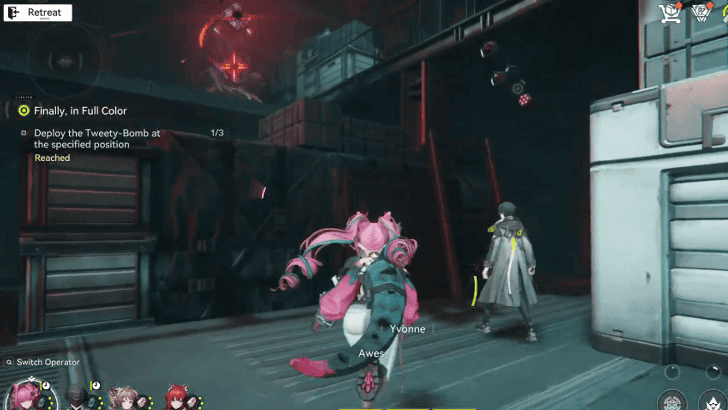 Move closer to the Aggeloi and head under the cover to the right where the next Tweety-Bomb is seen. |
Keep Exploring Ahead
Call for the elevator at the other side. Head to the second floor and move to the next room by opening the door.
Defeat the Aggeloi Inside

Open the door to enter the new room. Jump down and defeat all 3 Aggeloi in the room.
Check the Gate Lock
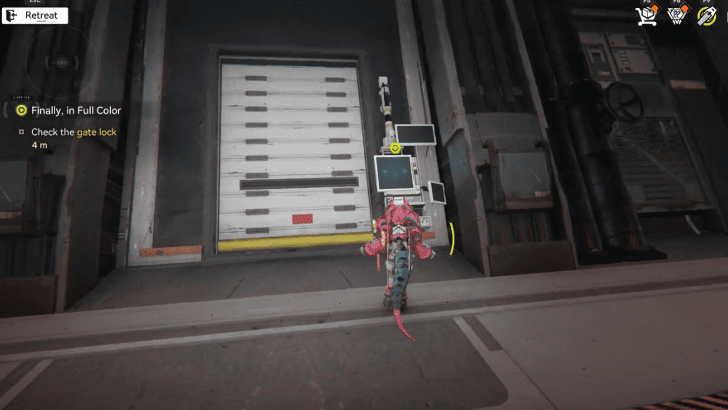
Approach the gate lock for Yvonne to hack it open. You realize that she designed the gate because of the smiley the control panel displays.
Explore Ahead
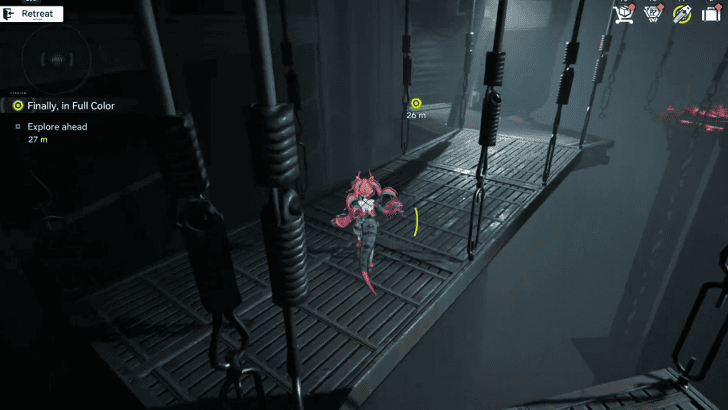
Enter the room and turn right to find hanging platforms that lead to the next location. Jump to the next platforms until you reach the gate. Open the gate and enter the room.
Figure Out a Way to Navigate the Obstacle
The room is filled with laser defenses. Avoid these lasers and ride the moving platforms until you reach the gate.
How to Figure Out to Navigate the Obstacle
| How to Figure Out to Navigate the Obstacle | |
|---|---|
| 1 | 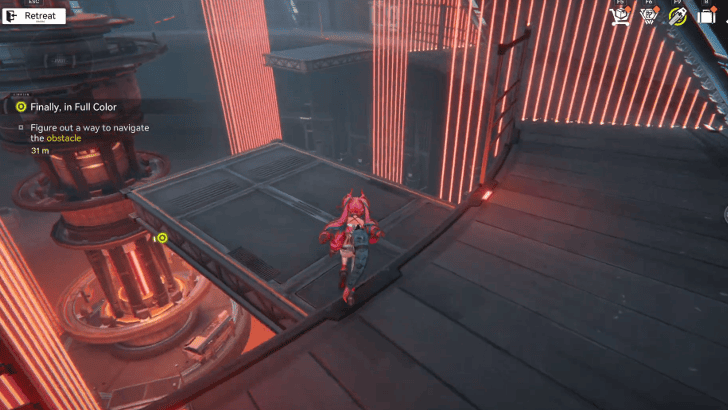 Ride the moving platform and wait until you pass two walls of lasers. Step off to the right. |
| 2 | 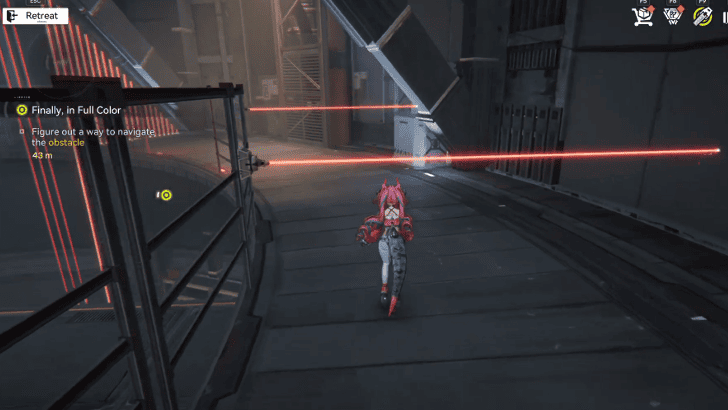 Pass through the lasers that move vertically. Ride the moving platform again to the left. |
| 3 | 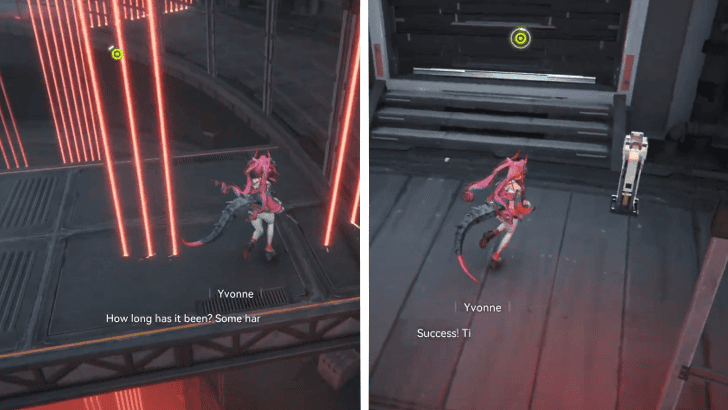 Move and dodge the lasers that can reach the moving platform. Then step off the platform to reach the gate. |
Keep Advancing
Open the gate and enter the room. With the road taken down, Yvonne tries to make a plan. Suddenly, you are getting surrounded by the Aggeloi.
Defeat the Attacking Aggeloi
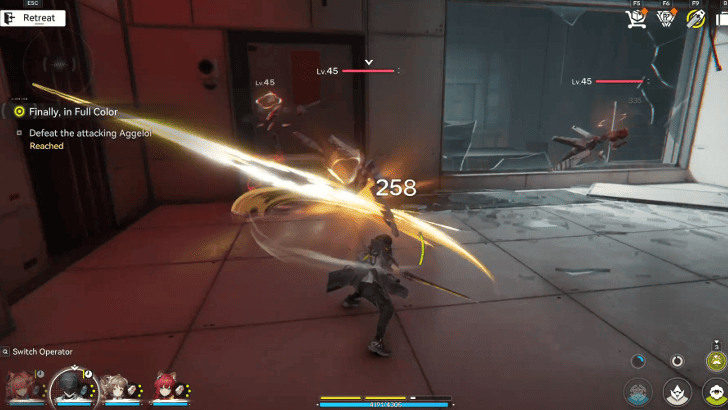
Defeat the Aggeloi for Yvonne to carry on with her plan. She got the drones lay down boards for you to cross.
Follow the Path Created by the Drones
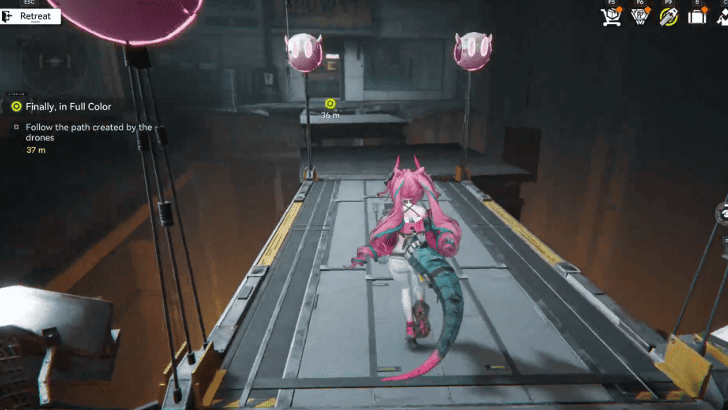
Wait for the drones to bring the board before crossing. Cross each platform created by the drones to reach the other side.
Keep Advancing

Enter the room to see a room with a big component hanging. Go around the room and turn left to find another elevator.
Head Below the Giant Machine
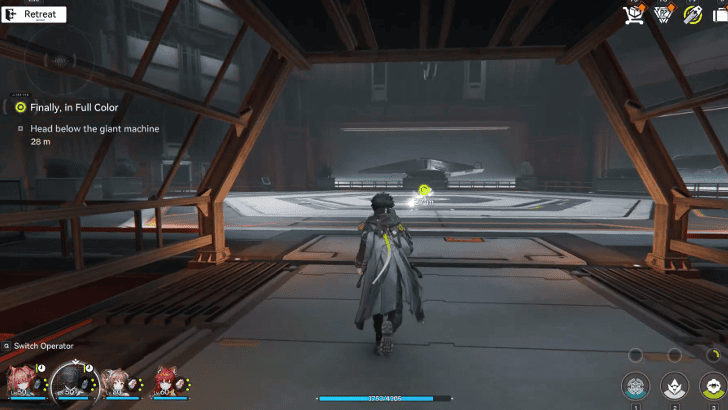
Take the elevator and head below the giant machine. While talking with Yvonne, a giant Aggelos jumps down from the machine.
Defeat the Aggeloi
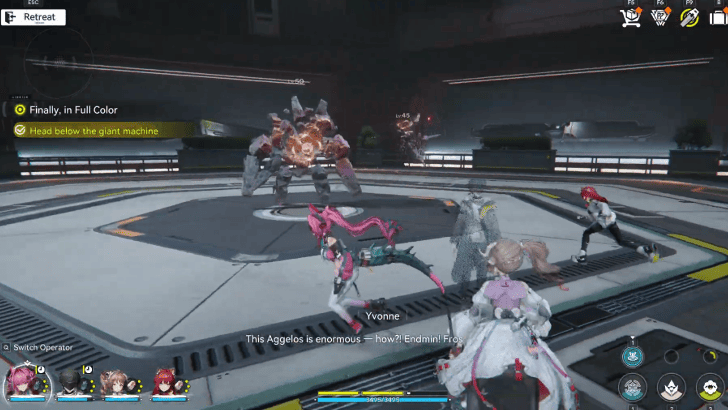
Defeat Aggeloi that blocks your path. Yvonne gets scanned and the locks are disengaged. The doors open as the both of you head in together.
Go to the Familiar Table
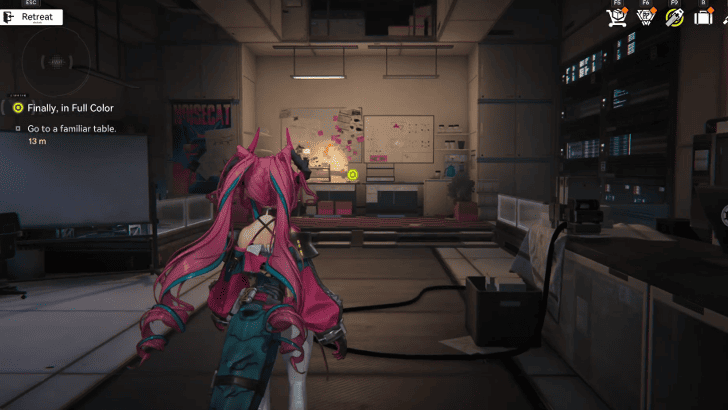
Walk towards the end of the room to the familiar table. All of Yvonne's notes are on the table where she first started working on Tata. She remembers why she started designing Tata and how it fulfilled its purpose.
Talk to Yvonne
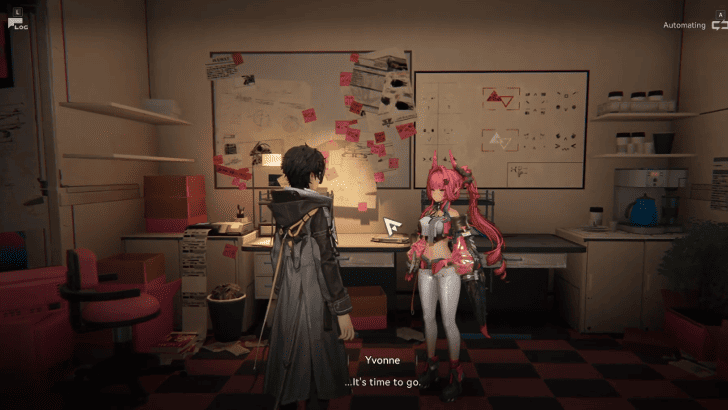
Approach Yvonne to leave and head up. You are greeted outside by UWST crew mates and Fabian Collins. He tells Yvonne that everyone really likes her graffiti and encourages her to finish it.
While finishing the art, Yvonne breaks down as she remembers Tata and you try to cheer her up. The mission ends with Yvonne inviting us to be co-artists in making their own companion.
Finally, in Full Color Rewards
Total Item Rewards
| Total Quest Rewards |
 T-Creds x4550 |
 Protoprism x9 |
|---|---|---|
You will also receive 200 Operational EXP for completing Part 1 of the quest. For Part 2, the rewards are included in the Algorithm of Joy subquest.
Finally, in Full Color Information
Finally, in Full Color Quest Line Details
| Mission Type | Operator Side Mission |
|---|---|
| Quest Line | Love, Scream, and & Prototype |
| Chapter | Yvonne - Act 1 |
| Location | Originium Science Park, Valley IV |
Finally, in Full Color is the first subquest for Yvonne's Operator Mission that's located in Originium Science Park. Part 1 will unlock after completing Conference of the Four.
Meanwhile, Part 2 is included in the Algorithm of Joy subquest, the 3rd subquest of the Yvonne Operator Mission..
Arknights: Endfield Related Guides

List of All Operator Missions
Comment
Author

Finally, in Full Color Mission Guide
Please participate in our site
improvement survey
04/2026
improvement survey
04/2026
Would you assist in
improving Game8's site?
improving Game8's site?

×
We are listening to our users' valuable opinions and discussing how to act on them.
The information collected through this survey will be used for the purpose of improving our services. In addition, the information will only be disclosed a part of a statistic in a format that will not allow identification of personal information.
Begin Survey
Not Now
×
Please rate each item regarding Game8.co's Advertisements.
Amount of Ads
Very Dissatisfied
Somewhat Dissatisfied
Fine
Somewhat Satisfied
Highly Satisfied
Placement of Ads
Timing of Ad Display
Ad Loading Speed
Safeness of Ads
Content of Ads
×
Please rate each item regarding Game8.co's Quality of Articles.
Amount of information
Very Dissatisfied
Somewhat Dissatisfied
Fine
Somewhat Satisfied
Highly Satisfied
Frequency of updates
Speed of new information
Accuracy of articles
Understandibility of articles
Readability of sentences
×
Please rate each item regarding Game8.co's Usability of the Site.
Ease of finding information
Very Dissatisfied
Somewhat Dissatisfied
Fine
Somewhat Satisfied
Highly Satisfied
Loading Speed
Use of Color
Font Size
Visibility of Images
Easy to Understand Layout
×
Please rate each item regarding Game8.co's Message Boards, Comments.
Ease of Writing
Very Dissatisfied
Somewhat Dissatisfied
Fine
Somewhat Satisfied
Highly Satisfied
Readability
Ease in Finding Information
Comment Quality
Comment Quantity
Admin Response
×
Please rate each item regarding Game8.co's Site's new design.
Please rate our site's new design
Very Dissatisfied
Somewhat Dissatisfied
Fine
Somewhat Satisfied
Highly Satisfied
Do you think that the website's design change makes the site easier to use?
Has the new design made it easier for you to find information on the site?
Has the new design improved the overall visual appeal of the site?
How would you rate your overall satisfaction with the new design of the site?
×
How likely are you to recommend Game8 to someone you know?
Very Unlikely
0
1
2
3
4
5
6
7
8
9
10
Very Likely
If you have other opinions regarding potential improvement to the website, please share them with us. We would appreciate your honest opinion.
Note: This is a free response section, so you can proceed without entering anything.
Note: Please be sure not to enter any kind of personal information into your response.
Note: Please be sure not to enter any kind of personal information into your response.
×
Thank You
×
Thank you for participating in our survey! Your answers will help us to improve the quality of our website and services.
We hope you continue to make use of Game8.
We hope you continue to make use of Game8.
Close
Premium Articles
Rankings
- We could not find the message board you were looking for.

Gaming News


![Forza Horizon 6 Review [Preview] | Beautiful Roads With a Whole Lot of Oversteer](https://img.game8.co/4460981/a7254c24945c43fbdf6ad9bea52b5ce9.png/thumb)
![Borderlands Mobile Review [Playtest] | The Same Borderlands Made Easy](https://img.game8.co/4465500/aac0c880a39ec5cd46073e49d18f3ed5.png/thumb)
Popular Games

Genshin Impact Walkthrough & Guides Wiki
Crimson Desert Walkthrough & Guides Wiki
Umamusume: Pretty Derby Walkthrough & Guides Wiki
Honkai: Star Rail Walkthrough & Guides Wiki
Monster Hunter Stories 3: Twisted Reflection Walkthrough & Guides Wiki
Wuthering Waves Walkthrough & Guides Wiki
The Seven Deadly Sins: Origin Walkthrough & Guides Wiki
Pokemon TCG Pocket (PTCGP) Strategies & Guides Wiki
Pokemon Pokopia Walkthrough & Guides Wiki
Zenless Zone Zero Walkthrough & Guides Wiki


Recommended Games
Monster Hunter World Walkthrough & Guides Wiki
Fire Emblem Heroes (FEH) Walkthrough & Guides Wiki
Pokemon Brilliant Diamond and Shining Pearl (BDSP) Walkthrough & Guides Wiki
Super Smash Bros. Ultimate Walkthrough & Guides Wiki
Diablo 4: Vessel of Hatred Walkthrough & Guides Wiki
Cyberpunk 2077: Ultimate Edition Walkthrough & Guides Wiki
Yu-Gi-Oh! Master Duel Walkthrough & Guides Wiki
Elden Ring Shadow of the Erdtree Walkthrough & Guides Wiki
The Legend of Zelda: Tears of the Kingdom Walkthrough & Guides Wiki
Persona 3 Reload Walkthrough & Guides Wiki


All rights reserved
Copyright © 2022 - 2025 GRYPHLINE. All Rights Reserved.
The copyrights of videos of games used in our content and other intellectual property rights belong to the provider of the game.
The contents we provide on this site were created personally by members of the Game8 editorial department.
We refuse the right to reuse or repost content taken without our permission such as data or images to other sites.