Paving the Way Main Mission Guide
✪ Check Game8 Endfield Twitter for daily tips!
★ Exclusive: Endfield's Connection to Arknights
★ Ver. 1.1: Release Date | Livestream | Maintenance
★ Tangtang (Build | Banner) | Rossi (Build | Banner)
★ Best Builds: Yvonne | Last Rite | Laevatain
★ Hot: Essence Tool | Blueprint | Best Dijiang Setup
Paving the Way is a Main Mission in the The Turbid Heavens quest series of Arknights: Endfield. Check out how to produce amethyst parts, how to unlock this mission, its walkthrough, and all its rewards in this guide!
| Previous Mission | Next Mission |
|---|---|
| Fort Showdown | Work Preparation |
List of Contents
Paving the Way Quest Information
Paving the Way Quest Details
| Mission Type | Main Mission |
|---|---|
| Quest Line | The Turbid Heavens |
| Chapter | Chapter 1 - Process 2 |
| Location | The Hub, Valley IV |
Paving the Way is the first quest under the The Turbid Heavens mission series. This quest is under Chapter 1 - Process 2 of the main story and is located in The Hub.
How to Unlock Paving the Way
Paving the Way is immediately unlocked after completing the Fort Showdown quest and has no level restrictions.
Required for Carly's Fairytale of the Valley Event
You need to complete Paving the Way to participate in Carly's Fairytale of the Valley. This limited-time event runs from February 7 to February 24, 2026.
Carly's Fairytale of the Valley
Paving the Way Walkthrough
Paving the Way Quest Guide
- Meet with Andre at the Core AIC Area
- Interact with the Protocol Datalogger
- Open the AIC Factory Plan and Research Mining II
- Place Electric Mining Rigs on Mining Spots
- Place Ores Moved to the Depot to Backpack
- Research Gearing Tech
- Place the Gearing Unit in the Core AIC Area
- Produce Amethyst Components
- Make Miner Overalls Gear
- Research Parts Fitting
- Use the Fitting Unit to Produce Amethyst Parts
- Give Andre the Completed Parts
Meet with Andre at the Core AIC Area
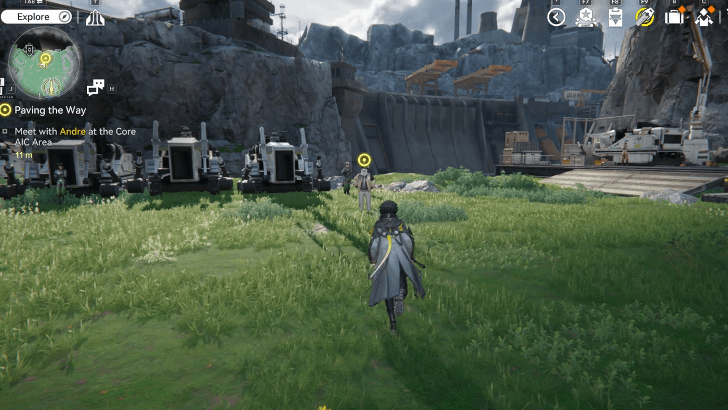
Go back to the Core AIC Area to talk to Andre to make more improvements to the factory. This is when you can access the AIC Factory Plan for a detailed AIC technology and development tree. It has three phases in which the next phase is unlocked after progressing through the main mission.
Interact with the Protocol Datalogger

Go to the Protocol Datalogger to talk to Pocus. Interact with it to collect AIC Index points to further progress through the AIC Factory Plan tree.
Open the AIC Factory Plan and Research Mining II
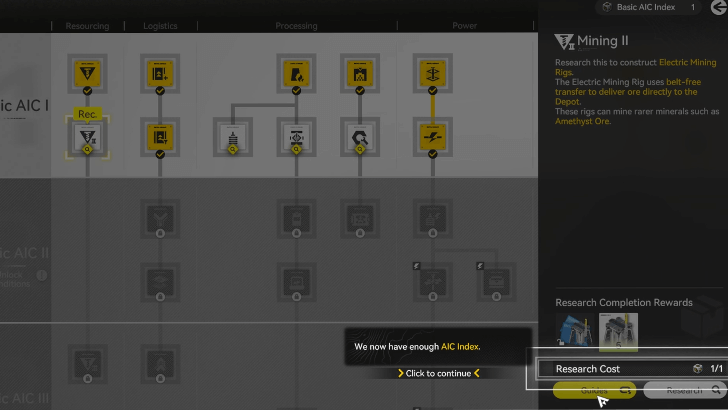
When you open the AIC Factory Plan, click on Mining II then click Research to unlock Electric Mining Rigs. Reselect the Mining II node and hit Guides to view simulations for the Electric Mining Rig.
Electric Mining Rig Simulation
| Electric Mining Rig Simulation Guide | |
|---|---|
| 1 | 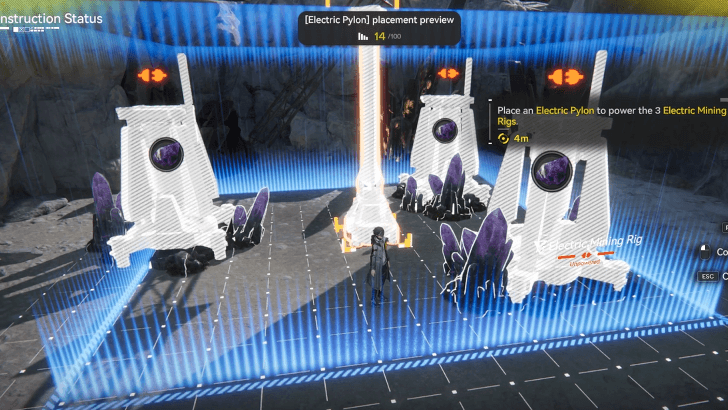 Make 3 Electric Mining Rigs Operational Place Mining Rigs on Amethyst Ore mining spots. Next, place an Electric Pylon to power up the rigs. Run to the Relay Tower and start transmission. Plug the transmission cable to the Pylon to power up the Mining Rigs. |
| 2 | 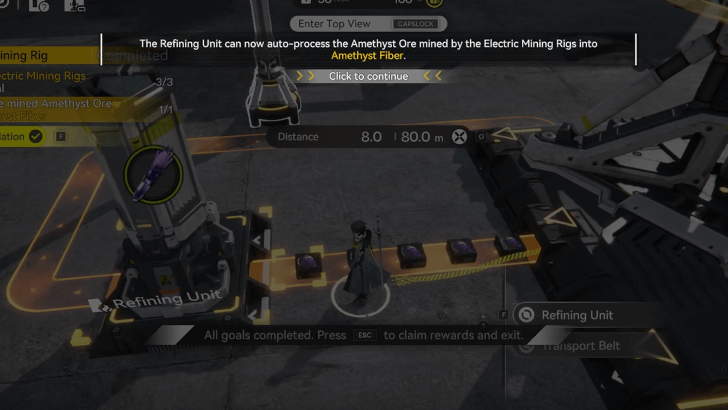 Process Amethyst Ore into Amethyst Fiber Head to the zipline to return to the Core AIC Area. Process the Amethyst Ores into Amethyst Fiber by going to the PAC output port and unloading the Amethyst Ores. Wait for the ores to be transported to the Refining Unit to be processed. |
Place Electric Mining Rigs on Mining Spots
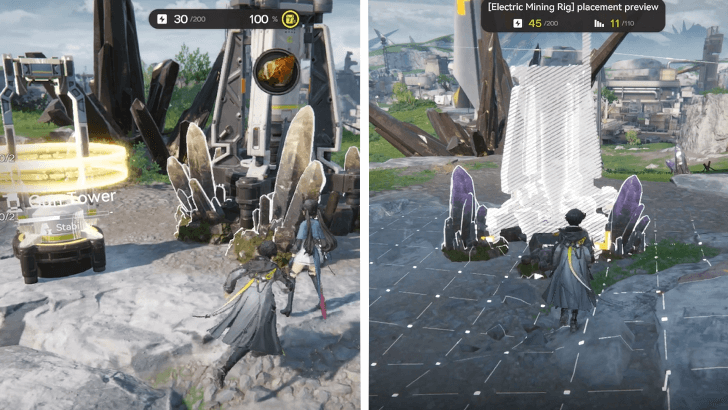
Back from the simulation, place Electric Mining Rigs in Amethyst and Originium mining spots. Amethyst Ore mining spots are straight ahead from Pocus, while Originium mining spots are south of the PAC TP. Remember to place Electric Pylons near the rigs and power them up from the Automation-Core transmission cables.
Place Ores Moved to the Depot to Backpack
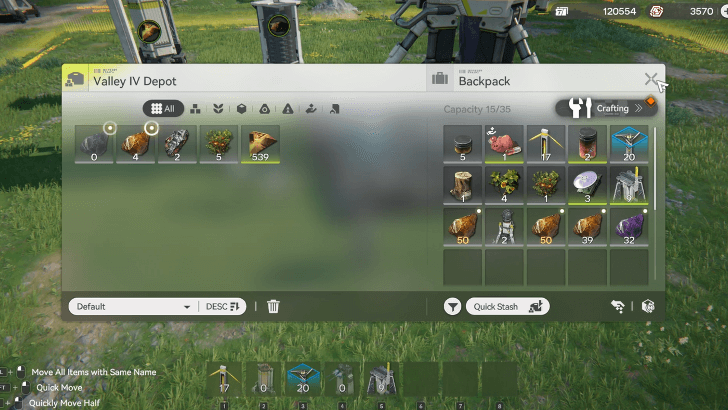
Move 50 Amethyst Ores and 50 Originium Ores from the depot to your backup. Give Andre the ores then talk to Vannikov for the next factory request.
Research Gearing Tech
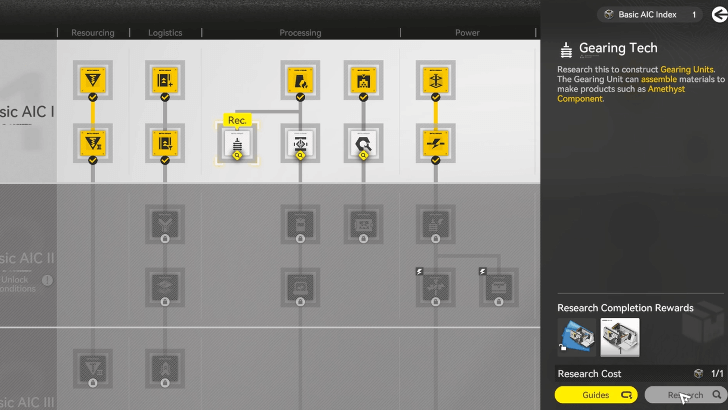
Open the AIC Factory Plan and select the Gearing Tech node. Make sure to have Basic AIC Index to research this node. Click on Guide to run a simulation on this node.
Gearing Unit Simulation
| Gearing Unit Simulation Guide | |
|---|---|
| 1 | 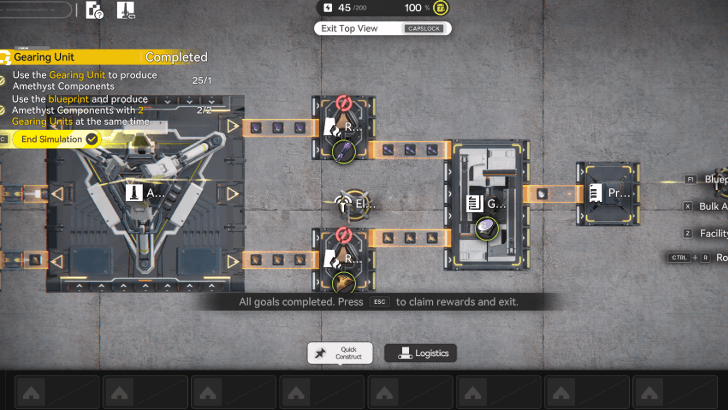 Use the Gearing Unit to produce Amethyst Components Unload the mineral ores to the PAC output port for processing. Use the transport belt to connect the Refining Units to the Gearing Unit. Wait until it produces an Amethyst Component |
| 2 | 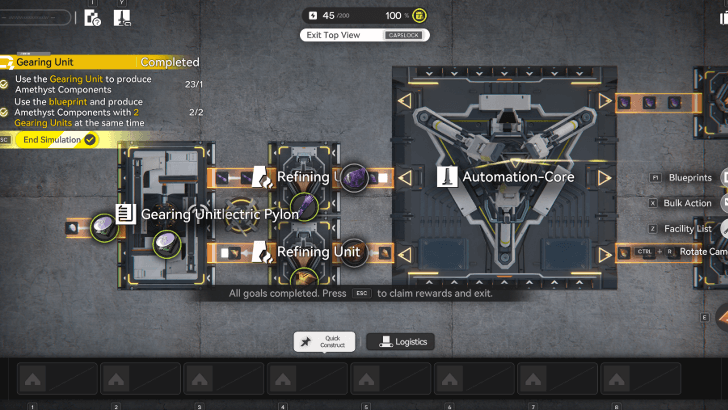 Produce Amethyst Components with 2 Gearing Units Open the Blueprint menu and place a Gearing Unit at the other side of the Automation-Core. Make sure to connect the ports to the transport belts. Unload the mineral ores to the output port and wait for it to produce Amethyst Components. |
Place the Gearing Unit in the Core AIC Area
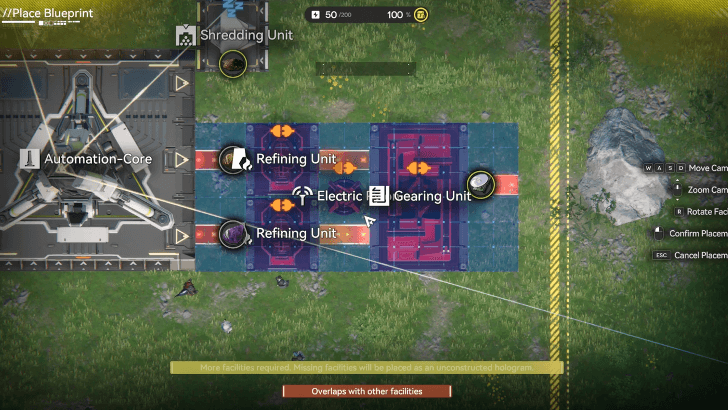
Go to the Core AIC Area and place the Gearing Unit. This is when the Top View Mode and blueprints are unlocked. Get into Top View Mode and click on Blueprints. Select the Gearing Unit blueprint and place it within the area.
Produce Amethyst Components
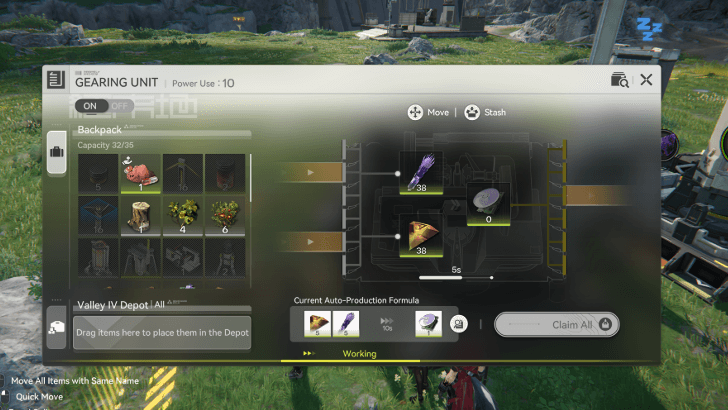
Similar to the Gearing Unit simulation, produce Amethyst Components with the Gearing Unit blueprint you just placed. Remember to connect them with transport belts.
Make Miner Overalls Gear
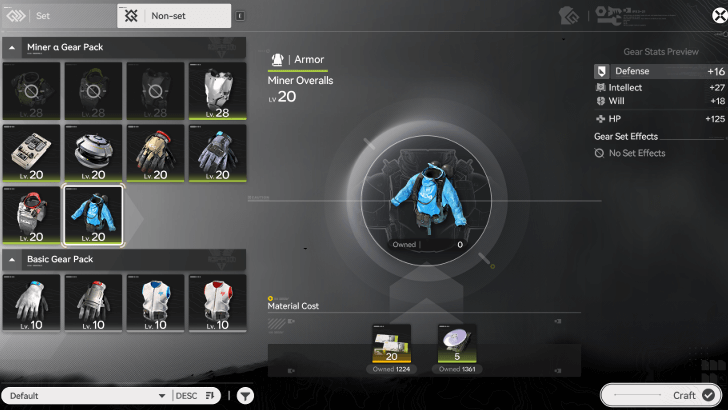
On the Gear Assembly menu, be on the non-set gear tab and craft 4 Miner Overalls with the Amethyst Components produced. Give Vannikov the Miner Overalls.
Research Parts Fitting
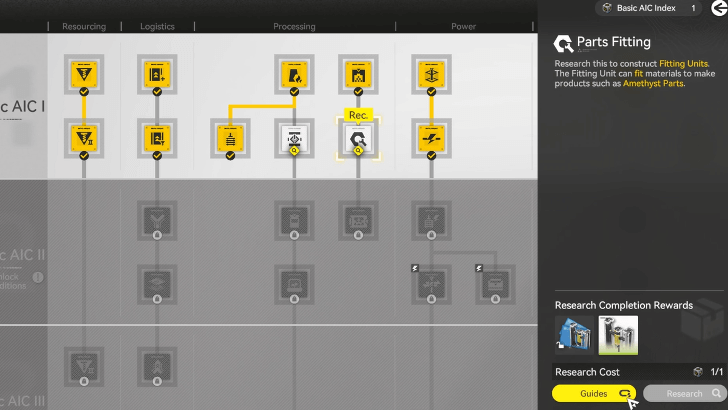
Open the AIC Factory Plan and research the node Parts Fitting. Make sure to have one Basic AIC Index to do this. Proceed with the simulation guide for this node.
Fitting Unit Simulation
| Fitting Unit Simulation Guide | |
|---|---|
| 1 | 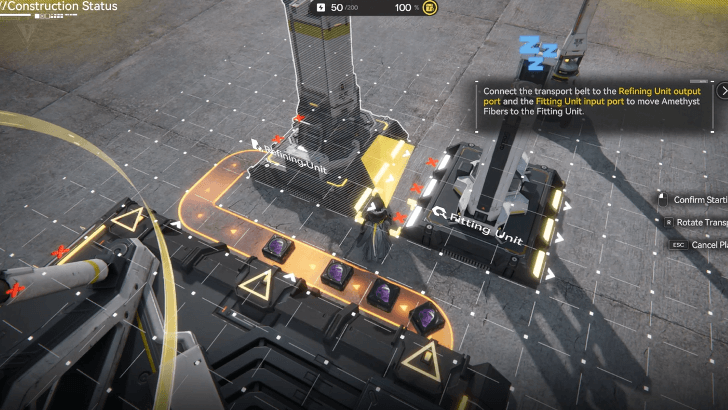 Use the Fitting Unit to Produce Amethyst Parts Unload Amethyst ores in the PAC output port. Place a Refining Unit by the Fitting Unit. Connect the PAC output port to the Refining Unit input port with a transport belt. Then, connect the Refining Unit output port to the Fitting Unit input port. |
| 2 | 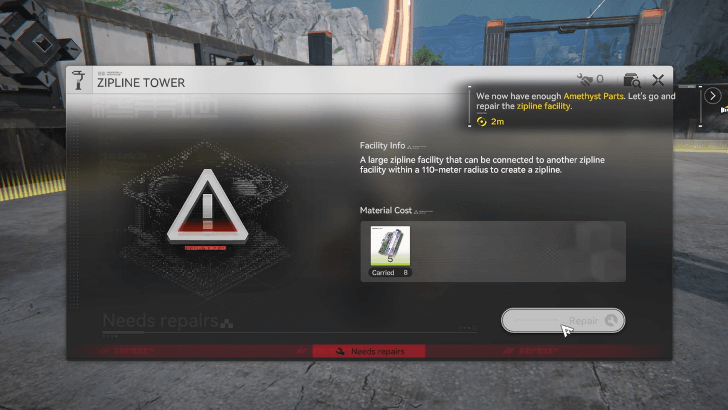 Repair the Zipline Tower with Amethyst Parts Claim the Amethyst Parts produced in the Fitting Unit. Go to the Zipline Tower and use the Amethyst Parts to repair it. |
| 3 | 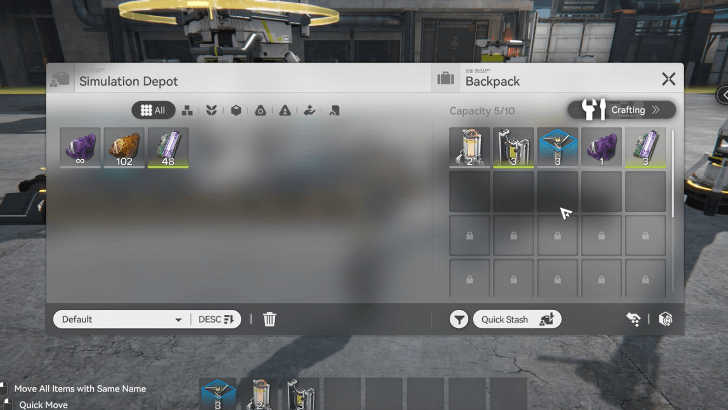 Bonus: Store More Amethyst Parts in the Depot Let the Fitting Unit produce 50 Amethyst Parts and transfer them from your backpack to the Depot. |
Use the Fitting Unit to Produce Amethyst Parts
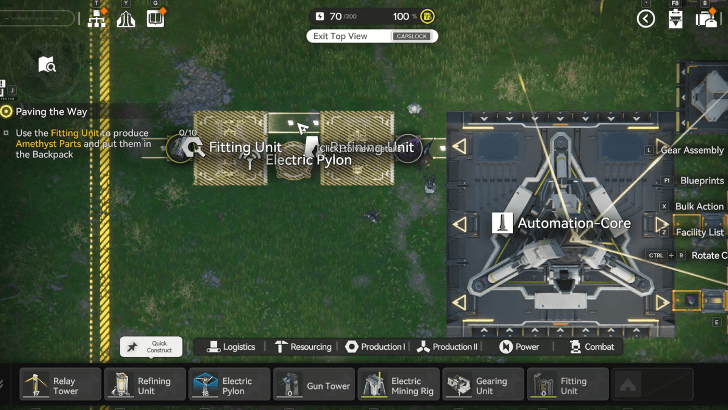
After completing the Fitting Unit simulation, place down a Fitting Unit blueprint by the PAC's output port to connect them immediately. Claim 10 Amethyst Parts and place them into your backpack.
Give Andre the Completed Parts
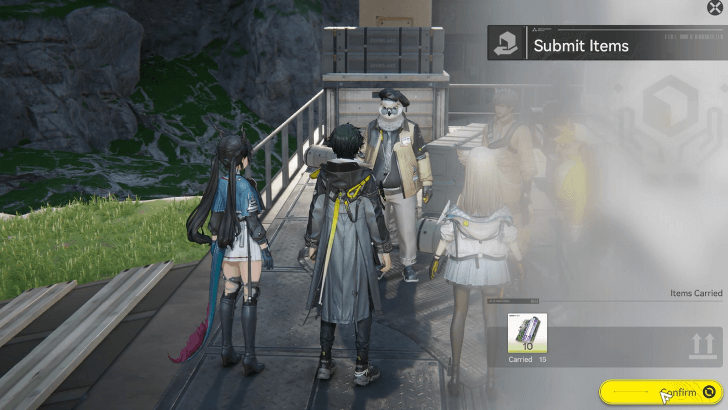
Go back to Andre and give him the 10 Amethyst Parts to complete the quest.
Paving the Way Quest Rewards
Total Item Rewards
| Total Quest Rewards |
 T-Creds x7400 |
 Origeometry x3 |
|---|---|---|
 Basic Expansion Core x1 |
 Arms INSP Kit x25 |
|
You also gain 600 Operation EXP from completing the mission.
Arknights: Endfield Related Guides
All Main Chapters and Processes
Author

Paving the Way Main Mission Guide
Premium Articles
Rankings

Gaming News


![Nova Roma Review [Early Access] | Newer, Better, and More Confusing](https://img.game8.co/4455512/2cbf8926e9a1c72a3ff056088f801ef4.png/thumb)
Popular Games

Genshin Impact Walkthrough & Guides Wiki
Umamusume: Pretty Derby Walkthrough & Guides Wiki
Crimson Desert Walkthrough & Guides Wiki
Monster Hunter Stories 3: Twisted Reflection Walkthrough & Guides Wiki
Honkai: Star Rail Walkthrough & Guides Wiki
Pokemon Pokopia Walkthrough & Guides Wiki
The Seven Deadly Sins: Origin Walkthrough & Guides Wiki
Wuthering Waves Walkthrough & Guides Wiki
Zenless Zone Zero Walkthrough & Guides Wiki
Arknights: Endfield Walkthrough & Guides Wiki


Recommended Games
Fire Emblem Heroes (FEH) Walkthrough & Guides Wiki
Diablo 4: Vessel of Hatred Walkthrough & Guides Wiki
Cyberpunk 2077: Ultimate Edition Walkthrough & Guides Wiki
Yu-Gi-Oh! Master Duel Walkthrough & Guides Wiki
Super Smash Bros. Ultimate Walkthrough & Guides Wiki
Pokemon Brilliant Diamond and Shining Pearl (BDSP) Walkthrough & Guides Wiki
Elden Ring Shadow of the Erdtree Walkthrough & Guides Wiki
Monster Hunter World Walkthrough & Guides Wiki
The Legend of Zelda: Tears of the Kingdom Walkthrough & Guides Wiki
Persona 3 Reload Walkthrough & Guides Wiki


All rights reserved
Copyright © 2022 - 2025 GRYPHLINE. All Rights Reserved.
The copyrights of videos of games used in our content and other intellectual property rights belong to the provider of the game.
The contents we provide on this site were created personally by members of the Game8 editorial department.
We refuse the right to reuse or repost content taken without our permission such as data or images to other sites.
VHERBIUGHVREJKVEERVEVEVE EEV E