Fix the Super Crane Mission (Quest) Guide
✪ Check Game8 Endfield Twitter for daily tips!
★ Exclusive: Endfield's Connection to Arknights
★ Ver. 1.1: Release Date | Livestream | Maintenance
★ Tangtang (Build | Banner) | Rossi (Build | Banner)
★ Best Builds: Yvonne | Last Rite | Laevatain
★ Hot: Essence Tool | Blueprint | Best Dijiang Setup
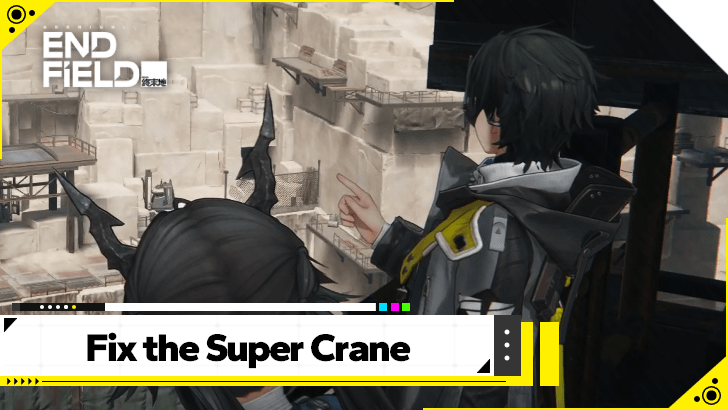
Fix the Super Crane is a Side Mission found in Valley IV in Arknights: Endfield 1.0. See the correct code, how to solve the security puzzle and the repair logic puzzle, a full walkthrough, and all mission rewards in this guide!
How to Unlock Fix the Super Crane
Finish Quarry Rescue
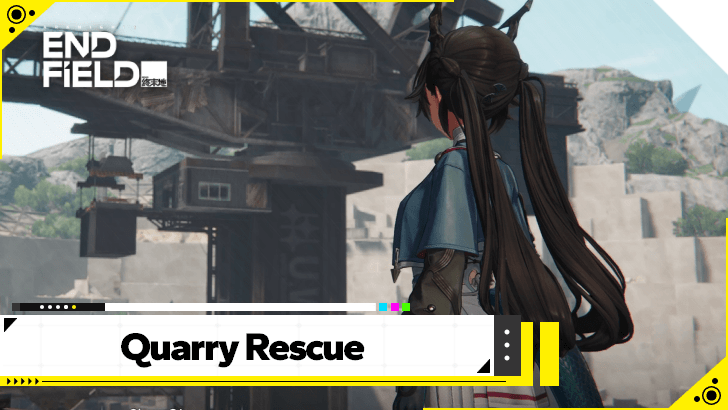
Fix the Super Crane is unlocked automatically after completing the Quarry Rescue quest.
Fix the Super Crane Walkthrough
- Check the Super Crane Power Nexus
- Control the Lifting Cage to Progress
- Go to the Archive
- Defeat the Aggeloi
- Hack the Security Device and Enter the Archive
- Read the Documents in the Archive
- Return to the Lifter Central
- Solve the Repair Logic Puzzle
- Explore the Quarry Site
- Find A Way to Approacht he Old Lady
- Keep Up With Penny
- Find a Way to Climb Up the Crane Arm
- Blast Apart the Obstacles Blocking the Shaft
- Control the Crane Arm and Make a Path to the Deep Management Post
- Defeat the Aggeloi
Check the Super Crane Power Nexus
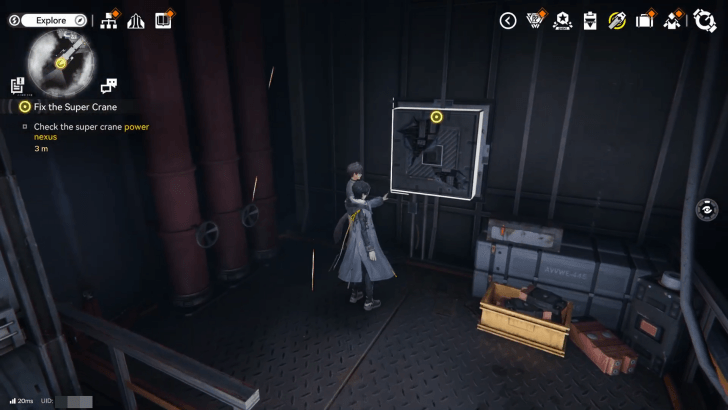
Follow Ramon and interact with the Super Crane Power Nexus panel and attempt to repair it. The Repair Logic puzzle will show a missing component style which you'll need to find within the quarry.
Exit the panel for a short cutscene where Ramon directs you where to go next.
Control the Lifting Cage to Progress
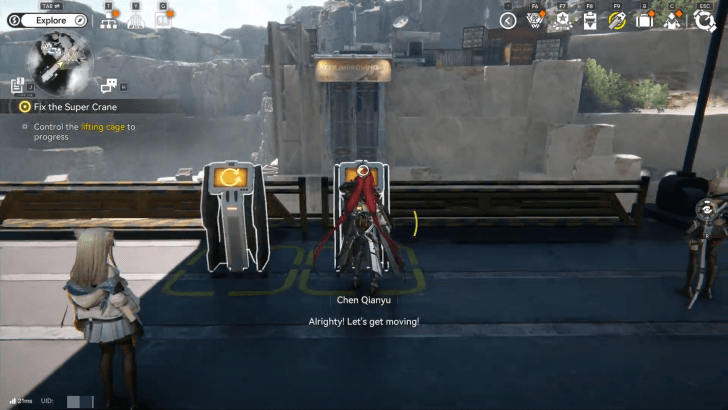
Interact with the controls just north of Ramon to control the lifting cage and wait until it brings you to the next area.
Go to the Archive
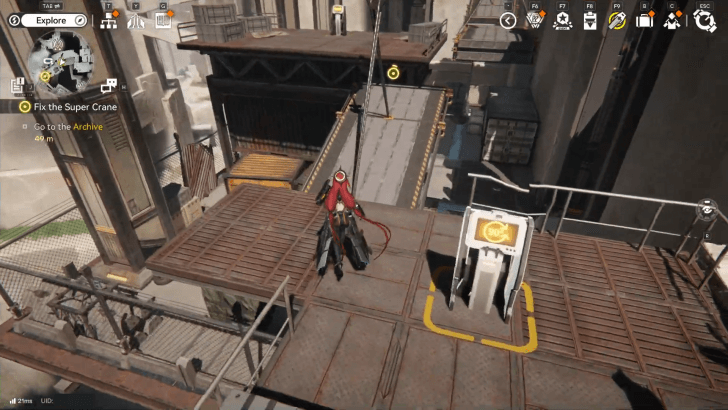
Once the lifting cage arrives at the bottom area, press forward and defeat the Aggeloi you encounter as you follow the path heading to the Archive.
You'll eventually reach a panel that controls some platforms. Interact with the panel so that the nearby platform allows you to reach the next section.
Note: Be careful dodging or dashing around the area as you can easily fall into the ravine and you'll have to fast travel to the checkpoint near the super crane.
Defeat the Aggeloi
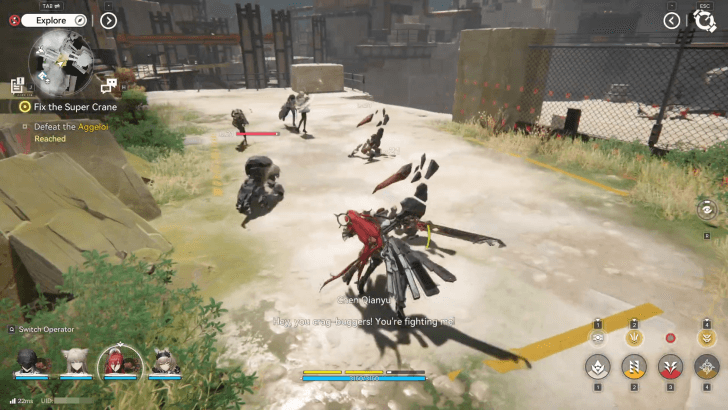
Continue following the path and a short cutscene will play where your character notices someone getting attacked by Aggeloi. Defeat the three Lv. 21 Aggeloi.
Once all Aggeloi are defeated, a short cutscene will play where the scared UWST Crew Mate named Mila will agree to escort you to the Archive.
Hack the Security Device and Enter the Archive
Mila will bring you to a security device that you'll need to disable to access the archive.
How to Hack the Security Device
| How to Solve the Security Puzzle | |
|---|---|
| 1 | 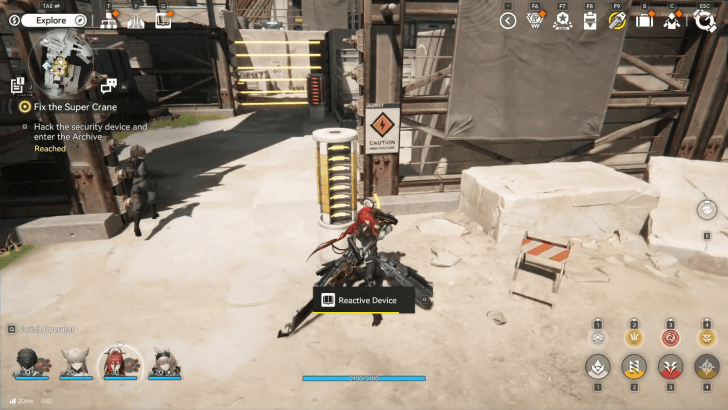 Hit the first reactive device to disable the first laser grid and enter the puzzle. The reactive device will eventually power on again, so make sure to head in before the laser grid goes up. |
| 2 | 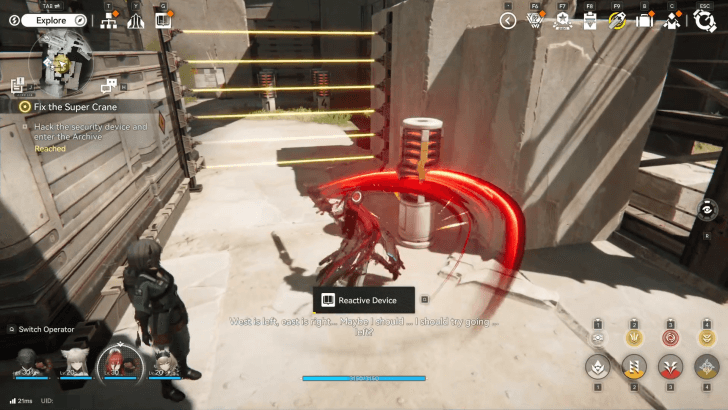 Once inside, turn right and hit the reactive device to disable the laser grid blocking the area with four reactive devices and a door. |
| 3 | 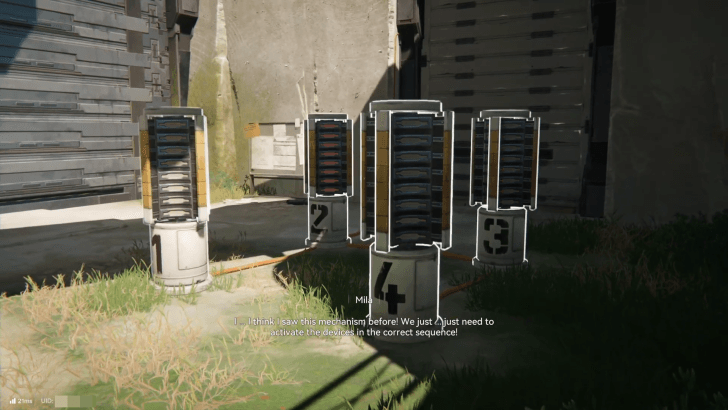 Read the memo to the left of the door to figure out the correct sequence to hit the reactive devices. Pay attention to what letter the password series is and hit the four reactive devices based on the order of the numbers. Password Sequences: J - 1324 U - 3214 P - 4231 The four reactive devices are marked accordingly, so if the memo mentioned the P-series parts, hit the 4, 2, 3, 1 reactive devices in that order to unlock the door. |
Read the Documents in the Archive
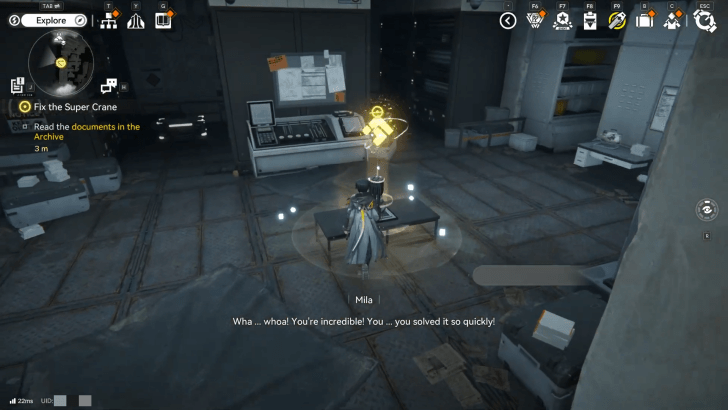
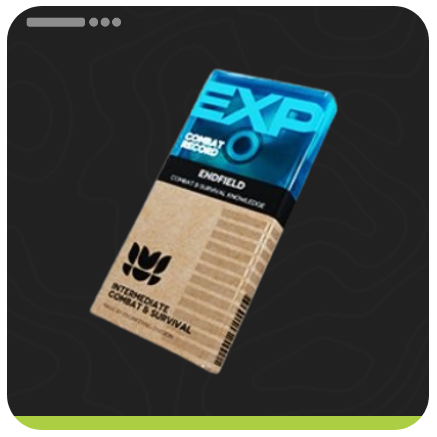
Head inside the door and read the documents in the Archive for a short cutscene where you'll receive a new orginium circuitry component. Mila then asks you to head back to Lifter Central.
Return to the Lifter Central
Exit the archive and make your way back to the Lifter Central. Follow the path back and defeat the three Aggeloi to clear the area, then activate the nearby panel to create a shortcut back to Lifter Central.
Head up the rope and the elevator, then speak with Ramon for a short cutscene.
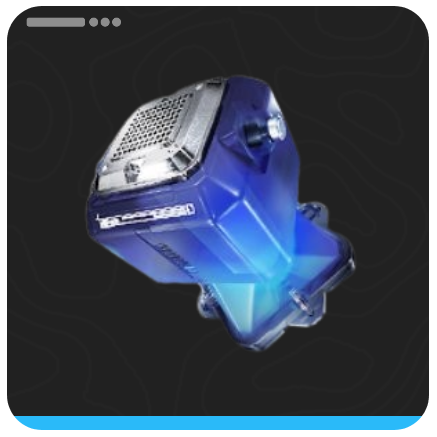
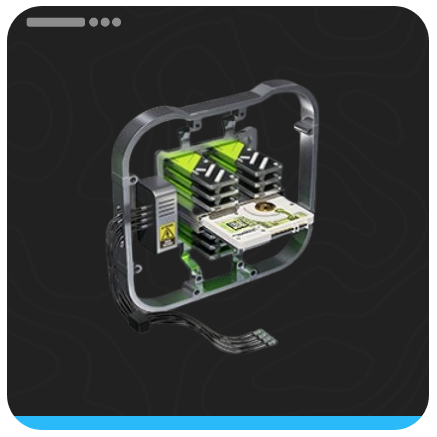
Solve the Repair Logic Puzzle
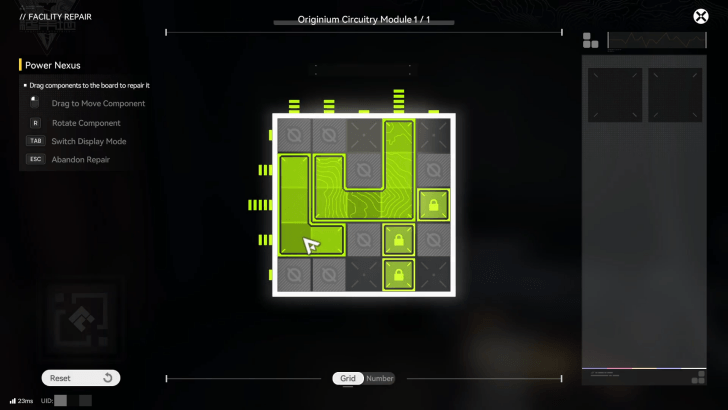
With the missing orginium circuitry in hand, interact with the power nexus panel again and solve the repair logic puzzle to fix the super crane.
Arrange the circuitry pieces like the image above to solve the repair logic puzzle and repair the power nexus.
Turn the Lifting Cage Right
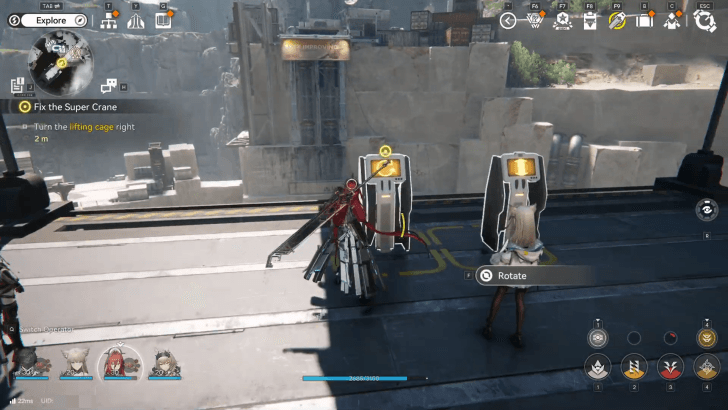
After the cutscene, head towards the now powered control panel and activate it to turn the lifting cage right.
Explore the Quarry Site
Disembark from the lift and activate the nearby checkpoint. There are several Aggeloi in this area that you'll need to defeat to safely traverse the area as you explore the quarry site.
Your goal here is to head up the top area of the quarry site, and you'll need to solve a few puzzles to get there.
How to Activate the Bridge
| How to Solve the Bridge Puzzle | |
|---|---|
| 1 | 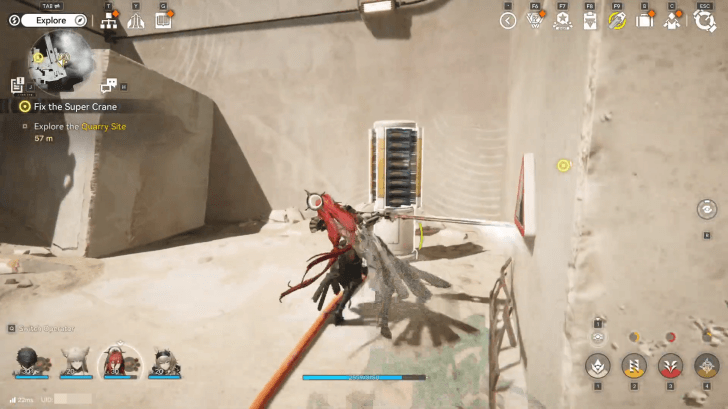 Hit the first reactive device near the right of the checkpoint to generate power to the bridge. |
| 2 |  Hit the second reactive device past the Aggeloi to activate the bridge connecting the lift to the upper area. |
Find A Way to Approach the Old Lady
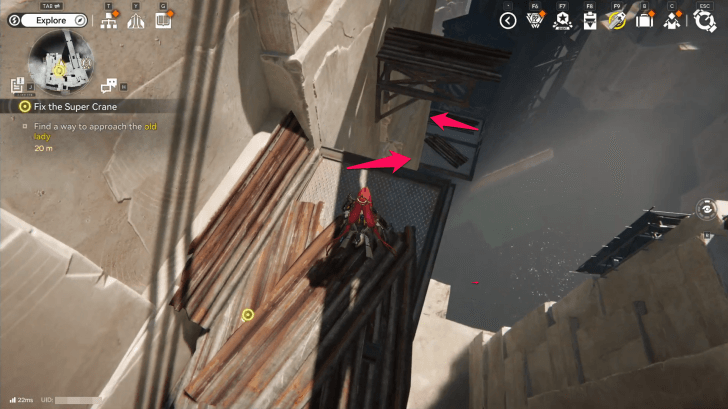
Follow the path to the right and use the nearby jump pad to reach the top platform for a short cutscene. An old lady will warn you to be careful since the nearby platforms are collapsing.
Once the cutscene ends, jump down to reach the lower pathway, then head left and up the rope to reach the old lady named Penny for another cutscene where she manages to reach the top of the quarry.
Keep Up With Penny
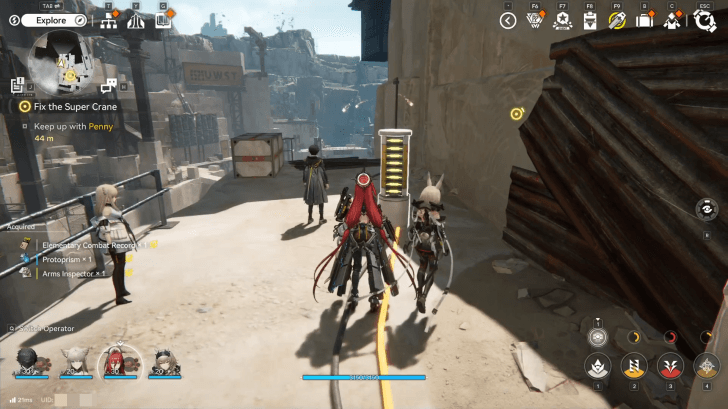
Follow the cables on the ground and hit the reactive device to power up the nearby jump pads. Head up the slop and use the nearby jump pads to reach the area where Penny is waiting for another cutscene where she'll tell you to continue following the route up.
Find a Way to Climb Up the Crane Arm
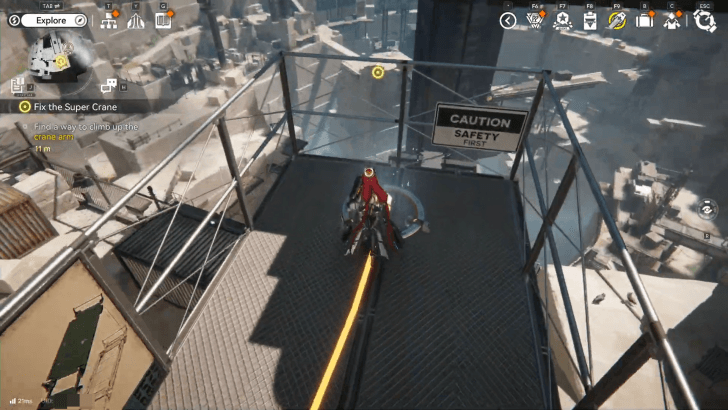
After the cutscene, hit the nearby reactive device and follow the cable on the ground to reach the upper area where you can use the now powered up jump pads to continue heading up.
Once you reach the top, step on the last jump pad to reach the crane arm.
Blast Apart the Obstacles Blocking the Shaft
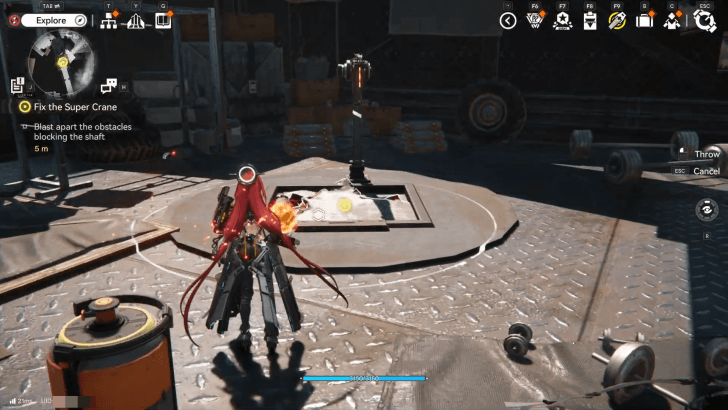
Continue walking across the crane arm until you reach a maintenance shaft that's blocked by a metal obstacle. Grab a nearby bomb and throw it at the shaft then use the rope to head down back to Lifter Central then speak with Ramon for a cutscene.
Control the Crane Arm and Make a Path to the Deep Management Post
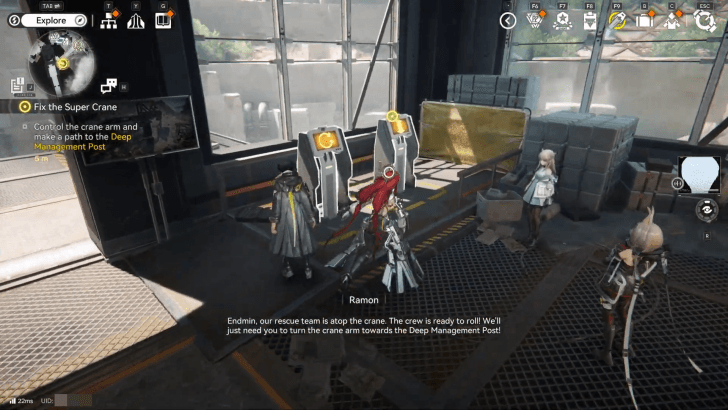
Once the cutscene ends, interact with right control once to bring up the elevator.
Next, interact with the left control twice to spin the super crane and make a path to the Deep Management Post.
A cutscene will play where the UWST SAR Crew will get attacked by enemies. Head up the rope back up the crane arm and speak with Ramon for another cutscene.
Defeat the Aggeloi
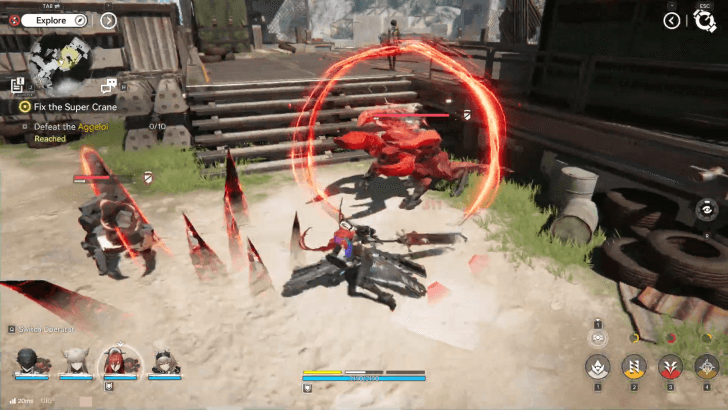
Run across the crane arem and drop down and defeat a total of 10 Aggeloi to save the UWST SAR Crew.
Once you defeat all the Aggeloi, a cutscene will play which completes the quest and also unlocks the next quest, Deep Management Post Rescue.
Fix the Super Crane Quest Rewards
Total Item Rewards
| Total Quest Rewards |
 T-Creds x6200 |
 Protoprism x4 |
 Oroberyl x150 |
|---|---|---|
 Arms INSP Kit x18 |
||
You also receive 400 Operational EXP and 200 Valley Regional Development Metric for completing the quest.
Fix the Super Crane Quest Information
Fix the Super Crane Quest Details
| Mission Type | Side Mission |
|---|---|
| Chapter | Chapter 1 - Process 2 |
| Location | Valley IV |
Fix the Super Crane is a Exploration Mission that's located in Abburey Quarry and requires you to complete Quarry Rescue to unlock.
Arknights: Endfield Related Guides
All Side Missions in Valley IV
List of All Side Missions
| All Side Missions | ||
|---|---|---|
| All That Rises Must Converge | Visitor from the Band II | Insider Threat |
| Visitor from the Band I | Cog in the Wheel | Base Revisited [Finale] |
| Rumors About Tech | Base Revisited | Invisible Glyphs - Revelation |
| Invisible Glyphs - Investigation | Invisible Glyphs - Discovery | Three Little Categories |
| Quarry Rescue | Fix the Super Crane | Deep Management Post Rescue |
| Cost of Hope I | Cost of Hope II | Morale Booster |
Comment
 iamhapie about 1 month
I had the U sequence in the game but it didn’t work. The P sequence did, however. So there may be a bug.
Author

Fix the Super Crane Mission (Quest) Guide
Premium Articles

Rankings

Gaming News


![Nova Roma Review [Early Access] | Newer, Better, and More Confusing](https://img.game8.co/4455512/2cbf8926e9a1c72a3ff056088f801ef4.png/thumb)
Popular Games

Genshin Impact Walkthrough & Guides Wiki
Umamusume: Pretty Derby Walkthrough & Guides Wiki
Crimson Desert Walkthrough & Guides Wiki
Monster Hunter Stories 3: Twisted Reflection Walkthrough & Guides Wiki
Honkai: Star Rail Walkthrough & Guides Wiki
Pokemon Pokopia Walkthrough & Guides Wiki
The Seven Deadly Sins: Origin Walkthrough & Guides Wiki
Wuthering Waves Walkthrough & Guides Wiki
Zenless Zone Zero Walkthrough & Guides Wiki
Arknights: Endfield Walkthrough & Guides Wiki


Recommended Games
Fire Emblem Heroes (FEH) Walkthrough & Guides Wiki
Diablo 4: Vessel of Hatred Walkthrough & Guides Wiki
Cyberpunk 2077: Ultimate Edition Walkthrough & Guides Wiki
Yu-Gi-Oh! Master Duel Walkthrough & Guides Wiki
Super Smash Bros. Ultimate Walkthrough & Guides Wiki
Pokemon Brilliant Diamond and Shining Pearl (BDSP) Walkthrough & Guides Wiki
Elden Ring Shadow of the Erdtree Walkthrough & Guides Wiki
Monster Hunter World Walkthrough & Guides Wiki
The Legend of Zelda: Tears of the Kingdom Walkthrough & Guides Wiki
Persona 3 Reload Walkthrough & Guides Wiki


All rights reserved
Copyright © 2022 - 2025 GRYPHLINE. All Rights Reserved.
The copyrights of videos of games used in our content and other intellectual property rights belong to the provider of the game.
The contents we provide on this site were created personally by members of the Game8 editorial department.
We refuse the right to reuse or repost content taken without our permission such as data or images to other sites.