The Flow Splits Course Main Mission Guide
✪ Check Game8 Endfield Twitter for daily tips!
★ Exclusive: Endfield's Connection to Arknights
★ Ver. 1.1: Release Date | Livestream | Maintenance
★ Tangtang (Build | Banner) | Rossi (Build | Banner)
★ Best Builds: Yvonne | Last Rite | Laevatain
★ Hot: Essence Tool | Blueprint | Best Dijiang Setup
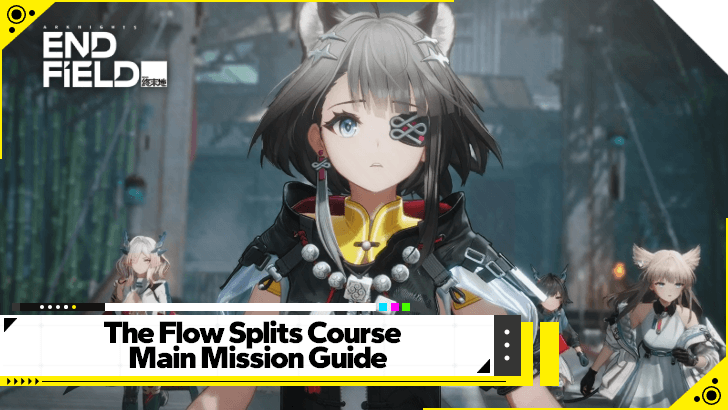
The Flow Splits Course is a Main Mission in the The Long Feud quest series of Arknights: Endfield. Check out how to unlock this mission, its walkthrough, and all its rewards in this guide!
| Previous Mission | Next Mission |
|---|---|
| Deep in the Mire | Surging From a Withered Spring |
List of Contents
The Flow Splits Course Quest Information
The Flow Splits Course Quest Details
| Mission Type | Main Mission |
|---|---|
| Quest Line | The Long Feud |
| Chapter | Chapter 2 - Process 3 |
| Location | Qingbo Stockade, Wuling |
The Flow Splits Course is the third quest under the The Long Feud mission series. This quest is under Chapter 2 - Process 3 of the main story and is located in Qingbo Stockade.
How to Unlock The Flow Splits Course
The Flow Splits Course is unlocked after completing the Deep in the Mire quest from The Long Feud quest series with no level restriction.
Deep in the Mire Main Mission Guide
The Flow Splits Course Walkthrough
- Go Further Into Qingbo Stockade
- Open Sluice Gate to Adjust the Water Level
- Go Further Into Qingbo Stockade
- Rotate the Bridge to Create a Path
- Go Deeper Into Qingbo Stockade and Find Tangtang
- Lower the Bridge
- Defeat the Enemies
- Find Tangtang
- Rescue Tangtang
- Catch Up to Ardashir and Ruan Yi
- Talk to Tangtang and Mi Fu
- Go to the Ancestral Spring
Go Further Into Qingbo Stockade
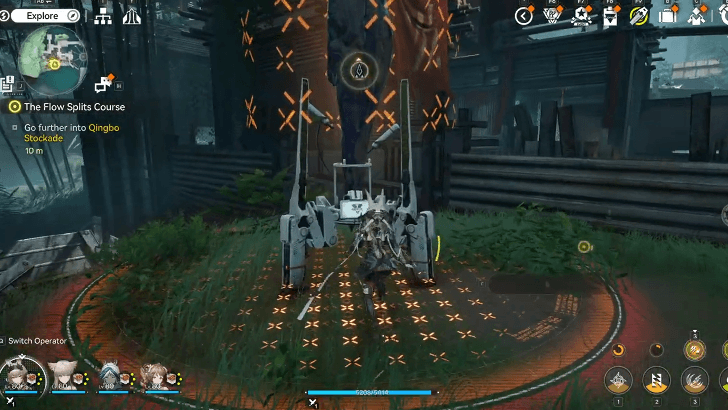
Immediately after completing Deep in the Mire, The Flow Splits Course starts after going through the gate. Activate the TP Point to complete this objective.
Open Sluice Gate to Adjust the Water Level
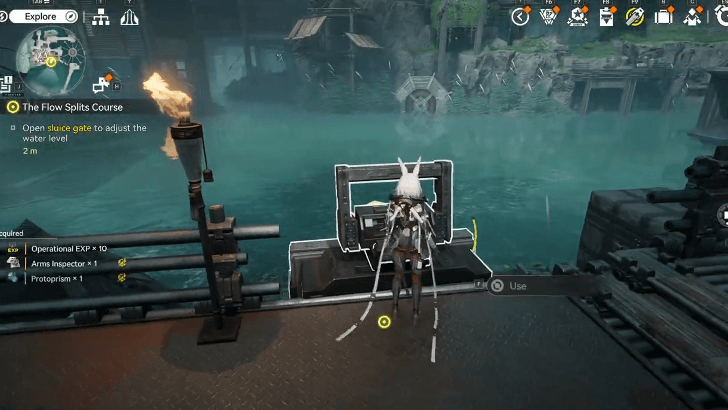
Head to the bridge and open the Sluice Gate to adjust the water level behind you. Once the path has been cleared, head down the stairs.
Go Further Into Qingbo Stockade
Take the rope up to return to the rotating bridge. Two Stockaders, Rusty Hook and Iron Boatswain, come out from hiding in barrels. They offer to help find a way to make the bridge work again, requesting that they escape Qingbo Stockade.
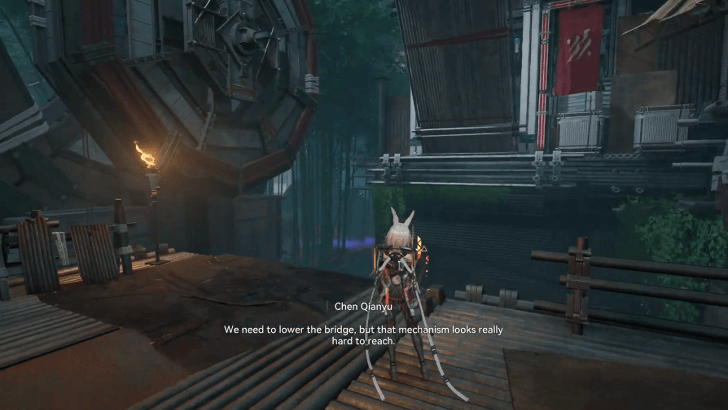
Rotate the Bridge to Create a Path

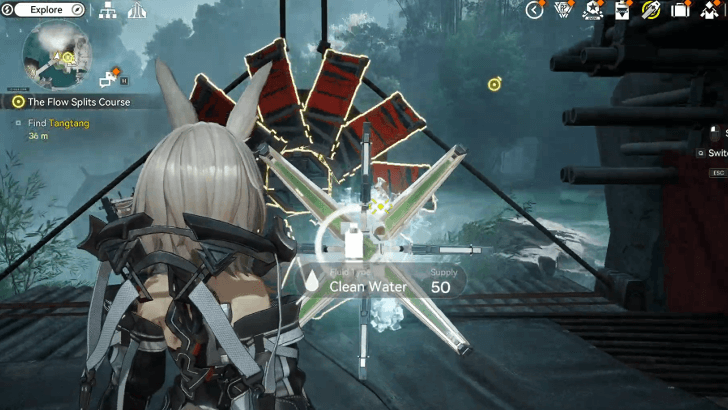
Find different wheel mechanisms to rotate the bridge to the right path. Find all mechanisms and use your Jet Drone to spray water.
How to Rotate the Bridge
| 1 | 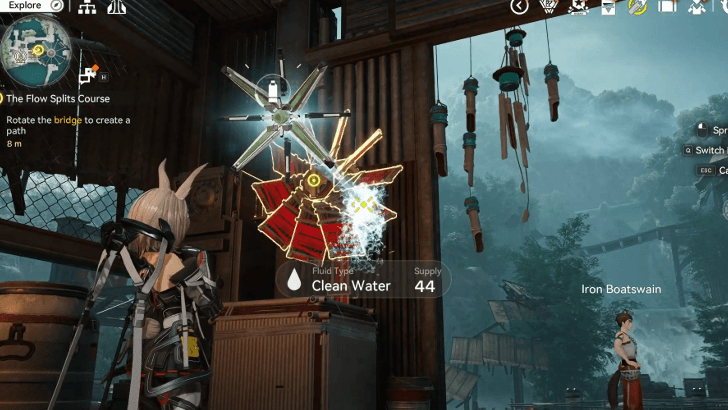 Use the Jet Drone to spray water on the wheel mechanism right in front of you. This will rotate the bridge from your point to the other side. |
|---|---|
| 2 | 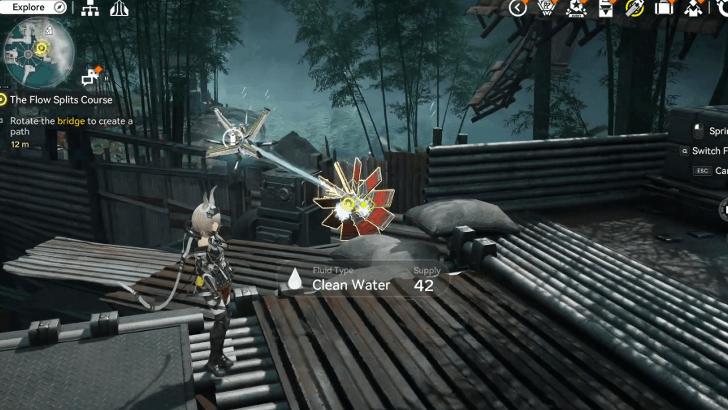 Head to the other side of the bridge and spray water on the wheel mechanism to the left. The bridge will rotate again slightly. |
| 3 | 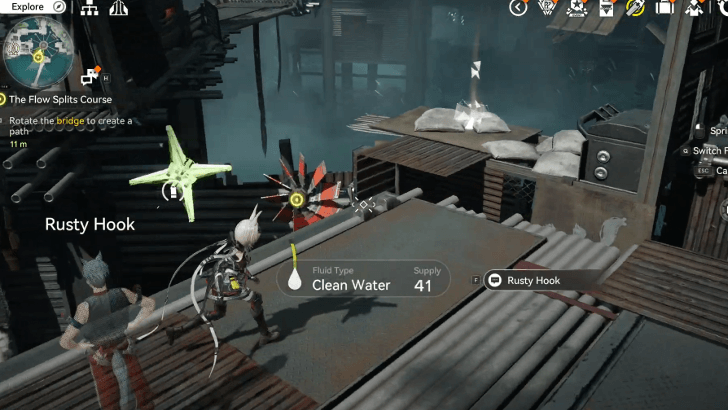 Head back to the other end of the bridge to Rusty Hook. Spray water on the wheel below Rusty Hook. The bridge finally rotates to the right path. |
Go Deeper Into Qingbo Stockade and Find Tangtang
Continue to head down the path to go deeper into Qingbo Stockade and find Tangtang. Fight enemy Stockaders along the way. You will find more wheel mechanisms to spray to open gates and lower bridges.
Tangtang Best Builds and Weapons
How to Go Deeper Into Qingbo Stockade
| 1 |  Take the rope up to find the first wheel on a different platform above. Use the Jet Drone to spray water and open the gate below. |
|---|---|
| 2 | 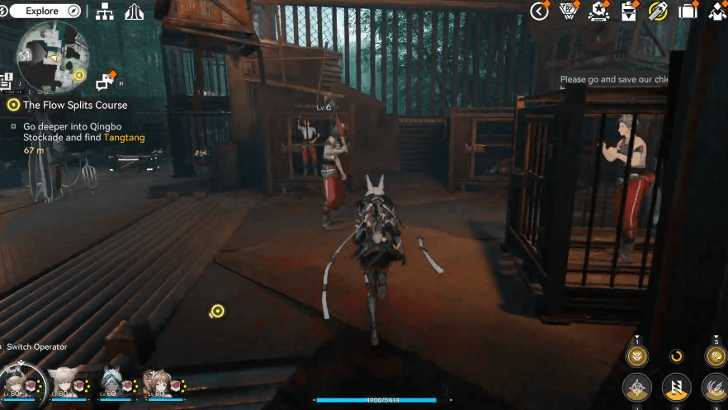 Enter the new area and defeat all enemy Stockaders in the room. Keep heading forward and take two left turns past the Stockaders to find another wheel mechanism. |
Lower the Bridge
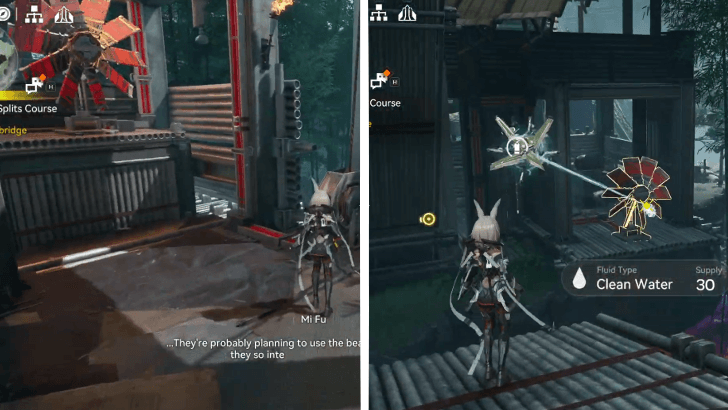
Use the Jet Drone again to spray water on the wheel. As the bridge lowers, it will only take you halfway. Spray the other wheel mechanism on the other end to lower the connecting bridge. You go further into Qingbo Stockade and see two Stockaders fighting.
Defeat the Enemies
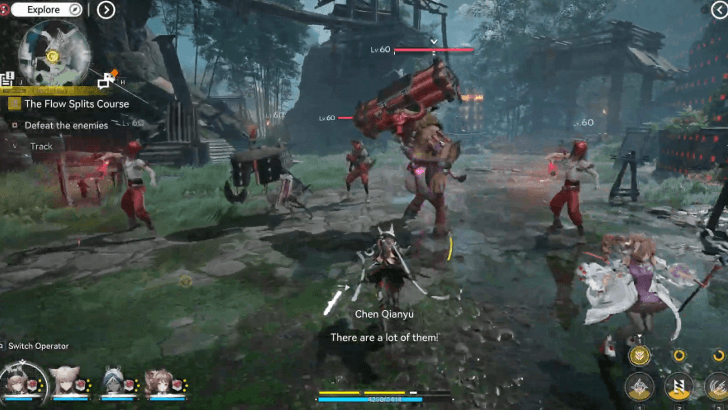
One of the Stockaders called for backup, determined to fight Wuling City for vengeance. Defeat all 5 enemies to learn that more traitors blocked the path ahead. You decide to save Tangtang first.
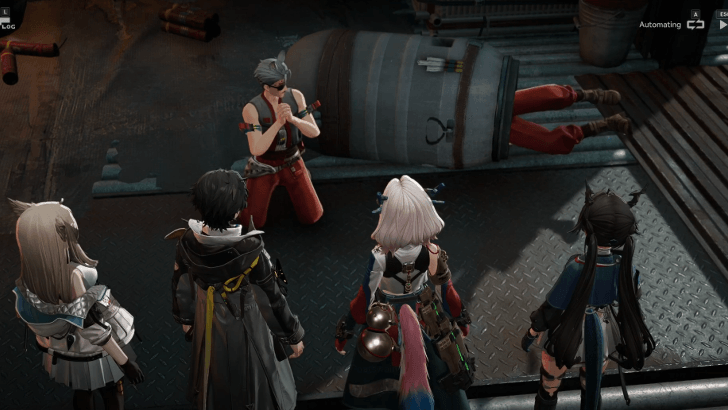
Find Tangtang
Head northeast across the bridge with Waterbell. As she rescues trapped Stockaders, step on the elevator and spray water on the wheel mechanism to head up. Step on the next elevator, spray the wheel again, and head up the stairs. You finally see Ruan Yi being led by Ardashir to Ancestral Spring.
Rescue Tangtang
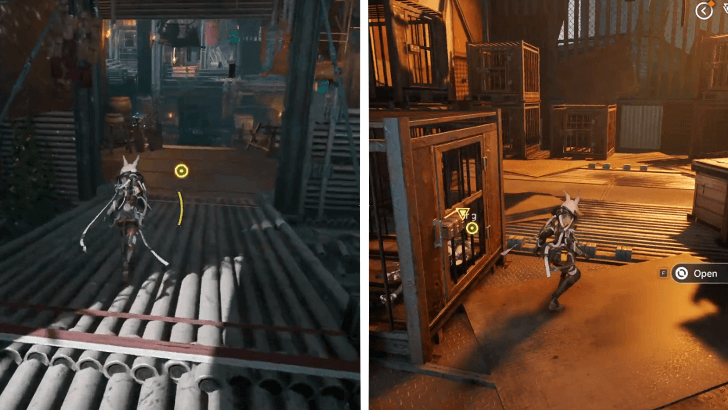
Head to the north bridge, make two right turns past the Stockaders to enter the room. Head down the stairs and take the next flight of stairs to the right. Enter the room and interact with the cage to wake up Tangtang. Tangtang opens up about a nightmare about the death of Ruan Yi's father.
Catch Up to Ardashir and Ruan Yi
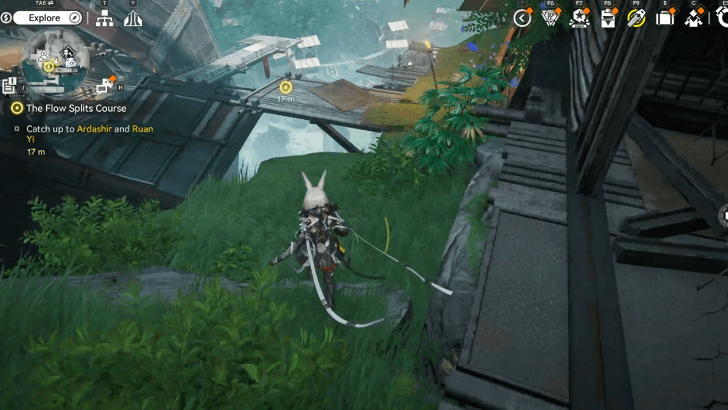
Tangtang wants you to run after Ruan Yi despite Mi Fu's opposition. Climb up crates and cages, and walk on the waterwheels to catch up to Ardashir and Ruan Yi.
How to Catch Up to Ardashir and Ruan Yi
| 1 |  Jump up the crate and cages and jump through the small opening. You can find a memo by the crate about Ruan Yi. |
|---|---|
| 2 | 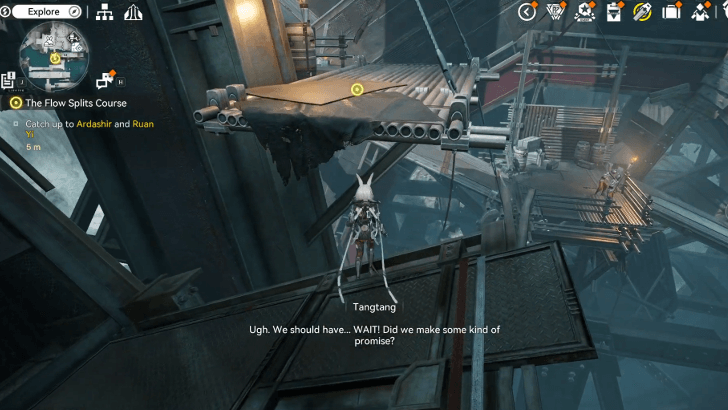 Jump on the first waterwheel platform to reach the other side. Head down the path to fight Stockaders patrolling the area. |
| 3 | 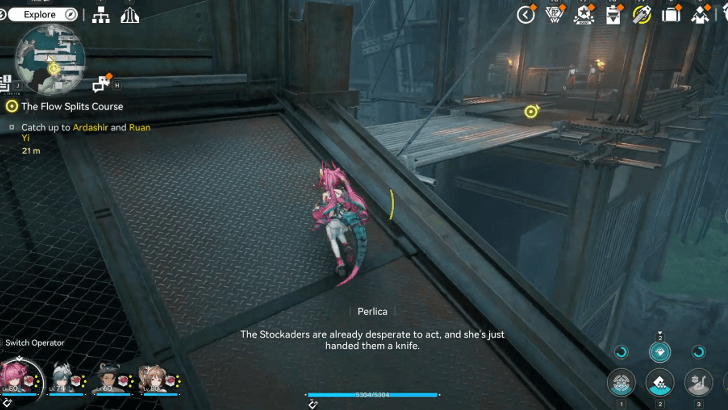 At the end, hop on the second waterwheel to go up. As the wheel rotates, move to the next platform. |
| 4 | 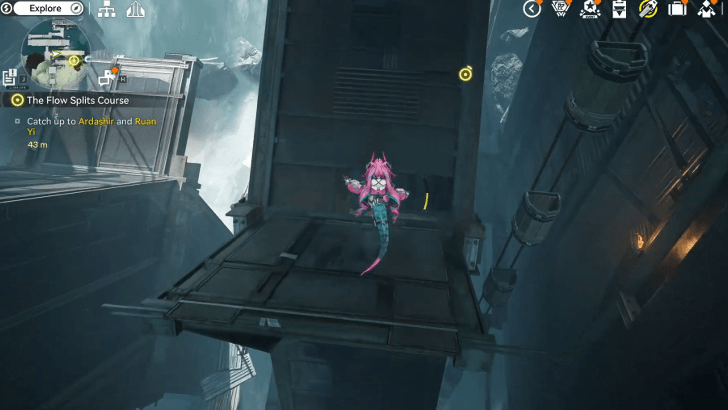 Make a left before the Stockaders to jump off the ledge onto the third waterwheel. As soon as the wheel rotates, jump off to land on the platform to your right. |
| 5 | 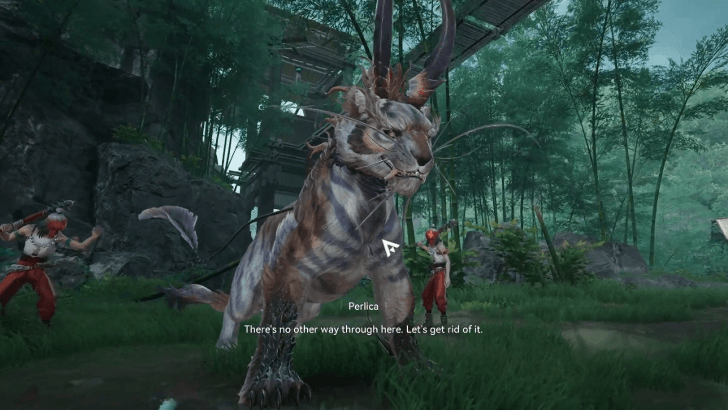 Follow the trail in the forest until your path gets blocked by a Rakerbeast. Defeat the Rakerbeast and two other Stockaders. |
| 6 | 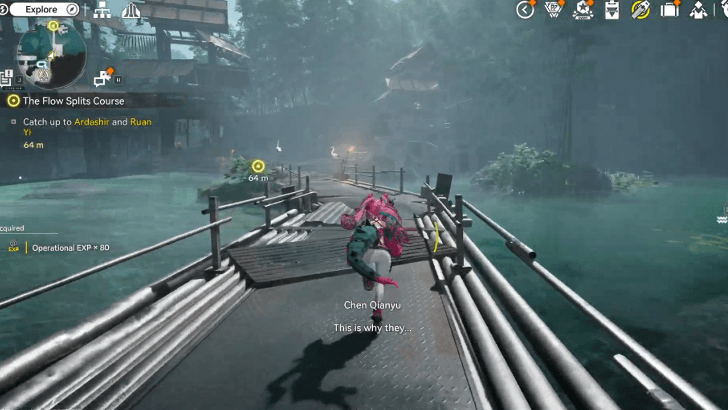 Continue heading northeast of the trail to pass through the bridge. Defeat more Stockaders blocking your path to continue down the trail. |
| 7 | 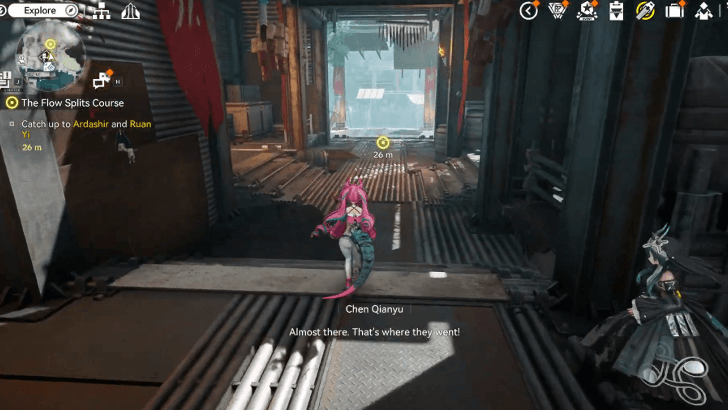 Head down to pass through the building to finally reach Ardashir and Ruan Yi. Tangtang has a heartbreaking encounter with Ruan Yi as he destroys the bridge. |
Talk to Tangtang and Mi Fu
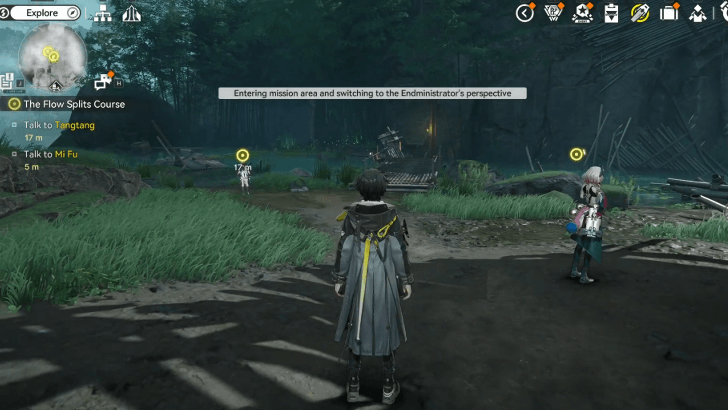
Talk to both Tangtang and Mi Fu after Ruan Yi's actions. Mi Fu leaves to carry out her duties and asks you to take care of Tangtang. Meanwhile, Tangtang still refuses to give up on her brother despite the betrayal.
Go to the Ancestral Spring
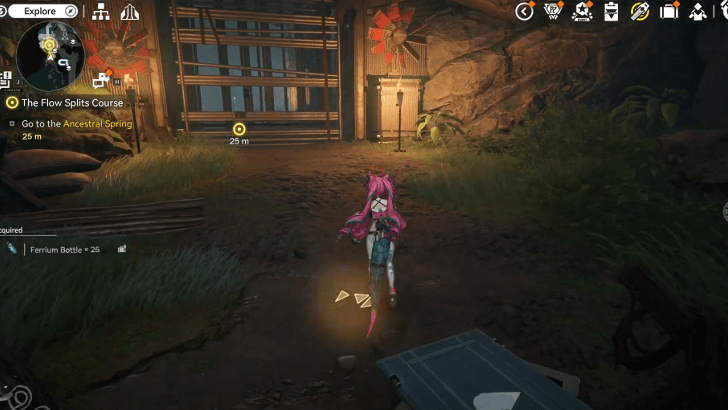
Pass through the makeshift bridge on the water and jump on the pads to get closer to the Ancestral Spring. On the way, you encounter more enemies and more wheel mechanisms before getting to Ancestral Spring.
How to Go to the Ancestral Spring
| 1 | 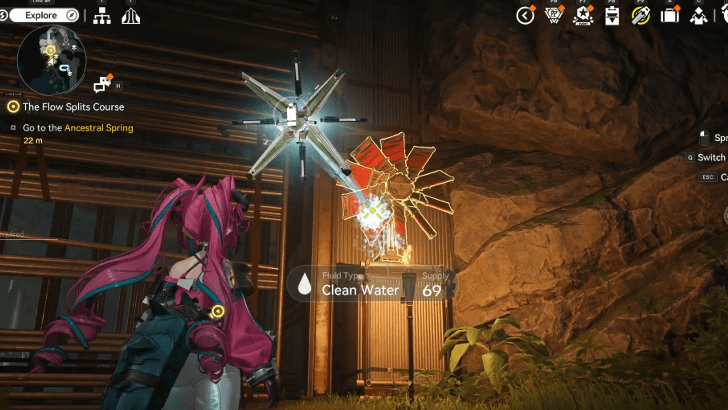 The path is blocked by a gate with two wheel mechanisms. Interact with the supply crate nearby to gain more Ferrium Bottles. Use the Jet Drone to spray both wheels. |
|---|---|
| 2 | 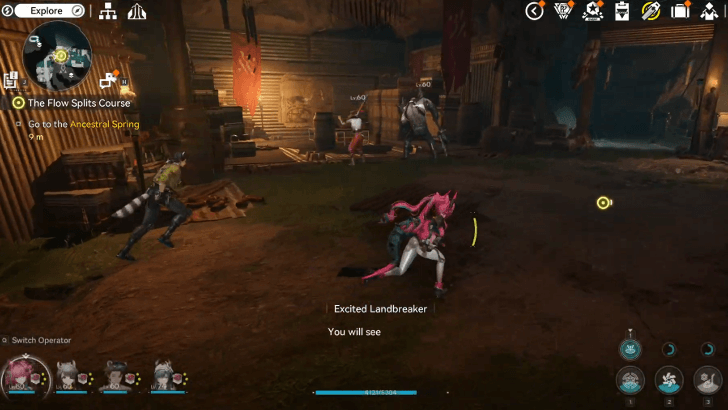 Pass the bridge and make a right to find a group of Stockaders and Landbreakers in the area. Defeat the enemies to find what the Qingbo Stockade traitors were preparing. Tangtang accepts that Ruan Yi might have been planning this for a long time. |
| 3 | 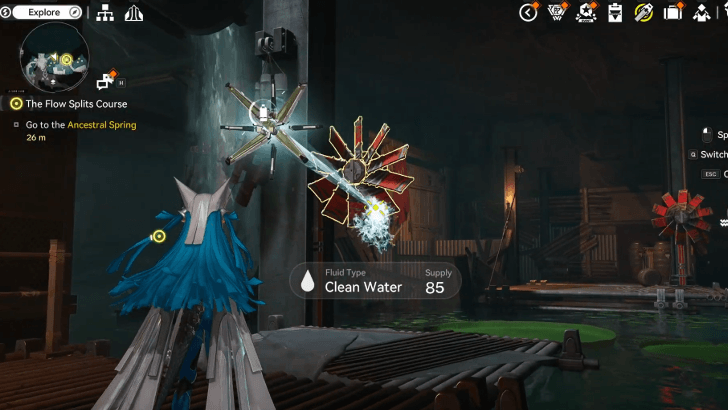 Continue heading east to a wheel mechanism. Spray the wheel to raise a platform beneath the water and reach the lily pads. |
| 4 | 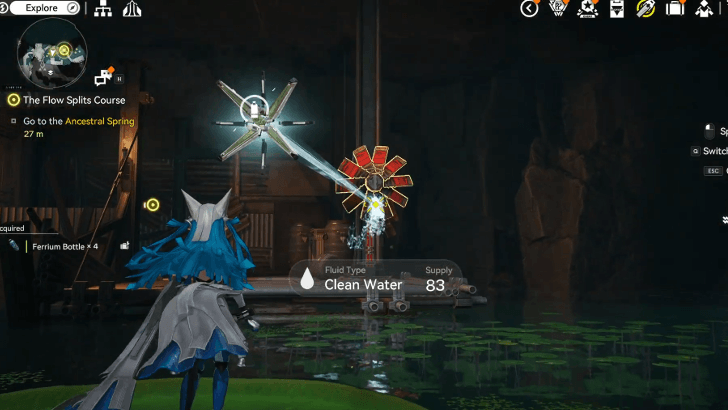 As you step on the first lily pad, spray the next wheel mechanism in front. This will raise another platform to reach the other side. |
| 5 | 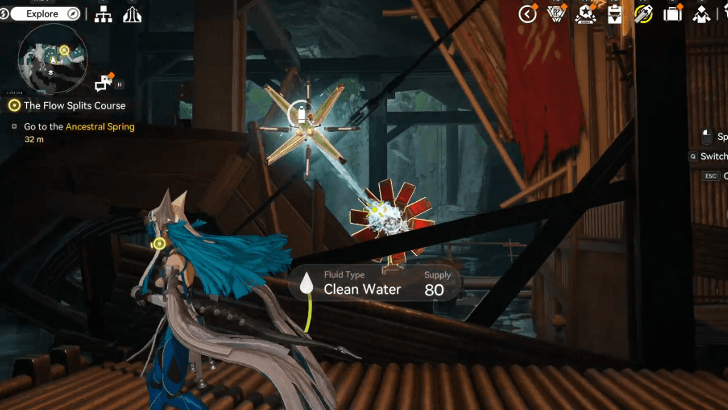 Once you reach the other side, aim the Jet Drone across the metal beams to spray the third wheel mechanism. This opens a door to reach the next two wheels. |
| 6 | 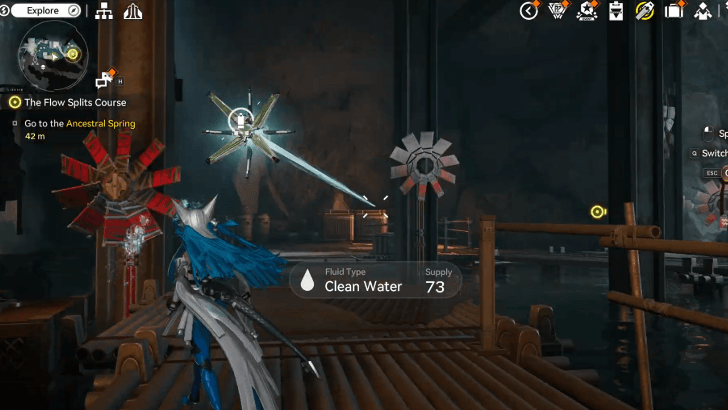 Spray the fourth and fifth wheels to raise two platforms to reach the other side. |
| 7 | 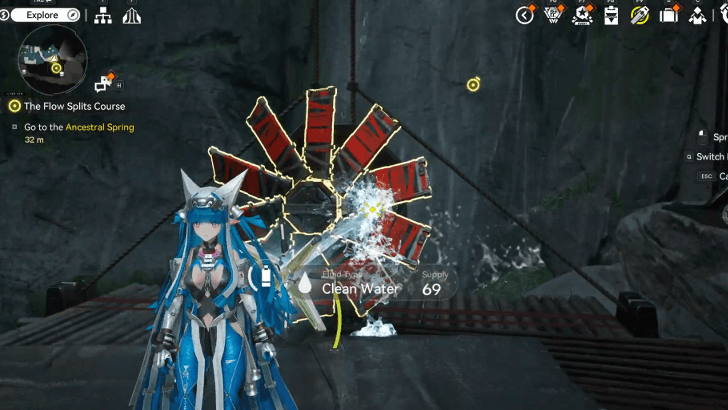 Step on the elevator and spray the wheel to raise you. Follow the path until you find Waterbell passed out. |
| 8 | 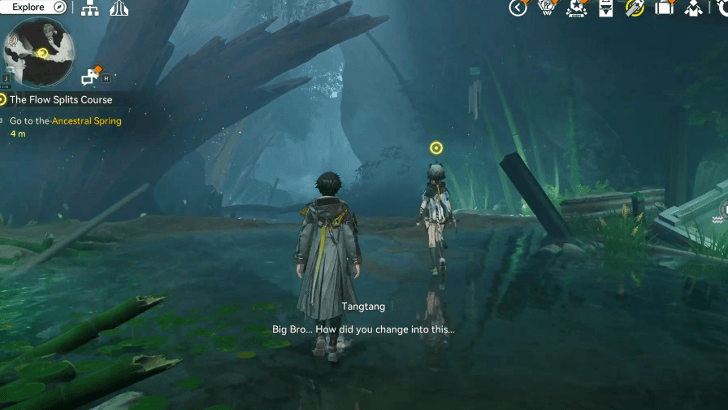 Walk with Tangtang while she opens up about the situation. She begins to reminisce while questioning Ruan Yi's motives. Reaching the TP Point will end the quest. |
The Flow Splits Course Quest Rewards
Total Item Rewards
| Total Quest Rewards |
 T-Creds x12000 |
 Protohedron x5 |
 Origeometry x3 |
|---|---|---|


You can also get 600 Operational EXP for completing the mission.
Arknights: Endfield Related Guides

All Main Chapters and Processes
Comment
Author

The Flow Splits Course Main Mission Guide
Premium Articles

Rankings
- We could not find the message board you were looking for.

Gaming News

![The Liar Princess and the Blind Prince Review [PC] | Lovely to Look at but Tedious to Play](https://img.game8.co/4442586/8d95f5faf05780f1765ce7e0938bd825.jpeg/show)
![Monster Hunter Stories 3 Review [First Impressions] | Simply Rejuvenating](https://img.game8.co/4438641/2a31b7702bd70e78ec8efd24661dacda.jpeg/thumb)

![The Seven Deadly Sins: Origin [First Impressions] | A Promising Start](https://img.game8.co/4440581/584e0bfb87908f12c4eab6e846eb1afd.png/thumb)
Popular Games

Genshin Impact Walkthrough & Guides Wiki
Umamusume: Pretty Derby Walkthrough & Guides Wiki
Pokemon Pokopia Walkthrough & Guides Wiki
Honkai: Star Rail Walkthrough & Guides Wiki
Monster Hunter Stories 3: Twisted Reflection Walkthrough & Guides Wiki
Arknights: Endfield Walkthrough & Guides Wiki
Wuthering Waves Walkthrough & Guides Wiki
Zenless Zone Zero Walkthrough & Guides Wiki
Pokemon TCG Pocket (PTCGP) Strategies & Guides Wiki
Monster Hunter Wilds Walkthrough & Guides Wiki


Recommended Games
Diablo 4: Vessel of Hatred Walkthrough & Guides Wiki
Cyberpunk 2077: Ultimate Edition Walkthrough & Guides Wiki
Fire Emblem Heroes (FEH) Walkthrough & Guides Wiki
Yu-Gi-Oh! Master Duel Walkthrough & Guides Wiki
Super Smash Bros. Ultimate Walkthrough & Guides Wiki
Pokemon Brilliant Diamond and Shining Pearl (BDSP) Walkthrough & Guides Wiki
Elden Ring Shadow of the Erdtree Walkthrough & Guides Wiki
Monster Hunter World Walkthrough & Guides Wiki
The Legend of Zelda: Tears of the Kingdom Walkthrough & Guides Wiki
Persona 3 Reload Walkthrough & Guides Wiki


All rights reserved
Copyright © 2022 - 2025 GRYPHLINE. All Rights Reserved.
The copyrights of videos of games used in our content and other intellectual property rights belong to the provider of the game.
The contents we provide on this site were created personally by members of the Game8 editorial department.
We refuse the right to reuse or repost content taken without our permission such as data or images to other sites.